
2019/03/13 - I've pulled this post/project out of the "birds" topic and created a new one to serve as an archive because it:
- had just grown:
-- too unwieldy
-- mostly irrelevant with respect to its original home
- really needed one
Contact - TadErcksn - at - aol - dot - com
---
Had been wanting to write an article on / operator's manual for my spotting scope system, most of which will be relevant to any spotting scope system. The article evolved into a book as I continued testing, experimenting, learning, better understanding the issues and developed, edited, expanded on, rewrote it. Major BITCH to get/keep all these interrelated issues concise, nonrepetitive, accurate, logically organized, reasonably properly illustrated, nonrepetitive - worked on this sucker pretty steadily for a week and a half. Read, skim, ignore it as you like.
---
What we're doing with a spotting scope is pretty analogous to what a hunter is doing with a rifle scope. We have a target upon which we're attempting to get centered, stable, focused as quickly and efficiently as possible. But we don't have to worry about and adjust for gravity and crosswind. And our target doesn't need to worry about and adjust for us.
I've attempted to optimize equipment and procedures for safety, speed, efficiency. Good news... If we're optimizing for one we're pretty much also automatically optimizing for the other two.
---
Probably initial Edition One effort times two as of this 2018/08/18 01:30:00 UTC version.
---
2020/03/30 - Ran over the post length limit of a quarter million characters.
Reset to three hundred thousand.Your message contains 250194 characters. The maximum number of allowed characters is 250000.
---
2021/02/07 - Reset to 350000.
---
2021/07/01 - Unlimited.
---
2022/07/23 - As I use, amend, modify, practice with, replace elements of this gear this document is near constantly being revised. Recommend reviewing relevant sections before acquiring gear and/or implementing procedures.
---
2023/05/10 - This document had devolved into a patchwork junk heap with no shortages of errors and inconsistencies and I'm currently working on a massive overhaul.
---
2023/06/01 - Things now in reasonably fair shape.
---
Note that I'm right handed and running and describing procedures with that bias. So feel free to swap terms whenever appropriate. (Also note that we're dealing with items of asymmetrical equipment very probably designed with such biases.)
---
For dimensions we'll use the convention: width x length x height
----------
Elements - Order of Discussion
2020/02/01 - This document has now undergone nearly eighteen months worth of edits, amendments, corrections, revisions and has long been in need of a fundamental restructuring. I originally started from the top and worked my way down but we build, assemble, set up from the foundation up. So I'm doing a flip; starting with the tripods and heads that aren't even designed, manufactured by Swarovski; working up to the glass; better ordering of discussions of offshoot issues.
At the end of this document there's a rudimentary table of contents / index which can substantially aid in navigating through and around in it.
----------
The Mission
---
2023/08/08
I recently returned from a (rather grueling) couple weeks of a Naturalist Journeys guided tour of the Pantanal - two guides, ten clients. I noticed there were three flavors of clients - all armed with binocular:
- Binocular only - six
- Binocular and Serious Camera - three
- Binocular and Scope - me
The two guides were Binocular and Serious Camera. And at least one of them was doing a lot of shooting to document and advertise the trip for the company. They had a Scope setup but my Swarovski ATX 95 / Feisol UA-180 rig was the more effective weapon and was going with me everywhere scopable and theirs saw almost zero action. I never even got the opportunity to check it out. The cameras were all handheld.
The photography has a totally legitimate and extremely valuable place but those guys are paying prices in terms of experiencing the moments. What I really enjoy is locking up quality and high value targets - wildlife and astronomical - and getting others on them. The reaction is virtually always "WOW!" And that included the photographers. On the rare occasions when they'd shot their fill of a bird I'd get them on it behind the Scope and hear the same "WOW!" I'd get from everyone else.
My point... Pick one - or alternate between two. But don't buy into the digiscoping scam - the way I did about a year into the game.
----------
Backup Loops
First let's take a look at some of the industry standard junk we need to eliminate, neutralize, work around in order to work safely, effectively, efficiently.
One of the most moronic ideas to emerge from the sport/cesspool of hang gliding is that the most disproportionally and ridiculously overstrength component of the aircraft - the hang loop (or strap) - might fail under load so we needed to have a slightly longer one installed at or near the same point to flutter in the breeze and degrade performance for the duration of the flight just in case. But wheels were - and are - for fags incapable of executing perfectly timed landing flares in all circumstances and conditions.
And as pilots we're supposed to be preflighting our birds after setting up and prepping for getting airborne. And if we're incapable of detecting an issue with this rather blindingly visible and simple a component we most assuredly lack the competence to do much of anything else related to the pursuit of this discipline.
And the optics game is well loaded with moronic crap like the backup loop which:
- addresses nonexistent issues
- degrades operating efficiency
- increases:
-- weight
-- expense
-- problematic and time and effort wasting operational issues
-- dangerous distractions
----
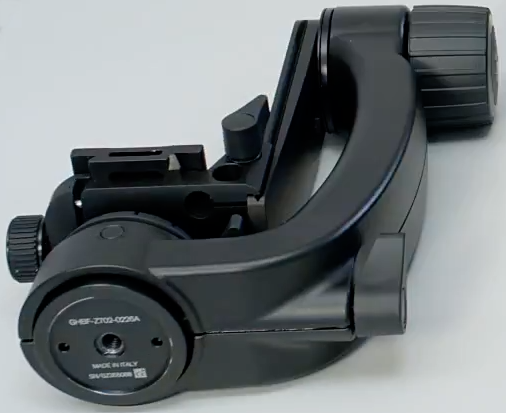
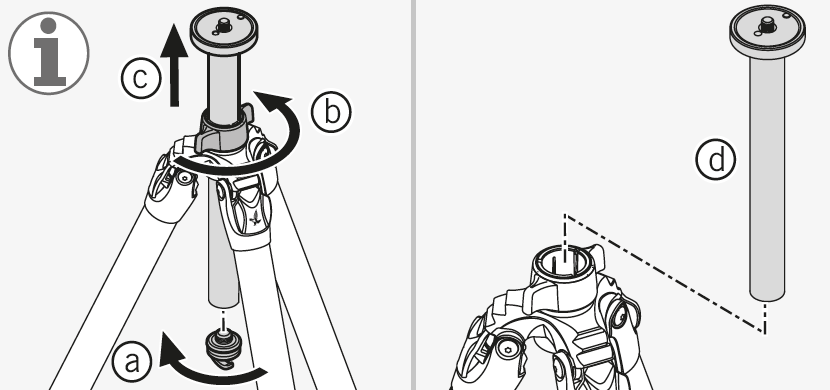
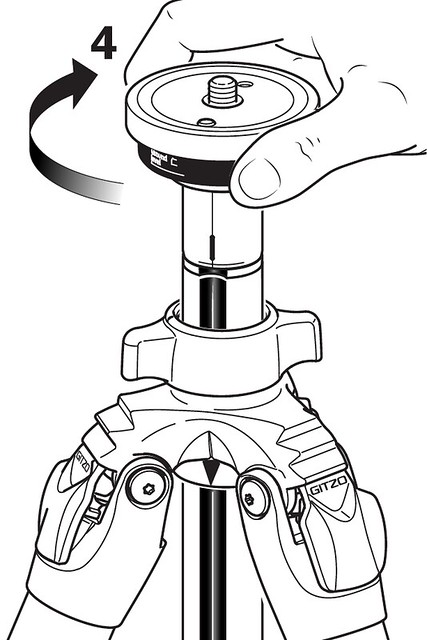
- Tripod Connection Plate Set Screws
Our Swarovski/Velbon CT101 and Swarovski/Gitzo PCT Tripod Connection Plates feature Set Screws driven from below to engage and immobilize the base surfaces/plates of Tripod Heads. THEY DON'T. They and the same on all similar gear are all placebo garbage and the folk who include them in their designs (damn near everybody) are quacks. We lock the Head onto the Tripod by torqueing it onto the Mounting Stud. And we prevent the Head from backing loose by setting panning resistance to something reasonable - just a bit over the max we want for panning to target - for torqueing on. And if we fail in those procedures it's not the least of a BFD as far as safety is concerned and the only thing Set Screw contacts will do is mar the base surfaces of Heads while they're being inadvertently or deliberately backed off. We see that effect here:
http://www.youtube.com/watch?v=6itWfnucOV0
01-00918
on this otherwise pristine and supposedly just-out-of-the-box copy being used by Swarovski for its PTH instructional/promotional video. And that marring was caused by Hans and/or one or more of their other pros having deliberately separated the Head on one or more occasions without remembering to first back off the Set Screw.
And why bother getting a pristine one out of a box for the shoot... They all look like this after the first or second trip to the field. This is totally normal.
Note that the scoring pattern is a pretty good match for the three Set Screws on their (Velbon's) rather chintzy CT101 Tripod's extremely chintzy Connection Plate - which we can see and identify in the video just fine. And that tells us that these Swarovski pros are buying into this Industry snake oil just like everybody else.
And we'll note the rather conspicuous absences of anything to do with installing their "SWAROVSKI OPTIK PTH professional tripod head" on their CT101 tripod and properly torqueing up the latter's Set Screws on Swarovski's "Video Tutorial Set up and features of the SWAROVSKI OPTIK PTH professional tripod head" instructional video. But don't worry... There's a breathtaking sequence on the installation of the Handle (which I tend to never use) that makes up for these voids ten times over.
Pull these things and stow them in the gear bag or find them new homes nowhere near any optical equipment. Don't just back them out generously leaving only a snowball's chance in hell of some Good Samaritan remedying your regretful oversight.
Minus the Set Screws the worst that happens is that we back off the Mounting Stud or from the Mounting Stud thirty degrees. Then we can lock up panning resistance, torque the Head back on a little harder, return to operational mode after a ten or fifteen second interruption. I've done that on several occasions. Not the least of a BFD. Matter o' fact I'll go on the record to say that we SHOULD BE erring on the light side and risking unintentionally backing off a bit every now and then.
On Car Talk eons ago I remember Tom and Ray saying that we manual transmission drivers SHOULD BE stalling out every now and then - that if we're not then we're burning clutch that we shouldn't be burning. Same deal.
I've inadvertently started unscrewing a lightly torqued on head during use while panning left on several occasions. And never in the combined world histories of birding and astro has such a minor annoyance evolved into a separation - which is the obvious implication of this crap.
The only way we can damage anything as a consequence of undertorqueing is if we're still stupid enough to have Set Screws installed. And if we're still stupid enough to have Set Screws installed we'll be motivated to overtorque and that DOES increase the probability of equipment maintenance issues and damage and physical injuries.
Everything relevant on our two models:
SetScrews-CT101
http://live.staticflickr.com/65535/49666462231_e9f16929df_o.png

SetScrews-PCT-1
http://live.staticflickr.com/65535/49665920528_07743c10d3_o.png
SetScrews-PCT-2
http://live.staticflickr.com/65535/49665920283_5a4c01f7b5_o.png
Everything not associated with the CT101's Connection Plate and the 44066 Adapter Plate is driven by a 3 millimeter Allen. A 3/16 inch slotted works for other stuff.
What we're seeing in the second frame of SetScrews-PCT-1 (i) above... The one Set Screw inboard, driven in and removed from above, not involved - directly anyway - in helping to prevent the Head from backing off. Its purpose is to immobilize the D0702.01 "Locking Screw" (Mounting Stud) which can be flipped to accommodate both 3/8-16 and 1/4-20 threading. If it's doing its job we can dismount our Head without risk of having to spin same a few extra revolutions due to the Insert coming with it.
If we're gonna:
- swap in a Head that takes 1/4-20 it doesn't matter in the least whether it stays with the Tripod or leaves with the Head. We need it fully disengaged anyway to flip it.
- reinstall this or swap on another 3/8-16 Head we can risk having the Insert coming off with the Head (BFD) or ensure that it doesn't by bending down and giving the Connection Plate a light clockwise twist. Versus hunting down a 3 millimeter Allen key to deal with the stupid fucking Set Screw which has already marred the little (unidentified) Cap that seats on the top of the Center Column.
Swarovski PCT
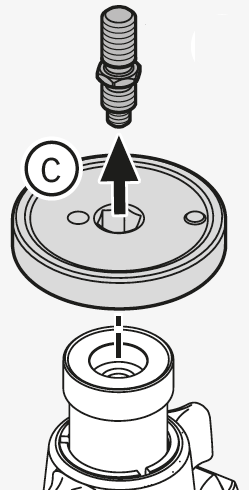
And that Little Unidentified Cap (on the Swarovski flavor only) is a total smoking gun. It's the foundation on which the three Set Screw protected components all or mostly above it - Head, D104215 Assembly Disc, D0702.01 Mounting Stud - are ultimately or directly anchored. Funny the we're suddenly able to rely solely on 3/8-16 screw torque, friction, compression at this level but not at the upper levels dependent upon it. What a load o' moronic crap.
And a real good analogy to backing up the forty G webbing that's connecting you to an aircraft that's gonna turn into swirling scrap metal at under seven Gs. But on the glider you have the option of removing the backup crap and being better than new. With Set Screws just by installing and engaging them you've already done irreversible cosmetic damage to the surfaces of whatever equipment it is that you're "protecting". And good freakin' luck consistently remembering to back off the Set Screws before starting to break the connection.
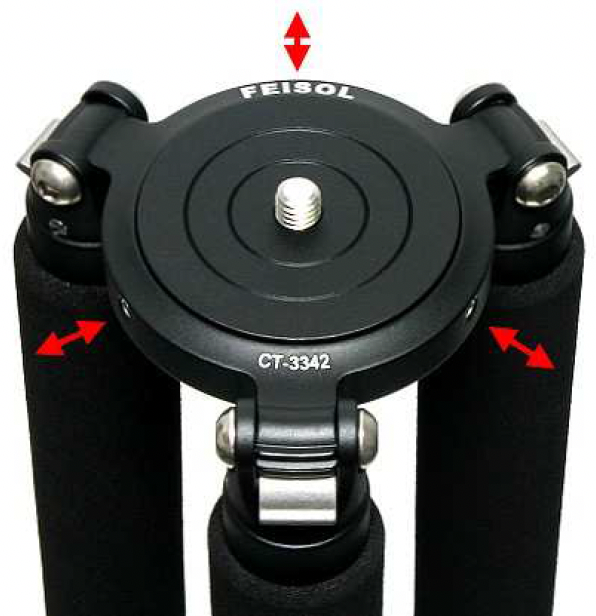
Gitzo GT3542L
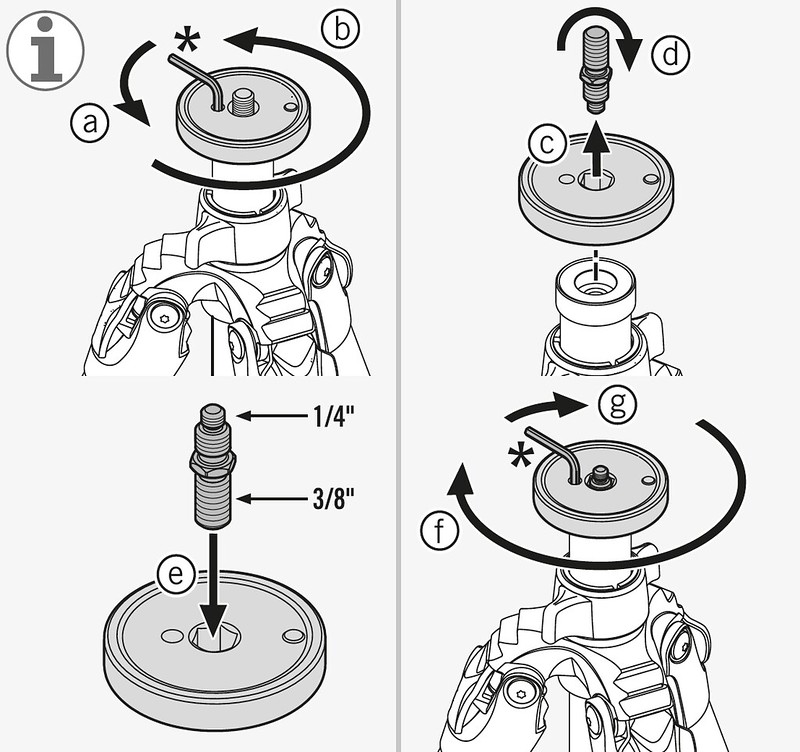
NOT SUPPLIED ON ALL MODELS?!?! So I guess the heads, cameras, scopes mounted on those models are backing off and crashing to the deck left and right. Please let us know what those models are so we can avoid them like the plague. Don't worry, I already have Feisol on my list. Hard to imagine all the carnage we're not hearing about anywhere.FIG. 4 - Fix Head on tripod
Mount the camera head on the disc at the top of the centre column (screw head clockwise).
Tighten the grub screw (not supplied on all models) against the base of the head, using the key supplied with the tripod. This feature prevents the head from unscrewing accidentally.

Head on that one is a (discontinued) Gitzo GH1780 Center Magnesium Ballhead.
And please don't show or tell us anything about about torqueing the Head on or off the Mounting Stud or making sure the Set Screws are backed off prior to separation.
http://www.feisol.net/manuals/FEISOL_Manual_CT-3342_CT-3442.pdf
FEISOL Tripod CT-3342 / CT-3442 User Manual
Wow. No set screws AND they're advising us not to over-tighten. Owners following this insane advice and stratagy must be smashing glass left and right.
For exchanging mounts (flat Ball-Head mount / Center Column mount / Leveling Base) on the tripod, unscrew the three counter-sunk screws on top of the mainframe using the included Alan key (see picture), insert desired mount and re-tighten the three screws. To avoid possible damage to the screws or tripod, please do not over-tighten them.
---
To firmly lock a leg section into place, turn the twist-lock approximately one half turn in clockwise direction. Please do not over-tighten.
---
When using the flat mounting plate (pre-installed on models CT-3372 and CT-3472), screw the Ball-Head into the mounting screw by turning the Ball-head clockwise until it fits snugly. Please do not over-tighten.
---
When using a Center Column, making sure that the Center Column is securely locked, screw the Ball-Head onto the mounting screw by turning the Ball-Head clockwise (see picture). Please do not over-tighten.
----
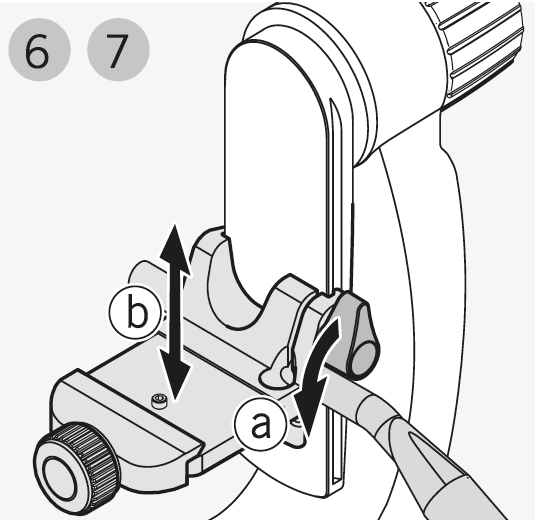
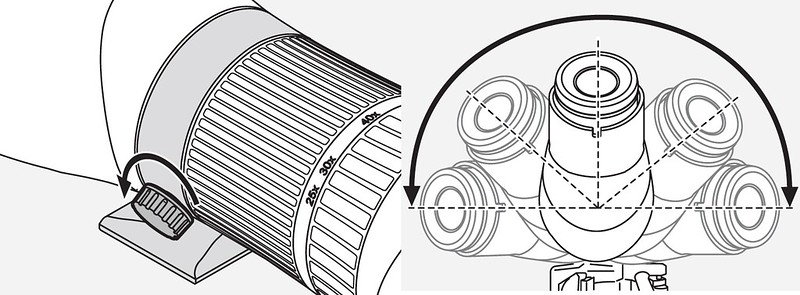
- Detent Button
02-01313
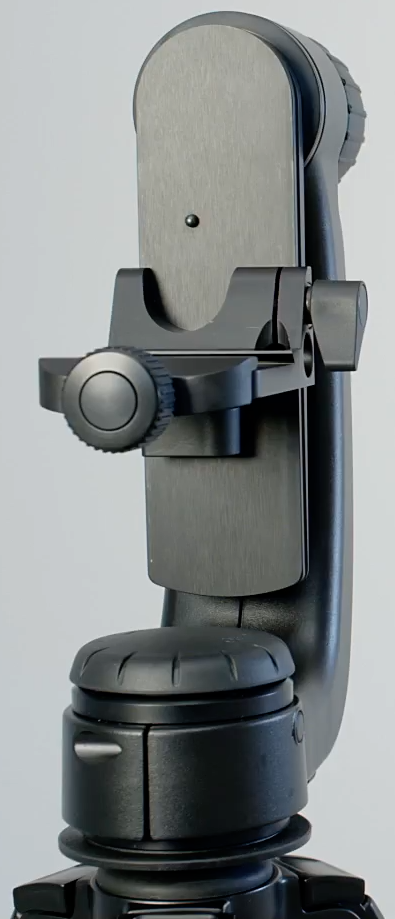
The Lens Support, we note in this shot, has a wide U-shaped cutout biased to fore and the Button is aligned with its low point. And the cutout surface is uniformly squared off from the Tilt Arm's face. 20 millimeters directly below that low/contact point on the Support's cutout we have a beveled notch such that the Button is automatically depressed when the Support is installed. Things can fall down as intended but they can't fall up minus operator intervention.
And if we WANT them to fall up while in operational mode we have to get a fingertip in between the Scope and Arm to keep the Button mashed down while we lift up on the unclamped Support - and whatever may be connected to it. And if our configuration doesn't allow sufficient clearance we'll need a popsicle stick on/in hand to do the job.
The position of the Detent Button - and implied upper safety limit - is a consequence of the Tilt Arm's mounting on the Tilt Dial and the latter's diameter.
05-03308-c
http://c2.staticflickr.com/2/1812/43116100014_cbb6caf538_o.png
Zilch to do with safety or performance. So pull the Button assembly and we have another 20 millimeters of Support travel/adjustment range up top.
As things work out our Scope tends to be pretty well trimmed for neutral at that level but who's to say we shouldn't be venturing up into the available instability range? Swarovski's DH101 and Compact Tripod Head can ONLY be operated well up into the instability range.
And the implication in both the Swarovski and Gitzo Owner's Manuals is that going above the Button isn't even an option. And rather interestingly in the Swarovski manual...
http://www.swarovskioptik.com/us/en/birding/products/accessories/spotting-scope-accessories-all/spotting-scope-tripod/professional-tripod-head#downloads
PTH professional tripod head - SWAROVSKI OPTIK
...the Button quite abruptly totally vanishes in the relevant illustration.
And speaking of vanishing Buttons... Mine wasn't always popping back out on its own after the upwards or downwards passing of the Support and required one to notice and apply a bit of agitation. Subsequently discovered that the Head had been assembled with a damaged spring. I'd been aware of this issue well before the Alaska trip and dealt with it as necessary during. But not long after I got back home... I was practicing on the backyard feeders and went to adjust from bottomed out to the top stop. 'Cept there WASN'T any top stop and the whole Scope assembly went totally and seriously airborne. I caught it like it was a bobbled ($4300 breakable) football and trapped it against the side of my head. (And I wasn't wearing a football helmet.)
I don't know how long it took for my brain to kick in enough for me to pull the assembly but I was pretty firmly locked in a mindset that the people putting this stuff together were doing everything for legitimate reasons. (Took me over two decades to pull the back-up loop off the glider I was flying.)
Button Housing - M08-1.00x5.
---
And note that on the Feisol UA-180 there are no port and/or starboard detent buttons to ensure that its Lens Support assembly and whatever glass we have mounted on don't fall up and clear to a near certain catastrophic end.
----
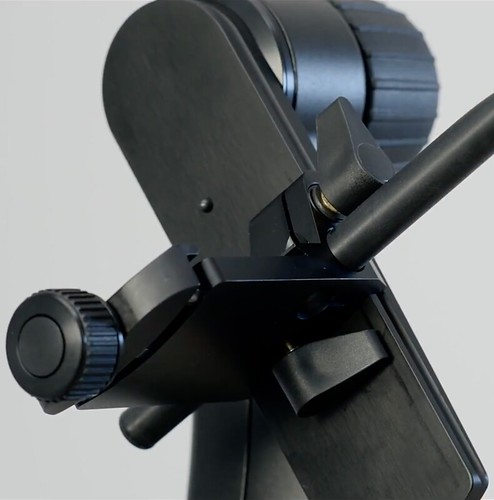
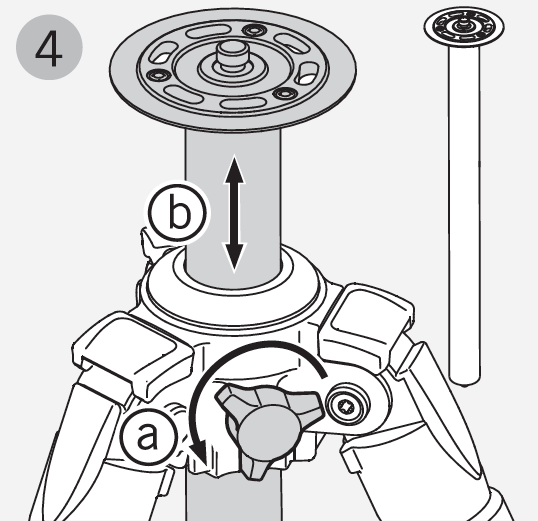
- Safety Stud
From Swarovski's video showing us the proper way to get glass properly and safely mounted on "their" Professional Tripod Head...
http://www.youtube.com/watch?v=6itWfnucOV0
Video Tutorial Set up and features of the SWAROVSKI OPTIK PTH professional tripod head


06-03802 - 07-03816
http://c2.staticflickr.com/2/1800/28947526087_8df2d00e0a_o.png-http://c2.staticflickr.com/2/1800/30014604428_c0aba19f43_o.png
08-03824 - 09-03906
http://c2.staticflickr.com/2/1780/28947524517_54edba8e58_o.png-http://c2.staticflickr.com/2/1799/30014603958_c342ac5735_o.png
10-03912 - 11-03914
http://c1.staticflickr.com/1/934/30014603728_d650392fbf_o.png - http://c2.staticflickr.com/2/1794/28948928777_459f8655ba_o.png
12-03918 - 13-03921
http://c2.staticflickr.com/2/1791/42981386415_9a2c8d8147_o.png - http://c1.staticflickr.com/1/932/28948928207_d1e68eeb7c_o.png
14-03924 - 15-04002
http://c1.staticflickr.com/1/933/28947523947_fbd5a094a7_o.png - http://c2.staticflickr.com/2/1817/30014603418_02f45dc181_o.png
16-04003 - 17-04007
http://c1.staticflickr.com/1/858/28947523557_b02c4000f8_o.png - http://c2.staticflickr.com/2/1814/28947523297_af63379e31_o.png
18-04116 - 19-04415
http://c2.staticflickr.com/2/1831/30014602858_80cc1547eb_o.png - http://c1.staticflickr.com/1/850/30014601448_bb5e10bfa0_o.png
Very subtle but at 11-03914 some structure on the underside of their "Balance Rail" (plate)...
1-03401
http://c2.staticflickr.com/2/1833/43949951251_7749d8df63_o.png
...bounces off the "Safety Stud" and necessitates a minor reset. Yeah, BFD, but these are the pros showing us newbie insects how to get and do everything right. Not even worth a retake. So we should EXPECT our five thousand dollar chunk of glass to bounce back out a little for most every installation. And with enough monkeys and enough typewriters... But perish the thought that we should remove the safety feature upon which we're depending for enhanced security.
02.5 socket head cap screw, M04-0.70x05:
http://www.manfrottospares.com/
http://live.staticflickr.com/65535/50967413967_63982560a4_o.png
Swarovski 45066 Plate with the same screw serving as a Centering Stud:
http://c1.staticflickr.com/1/859/43616064242_2d9f9715b2_o.png
(If that Plate (in this obvious Swarovski studio shot) isn't configured for an ATX 65 - which is highly unlikely IMHO - it's installed BACKWARDS.)
It interferes with balance adjustments (fore/aft) for both Plates 070:
http://c1.staticflickr.com/1/941/43965137332_07b7d12e6c_o.png


http://c2.staticflickr.com/2/1815/43294926474_41bec4c70b_o.png
and 140:
Gitzo GS5370LDR Long Quick Release D Profile Plate

It prevents:
- balance adjustments for Swarovski Arca-Swiss Feet
- in a modified Clamping Channel installation of Swarovski Standard Feet
- us from deliberately sliding anything into or out of the fore or aft end of our slightly opened Clamping Channel
There will be problems we don't need to have when we're swapping glass.
We need to treat this gun as if it's always loaded and not think we can ease up on procedures a bit 'cause we have this Safety Stud (probably) installed to catch one of our lapses into casualness.
http://live.staticflickr.com/65535/49704851952_79c75b8241_o.png

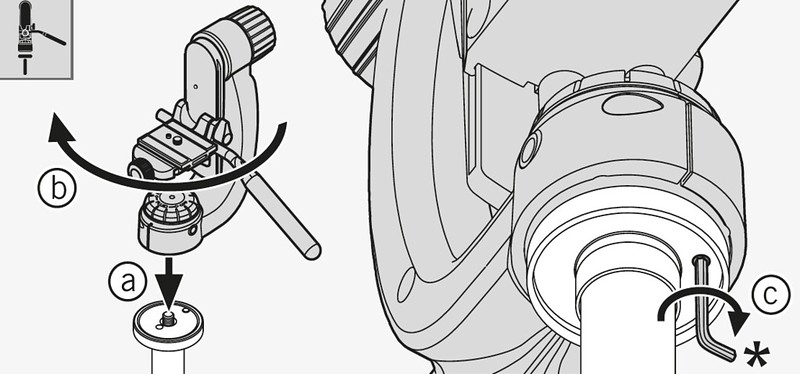
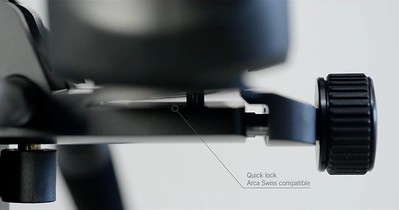
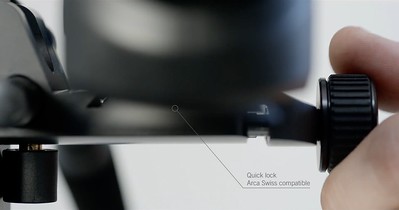
So if we DO have the safety pin installed for an assembly which can accommodate it we don't we don't need need to be as careful about clamping our glass after we have it installed in the channel? I can take this hairpin on this wet mountain road at fifty 'cause I'm wearing my seatbelt and have airbags installed?FIG. 7 - Usage with other brand plates
The Head accommodates some plates with similar dimensions. Test your plate by mounting it on the quick release adaptor. If the safety pin "H" blocks the mounting of the plate, or prevents the sliding of the plate, remove the safety pin, but take care you haven't a safety pin stop anymore!
Have you ever done any kind of survey of equipment operators to find out whether or not this crap has or could've defused an incident? Funny I've never heard so much as a recounting of a single one.
Also note that in the Swarovski flavor manual there is zero issue under any circumstances with the Safety Stud. It's a permanent element of the head assembly.
----
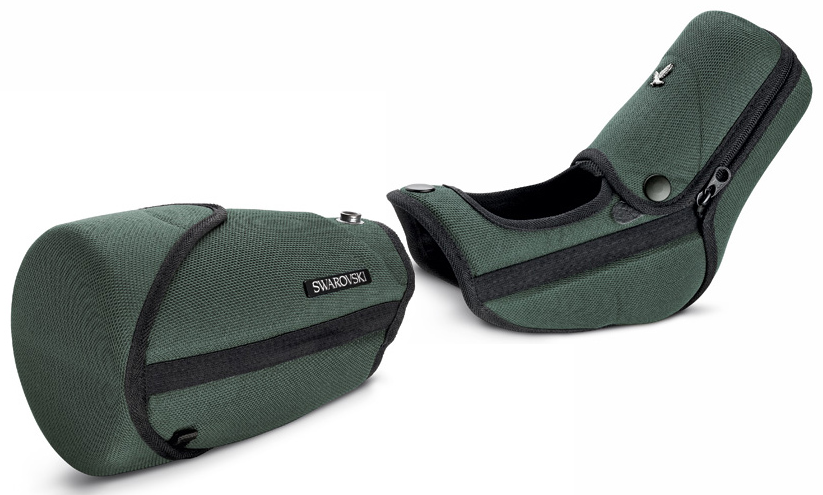
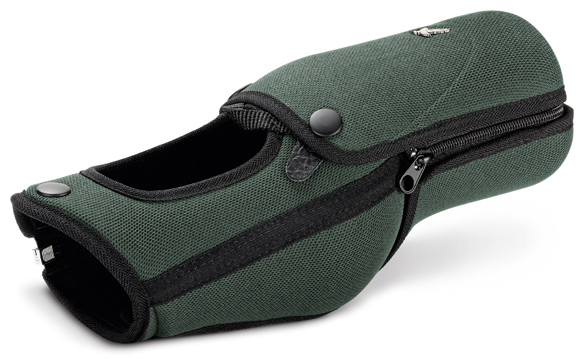
- Stay-On Cases
http://live.staticflickr.com/65535/52884051054_c5d6f0a736_o.png
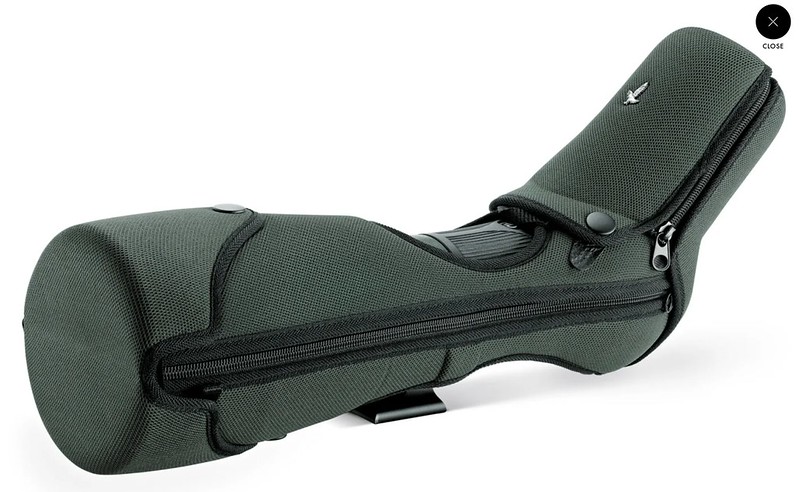
Oxymoron. One transports glass to the field in a case. Upon arrival the glass comes out of the case, the case gets stowed, the glass gets mounted on a tripod ready to perform for an operator whose goal is to as quickly and efficiently as possible start hitting high value targets. Stay-On Cases massively cripple the operator's ability to utilize the features of his glass and quickly and efficiently operate.
What's illustrated above is the full assembly for ATM/S 80 millimeter - Swarovski doesn't illustrate likewise for ATX - and we'll note right away that they've wallpapered over the Tripod Ring Locking Screw.
http://live.staticflickr.com/65535/49719514033_c4d6c7bd96_o.png
Might as well 'cause:
- no Swarovski Scope can be rolled off of 12 o'clock while it's being protected by a Stay-On Case
- by Swarovski and all of its Industry co-conspirators there is:
-- just shy of zero recognition that there's any capability of rolling a Scope off of 12
-- absolute zero recognition that there's ever any advantage to be gained in rolling a Scope off of 12
- this (in the ATS photo) is a Swarovski Standard (versus Arca-Swiss) Tripod Ring / Foot and the Locking Screw is barely operable under the best of circumstances
While for the ATA Stay-On Case we cover stem to stern in two elements for ATX...
85 millimeter
...(or STX) we have fore/mid/aft and the Locking Screw (Swarovski Standard or Arca-Swiss) IS accessible... But so what? Like having a switch to a light bulb that's been painted black.
And note the back end component of these Stay-On Cases DOESN'T and CAN'T Stay-On. It needs to come off and get stowed somewhere safe before we can get operational. And I can think of tons of other stuff I can put to actual use with the time and effort I'm wasting on this bullshit.
And how much thinking have we done about what Stay-On Cases are doing with respect to accessibility of our Focus...
52-053513
http://live.staticflickr.com/65535/52543133697_5f1a2b3df1_o.png
...and Zoom Collars? Not much 'cause we're a bit lucky to be remembering we have Focus and Zoom Collars while we're looking at the advertising shots.
Swarovski Scope Feet - Swarovski Standard or Arca-Swiss - are 43 millimeter length (fore to aft). My 95 (Swarovski Standard) is now used exclusively on my UA-180 Head. Its Lens Clamp length is 120 millimeters and I balance - Sunshade fully extended or with Solar Filter installed fully retracted - with about 30 millimeters of aft end and 47 millimeters of fore end clear. But for different situations I need to clamp at other positions.
Minus the Stay-On Case I can go full fore and aft without having the Scope's front end bottom out on the fore edge of the Lens Clamp. Gotta go about 13 millimeters out of the back end before I get contact.
With the Stay-On Case....
- I'm making contact with the fore edge of the Lens Clamp with about 43 millimeters of empty Clamping Channel aft.
- We lose the ability to stow the Scope with the Foot rolled up to 12 in between the Objective and the high point of our Ocular Module.
- Good luck with the:
-- rotation of the PTH's Lens Support Clamping Lever
-- stowing of your ATX with its Foot rolled up to 12
- We get a nice little three point attachment shoulder strap that I seriously doubt anyone anywhere has actually used. If I were using the Stay-On Case I'd throw the Scope in the Backpack - just as I do with LensPouches on the front and back ends with the Foot rolled up to 12 in between the Objective and the high point of my Ocular Module.
For the back end of an STX configuration:
Neither of those components is interchangeable with the corresponding ones for the ATX. (If we get things mixed up we've noted that the logo areas for the STX components are way longer than the corresponding areas for the ATX components.)
Swarovski uses as a selling point for its ATX/STX/BTX systems that they're more easily transportable because they can be broken down into their Objective and Ocular components. This is total bullshit. (Note the conspicuous absence of advisories on the downsides of transporting with the Modules assembled.) Our package packs tighter and is more abuse/damage resistant when the two elements stay bayoneted together. That configuration translates to less total volume - and that's BEFORE we start adding in the additional required packing. And instead of having four ends needing protection we have two - the fore end of the Ocular element protects the aft end of the Objective element and vice versa.
We all know we're idiots and capable of dropping onto unforgiving surfaces this expensive glass we're all trying to protect and pamper so this elegant snake oil is a fairly easy sell to someone getting started in this game. But when we're on a set we have a job to do and this crap is substantially interfering with and blocking our ability to do it. It WILL cost us:
- time:
-- setting up
-- acquiring targets
- targets we'd have otherwise nailed
If we had a Tripod Ring that left our ATX frozen at 12 and Focus and Zoom Collars that couldn't be budged at wide 09 and 03 ranges we'd send the Scope back to Swarovski for them to make good on their lifetime warranty guarantee. With the Stay-On Cases it's a pretty good bet that a few owners will never see through the scam and the practical effect will be one of permanently damaged equipment.
But - in stark contrast to the goddam Set Screws - they:
- don't physically damage the equipment they're supposed to be protecting
- are quite capable of preventing damage - in situations we shouldn't have allowed to happen
But I'm very happy with and doing fine with a:
- LensPouch on the front end for all routine activities when not targeting
- smaller LensPouch - along with the Ocular Module's Cap - on the back end for stowage and serious transport
And from all their authorized dealers:
And as a heavy user... Yeah, that aspect is pretty goddam good and effective and has zero downsides. Just not good enough when one's pitching this SOC crap.Complementing the optical performance and technologies is a lightweight and durable magnesium-alloy chassis that is wrapped in a protective rubber armor.
---
The 95 Objective Case element:
For differentiating it from the 85... Swarovski label is 41 millimeters. The lengths of the black longitudinal seams - fore edge to aft edge - for the 85 and 95 are 164 and 214 millimeters respectively. Ratios: 4.00 and 5.22 to one.
To install... Objective element goes on first. Go upside down and match the recessed area of the Case with the projection of the Foot so you can start and continue with proper alignment.
---
Component 1 is kinda cool - bottom attachment is a snap, top is a magnet, and you can rotate it 90 degrees to the side when using the Scope as a scope.
The back end boot component beats the hell outta the Ocular Module's Cap in the staying on department.
----
- Tripod Center Columns
Kinda like backup loops in that the primary item wasn't really strong/high enough to do the job properly - so we better throw on some supplemental piece o' crap. Go above and beyond the spider/apex of a tripod and we're no longer really dealing with a tripod - we start compromising the safety of our glass and stability of our image.
When I started in this game I stupidly assumed that features of industry equipment existed for legitimate reasons. We needed set screws to prevent our heads (the tripods') from backing off and falling to the asphalt with our glass engaged and center columns to extend our vertical operating range. Took me years to start realizing that center columns were absent from top notch tripods and a fair bit more to develop appropriate contempt for them.
Before I'd known and figured out much of anything my strategy for hitting and viewing high angle targets was...
- Tripod:
-- Legs:
--- fully extended
--- angled out to the first / 24 degree stop
-- Center Column extended up to about 80 percent of its capacity in order to get the back end of the Scope way the hell up
- Scope tilted way the hell up to or close to target.
- Stand straight behind the Scope.
- Tilt head (mine) back to not much shy of limit - near or to 45 degrees - in order to be able to look up into ATX's back end.
It took I-don't-know-how-long for me to stumble upon and start incorporating the technique of:
- at the waist:
-- bending down
-- twisting left
- turning my head/face formerly left / now up to look up through the ATX's back end
And...
- Feel free to substitute right for left if that works as well or better for you.
- This seems to be an issue with human wiring. I've had zillions of guests behind my glass for high astronomical targets. And quite often after I've explained and demonstrated the technique instinct will override and they go straight in behind the Scope in tilt-back mode.
- We humans are WAY better at twisting our waists and turning our heads to the left or right than we are at bending over backwards and looking straight up.
- We only need to bend and twist at the waist if the Scope's back end is a bit low. But I'm near always using low sets 'cause:
-- I'm using wide spreads of my fully extended Tripod's Legs for greater safety and stability
-- I gear and practice for sharing with guests - most of whom are lot shorter than I am
-- it's no BFD for me to use a low set even when it's down at little kid level
So no, we have zilch use for a Center Column whose only use is to get the back end up for a hypothetical boost in viewing comfort. And in the more recent past I was seeing my Center Columns as assets for the Gitzo Bubble Level installation and nothing more.
And I'm on the tall side and have been doing just fine with low sets on all normal targets and well enough even on straight-up astronomical targets.
A novice is gonna assume that when he's getting a thousand dollar Swarovski label piece of optical equipment that all the components are present for legitimate reasons and will want to utilize them and get up to competency speed. And when ya start getting up to competency speed (years later) ya start realizing that actual top notch tripods and operators don't use and incorporate center columns in their configurations. What a colossal waste of time, effort, dollars.
----
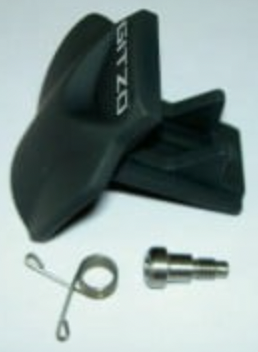
- Gitzo D0806.05 Assembly Button
Dealt with in the GT3543LS Systematic Carbon Fiber Tripod section. Massively analogous to the Gitzo / Swarovski label PTH Detent Button. Reduces the risk of the Scope assembly from falling up out of the Systematic Spider of the GT3543LS after we've backed off on the clamping.
----------
Control Axes Terms Conventions
Three control axes: pitch, roll, yaw.
With scope stuff we're not dealing much with roll - other than with respect to rotation to position the ATX Eyepiece with respect to the tripod / horizon / observer. We're trying to get the tripod set up vertically at Square One to eliminate it from further operational equations. And we're looking at an image with a circular boundary so it tends not to be an issue within reasonable limits. And if we have a camera on the back end we tune out minor issues with the camera.
Yaw... The conventional term is pan. Dictionary definition allows yaw/horizontal and pitch/vertical - and presumably a combination of the two - to scan a scene or follow a subject. Swarovski uses swivel. We're going with pan for this document. And since the word pan is derived from panorama we're on reasonably solid ground with that convention.
Pitch... Tilt.
----------
Tripod Orientation
Let's name/standardize the Legs of the three Tripods based on the features on their Spiders (chassis, hubs).
- CT101
-- 02 - Center Column Clamping Lever (Knob)
-- 06 - nothing
-- 10 - eye strap into which the top end of the shoulder (carrying) strap is hooked (if we use it - which I don't)
- PCT
-- 02 - nothing
-- 06 - inside a Ridge which engages the Groove in the Center Column (to prevent it from yawing)
-- 10 - nothing
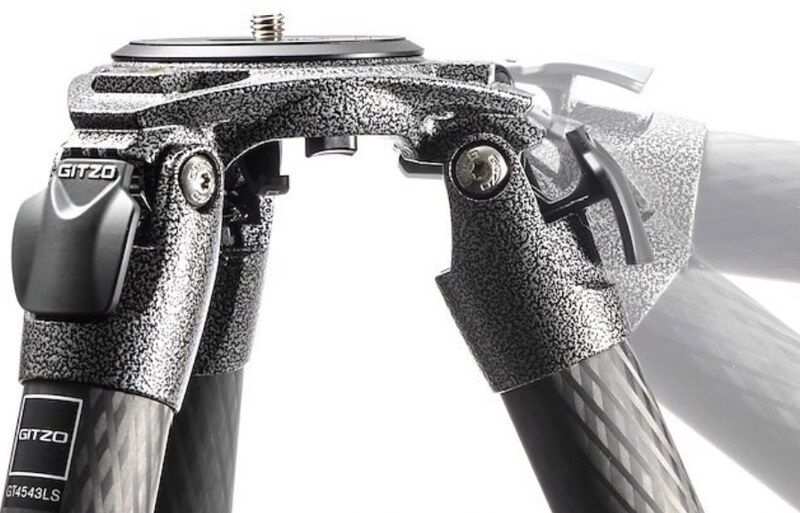
- GT3543LS
-- 02 - 3/8-16 port
-- 06 - Locking (Clamping) Knob
-- 10 - Assembly Button (below)
So our Legs are now 12, 04, 08 o'clock. (Bow, Port, Starboard would also work.)
--12--
08--04
We could also think of them as:
--NN--
SW--SE
That wouldn't be all that accurate 'cause those bearings would be:
---000---
225---135
whereas the actual bearings are:
---000---
240---120
We'd be fifteen degrees too South for both. (This happens 'cause while each quarter of the clock face is next divided into thirds on the compass rose things are halved.) But let's ignore that and use North as a synonym for 12:
----12NN----
08SW----04SE
and take a look at how our numbers work:
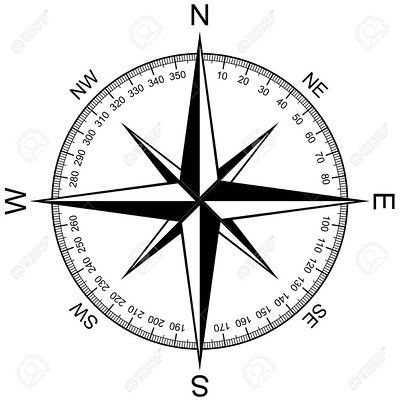
---
Our base is a compass of 360 degrees. If it's one of the:
- eight (intercardinal level) compass points it has to be divisible by 45
- twelve clock hours it has to be divisible by 30
E-03-090, S-06-180, W-09-270, N-12-360 are the only four points which do both. (Minimum prime factorization: 2*3*3*5))
If we wanna allow half hours then we do 15 (3*5) and pick up the four intermediate compass points.
For NNE (half-wind) level resolution we have to go 22.5 (45/2 (12:03:45)).
http://www.123rf.com/photo_54708808_stock-vector-compass-rose-isolated-on-white.htm

http://illustoon.com/?id=5051
A couple tables to see/show what's going on with increments:
15 Degree / Half Hour
015 - 00:30
030 - 01:00
045 - 01:30 - NE
060 - 02:00
075 - 02:30
090 - 03:00 - E
105 - 03:30
120 - 04:00
135 - 04:30 - SE
150 - 05:00
165 - 05:30
180 - 06:00 - S
195 - 06:30
210 - 07:00
225 - 07:30 - SW
240 - 08:00
255 - 08:30
270 - 09:00 - W
285 - 09:30
300 - 10:00
315 - 10:30 - NW
330 - 11:00
345 - 11:30
360 - 12:00 - N
22.5 Degree / Compass Point
022.5 - NNE
045.0 - NE - 01:30
067.5 - ENE
090.0 - E - 03:00
112.5 - ESE
135.0 - SE- 04:30
157.5 - SSE
180.0 - S - 06:00
202.5 - SSW
225.0 - SW - 07:30
247.5 - WSW
270.0 - W - 09:00
292.5 - WNW
315.0 - NW - 10:30
337.5 - NNW
360.0 - N - 12:00
Actual orientations in hours, minutes, degrees:
--12--
08--04
--60--
40--20
---360---
240---120
---
We're gonna assume terrain with some degree of slope and/or irregularity 'cause that lines up pretty well with the real world. And our only concerns are getting the Tripod set up vertically, at max stability, and such that the back end of the Scope will or can be rolled to be at a reasonably comfortable height for a viewer. And for max stability we want our two downhill Legs - 04 and 08 - extended to the max or otherwise evenly and our uphill Leg - 12 - retracted and/or angled out to whatever degree is called for.
In order to stay consistent with our Leg designations we'll assume that all slopes face South and thus our configuration for all sets will be:
----12NN----
08SW----04SE
and bear in mind that our Tripod orientation has zero to do with our target direction. We're trying to get the assembly up vertical and at max stability and it doesn't matter in the least where or what our target or targets are or will be. But we will be standing downhill from / to the South of and facing uphill / to the North of our set while effecting it.
Note: In PCT photos the Swarovski Goshawk logo is on the Leg angle Sliding Stop for Leg 12.
It's occasionally useful to have a Tripod with everything - Legs and Center Column - fully collapsed but stood up with Legs fully spread. We'll refer to that configuration as a short set.
---
Bow - Port - Starboard could work pretty well for what we're doing.
----------
Tripod Legs Extensions
http://live.staticflickr.com/65535/32932167597_6671ffae4e_o.png

We'll designate Legs Extensions and the Extension Clamps or Twist Locks which free and lock them as 1 through 2 or 3 from the top down / largest to smallest diameter. (I've flipped this photo so the Swarovski Goshawk logo is a mirror image.)
And we'll designate fixed tubes into which the Extensions retract/collapse as Level Zero.
----------
MidHead Screws
In the various Tripod and Head components under discussion we have various screws with hex "heads" not at any end of the fastener - like most obviously:
Also:
- PTH:
-- Lens Support Clamp Mounting Stud
-- Clamp/Lock Levers:
--- pan control
--- Lens Support height
-- Handle
- Car Window Mount clamp
Until I stumble across an established industry term for these screw threaded fasteners I'll be referring to them as MidHead Screws. Could also be Hex MidHead Screws but that would be a bit superfluous as hex is our only option in these configurations.
The MidHead is a fair bit smaller than the heads we'd find on garden variety screws of the same diameter and pitch.
- In the illustrated 3/8-16 example the head would normally be 9/16. For the Head Mounting Stud it's two sixteenths under.
- Lens Support Clamp Mounting Stud is anchored into the base component via M06-1.00. MidHead is 07 millimeters. Standard is 10.
----------
Tripod Stability
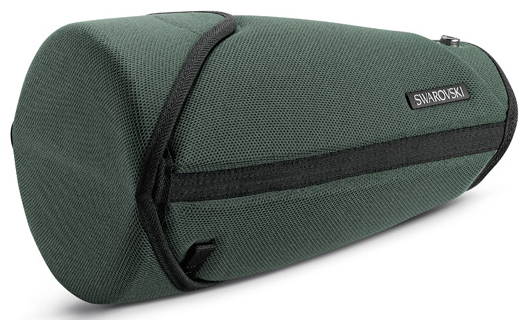
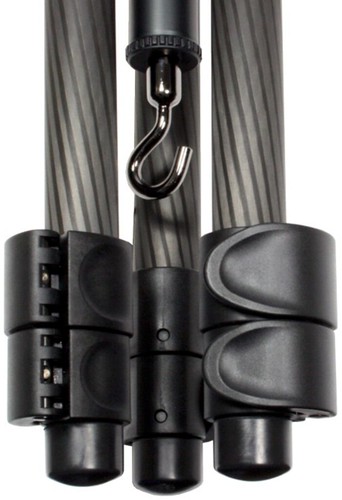
Tripods typically feature Ballast Hooks on the bottoms of their Center Columns.
http://live.staticflickr.com/65535/49665920283_5a4c01f7b5_o.png
We can hang weight - like a backpack or bag of locally harvested rocks - to really ramp up stability and inertia and lower the hell out of the center of gravity. I've never yet been temped to give that option a go and have never yet heard of it being used in a birding application.
I've pulled the Hooks off of my CT101s and capped the 1/4-20 Screw Studs projecting from the middles of the Center Columns' (bottom) Endcaps with nylon hex nuts. Better option... Screw a 1/4-20 to 3/8-16 Adapter into a 3/8-16 nylon nut and screw that onto the Stud. Doesn't weigh anything worth mentioning, we're more likely to need the Adapter than the Hook, better protection, better for setting the Limit Stop down upright.
The Hook on the PCT is integral with the Endcap and doesn't present any problems.
---
Another stability trick I've never used or been tempted to use in the field... Install the Center Column / Head assembly in the Tripod upside down and bring your folding stool into play. (And make goddam sure the Center Column Endcap is properly and fully screwed in.)
---
On the subject... The stability of the Tripod can't be any better than the stability of the surface upon which we're set up. I've found that if I set up on the center of the back deck and continue to breathe my image is all over the place. Think trampoline. Relocating to the corner with the least ground clearance improves the situation humongously.
---
Much more on the subject but best to wait until after we've settled on a tripod and have a head, some glass, a bubble level installed. See "Uprighteousness" section far below.
----------
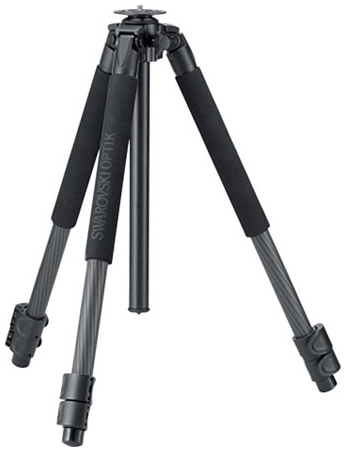
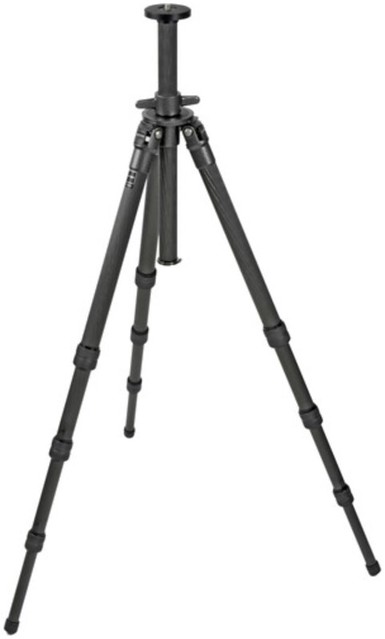
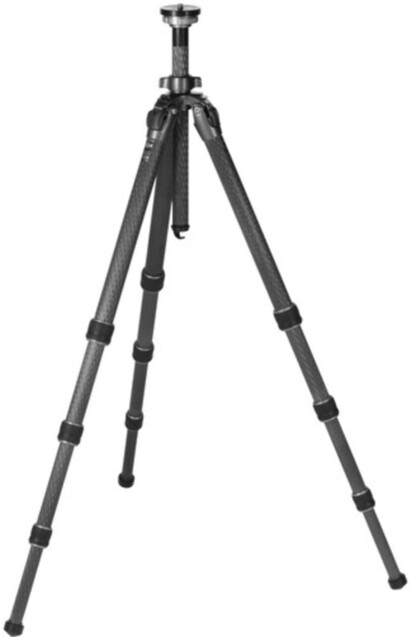
Swarovski Label Tripods
We'll be dealing with two of them - the now (2019) discontinued CT101 (Carbon) Tripod, introduced in 2005, depicted here...
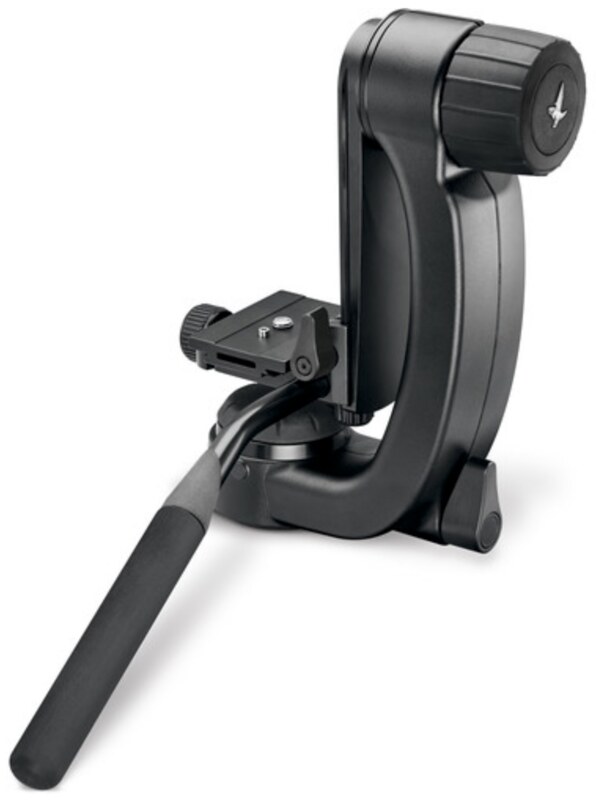
...with the DH101 Head) and the new and much more robust and expensive PCT (Professional Carbon Tripod)...
http://c2.staticflickr.com/2/1775/43919904991_22a5bda4e7_o.png
http://live.staticflickr.com/65535/43881852322_1391176778_o.png
...which superseded it.
And they're not Swarovski tripods. They're mainstream industry tripods with Swarovski labels on them. But I didn't find that out until 2019/02 after the Costa Rica trip.
The CT101 was Velbon (http://velbon.net), the PCT is pretty much totally a Gitzo GT3542L Mountaineer Series 3 Carbon Fiber Tripod (Long).
- G - Gitzo
- T - Tripod
- 3 - Series
- 5 - Material - Carbon
- 4 - Leg Sections
- 2 - Release
- L - Long
Swarovski also does a CCT / Compact Carbon Tripod which is probably mostly a GT3542 (Not Long).
----------
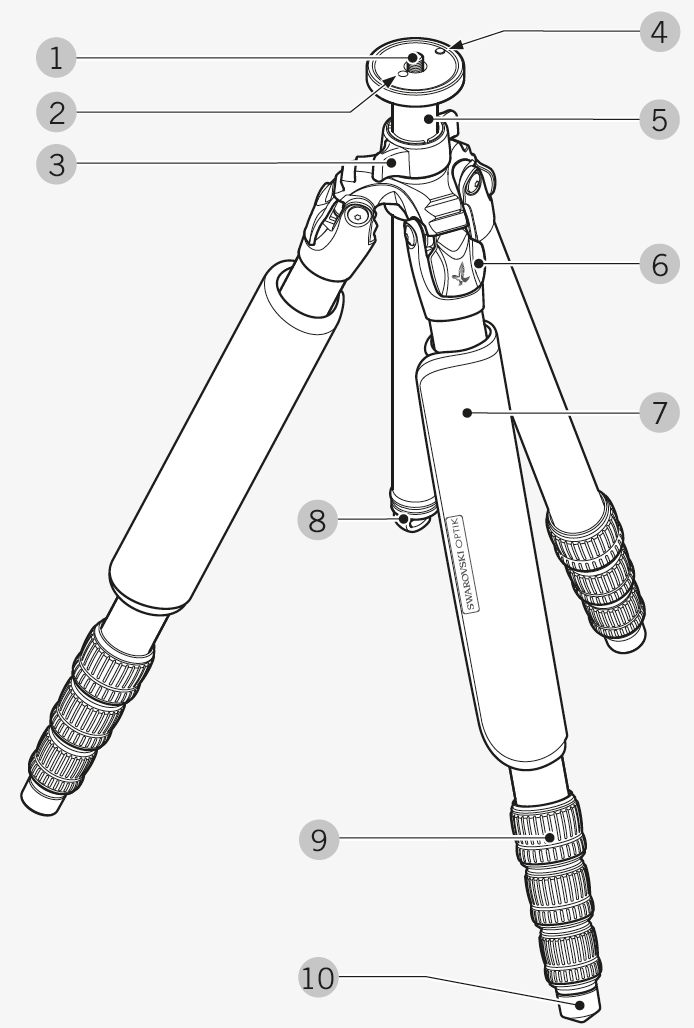
Velbon CT101
Note that in a couple illustrations of the CT101...
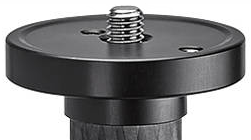
01 Connection plate - 3/8" connector thread (standardised)
02 Locking bolts - for attaching tripod head
03 Central column (external diameter 28 mm)
04 Clamp lever - central column
05 Limit stop - central column with 1/4" connector thread
06 Locking button for leg expansion - 3 angles of inclination
07 Quick locking clamp - for leg sections
08 Adjusting tool - quick locking clamp (CT 101, CT Travel)
09 Shoulder pad
10 Hook - removable
11 Spikes (AT 101)
12 Carrying belt - removable
13 Adjusting screws - for tripod leg movement
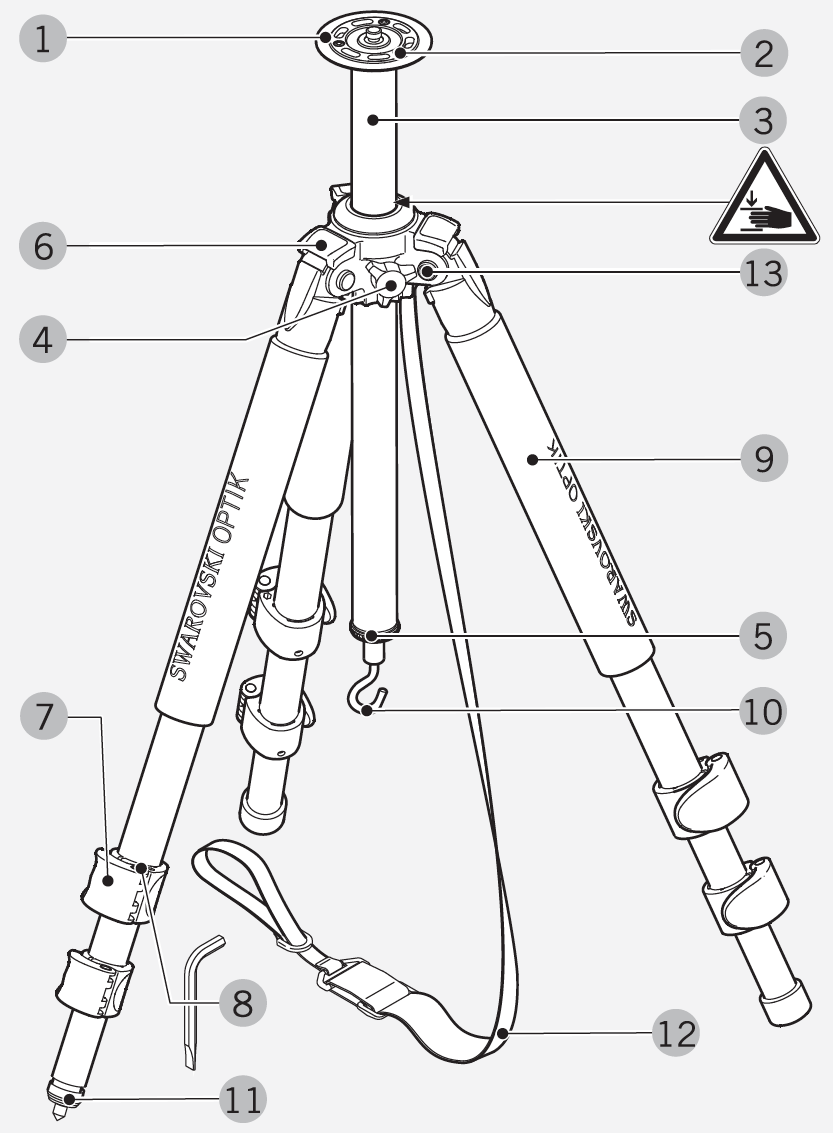

...I needed to Photoshop a Connection Plate onto the top of the Center Column because no stock photos were available. And the Connection Plate is off of a PCT and a lot thicker.
Much more accurate illustration from the Manual:
02-01313-C1
And a low resolution photo on the side plus a crop from Swarovski's PTH video below in which they're mounting on a CT101.
(And it looks like B&H...
http://live.staticflickr.com/65535/51348396937_5357681a52_o.png

...also had a hard time finding a stock photo of the CT101 minus a head.)
Pretty good additional smoking gun evidence of what a total joke Tripod/Head set screws are. If we tighten them evenly we start establishing a wave pattern in the Connection Plate. Thus if the set screws were serving anything beyond a placebo function they wouldn't/couldn't be.
And - speaking of locking things such that they won't rotate - the CT101's Center Column Clamping Lever won't/can't clamp the Center Column to the extent that it will prevent rotation. (Hell, it's essentially an M08-1.25 set screw installed such that it - in addition to not being able to solidly clamp anything - isn't able to damage anything.) The Gitzo clamping mechanism... no problem.
On the first outing of the Scope's first ecotour (Alaska) a glued on Foot fell off of the end of one of the CT101's Legs and was temporarily lost in the SUV's boot - an issue which took the whole Tripod out of action. (Good thing I'd purchased and packed a spare.) And about midway through the Scope's second ecotour (Costa Rica) there was a failure of the connection between the Connection Plate and the Center Column which critically and severely endangered the entire PTH / Balance Rail / ATX Scope assembly.
The Center Column is 28 millimeter aluminum tubing. The Connection Plate is mostly a piece of molded plastic with a 10 millimeter "long" finely threaded plug which is screwed and glued into the Center Column. If (When) that connection fails:
- the Center Column / Connection Plate component (it's considered a single component) is considered broken and must be replaced
- everything that's being supported by the Tripod is at a high risk of going into freefall mode
I was - luckily (as the CT101 is out of production and can no longer be supported) - able to obtain under warranty an intact Center Column / Connection Plate assembly replacement and restore my primary CT101 to its out-of-the-box condition. But that was the condition which at one point put five and a half thousand dollars worth of optical equipment at extremely high risk of toppling. And I would no longer use for my full assembly one of these Tripods for anything but an emergency backup. Substantially lighter loads... OK, but keep an eye on it. Based upon my experience with this issue there should be about zilch chance that we'll lose the Scope immediately after the component failure. Just don't push your luck after you've detected the wobble.
A PCT or Gitzo GT3542L Center Column will fit and work - but would be an exercise in throwing good money after not so good money.
---
2021/07/14 - I think I FINALLY figured out the whole story behind the CT101 Center Column failure - and it's pretty freakin' outrageous. Well, a little more freakin' outrageous than having a rather new and never even slightly abused Center Column fail for any reason in the first place.
I own two CT101s and three of their Center Columns:
- CT101-1 failed
- CT101-1 replacement
- CT101-2 original and pristine
Everything that can be seen - with CT101-1 insecurely reassembled - is identical. So that's a pretty good indication that all CT101 Center Columns are identical and this wasn't just an unfortunate one-off failure of manufacture and/or quality control.
Tubing is aluminum, everything in millimeters - OD 28, ID 26, Length 400, Threading (top and bottom, Connection Plate and Limit Stop) 1.00 (internal). Limit Stop is removable, Connection Plate is permanently glued in so we can't see anything until after it fails. Top end is cut square. Bottom is beveled.
Connection Plate and Limit Stop bodies are plastic. (Do we really need to be investigating much further?)
At the top squared glued end we have a range of 4 millimeters of smooth followed by 10 of threaded.
At the bottom tapered removable end we have threaded from IMMEDIATE and in to 11.
Between the Connection Plate flange and the beginning of the threading on its insertion cylinder (plug) - 5.0 millimeters of smooth followed by 7 millimeters of threaded. Between the Limit Stop flange and the beginning of the threading on its insertion cylinder - 2.5 millimeters of smooth followed by 6 millimeters of threaded.
Yeah, let's pull a number outta our ass and rate it for 5K grams - or about the same number of dollars worth of target glass - we're gonna load up onto it.
If any actual thinking of any degree went into any stage of the design and production of this equipment then all of these Center Columns are fabricated upside down with regard to the original intent.
The only ID we find on these Tripods...
- "SWAROVSKI OPTIK" on each of the three black foam rubber padding tubes on the three top Legs sections
- Decals:
-- "CT 101" on the Spider face between Legs 04 and 08
-- "Made in China / Fabriqué en Chine" well concealed on the top inside of Leg 08
And I'll bet they do a good job of wiping the fingerprints from all the relevant surfaces before shipping to the user.
---
From B&H:
Translation... Sucks for serious equipment. Agreed. Put a DH101 Head on it, use it for your binocular, keep an eye on things.Swarovski's CT 101 Carbon Fiber Tripod Legs feature a user-friendly lightweight (3.21 lbs/1.46 kg) construction, fast and almost soundless opening and closing of the leg retaining clamps, and a load capacity of 11 lbs (5 kg). With stable, low-maintenance, vibration-damping synthetic components made from Makrolon, these legs combined with a lightweight head (not included) are ideal for long hikes or travel with scopes or lightweight camera equipment.
- Sturdy, feather-light tripod with maximum carrying comfort
- Ideal for longer hikes, trekking, travel or digiscoping with lightweight camera equipment
- User-friendly ergonomic design
- Fast and almost soundless opening and closing of the leg retaining clamps
- Stable, low-maintenance, vibration-damping synthetic components made from glass fiber-reinforced Makrolon
- Supplied as standard with additional adjustment tool for locking legs
By the way... User-friendly? Name anything on any of these systems that isn't at least being presented as being user-friendly.
In my experience a tripod with a glued-on Foot which falls off and is lost for a day or two on a really serious expedition and a plastic glued-in lightly threaded connection plate which comes unglued and strips on another really serious expedition is as user-hostile as anything we wanna name. Ditto for the Gitzo/Swarovski upgrades with all of their pain-in-the-ass to nightmare issues. We want user-friendly these days we start looking at an ATX 49901 Objective / 85 millimeter 48885 Ocular combo for $4.1K - but then we realize there's no finder scope. So good freakin' luck.
---
But anyway...
We've designated the Leg counterclockwise from (in the illustration to our right of) the Clamping Lever as 12. It's also clockwise from the steel Eye Strap intended as the top anchor for the shoulder strap (that I suspect no one ever actually uses). And on the Spider between 04 and 08 we have nothing.
Leg pivot resistance is adjusted/set by adjusting torque on the Pivot Screw driven using a Torx 25 bit. They come from the factory torqued up about as hard as they can be. Maybe back off a wee bit then don't worry about it. Not a particularly critical issue on this tripod.
The CT101 includes a small tool which stows in neatly and fairly flush in a recess of any one of the three (identical) Level 1 Leg clamps. It's mostly a 3 millimeter Allen key 'cept the tip of the long end of the L lets it double as a slotted screwdriver. (See "SetScrews-CT101" above.) And the long end tip works fine in the Allen socket to spin things in at light torque. Note that when fully inserted the flathead screwdriver tip portion projects out through/low close to two millimeters. The "problem" though is fixed whenever we do full collapse.
The CT101 uses Extension Clamping Levers to lock, moderately clamp, free the six Legs Extensions of the Tripod. And the available clamping power for each Clamp is adjusted/set by turning with the aforementioned tool an M04-0.70x23 screw (same for both Levels) - exposed when the Clamp is swung open/loose. But don't assume that that we can do a one time universal tweaking operation and stay good - they seem to be a lot more temperamental than that. (Temperature sensitive?) So check and adjust as/if needed.
Tuning procedure...
- Pull the Center Column and set up (normally) with all three Legs fully extended and spread.
- Stand between Legs 04 and 08 and tilt towards 12 to bring it to vertical and 04 and 08 airborne.
- Hands on the Spider and/or Leg 12's Level 0 Tube (which is padded), press down HARD to try to induce a partial collapse. If you're:
-- successful identify the weak link, open the relevant clamp, tighten the adjusting screw no more than an eighth of a (clockwise) turn and retest
-- unsuccessful open the Level 2 (lower) clamp, loosen the adjusting screw an eighth turn, retest. If you're:
--- still unsuccessful keep going
--- successful tighten as per above and go up to Level 1
- Rotate clockwise and repeat for Legs 04 and 08.
For subsequent checks give anything that slips another eighth turn.
The thought occurs to me that these "Quick Locking Clamps" actually aren't - in actual practice. They require more manual precision, time, effort to operate and what should be a one-time-only resistance adjustment doesn't seem to be. I'm finding the PCT/Gitzo Twist Locks approach a much more practical and effective - not to mention robust and versatile - solution.
And note that in order to free the CT101's Clamps we need to work a thumb under the tip and lever it open. That can be substantial stress and I'd recommend going Level 2, Level 1 - rather than both simultaneously - for each pair. (But we can safely squash them both simultaneously with the heel of our palm for breakdown.)
Setup and breakdown actions are analogous to those described for the PCT.
ODs for Levels 0, 1, 2: 28, 24, 22 millimeters.
---
2019/05/11 - Found the Limit Stop (plug at the bottom of the Center Column) totally welded in place - despite the fact that I'd last installed it and wouldn't have gone nuts with force. Remove the Hook, boil a small glass of water in the microwave, immerse... End of problem.
2019/12/02 - For both of these CT101s I had to do the boiling water trick and use a rubber Jar Lid Gripper Pad. Lubricate the threads and be conservative with torque when reinstalling.
----------
Gitzo PCT - Professional Carbon Tripod
http://aa.swarovskioptik.com/download/pdf/5475051-BA.pdf
(Note that back for the CT101 we had a "Central column". Not all that fluent in English and too goddam lazy to check.)
01 Connection plate - 3/8" connection thread, adjustable to 1/4" connection thread
02 Locking screw - adjustable connection thread
03 Lock lever - center column
04 Locking screw - for attaching tripod head
05 Center column
06 Locking knob - for setting angle of legs
07 Shoulder pads 2x
08 Hook - detachable
09 Screw cap - leg sections
10 Rubber feet - detachable
The first time I checked Swarovski's website after returning from Alaska I found my CT101 Tripod had been superseded by a "PCT - Professional Carbon Tripod":
http://c2.staticflickr.com/2/1775/43919904991_22a5bda4e7_o.png
http://live.staticflickr.com/65535/32932167597_6671ffae4e_o.png
46 pound load capacity versus 11, 5 centimeter higher full extension height, Feet are solidly screwed in (rather than being lightly glued on), collapses to 3 millimeters longer, a bit over 0.4 kilograms heavier, a few more bells and whistles, not far below twice the price... And apparently overnight they never heard of the CT101 before. No archives, Owner's Manual available. Pretty sure if we needed repair, parts, service we'd be SOL. Not impressed AT ALL by that bullshit. Making previously posted information unavailable to owners, customers, the public...
---
2019/03/13 - Update/Expansion on the PCT...
On 2019/02/07 I acquired a PCT.
I'd been assured that its Center Column wasn't compatible with the CT101 but guess what. Carbon versus aluminum, a bit shorter, but identical OD - 28 millimeters. Popped right in, really robust mounting for the Connection Plate...
...problem solved. I was not happy.
Didn't really wanna send it back though so spent a week studying, playing with it in an effort to justify the purchase of the whole freakin' assembly.
Four Leg sections - one fixed, three extendable (versus the CT101's three total). ODs: 33, 29, 25, 22 millimeters. Lock/Unlock by means of twisting Twist Locks rather than flipping (on/off) Extension Clamps.
The lengths of the Twist Locks are 38, 37, 36 millimeters for Extension Levels 1, 2, 3 respectively.
The Stops engaged by the Sliding Stop set our Legs angled out at 24-52-85 degrees. (And let's see what happens when we use this Swarovski label tripod at the 85 Stops... Spider near all the way down with Center Column all the way up.)
While the Center Column Lock Lever does cost us some squash range - as well as a little altitude over max stability potential - it is superior to the analogous arrangement on the CT101. Way more mechanical advantage and thus we can more quickly and easily achieve or undo a solid lock.
We won't be able to see it in any Swarovski photos or illustrations but there's a Ridge-and-Groove arrangement between the Center Column and the Spider Cylinder through which it slides. The Center Column has a deep Groove running its length and there's a metal projection low inside the Spider Cylinder - 12 millimeter vertical and about 3 width - which engages it and prevents the Column itself from yawing/panning when unclamped save for two or three degrees of slop.
Make a practice of centering the Groove over the Ridge with every clamp 'cause we'd rather not have any significant load on the materials in that area. What this feature does for us is keep us reasonably well on target when we have cause to extend or retract the Center Column. And if we're always shooting for center we'll be staying in pretty good shape.
2019/05/26 - Here it is on the one with the original Gitzo label:

Note the arrow indicator on the lower Spider area between 04 and 08 aligned with the Groove to help get us properly oriented for re-insertion. (None of this exists in Swarovski World.) Also:
- if we're not seeing the logo we're in good shape
- in lousy light we can feel for the arrow on the outside or projection on the inside
In no Swarovski promotional photo will we find the slightest indication that this Ridge-and-Groove feature actually exists. Ditto for fifteen relevant illustrations in the Owner's Manual - including, astonishingly, these two:
Must've been deemed insufficiently elegant.
Note that, while a PCT Center Column is compatible with a CT101 Tripod, the Ridge projection in the PCT negates the converse arrangement. But one really wouldn't want to go for the former anyway save for in some emergency situation.
---
The Swarovski flavor of this Tripod comes with two velcro-on Shoulder Pads which get installed around the uppermost reaches of the uppermost Leg sections. Their photo shows them installed on 12 and 08, their Owner's Manual shows them installed on 12 and 04, I had installed them on 04 and 08 before understanding how problematic they were and pulling them. (Funny Swarovski doesn't mention any issues.)
Issues... The Pads:
- prevent 08SW and 04SE from swinging/stowing together as well as they might otherwise - 'specially installed in conjunction with the Gitzo Level. This presents a bit of an issue when collapsing as described above. Minus the Pads the Legs fold in beyond parallel - to the point that at full extension the Feet are just a bit shy of being in contact with each other. And that works real well with what's involved in setting up vertical on an incline.
- present a lot more sail area way up as far as we can go - and where we least want it.
- are a pretty much unmitigated disaster.
http://live.staticflickr.com/65535/49323628837_321592d22b_o.png

2021/05/21 - According to their current Owner's Manual the tripod still ships with the Pads but otherwise good luck finding a current Swarovski illustration which includes them.
---
There's an O-Ring installed on the Ballast Hook plug (on the bottom end of the Center Column). Its purpose is to prevent hard contact between the metal plug and the three uppermost carbon Leg sections when the Tripod's folded. Unseats pretty easily. Lose it before you lose it. We need to install a Gitzo Center Column Bubble Level (see below) on the bottom end of the Column anyway and that provides a broad plastic contact surface / bumper just above the O-Ring and pretty much eliminates it from the equation.
If we lose the O-Ring and wanna lose another one just like it... Metric - 25 millimeter ID, 31 OD, 03 diameter. True Value sells it as a 98279.
There's another O-Ring installed around the base of the Ballast Hook's 12 millimeter diameter installation screw - for waterproofing I'd guess. 09 millimeter ID, 12 OD, 01.5 diameter.
Note that with the PCT in stock configuration with its Center Column fully extended the inward travels of the bottom ends of the fully retracted Legs are limited by each other. With the Gitzo Center Column Bubble Level installed we lose 9 millimeters worth of extension and the 30 millimeter max OD of the (hard metal) Ballast Hook component limits the inward travel (against tons worth of mechanical advantage). This is not a good situation but one unlikely to be stumbled into inadvertently. With the Center Column fully retracted - as it should be - the Bubble Level OD is the limiting factor and the retracted Legs fold in to a bit inside of parallel to each other.
http://live.staticflickr.com/65535/32932167597_6671ffae4e_o.png
---
The Legs pivot out/in on an axle (D104217) secured by Torx 25 head M06-1.00x13 screws at both ends up at the Spider (D104201C30Z).
Torque target should be:
- Leg fully extended and angled up/out to horizontal
- stays that way save for a small fraction of a degree
Rock solid leaves us with excessive stiffness which does nothing but work against us during routine ops. For the instructions on working on this connection see the "Tools" section.
---
2023/06/01 - Couple days ago I experienced an incident with my primary Mountaineer flavor Tripod near the beginning of a practice/solar set.
GitzoSystematic-3
http://live.staticflickr.com/65535/52886174732_3a62354ab1_o.png
There's a very cleverly engineered spring loaded three part component outboard of the pivot point at the top of each Leg which - when tripped and engaged - arrests the Leg's pivoting out at the 24-52-85 degree stops when the stops are engaged.
http://www.manfrottospares.com/image/cache/catalog/D1/d104211z-228x228.jpg
Gitzo refers to it as a D104211Z Assembly Square, Swarovski as a Locking Knob. Pull/Disengage it and the Leg can be angled out to 90. At that point the D104211Z is automatically tripped and re-engages as we're angling back in/down.
There's a:
- main structural component
- special machine screw
- trapped spring
Screw's overall length is 14 millimeters and diameters of regions from head to tip are 7-5-4-3. Corresponding depths are 3-4-4-3.
- Head is pan with a 3 millimeter hex socket.
- Clear shaft engages the Spring coils - and nothing more.
- Threaded shaft is M04-0.70.
- Tip projects down into a narrow box canyon channel and prevents the assembly from exiting outboard in one's hand.
The Spring is symmetrical - rightside up is identical to upside down. It's ends are tensioned together towards outboard and seated in the recesses of the top of the Zero level component of the Leg at the same level.
The Screw had backed out to the extent that its tip no longer projected down into the channel and when I pulled the Knob the assembly exited outboard in my hand.
With the Leg angled out and locked at the 52 stop we have an excellent shot at the head of the Screw. My 3 millimeter Allen key's short/business leg is under 20 millimeters. That leaves us tons of clearance below and inboard of the axle. I don't know if it's possible/practical to reinstall the D104211Z after separation with the Leg installed - what with spring issues - but it's brain dead easy to screw in and torque up before getting to that point. Occasional visual inspections and retorqueings will serve us extremely well.
---
Pack for the next stop or plane, fully collapse and stuff the assembly in the same 34 inch Benbo Trekker Tripod Case that we use for the CT101 with the PTH (also) installed. According to the Manuals, CT101 and PCT collapsed lengths - 58 and 56 centimeters respectively. If one actually measures them however, one gets about 58.1 and 58.4 respectively - not to mention another 7.5 millimeters for the Head Mounting Stud projection.
---
2021/05/21 - Acquired and test drove a Gitzo GT3542L Mountaineer Tripod. Impressions, observations...
At 21 percent over the Swarovski label PCT - which includes the Shoulder Pads and Strap nobody ever actually uses and/or wants and whose production is environmentally irresponsible - it's overpriced. But give them a wee bit of credit for including stuff the owner is likely to use. Three key tools - a pair of Torx 25s and a 3 millimeter Allen.
Each Foot includes a spring which wraps around the bottom region of the Foot's installation screw and is compressed when the Foot is screwed into its receptacle. Probably prevents the Foot from backing out during normal use and that does seem to be an issue on the PCT - but not enough to be concerned about losing a Foot and it's a good and easy practice to give each Foot a quick clockwise twist when stowing anyway.
I'm finding that I need to REALLY torque the Twist Locks to get the Extensions firmly locked at target - 'specially (not surprisingly) the Level Threes. Can't understand why 'cause - aside from one or two cosmetic only issues - the components are identical. Maybe/Hopefully a break-in issue.
The Gitzo label features some engineering which permits one to truncate the Center Column down to a stub...
http://live.staticflickr.com/65535/51193806403_feb8288ab4_o.png

http://live.staticflickr.com/65535/51193592776_2c97e0d0a3_o.png
...to configure for a "Ground Level Set" in which the Legs are spread way out to a bit shy of ninety. At max spread we get 68 millimeters worth of projection below the bottom rim of the Spider's Center Column Cylinder.
http://live.staticflickr.com/65535/50939065262_d7e70d9d13_o.png

The stub center column extends 31 millimeters down into the Spider's 57 millimeter depth Cylinder and normally fits over the top end of the main Center Column tube. There's a Ground Level Set Ring which:
- is left hand threaded and makes things a bit confusing as one is gearing up
- serves to lock itself and the rest of the Connection Plate assembly to the main Center Column tube
To go forth and back to and from Ground Level Set....
- Unclamp the Center Column and reset and clamp the assembly just high enough above the Lock Lever to be able to see and align the Groove on the main with the alignment mark on the stub.
- Spin the Ground Level Ring full bird's-eye-view counterclockwise to allow separation or full engagement and seating of the two components.
- Separate or fully engage and spin the Ground Level Ring full bird's-eye-view clockwise to lock.
- Proceed to effect and enjoy the desired mode.
This is a trick one would ONLY wanna employ for photography / NEVER wanna employ for scope/observation stuff.
Cost of having the full Mountaineer Center Column assembly on standby:
http://www.manfrottospares.com/
Manfrotto Spares and Parts
015.66 - D0702.01 - Insert
055.40 - D104215 - Assembly Disc
120.14 - D104208 - Disc
167.82 - D107001 - Assembly Column
031.41 - D104214 - Ballast Hook
390.43 - Total
Plus shipping. (And a Bubble Level.) But we got the "Swarovski" PCT for two hundred bucks under.
Or we could just do the first/top three components and have the assembly we'd actually be using for a Ground Level Set.
Kinda interesting the way Swarovski has eliminated the Ground Level Set capability from their flavor of the Gitzo Mountaineer Tripod given that their ATX/STX Scope line is engineered as a digiscoping platform.
(Also a bit interesting to note that if the ground upon which we're ground level setting isn't level then we have no way of getting whatever it is we have installed in our spider solidly vertical without getting a bit creative.)
---
2023/01/07
And now that Swarovski would be pretty happy having everybody forget everything about their ATX/STX Scope line having been engineered as a digiscoping platform they're about as interested in Ground Level Set capability as Yours Truly is.
A spotting scope is designed for spotting and observing. The purpose of a camera is to record images. Gear up and operate accordingly.
---
On about 2021/07/12 I had a rather unpleasant and probably expensive learning experience involving my less than two month old Gitzo GT3542L Tripod and first PTH Head.
With the Swarovski flavor of the Tripod I can lock the Head down (as I've described below) by clamping the Center Column and Head to max pan resistance torqueing the Head clockwise to near the limit of my physical capability. And I still believe it's virtually impossible to cause an overload of anything with this technique. With the Gitzo Ground Level Set capable model however... SNAP and I heard a small chunk of metal fall inside the length of the Center Column.
When I pulled the Ballast Hook the small chunk of metal turned out to be the lower 6 millimeters of what used to be a 3 millimeter diameter and 14 long steel Dowel Pin. It fits in the notch in the fitting at the top of the regular Center Column - which we'll designate as the Center Column Plug - we can see illustrations above. And with it sheared what's left at the top can't be clamped hard enough to permit separation of the Head from the top end mounting stuff.
I'm sure that if I didn't care about further mangling the top end mounting stuff I could get the Head free with a pipe wrench but I do and will see if some local machine shop has some large sorta chuck to do the job right. Then they might ever be able to extract what's left of the Pin and tap in a replacement.
Not really pissed off at myself over this one. We need a lot of torque to make sure we won't back the Head loose with counter panning, this rig is under-engineered, there was no caution in the fuckin' manual or any other advisory. In the Spider Cylinder there's a 12 millimeter long (high) Ridge with a 3 millimeter width at its base which engages the Groove and prevents rotation and it doesn't fail. Should've been engineering up top with comparable capacity.
--
2022/12/13
We DON'T NEED and should NEVER USE anything but minimal torque to mount ANY head but good freakin' luck finding the issue dealt with in any fuckin' manual or manufacturer's instructional video. In "Video Tutorial Set up and features of the SWAROVSKI OPTIK PTH professional tripod head" for example the head mounts itself on the tripod and has the set screws engaged with no human intervention whatsoever. Maybe we could get more information on the subject by watching "Video Tutorial Set up and features of the SWAROVSKI OPTIK ATH amateur tripod head".
See this date's entry below in the "Head Installation" discussion.
--
And we're screwing onto a 3/8 inch / nine and a half millimeter diameter Stud but preventing rotation with a three millimeter diameter Pin? Yeah, the Pin's out from center about ten and a half but still...
This issue should be covered under warranty but I've read enough pissed off reviews regarding service from these folk that I won't bother.
When I get back in business I'll need to develop a sweet spot hitting skill.
---
Got my self and wreckage into Covington Machine & Welding in Annapolis. Guy (his name) came to my assistance, got kinda interested as I explained the problem. Ran back out to the car to get the Swarovski intact versus Gitzo out-of-commission assembly to show him how things were supposed go together and come apart. He was worried that he might have to mangle the Stub Column of the D104208 Disc in clamping it sufficiently but had things apart and unmarred in no time. Then, with the separation issues resolved, he tapped out the upper 8 millimeters of the Dowel Pin through the upper surface of its component. Couldn't replace it 'cause he didn't have the material but I was pretty happy. And he wouldn't take a penny for his time and effort.
But the bad news... Undetectable visually but the Stub Column must now be ever so slightly out of round. Reinsert the Center Column Plug of the D107001 Assembly Column. Takes lotsa effort. And when one pulls it back out the resistance is so high that the Plug comes unglued from the carbon column tube.
For want of an adequate Dowel Pin the D104208 Disc was lost. For want of a fully intact D104208 Disc the Center Column was lost. I can still mount a Scope and have everything reasonably functional. And I'm safe as long as things don't get turned upside down - and that's something that never happens with me in the field. But now what I have is something of a pristine looking and very expensive garbage dump. One thing Swarovski seems to have gotten right on this one.
---
2021/07/28 - Had ordered a D1318.25 Center Column from Manfrotto Spares. Big mistake. Works for the installations at top and bottom end, 115 millimeters longer - still OK... Diameter 32 versus 28. If I'd been smart enough to compare these two images:
http://live.staticflickr.com/65535/51341429281_0dbbd7f544_o.png
http://live.staticflickr.com/65535/51342169579_39b2d76d2d_o.png
GT3541L and GT3542L side by side the fatal flaw would've been obvious.
(All the other carbon tubing sections and Twist Locks are the same. The 2's Legs appear more robust 'cause it's "shorter" - the Center Column isn't extended nearly as high as the 1's - and it's shot from closer or zoomed in more.)
---
http://www.bhphotovideo.com/c/product/1034917-REG/gitzo_gt3542l_gt3532_mountaineer_series_3.html
Gitzo GT3542L Mountaineer Series 3 Carbon Fiber Tripod GT3542L
Yeah.JonH - 2016/06/16
Verified Buyer
Nice tripod, poor quality, worse service
My GT3542L was two months old when the center column failed. The previous one I ordered from B&H also failed, but B&H nicely replaced it. The Manfrotto/Gitzo service facility in AZ (CRIS (Camera Repair Instrument Service)) has had my tripod for 3 weeks. They never acknowledged receipt, gave me a time frame, or communicated with me in any way. I've called them multiple times, and they referred me to Manfrotto in NJ. A ship from Italy (I kid you not), is arriving in one week with the part for my tripod. I think. They couldn't tell me for sure except that a center column for a tripod model # same as mine was arriving in a week. So if that is even FOR my tripod, the CRIS facility will have had my unit for well over a month. Stay away. I am looking into RRS or FLM, and trying to find out now about their service. Nice functionality, horrible quality and terrible customer service.
But living with the wreckage - everything failed and disconnected to the extent my Center Column assembly is...
Shove everything back together so it at least looks like it did coming out of the box - same overall length (height - actually) - minus the Ballast Hook (and Bubble Level) for the time being. Measure up 272 millimeters from the Center Column's bottom end and pencil mark (in the face of the Groove area where we'll be able to see things). Install the Center Column down into the Spider's Cylinder and hard clamp such that our mark appears below / just clear of we'll have 272 millimeters of Center Column extending below the Cylinder. When we're hard clamped with that extension we'll have the Shim engaging enough of both the Center Column and D104208 Disc's Stub Column totally immobilized.
If we pan the Scope counter enough continuous revolutions we can disconnect it from the Stud and drop it but otherwise we're perfectly safe and reasonably functional.
---
2021/08/07 - Got an eBay 3x14 millimeter steel Dowel Pin from Nanjing in today's mail. Got fifty of them actually - though I just asked for two (and the dickhead agreed). (Also some 4x30s for my Lens Support Clamp modification.) Easily tapped back into the D104208 Disc and restored my ability to torque a Head back on with the same degree of security allowed by this Center Column just outta the box (for all that that's worth). With the Center Column raised a wee bit up from min the only thing keeping the Scope assembly connected is gravity but that's a reasonably reliable force down here on the planet's surface. I think I'll be able to hot-glue the Center Column's top fitting back into place as securely as it was originally. Then all I'll be down in functionality will be the lack of Ground Level Set capability. And that I can continue living just fine without.
---
2021/08/09
In the top of cylinder of the of the D104208 Disc's (silver) Lock Wheel there's a Retaining Ring. ID and OD are a bit over 35 and 37 millimeters respectively, round cross section. It can be disengaged and removed with an index fingernail. Do it so's we can see how this thing is put together and works.
First off... All the Retaining Ring does is restrict the Lock Wheel rotation to what's required to enable disengagement of the Center Column. We could live without it easily enough.
Let's do the next steps with our D104208 Disc assembly standing upright on a tabletop.
The Lock Wheel engages the (black) Stub Center Column by means of about seven threads worth of left 35-1.25 millimeter near the tops of both main components. So keep things vertical and spin the Lock Wheel counter down the Stub Column a bit over four revolutions until we're disengaged and pull the Stub up and out clear of the Wheel. Stay vertical and set it back down.
There's a black rubber Gasket installed at the bottom of the Wheel's bottom projection which serves as a seal between the two main components which can be left in place or easily popped out and reinstalled. Doesn't care whether it's rightside up or upside down. Pull it and lose it for the time being so's we can see what's going on.
Through the top face of the Stub, which we've always been able to see with the Assembly Disc separated, we have our 3x14 millimeter Dowel Pin (or whatever happens to be left of it). That's aligned with our Center Column Groove at 06 o'clock.
Immediately below the 35 millimeter diameter threaded shoulder projection of the Stub and centered about 13 millimeters below the extreme top end we have ovallish 8x4 millimeter openings through the Stub at 12, 04, 08 o'clock.
Held lightly engaged in the Ports by small steel Spring Clips are three maybe aluminum Lock Pads. The Clip/Pad assemblies are held in position by a ridge projection off the Stub. (Forms a 2.5 millimeter wide (top to bottom) channel which keeps the Clip/Pad assemblies properly aligned and engaged as things are assembled.)
If we've failed to keep the Stub vertical we'll have two lightly engaged Clip/Pad assemblies and a third one on the tabletop. If we're not careful recovering the third one the Clip/Pad assembly will disassemble.
But everything goes back together easily too. The Pad goes up to engage the Spring Clip if we have nothing still assembled to use as a guide. Also we won't be able to assemble things with the wrong orientation.
When we've spun the Wheel full up (the wrong way) the Lock Pad array is full down inside the Wheel's cylinder. The OD of the Stub cylinder is 28 millimeters. The ID of the Wheel's lower cylinder projection at Pads array level is about 32 millimeters. As we go up inside that cylinder our ID expands (conical interior) and our Lock Pads spring out clear of the interior of the Stub Column. We move the Lock Pads array up in the expanding cylinder from full lock to full clear in real close to 1.5 counterclockwise revolutions of the Wheel.
So as in:
http://live.staticflickr.com/65535/51193806403_feb8288ab4_o.png
We have everything properly aligned - Groove, Arrow, Ridge, Notch, Dowel Pin, Stub Column indicator line - and our Wheel backed off full (1.5 revolutions or over) we insert the Center Column up in the D104208 Disc. (The Disc may be fully separated from the rest of the Tripod and Head, clamped in the Spider with Head and Scope mounted, anything in between.) Go full up/in to the stops and spin the Wheel full clock to back it full up. The Lock Pads are pressed full in about 2.3 millimeters apiece and we're locked solid.
While the Gasket can be installed with the Lock Wheel and Stub Column engaged we need the Wheel off separate for disengagement.
---
What with all the violence associated with my invisibly distorted Stub Column the top area of the Plug notch has suffered some damage so the opening has flared out a bit. With that distortion I've found that the Dowel Pin has developed a tendency to back out (up).
Pulled the Head at one point and found the Assembly Disc WELDED to the D104208 Disc. Half killed myself trying to back it off. Had both set screws installed (but backed off) in the Assembly Disc. Started thinking about acquiring a pair of M06-1.00 threaded bolts to install in the Assembly Disc's two stupid set screw ports to help with purchase. The Inboard set screw is driven down from above via its 3 millimeter Allen socket, that was the easy and obvious target, I pulled it.
Whoa! Look at this! The Inboard set screw port is perfectly lined up with the (top end of) the Dowel Pin! I wonder if the Dowel Pin has backed out and locked the Assembly Disc full down. A couple taps from above on a pin punch and my nightmare was suddenly over. (Could've also pulled it down from below with a pair of needle nose pliers.)
(And we'll always be able to access the outboard set screw's socket from below between the spokes of the Lock Wheel.)
That lock alignment was a one in six shot.
Let's designate the six faces of our Mounting Stud's 7/16 hex MidHead as 02, 04, 06, 08, 10, 12 o'clock. When we're in "proper" engagement in the Assembly Disc then Six Face lines up with Six Tripod/Spider/Groove/Pin and Inboard set screw port. If we disengage the Mounting Stud from the Assembly Disc and use any of our five misalignment options this lock can't happen.
But let's optimize. Disengage from the D104208 Disc, lift the Mounting Stud out of the Assembly Disc's hex cylinder enough for the MidHead to disengage, rotate the Mounting Stud clock 60 degrees such that its 12 MidHead face is aligned with the hex cylinder's Two, drop and reinstall. This way when we start disengaging from the D104208 Disc we'll have a minimum of 300 degrees worth of back-off from the top end of our Dowel Pin when our Dowel Pin is first aligned with our Assembly Disc's Inboard set screw port. Nearly one and a third millimeters worth of air minimum.
---
More on the M06-1.00 threaded bolts idea above...
The inboard (threaded) set screw port has a depth of 09.8 millimeters, outboard is 04.5. Everything following - respectively. Let's get two M06-1.00 Socket Head Screws - 20 and 16 millimeters / Inboard and Outboard. Overall lengths are 26 and 22 millimeters. If we screw them in (from the top) to the point our projections are 16 and 17 millimeters we're maxed out for ports engagements and not projecting below. Our Mounting Stud projects up only 07 millimeters, our socket heads are 06 millimeters so we have a minimum of 03 millimeters clearance for whatever we might wanna use for a lever to engage the two socket heads.
And yeah, we could've just used two 16 millimeter Socket Head Screws 'cause the three revolutions we're gonna get out of our outboard is gonna be our weak link.
Another time saver procedure we can use at least on our Swarovski and Gitzo configurations... Just screw the Inboard max in then back out a quarter turn.
--
2022/03/07
http://www.jbweld.com/product/j-b-weld-twin-tube
J-B Weld Original Cold-Weld Formula Steel Reinforced Two-Part Epoxy - 24 hours
Seems to have safely secured the Plug back into the top of the main Center Column tube - I'd guess at least as safely as it had been originally (read overkill). 24 hours is the manufacturer's worst case for full set time. We should have no problem giving our repair that much downtime plus a couple more for good measure.
---
2023/01/06
The repair has stayed together and functions pretty well - a bit sticky pulling from and installing in the D104201C30Z Spider but far from a BFD.
And after more time and effort than I care to think about spent trying to acquire the main component of the Swarovski flavor Center Column I've reached the conclusion that it's not doable.
The carbon tube of the primary element has a length (height) of 306 millimeters - EXACTLY what we have in all the relevant Gitzo label stuff. And the bottom element for screwing in our Ballast Hook is identical. But ALL relevant Gitzo Tripods:
GT0532
GT0542
GT1532
GT1542
GT2532
GT2542
GT2543L
GT3532
GT3542
GT3542L
come with the Ground Level Set flavor top end. So they're producing the Swarovski Center Columns and our chances of getting our hands on the desired component are just as good as our chances of getting Swarovski to swap an Arca-Swiss Tripod Ring on in place of one of the old junk Swarovski Standard ones.
There's also a little cap that goes on the top end of the Swarovski Center Column that we can't get but we could either swap in a hardware store washer or live without it just fine.
----------
Center Column Lock Lever - Locking/Unlocking
First let's take a look at how the relevant components are assembled and work.
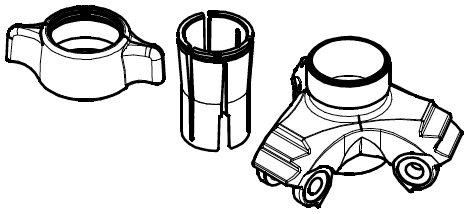
D104203C30 - Knob / D104204 - Shim / D104201C30Z - Spider
(Swarovski calls Gitzo's "Knob" the "Lock lever - center column".)
The Shim snaps/locks into the Knob and those two components then function as one.
Separating the two elements is a bit of a trick. The Shim is a continuous cylinder mostly split into thirds viewed from the top. Same deal viewed from the bottom but the slits are offset to fall in the centers of what we're seeing up top. (As we can see reasonably well in the illustration.) Stay at the top and think clockwise. Tuck the trailing edge of the clock section under the leading edge of the counter section - for all three sections. Then we can squeeze it to a smaller diameter, torque it out of alignment by pushing sideways on what's projecting out below, disengage, push it out through the bottom.
Reinstallation is much more painless. We can just push one third section in and install from above.
The upper projection of the Spider is a 37 millimeter OD male threaded cylinder. Threading is 1.25 millimeter and the thread count is about ten. The count for the female threaded Knob is about seven. And when we spin the Knob clock just enough to take the slop out our Center Column is already practically welded to whatever extension level we had it set to. Pan however... not so much.
From slop-gone to max is another half revolution.
As we screw the Knob/Shim DOWN onto the Spider cylinder projection the Shim gets compressed to start gripping the Center Column. But there's an unwanted byproduct of that action in that we're also pushing the Center Column DOWN through the Spider's cylinder. About one and a half millimeters. BFD. 'Cept if we're already full down in the cylinder - which is ideally where we wanna be - we're getting reduced effectiveness for our effort. And furthermore as we're unclamping from a hard full down set we'll also be lifting the Scope assembly. And we should be thinking about Repetitive Strain Injury issues.
So probably not a bad idea to hard clamp with the Scope up three or four millimeters - at least for short term stuff.
The physical actions...
- Position yourself to push a Lock Lever (Knob) Shoulder on the far side of the Spider counterclockwise with your right thumbtip - thumbnail up.
- Curl the fingers of your right hand around the top end of whatever Leg is most comfortably available.
- Move clockwise around the Tripod until you're in position to do likewise with your left and for the other - now near - Shoulder.
- Grip and Torque to break the clamping.
- Count on a second less vigorous effort. There's ALWAYS a hang-up after about a 45 degree initial rotation.
This way when the clamping suddenly gives we don't get knuckles banged up when they slam into the lower Head structure.
Things aren't as problematic with the Center Column elevated but that's also a pretty good technique to employ for that end of the operation and the practice won't do anyone any harm.
Before we leave this section let's compare/contrast the analogous hardware for clamping Center Column elevation and pan on the CT101 - millimeters Gitzo then Velbon. Handle diameter is what we'd have is the way of mechanical advantage if we substituted a disc for the PCT's two arm Lock Lever and the CT101's three arm Clamping Lever:
- 37-1.25 - 08-1.25 - threading
- 71.5 - 34.6 - handle diameter
And for the PCT we can use both hands while pressing with both thumbs while on the CT101 we're restricted to the fingers of one hand.
And we're using the same glass up top.
So with which one do we think we'll do better with in immobilizing things? And no, I DON'T think we're over-engineered for this aspect of the PCT/GT3542L.
----------
PCT-CCT Identification
There's no identification on the PCT beyond the Swarovski Goshawk logo.
---
2020/03/22 - Yes there is.
At the top of the exposed carbon on the dark side of 12NN there's a little black sticker with white print I never saw before a few minutes ago:
MADE IN ITALY
SN GC641118
And on 04SE:
PCT
---
But anyway, from the photos...
PCT - lft -http://live.staticflickr.com/65535/49323628837_321592d22b_o.png (1639x2860)
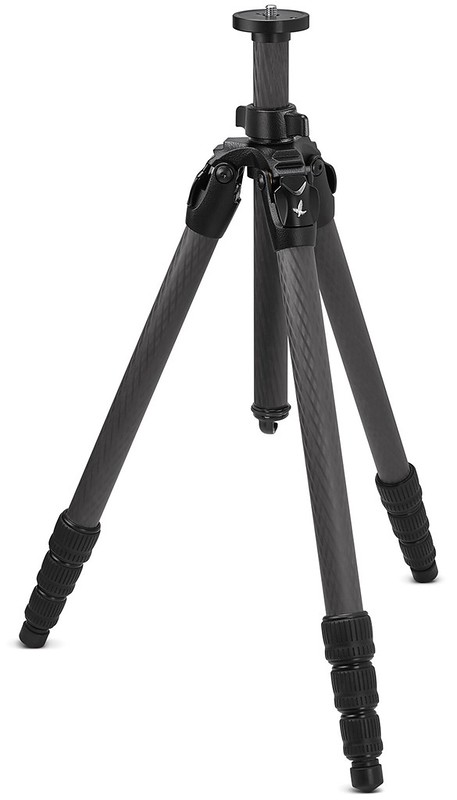
CCT - rgt - http://live.staticflickr.com/65535/49612201177_54c18ffddc_o.png (1622x2838)
All the same hardware and tubing diameters, the tubing sections - save the Center Column - on the CCT are gonna be shorter.
Take the full rez images (using the displayed URLs), rotate them ninety degrees counterclockwise (to better utilize our screen area), then rotate them back eight degrees clockwise. That last action gets the near Leg (12NN) perfectly horizontal (or goddam close) so's we can get lengths easily measured using pixel units.
Let's look at the ratios of exposed carbon to the Twist Locks and Feet on the fully collapsed collapsible sections:
- PCT - 1390:0625=2.224
- CCT - 1314:0639=2.056
The carbon to bottom end hardware ratio is higher on the PCT.
Measurements in millimeters on my actual Tripod:
312:140=2.229
(Granted, there will be issues with such photographs but the camera's high and shooting down and the apparent diameters of the relevant carbon tubing sections stay pretty much dead consistent from top to bottom. So until I get my hands on a CCT...)
Another tell - if we're looking at a photo of a Tripod with the Swarovski Pads installed...
http://c2.staticflickr.com/2/1775/43919904991_22a5bda4e7_o.png
The PCT's top / Level 0 Leg sections (again) show 312 millimeters of exposed carbon. A properly installed Pad will cover 250 millimeters / 80 percent of it...
And in the happy event we can get our hands on the equipment in question the exposed carbon lengths of the three retractable sections, disassembled, from Level 1 to 3 (high to low) are 358, 389, 422 millimeters (shorter to longer) respectively.
(And the diameter of the Level 0 tubing is 33 millimeters so the length to diameter ratio is 312:33 (9.45:1) for the PCT if we wanna work that route.)
---
And again... These are the Swarovski label Gitzo GT3542L and GT3542.
----------
PCT Twist Locks
http://live.staticflickr.com/65535/32932167597_6671ffae4e_o.png
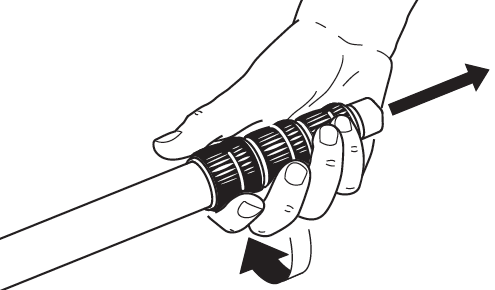
The Grips are total garbage. In early 2020 I started experiencing failures. Initially I thought I must've been cutting them with my thumbnails while twisting adjacent Locks but they're just under and poorly designed.
Yeah, let's put little GROOVES into the surface of this rubber Grip 'cause otherwise our hand might slip when we're trying to get this thing firmly clamped. And let's not worry about the glassy smooth inner surface of the Grip interfacing with the glassy smooth outer surface of the Twist Lock it's engaging. Couldn't possible have an issue at that front. And WHEN this rubber Grip fails what's the line of failure gonna be? Probably in the middle of one of the ridges where the material is THICKEST.
The grooves - which do NOTHING to enhance effectiveness but look like they do - critically weaken the already underbuilt structure and quickly leave us to deal with short, small diameter, glassy smooth surfaces.
And we can't just get replacement Grips - which would be stupid in any case.
http://www.manfrottospares.com/
Manfrotto Spares and Parts
Gotta get the Cylinder as well. So after all nine of them have gone on the first cycle we're out well over three hundred bucks plus shipping. Went that route a couple times before saying fuck this and starting to think about solutions that benefitted me and totally removed Gitzo from the loop.
There's probably some kind of glop we could get at the hardware store that we could apply with a brush or out of a tube that would be the most effective and practical solution but I've never pursued that approach. Was afraid that the result would be inelegant and not easily reversible.
124 millimeter diameter Jar Lid Gripper Pads:
http://live.staticflickr.com/65535/51351399238_51c48fc04b_o.png

Having one of those in the palm of our hand works a helluva lot better than the original equipment - stick like glue and bombproof. And the set of eight plus shipping and tax (eBay, China) costs 42 percent of the smallest cheapest replacement Grip minus shipping and tax. Not to mention being useful in other situations. But not particularly elegant or ideal.
Maybe something with a similar sticky surface I could wear on my hands...
2021/08/12 - A pair of:

Master Mechanic Men's Latex-Free Nitrile Coated Gloves for $3.29 plus tax from True Value. They GLUE themselves to the bare Twist Locks surfaces. Really happy with their effectiveness. Found I could leave them on for post setup ops but after a while didn't want to.
Pull the cuffs inside out back over the wrist areas when donning - otherwise the aft edges tend to roll up outside in.
2021/08/28 - There's a run in the left cuff material and the coating has started to crack and flake away. Still doing the job far more effectively and inexpensively than the crap shipped by Gitzo.
2021/10/16 - The coating kept flaking away, the rate accelerated, didn't take long before they weren't doing the job very well. Read some reviews of similar gloves and it looked like no similar coated gloves held up very well. Acquired a pair of Ace Men's Indoor/Outdoor Utility Work Gloves (XL) for twelve bucks.
http://live.staticflickr.com/65535/51599193173_d98b7d2347_o.png

Gripping surfaces are a synthetic leather material. Not as sticky as the stuff that flakes but much better than a bare palmed grip - no slippage with a small amount of effort expended - and hopefully they won't degrade as I'm using them for this relatively light duty. (Also a much better purchase than we get with actual leather.) And it's nice to have one of those gripping surfaces between one's flesh and cold metal.
Stay clear of the hook element of velcro fasteners - such as the Walkstool's securing strap.
--
2021/11/14 - After near a month's worth of substantial use they're still as good as they day I first put them on. No complaints whatsoever.
--
2023/11/17 - The synthetic leather and the synthectic leather is coated. And today I discovered that the coating is flaking away. Appears that the solution for which I'd been pursuing doesn't aactually exist.
--
2022/02/04
One quasi complaint. I had several experiences in below freezing environments operating with both the above and uninsulated leather work gloves in which the heat was almost instantly sucked out of my hands - and recovery indoors took forever.
http://live.staticflickr.com/65535/51861891031_0e0f599f82_o.png

FIRM GRIP (X-Large) Winter Pro Grip Gloves with Thinsulate Liner from Home Depot for ten bucks. Not expecting magic bullet results but I'll take what degree of improvement they'll offer.
--
2022/02/17 - Racked up a fair bit o' field time with them. They put a substantial dent in the problem.
--
2022/06/21 - I've been fine with these Gloves well into hot weather. And the thickness of the insulation on the palms definitely gives me substantial advantages in the torque and comfort (while delivering) departments.
--
2022/09/06 - Through almost all of the summer, hottest part well past. No issues.
--
2023/03/23 - A Cable Tie cut down to the length used to secure the Reflective Strips to the Center Columns works nicely to secure the pair together for stowage. (Little loop tabs off the cuffs on the flip sides.)
--
2023/04/19 - Discovered a little cut in the Glove's left hand middle fingertip area. Think I remember recently getting it caught between a couple PCT Twist Locks will breaking down. Damn.
--
2023/04/23 - Noticed today that the gripping surfaces of the Gloves have started to deteriorate a bit. No complaints. They've seen over sixteen months of fairly steady and heavy use and aren't yet anywhere close to being shot. But I'll acquire another pair to live in the gear pack to serve as spares and standbys.
--
2023/04/24 - Crap. About a half hour before I'm set to purchase a backup/replacement pair they, as far as I can tell, discontinue the Extra Large flavor - which fit me like a pair of gloves. A desperate search took me to the OneStopClearanceShop in Buford, Georgia where I picked up a pair - plus shipping - for a song. (Probably should've gotten a couple pair 'cause...)
--
2023/10/07
Over the course of the previous couple weeks I'd had problems with getting the Tripod Legs' Twist Locks adequately clamped. Had been thinking that the problem was an injured left index finger (now close to fully recovered) which wasn't the least bit happy about engaging in the procedure (and was telling me so). But yesterday afternoon while trying to get up for a solar I took a good look at the palms. Rubber grip coatings majorly shot. So that pair is getting retired.
Will go with the Ace gloves when low temperatures won't be an issue.
--
2023/10/10
Been doing these gloves wrong. Rubber gripping film on ANY glove surface WILL eventually disintegrate and peel off as the glove is used for gripping. The synthetic leather palm of the Ace glove is probably good forever.
New strategy... Regardless of temperature use only the Ace gloves for setup and breakdown. If it's cold go to the insulated Firm Grips for the duration of the set - but treat them as if the gripping surfaces were lubricated.
The Firm Grips can go on over the Ace Work Gloves if it's cold but there's probably very little - if any - benefit derived. All gloves separate fingers which is a bad thing for heat retention. Mittens don't.
--
2023/11/01
And speaking of cold and mittens...
http://live.staticflickr.com/65535/53305619650_2911b865df_o.png
Anound 04:00 EST for the first time this season temperature had dropped to the freezing point - but with zero wind. Seriously layered up and put a pair of North Face Men's Montana Ski Mitts - XL - into action for the first time. Initially tried them over the old Firm Grip and Ace gloves. Both experimental efforts sucked. Crippled what little dexterity I had left and very probably left my hands MORE susceptible to the cold by separating my fingers. (See above.)
Worn in factory configuration they made the full mission survivable but I still needed to periodically withdraw fingers and thumbs from designated projections and ball up fists for a while. Could've stayed operational indefinitely so configured but wasn't far from the edge of the envelope. Throw in a fair dose of windchill factor and...
Designed for grasping and delivering force to ski pole grips and that translates real well to relevant scope tasks - like delivering torque to Tripod Screw Caps and Zoom Collars. And we're also good for adjusting focus for scope and binocular.
Don't help any when we're trying to get the Binocular properly stowed in the Cotton Harness Receptor Slot but we can do OK by slowing down and carefully feeling for proper position, orientation, alignment.
Stow connected together courtesy a tiny side release buckle arrangement at wrist latitude.
----------
GT3543LS Systematic Carbon Fiber Tripod
The GT3543LS Systematic Carbon Fiber Tripod (Long) is a GT3542L (Swarovski PCT foundation) but with a fat Spider and minus a center column unless amended. The Spider accommodates a 70 millimeter diameter "Center Column" (Systematic Flat Top Plate) - versus the 28 millimeter diameter Mountaineer Center Column. (Factor of 2.5.) Everything with this hardware:
GT3533S
GT3533LS
GT3543LS
GT3543XLS
GT4533LS
GT4543LS
GST80
Last one seems to be out of production but used the GT3542L length Legs.
http://www.the-digital-picture.com/Reviews/Gitzo-GT3543LS-Systematic-Carbon-Fiber-Tripod.aspx
Gitzo GT3543LS Systematic Carbon Fiber Tripod Review
https://media.the-digital-picture.com/Images/Other/Gitzo-GT3542LS-Systematic-Carbon-Fiber-Tripod/Gitzo-GT3542LS-Top-Plate-Removed.jpg
https://media.the-digital-picture.com/Images/Other/Gitzo-GT3543LS-Systematic-Carbon-Fiber-Tripod/Easy-Link-Attachment.jpg
Really excellent treatment of this gear at the above site.
--
Assemblies necessary for converting a Swarovski PCT into a Gitzo GT3543LS:
- 252.80 - D110601 -- S3-4 Systematic Spider
- 165.00 - GS3321SP - Systematic Flat Top Plate, Series 2/3/4
- 417.80
Elements included with the:
- first:
-- 049.63 - D0806.01 - Locking Knob
-- 030.40 - D0806.05 - Assembly Button
-- 014.01 - D110610 - Easy Link Bushing
-- 013.92 - D503.89 -- Assembly Spirit Bubble
- second:
-- 045.78 - D4040.77 - Hook
-- 011.06 - D3.6586 -- Grub Screw (Set Of 5)
---
Ordered the two assemblies 2022/12/28 in hopes that the surgery on my GT3542L would go the way I was fairly confident it would. The apparent reason for having this rather humongous "center column" diameter is to allow one to swap in a GS3513S Rapid Center Column. Wasn't entirely thrilled with that compromise.
---
2022/12/30 landed the two assemblies 2022/12/29 10:30 EST - not much more than a day after placing the order with Manfrotto Spares. Wow.
Mounting Stud is 3/8-16 - no adapter required. (And thus also no quick and easy 1/4-20 capability - a limitation with which I can live just fine.)
One issue on the surgery... When we separate the original Spider there will be three pairs of washers on which the Legs articulate which - courtesy of the grease - will stay in place on and look like components of the original Spider. And good luck getting the axle assemblies torqued up to comfortable resistance until after the issue is identified and remedied.
And these washers aren't real obvious on the Manfrotto GT3542L parts schematic - appear as components of the D104217 Assembly Spacer. The illustration for the GT3543LS is a zillion times better.
Bad news...
The bottom end of the fully collapsed GT3542L Center Column was real nice for preventing Legs - fully extended, fully collapsed, anything in between - from folding in to thirty degrees beyond vertical. In the center columnless configuration we have to pay a lot more attention to what we're doing.
GitzoSystematic-1
http://live.staticflickr.com/65535/52886174762_9bda2e5a50_o.png
A Bubble Level is built in (retained by a circlip which I have yet to be able to disengage) at 12 o'clock and is a fair bit harder to:
- see
- use for getting the Tripod properly vertical
- keep from getting bleached out by direct sunlight
But it's not that much bother to pan, tilt, raise the Scope to get a clean and close shot at it.
Pulled the idiot grub/set screw from the Flat Top Plate and added it to my collection.
---
On the 02 o'clock Face of the Spider there's a 3/8-16 threaded port...
GitzoSystematic-4
http://live.staticflickr.com/65535/52886747696_bc8b03be4b_o.png

https://media.the-digital-picture.com/Images/Other/Gitzo-GT3543LS-Systematic-Carbon-Fiber-Tripod/Easy-Link-Attachment.jpg
...which permits us to mount stuff to the side rather than center and up. A 1/4-20 to 3/8-16 Adapter (D110610) lives in it to keep options more open at zilch cost of anything.
On the 06 Face a bit to port of center there's what Gitzo refers to as a "Locking Knob" - but what is in fact a CLAMPING LEVER - which needs to be backed off about a third of a turn for installation and removal of the Flat Top Plate - and everything mounted on and/or under it.
GitzoSystematic-2
http://live.staticflickr.com/65535/52886913894_9b80140047_o.png
- The Clamping Lever works on the same principle as the ones discussed elsewhere in this document 'cept backwards. Minus human intervention the spring pushes the lever to disengage it from the hex head and to clamp or free things up we need to press and hold it engaged while applying torque.
- The split upon which the Clamping Lever acts for clamping and disengaging the Flat Top Plate is (not surprisingly) centered on the 06 Face. (And that can be a useful marker for getting stuff aligned.)
For the removal drill after backing off the Clamping Lever... At the 10 o'clock position installed in the inside face there's a spring loaded D0806.05 Assembly Button mechanism we can see in the above photo with a catch that engages a groove in the cylinder of the Flat Top Plate to keep us from lifting the Plate out of the Spider after we've backed off the Clamping Lever. Thanks so much for making our job three times as difficult for us as it needs to be.
On the 10 o'clock face...
GitzoSystematic-3
http://live.staticflickr.com/65535/52886174732_3a62354ab1_o.png
...a closer view of the Button component of the Assembly Button on which we need to continuously push upward on while lifting out the Flat Top Plate and whatever's connected to it - a Feisol UA-180 Carbon Gimbal Head and Swarovski 95 millimeter ATX Spotting Scope perhaps - with the free hand.
Or here's another idea... Lose the D0806.05 Assembly Button so's after backing off the Clamping Lever we can lift the glass and everything directly and indirectly connected to it with both hands. But then we'd have to remember not to turn the Scope/Head/Tripod assembly upside down while holding onto the Tripod only with both hands. I'm guessing this happened pretty frequently before Gitzo introduced this "secure system". Keep up the great work guys.
And yeah, I pulled the D0806.05 Assembly Button assembly, mothballed the three moving parts - Button, Spring, Catch, reinstalled the Retainer with its pair of M03-0.50x08 Flat Head Socket Cap Screws.
The 10 o'clock Face is the only one with nothing projecting outwards from it the least bit so that's the one that goes down (04 o'clock Leg up) when the Tripod goes in the bag for stowing and/or transport.
The Ballast Hook - D4040.77 - is a lot shorter and lighter than the Center Column flavor and is threaded at 3/8-16 - versus M12-1.00. (Partially visible in GitzoSystematic-3 just above.)
The 3/8-16 Mounting Stud and Ballast Hook receptacle come courtesy of a special screw which we can easily separate from the GS3321SP with the aid of a largish adjustable wrench adjusted to a span of 5/8 inch and applied on the underside. The screw engages the rest of the Systematic Flat Top Plate courtesy 5/8-13 threading.
I was totally fine with the UA-180 mounted glass height. I like to be able to fully extend Legs at the beginning of a set 'cause it's fast fast and easy and nice knowing that everything's equal before manipulating to get the Bubble centered. And longer Legs when angled well out provide greater stability. I'm just about 45 millimeters lower than before and I have:
- pretty much never found myself wishing I had more height in an extreme situation
- often needed to roll the ATX down from 12 for shooting close to the horizon
- frequently needed to drop down for sharing situations
Nice review of the GT3543XLS and excellent photos up at:
http://www.samuelscicluna.com/gitzo-review
Review - Gitzo GT3543XLS Tripod - Samuel Scicluna Photography
---
This configuration and Yours Truly got a serious workout most 2023/01/02 doing the Annapolis area Christmas Bird Count. Pretty much everything I did was on foot and the scope assembly accompanied me pretty much everywhere.
---
Lose the D4040.77 Ballast Hook.
Swarovski PCT Center Column Assembly:
- G0702.01 - Mounting Stud
- D104245 - Assembly Disc
- 00000.00 - Center Column (Unobtainium)
- GLEVEL2 -- Center Column Bubble Level
- D104214 - Ballast Hook
Screw it in where the D4040.77 Ballast Hook used to be.
Now we can set up vertically, fold in and collapse our Legs, carry as easily as with the PCT configuration. I effected this modification early 2023/01 and have been immensely happy with it. We'll call it the GS3321SP Center Column Assembly. It's still a center column - just not one that can be used on a Systematic configuration to raise glass up above a spider.
We can do the same trick with the GT3542L Center Column Assembly but - although the carbon element length is identical - there's 51 millimeters extra as a consequence of the Ground Level Set capability crap. And that puts the bottom end down in contact with the Level 1 Twist Locks - hard stuff to other hard stuff.
With the Systematic Disc system we can very quickly and easily separate and reinstall everything that isn't Tripod Spider and Legs from and back into the Tripod Spider and Legs - minus the time, effort, unpleasantness, stress, potential for damage involved in screwing off and on a 3/8-16 Mounting Stud.
Lose the GS3321SP Center Column Assembly (or D4040.77 Ballast Hook) and we can set everything down upright and stable on a table top.
---
My dream Tripod (Swarovski PCT / Gitzo GT3543LS hybrid starting from scratch...
Swarovski PCT (Gitzo GT3542L with Unobtainium Center Column). Lose the:
- Set Screws - 2
- Twist Lock Grips - 9
- Shoulder Pads - 2
- D104201c30z Spider - but not the six D104217 Assembly Spacer component washers stuck to it
- D104204 Shim
- D104214 Ballast Hook component Bumper O-Ring - which will lose itself if we don't
D110601 S3-4 Systematic Spider - includes:
- D503.89 Assembly Spirit Bubble
- D0806.01 Locking Knob (Clamping Lever)
- D0806.05 Assembly Button - which we'll lose
- D110610 Easy Link Bushing
GS3321SP Systematic Flat Top Plate, Series 2/3/4 - includes:
- D4040.77 Ballast Hook - which we'll lose
- D3.6586 Grub Screw - which we'll lose way more
GLEVEL2 Gitzo Center Column Bubble Level
---
Cost - going through B&H and Manfrotto Spares...
0999.00 - Swarovski PCT
0252.80 - D110601 - S3-4 Systematic Spider
0165.00 - GS3321SP - Systematic Flat Top Plate
0020.24 - GLEVEL2 - Gitzo Center Column Bubble Level
1437.04
Plus:
- A bit o' shipping.
- We gotta waste or find homes for some stuff - most notably the PCT's D104201c30z Spider (77.43).
But not ridiculous by any means.
----------
Head Installation
Nowhere in any Swarovski or Gitzo resources will one find any instructions for properly and safely securing a head of any description onto a Swarovski or Gitzo Tripod. This omittance is undoubtedly an industry standard protocol. So...
----
For starters I'm gonna say that we should do zero installations of serious heads onto Studs with Systematic Flat Top Plates still mounted in their Tripods. If we're very careful and move very slowly we can get them started on and torqued up with negligible risk of damage to threads. But it's a zillion times safer and smarter to pull the Plate and screw into the flipped head. Any head can be held upside down in one hand while the relevant virtually weightless Tripod component can be properly aligned, carefully started in, fully engaged with the other.
And any time penalty - if it actually exists - is pretty damn negligible.
I'd like to say ditto for conventional Center Columns but for mine on the bottom end in addition to the Ballast Hook and Bubble Level I have Reflective Strips cable tied on and that would constitute something of a deal breaker. So just angle all the Legs full in, go upside down, treat the assembly as a very large but not significantly heavy machine screw.
----
2022/12/13
When I first started in this game and with all the glaring gaps in The Fuckin' Manuals across the board I made some assumptions which immediately became hardwired into my thinking whether they were valid or not. One real biggie in the latter category was that the head was an extension of the tripod and should be torqued on as hard as possible while leaving a little daylight shy of the damage zone. Dangerous rubbish.
Need to drop down to close to the other end of the range - just a comfortable bit over the top end of the maximum we're ever gonna set for adjustable panning resistance.
If we err with the torque a bit on the light side the worst that's ever gonna happen is that if we pan quickly to the left we're gonna unscrew from the Stud five or ten degrees. Ramp up the pan resistance, torque a bit more solidly, back to targeting. We're not gonna lose the scope and head and we probably won't even lose the target.
And those goddam stupid set screws featured on the Swarovski label tripods and described in The Fuckin' Manuals ("Locking bolts - for attaching tripod head" / "Locking screw – for attaching tripod head") do NOTHING but instill and foster that mindset.
----
Reasonably noncritical stuff.
We're assuming a 3/8-16 Stud and want to have stripping issues neutralized to the widest possible margins. So for all scenarios we first line up as colinear as possible, make contact, rotate counterclockwise until we hear and feel the click that tells us we're at the right point to reverse to clock and start engaging threads.
Normally the best way to accomplish this installation...
Standing or - if convenient - seated start with the:
- glass off the head and the head upside down
- tripod:
-- legs fully:
--- collapsed and locked
--- angled full in
- upside down and aligned for engagement to the best of our abilities
Engage and rotate counter until we hear and feel the click which tells us we're good to start turning clock.
Spin to full engagement.
Set up the tripod with legs angled full out but still collapsed and torque to target.
The engagement is a lot easier with the center column separated from the spider and legs but it's not worth the time and effort required to pull and reinstall.
And we can also spin the head onto the tripod with the latter set standing but I find the above procedure safer, easier, faster.
---
When backing off... Immediately after breaking the lock twist the Assembly Disc (Connection Plate) clockwise to clamp it and the Stud back down and prevent them from coming free with the Head. And it's a good idea to safety things by installing a 3/8-16 nylon nut finger tight on the Stud if the Tripod's gonna be headless for any significant time period.
----------
Clamping Levers
Everything in this text identified as a Clamping Lever save for the two flavors associated with the CT101. All the others are associated with two Heads - the Car Window Mount and PTH. They're rather minimally and poorly explained and illustrated in Swarovski materials and I went through months of work-around hell with them before around 2019/02/24 when I accidentally - maybe instinctively - pulled the Lever of the PTH Lens Support Clamping Lever assembly out free of its hex MidHead to deal with a clearance issue involving the Balance Rail.
And here, from the Swarovski manual:
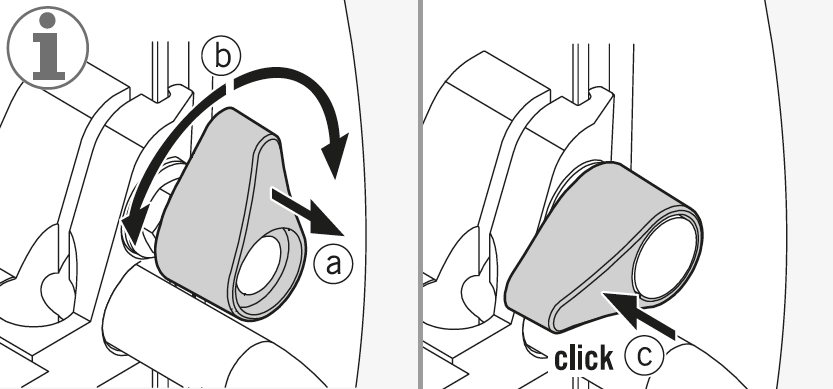
is how they work. Also in this 25 fps video:
http://www.youtube.com/watch?v=6itWfnucOV0
Video Tutorial Set up and features of the SWAROVSKI OPTIK PTH professional tripod head
from 0:23:07 through 0:23:22, a duration of 0.60 seconds, shortly before:
05-03308-c
http://c2.staticflickr.com/2/1812/43116100014_cbb6caf538_o.png
We get to see it happening:
- in a situation in which:
-- it barely matters
-- we'll never find ourselves if we configure for (crude) bore sighting capability
- IF we:
- already understand the function
- are:
-- watching carefully to see if it happens
-- using software with which we can view frame by frame
And furthermore... We haven't even seen the Lens Support unclamped from the bottom of its range and raised and reclamped to that mid level.
Un freakin' believable. There's zilch illustrated in this video that would help speed a five-year-old along on the path to mastery and the one issue that ISN'T blindingly obvious they - for all intents and purposes - make totally invisible.
Oh, look at how blindingly obvious and effortless everything is. I think I'll buy two.
And Gitzo has even less (read zero) information on this function.
Two of the four PTH Controls - Pan and Lens Support - are effected by Clamping Levers. Heavy duty job for panning resistance and lock:
29-10919
http://c1.staticflickr.com/1/852/42026652560_a4bf1099be_o.png
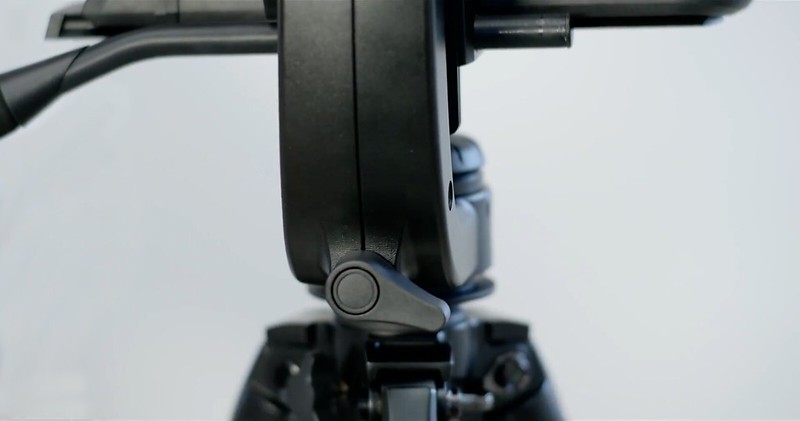
Little one for freeing and locking into desired position the Lens Support on the Tilt Arm:
05-03308-c
http://c2.staticflickr.com/2/1812/43116100014_cbb6caf538_o.png
These illustrations:
http://www.gitzo.com/us-en/gimbal-fluid-head-ghfg1/
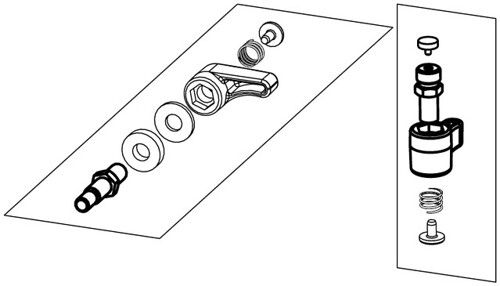
http://live.staticflickr.com/65535/49658523261_5bdb7ca549_o.png
from the Gitzo GHFG1 Gimbal Fluid Head schematic of Assemblies D1108138 (Lens Support) and D1108139 (Handle) respectively would've helped a great deal - but it would be a long time before I'd come to understand that the PTH was a Gitzo product with a Swarovski label on it.
There's a compressed spring component pushing the plastic lever in to fully engage the MidHead. 13 millimeters on the big ones (Car Window Mount and PTH Pan Clamping Lever), 08 on the other two (Lens Support and Handle Clamping Levers) of the screw it's driving. We can pull the Lever out enough to further compress the spring, disengage the MidHead, rotate and re-engage as necessary to achieve the desired loose-to-clamped rotation range orientation, deal with obstruction issues.
Still a bit confusing.
- The Swarovski Levers are symmetrical and the Swarovski assemblies can easily be quickly and fully disassembled. Pry off a dust cap (cosmetic only) and remove a Flat Head Socket Cap with a 2.5 Allen. Gitzo uses no dust cap, incorporates what appears to be a rivet instead of the Flat Head Screw. Not sure they can be non destructively disassembled. And for that reason I prefer the Swarovski flavor.
- For the Lens Support Clamping Lever the Spacer and Washer are lined up on the wrong end of the Screw.
The big Pan Clamping Lever assembly business Screw - 7 millimeter diameter steel is a permanent component of the D1108126 main head assembly. The Gitzo parts document reads: "Spare parts not available. Do not attempt to repair. Please contact the Gitzo distributor to arrange repair service." Swarovski assumes than none of their customers could possibly have any interest in breaking anything down beyond Tripod/Head/Scope level. Also that anything upon which they've slapped their label could ever need to be broken down by any of their customers beyond Tripod/Head/Scope level. If our original Vertical Clamping Lever Screw shaft shears in half after some period of normal use we pack our PTH up and ship it to Customer Service.
The big plastic Clamping Lever has twelve graduations for orienting the Lever with respect to the Screw's MidHead. Ditto for the Car Window Mount counterpart. The little guys - Lens Support and Handle - have six graduations and 5 and 8 millimeter diameter brass Screws respectively but identical symmetrical plastic Levers.
Note that 7 millimeters is what we can measure of the unthreaded outer stretch of the Pan Clamping Lever's business Screw before it passes the "Do Not Enter" sign. The Car Window Mount's business Screw is 08-1.00x10 but the 2 millimeters adjacent to the MidHead is unthreaded and the diameter of that short stretch is also 7 millimeters. So it's a real good bet that what's beyond the PTH's "Do Not Enter" sign is also 08-1.00.
The threading for the 20 millimeter long Lens Support Clamping Lever Screw is M05-0.80 and that does the job rather nicely. The Handle Clamping Lever Screw is CLOSE TO but NOT 08-1.25. I can't match it to anything - metric or SAE (Society of Automotive Engineers). And good luck getting the Handle clamped hard enough to prevent rotation under normal use load.
We can fully remove the two little Clamping Lever assemblies from the Lens Support assembly without fear. There's a rubber pad - Brake Pad - extension at the end of the Handle Clamping Lever Screw...
D1108139
http://live.staticflickr.com/65535/51218954519_8570367fed_o.png
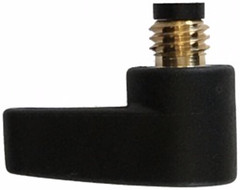
...that tends to separate and stay in the threaded cylinder after the rest of the assembly is gone but we can push it back all the way into the Handle Receptacle Cylinder with a toothpick, recover it, push it back onto the end of its Screw.
---
2021/08/25 - I now realize that these are mainstream mechanisms - just do an image search for "clamping lever". Ours are adjustable handle clamping levers.
----------
Flat Head Screws
http://live.staticflickr.com/65535/51332237843_b0abda487e_o.png

http://live.staticflickr.com/65535/51333221965_bbe54b7e66_o.png
Flat Head Screws are incorporated to secure all clamping mechanisms of the Car Window Mount and PTH Heads. All are threaded M04-0.70, have 8 millimeter diameter heads, are driven by a 2.5 millimeter Allen. All except the one in the port end of the PTH Lens Support Mounting Stud maintain forces to keep Levers engaged on hex MidHeads when not being pulled free for Lever reorientation. The odd one out serves only to prevent the Clamp Wheel from being inadvertently disengaged from the Mounting Stud - if we're reasonably careful we can do just fine without it.
Flat Head Screw length is measured from end to end / top to bottom - rather than just the length of the threaded shaft. It's the depth to which it would penetrate if it were screwed in until its flat head surface were flush with the target's outer surface. For an M04-0.70 we have two millimeters of head before transitioning to threaded shaft. (And with a Flat Head Screw it's a bit of a bitch to precisely distinguish threaded length from head anyway.)
Lengths in millimeters:
- 10 - Pan Clamping Lever
- 10 - Lens Support Clamping Lever
- 10 - Handle Clamping Lever
- 08 - Lens Support Clamp Wheel - Swarovski Standard modification
- 08 - Car Window Mount Head Clamping Lever
- 06 - Lens Support Clamp Wheel - Arca-Swiss (factory)
----------
Car Window Mount
(Something of a miniature tripod/head assembly. Segues in nicely at this point in the article.)
There's a Car Window Mount option for spotting scopes - a simplified tripod head that clamps on over the top edge of a partially lowered driver or passenger side window and connects with a 1/4-20 Stud (and thus requires a 1/4-20 to 3/8-16 Adapter (one's included with the Objective Module (and what's illustrated below has it installed)) to go into action with a Swarovski Scope). Tripod head for which our automobile is our tripod. Swarovski's is the 49043. Currently no indication of its existence on the Swarovski site but has always been and is still available from dealers - B&H Photo, Optics4Birding... (And of course there are tons of other Window Mounts which would work just fine.) I'm now thinking that what had appeared to me to be a discontinuation is actually a website fuckup. Wouldn't be their only current one.
The Adapter after having been clamped down hard into the Head's rubber contact surface can be a bit of a pain to back off. The little flathead screwdriver tip on the long end of the 3 millimeter Allen key that stores on the CT101 Tripod works nicely to resolve this issue.
2020/02/01 - The clamp component is a Manfrotto 243 Car Window Pod. The Head...
http://c1.staticflickr.com/1/859/28886647507_f6938170bb_o.png
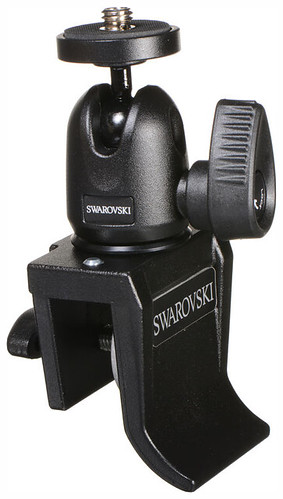
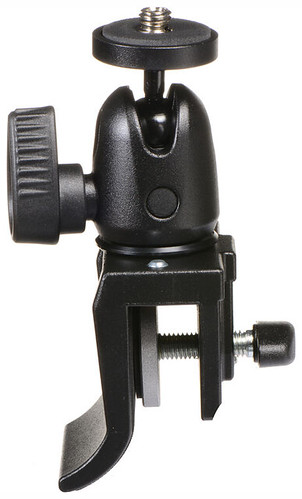
http://c2.staticflickr.com/2/1831/28886646897_429fb3780f_o.png
I acquired one, tested it at home, figured out how to make it work with an angled Scope - but angled most assuredly wouldn't be our first choice for this application. It never went into action on the trip and there was never a situation in which it would've been an asset. If the bird's close enough to scare by getting out of the car we're going to do better with a binocular. If we need a scope the bird's going to be so far away that he won't give a rat's ass whether or not we're in the car. Similar deal with something that might wanna eat us.
Digiscoping something close however... Different story.
2019/05/08 - Did a short (stationary) test drive with my new STX configuration on the Window Mount. Not bad. (With the ATX - pure hell.) Discovered it has the same Clamping Lever arrangement which the PTH does for all three of its Clamping Levers which allows us to change the orientation of the lever itself with respect to the MidHead it's engaging. Pretty much identical to the larger and more robust Pan Clamping Lever - 13 millimeter hex MidHead, 07 millimeter diameter Screw Shaft, Flat Head Screw (Locking), 12 graduations Clamping Lever.
Could be of use for a digiscoping opportunity. Probably wouldn't wanna pull the Scope off the Balance Rail for this application minus a pretty good reason though.
2020/01/21 - Shortly after the Osprey Overlook stop from General Brant Road I had a bird down on the field at about 26°11'38.63" N 097°21'21.50" W. Facing into the north thirty and about three hundred yards out. Was loaded for Aplomado Falcon and this looked promising. I knew from the previous stop that the Tripod/Scope assembly would be totally useless for the exercise but happened to have the STX Ocular Module and Window Mount with me. How 'bout with over a ton and a half of Chevy Malibu rental car plus a few hundred pounds more of occupants and gear as ballast?
Saved the day. If I'd been a better birder I think I could've IDed it from that perspective. Relocated to Buena Vista Boulevard to the bird's east and maybe an extra 140 yards out but thermal turbulence was real problematic at that range. Bird disappeared from the Scope while I was going to the field guide. Osprey appeared airborne about where something that had taken off from that position would have been expected to have been.
Pretty sure that was the bird and I'd been thrown by the rather atypical landing spot. But the system was a major success and I'll be gearing accordingly in the future.
----------
Tripod Heads
First off... installing them on the Tripod.
All relevant Tripods have standard enough Connection Plates at the tops of their Center Columns such that any head can be installed on any Tripod. (The connection of the Connection Plate to the Center Column... Not necessarily so much.) A 3/8-16 Stud projects from the center of the Plate. (The PCT features a clever arrangement by which the Stud can be flipped - sans tools - to do 1/4-20. (See "SetScrews-PCT-1" above.)
01-00918
----------
DH101 Tripod Head
01 Tripod plate - 1/4" standardised connections
02 Fast Mount System FMS
03 Release lever - FMS
04 Release point - FMS
05 Spirit level
06 Clamping screw - hand-grip
07 Hand-grip
08 Fixing button - fast clamping of tilt movement
09 Control button - resistance for tilt movement
10 Fixing lever - fast clamping of turning movement
11 Locking screw - resistance for turning movement
12 3/8" standardised connector thread - tripod connector
13 Rotary lock - tripod head/tripod
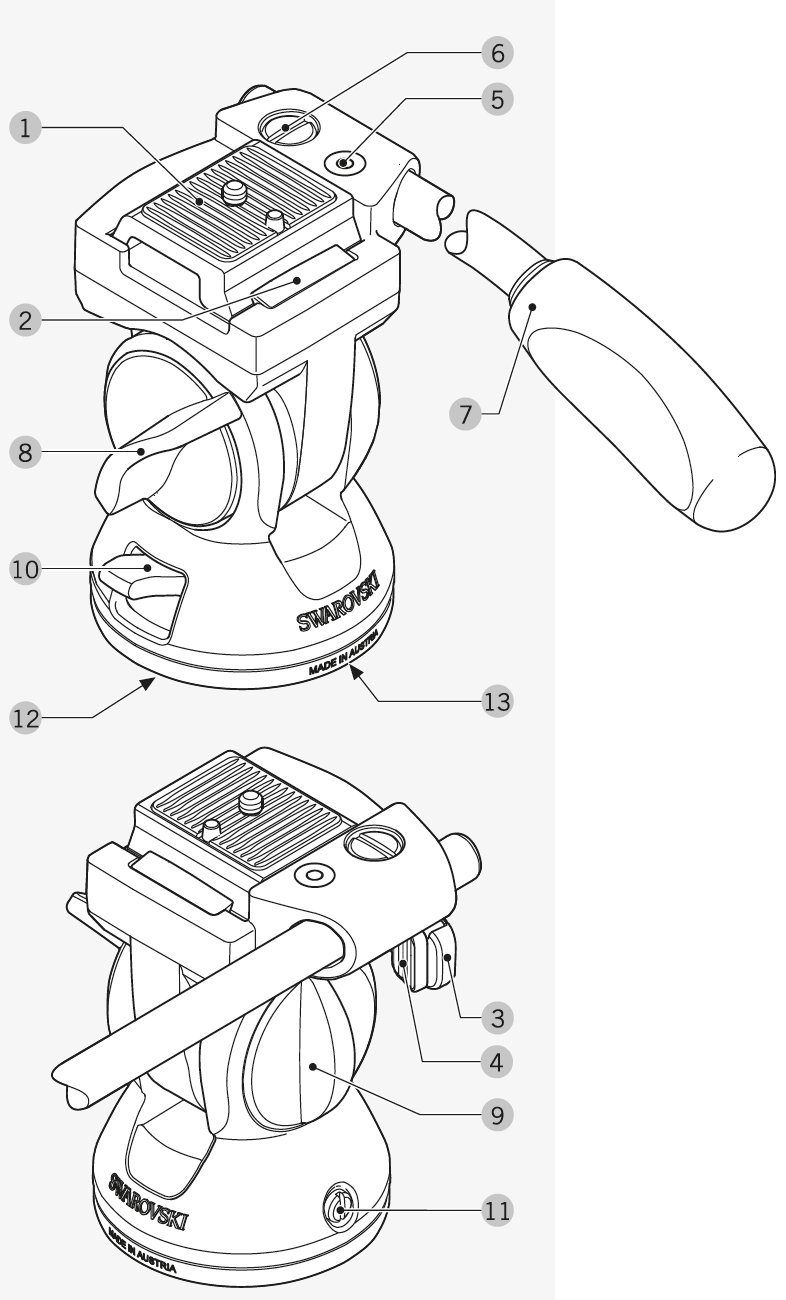
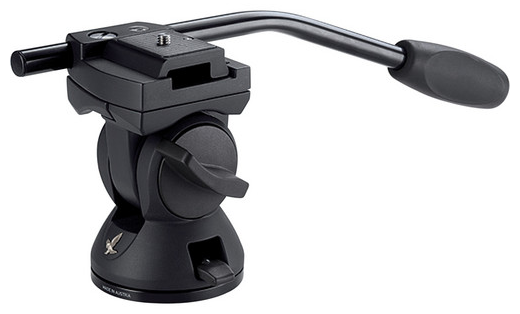
Made in Austria but not by Swarovski, introduced about a decade ago. Built-in Bubble Level. Shown with a 44066 Adapter Plate engaged by the Head's snap engagement / quick release clamp. A Swarovski Scope's Foot - Standard or Arca-Swiss - snaps and locks directly into the Head minus any Plate. On the starboard side top fore...
http://c1.staticflickr.com/1/935/42133017970_f219f617fa_o.png
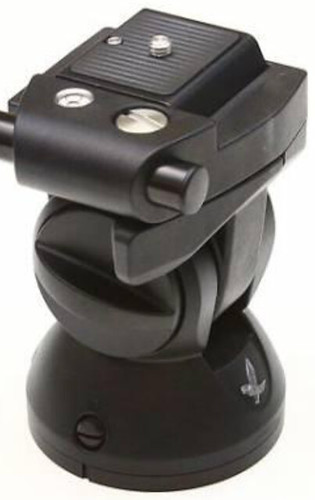
...just below the "deck" we have access to the flip end of a release lever. On its aft side there's a "Release Point" - a safety mechanism that must be pulled outboard before the lever can be pushed forward to dump the Scope. Makes it virtually impossible to accidentally dump the Scope - but NOT impossible to drop the Scope as a consequence of misjudging the balance point at the instant of release. (Found that out the hard way.) Also... If ejecting just an unattached Plate have your left hand in position to trap it and prevent it from flying off and hitting the rocks.
Note the little Bubble Level... Harmless but pretty much totally useless. We want the Tripod's Center Column vertical - not the Head's mounting platform plane horizontal. If we're setting up on a flat horizontal surface (like a floor's usually supposed to be) we can get our Center Column vertical by extending all three Legs equally. But if we're on irregular terrain...
The 44066 Plate...
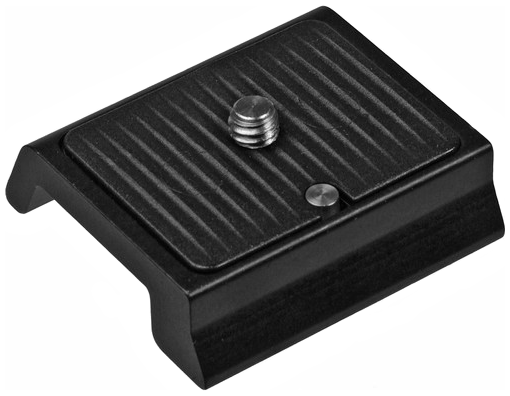
...can be used to adapt a non Swarovski scope, binocular, camera, anything with a 1/4-20 inch thread mount to the Tripod. (It has fore and aft edges (aft being near/bottom in the above photo) but it doesn't seem to matter if it's clamped in backwards.) Set screw is M06-1.00x11 millimeter slotted and can only be installed/removed through the top surface.
And note that a Swarovski Objective Module ships with a thread Adapter insert installed in its Foot. The Foot itself is threaded for 3/8-16. The Adapter steps this down to 1/4-20.
Also on the starboard side...
- Near the bottom edge there's a screw by which panning resistance is adjusted. It's slotted - 7 millimeter - and we need to have a Penny between our thumb and forefinger to turn it. Short of ideal but I found it to be pretty much a nonissue. Just set it a little stiff and forgot about it.
- On that end of the cylindrical construction there's a large dial centered on the tilt pivot axis by which tilting resistance can be easily adjusted by hand. Tilting resistance IS a big fuckin' deal - especially on a head such as this one on which the Scope is mounted above the tilt pivot axis - and we NEED to be able to adjust it quickly, easily, efficiently.
Both of the port side mechanisms are locking. The flip lever at the base locks panning. The dial locks tilt.
Coin turnable - 14 millimeter slot - Screw at top port to clamp the Handle into place. As we turn clock a clamping pad is pulled up from low port to press and immobilize. If there's zero forward projection at 09 o'clock we're in well more than we need to be.
Bubble Level aft of the head of the Screw.
The DH101 is a nice, compact, lightweight, functional, relatively inexpensive little component and I'm happy to have the two I now I do.
(And at the time I acquired my first it was pretty much absent from circulation and a major bitch to come by.) And on the plane trip out it was nice to be able to put this little item in my carry-on Backpack along with the monster Scope assembly so's if I were to get separated from the checked tripod bags all I'd have needed to get back in business would've been a cheap or borrowed tripod.
BUT...
This is NOT anything we wanna use as a primary for a heavy scope. It's inherently unstable and it's a major BITCH to set and lock tilt where we want it for a target. If it balanced where we wanted it for a particular elevation then we were lucky - and it won't balance for any other tilt angle. Hold the scope where you want it to center it on a target, clamp the setting, count on it radically dropping or rising. So we have to guestimate a compensation and go into trial-and-error mode until we get it or it flies away. The only things that actually CLAMP in place on this scope system component are the "Clamping screw - hand-grip" and "Hand-grip".
----------
Arca-Swiss Quick Release System
2019/05/25 - For mounting heavy expensive glass assemblies - scope, long lens camera assemblies - the industry has moved to Arca-Swiss Quick Release System compatibility. The feet and bases of all current relevant Swarovski components are designed to be accepted by Arca-Swiss compatible...
11-03914
http://c2.staticflickr.com/2/1794/28948928777_459f8655ba_o.png

...clamping mechanisms and the only two currently available Swarovski labeled Tripod Heads feature Arca-Swiss compatible...
http://c1.staticflickr.com/1/848/43268691534_347a27c724_o.png
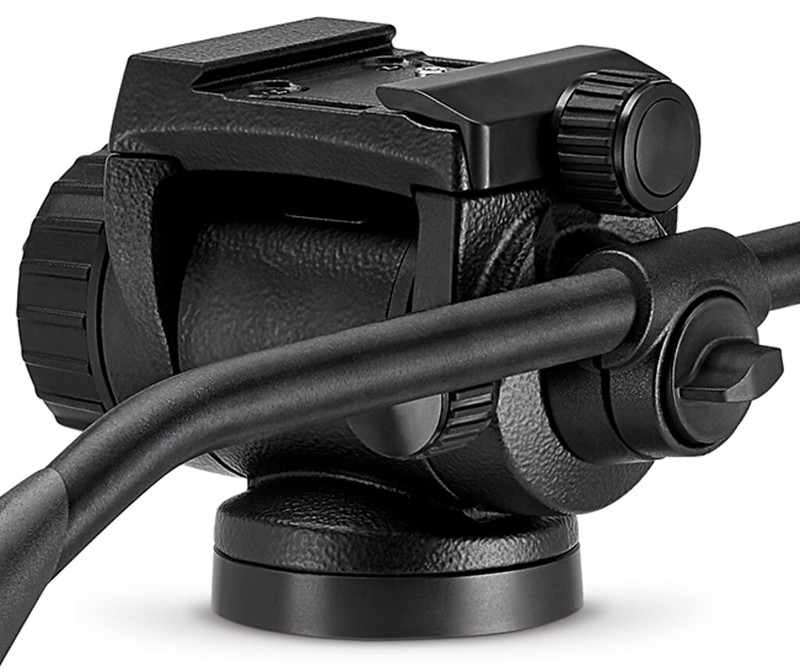
...clamping mechanisms. Both Swarovski Standard and Arca-Swiss Feet raise the Swarovski Scope 18 millimeters above the mounting surface.
They ARE NOT "Quick Release/Install" systems - which is what we actually had with the DH101 / Swarovski Standard - but they're quick enough, simple, well engineered, brutally robust, absolutely mandatory for balancing applications, and industry standard.
http://www.youtube.com/watch?v=9G27wH-xhRg
The Arca-Swiss quick release mounting system.
(So what took so long?)Wimberley Inc. - 2016/07/29
Clay Wimberley discusses the features and advantages of the Arca-Swiss mounting system. The "Arca-Swiss Style" Quick-Release Geometry refers to the open-cavity dovetail quick-release system developed decades ago by Arca-Swiss for use with their Monoball ball heads and large format cameras. After the extreme popularity of the Arca-Swiss B-1 ball head in the 1990s, other companies began manufacturing custom camera-body and lens plates using this geometry. Since then, this geometry has become the industry standard for high-end tripod heads (particularly in the nature photography industry).
The Wimberley Head Version II and the Wimberley Sidekick use this quick-release system, so any lens that you wish to connect to our heads must be equipped with an Arca-Swiss style lens plate. Manufacturers that use the Arca-Swiss Style Quick-Release Geometry include: Acratech, Arca-Swiss, Foba, Giottos (only on their most recent line of ball heads & plates), Kirk, Markins, Novoflex (only on some of their products), Really Right Stuff, Studioball, and of course Wimberley.
Wimberley is a father-son partnership dedicated to the design and manufacture of the highest quality professional photography equipment. We make tripod gimbal heads for large telephoto lenses, macro accessories, modular flash brackets, Arca-Swiss style quick-release clamps & plates, and more... http://www.tripodhead.com/
And do note that the DH101 Head along with its 44066 Adapter Plate...
...have been history for several months now.
2021/02/18 - You can still get them from Optics4Birding.
The Standard (see immediately above) was 45x43 millimeters - fat and short - and snapped quickly and neatly into its receptacle mechanism in which the rather blunt fore and aft bottom edges - 65 versus the 45 degrees Arca-Swiss uses for port and starboard - were engaged and held tight. And a Swarovski Arca-Swiss Foot - having the same fore-aft dimension but a 38 millimeter width will also snap directly into and be secured in the same Swarovski Standard receptacle. Best to make sure it's nicely centered / being fully engaged by the aft catch mechanism though. Arca-Swiss doesn't give a rat's ass about length so if we have a long enough Plate we'll be able to balance anything.
2021/07/14
When I scored a used 95 off of eBay 2020/03/02 I didn't realize I was getting a Standard and understand the implications. And I had to throw in a 45066 Plate - extra weight, bulk, distance down the Tilt Arm - for the sole purpose of compensation. And eventually that pissed me off enough to develop an alternate strategy. The strategy is a bit of a compromise but hell, so is the Plate. And Plan B gives us the better end product. I describe it below in a dedicated section "Swarovski Standard to Arca-Swiss sans Plate" below.
2022/08/21
I've gotten so fed up with Swarovski Standard issues that I've decided to start operating with my 48885 Objective a lot more and my 49995 a lot less. My Canon 10x42 and Apertura 10x50 Finder Scope are Arca-Swiss ready and I've had it with wasting valuable field time fucking around with reconfiguration hoops. And it's totally outrageous that Swarovski has such contempt for the owners of their glass with this disastrous but easily replaceable and fairly inexpensive component that they won't provide and advertise the service. Guess they figure that the cost to their reputation of admitting that they'd ever done any design and production work of less than stellar quality would be way too high.
I'll use mostly use the 85 for astro work when there's a strong possibility of the Finder Scope needing to be swapped in and out fast and the 95 more for birding and wildlife. And for astro it's often not too much trouble to run both Scopes simultaneously.
---
From the Optics4Birding site:
MAJOR emphasis on the Arca-Swiss com compatibility issue. About the first thing they mention. Whereas Swarovski itself presents Swarovski Standard and Arca-Swiss as just two inconsequential flavors of the same thing.Modular Objective 30-70x95 (Arca Swiss Foot)
The Swarovski Modular Objective 30-70x95 (Arca Swiss Foot) pairs with either the ATX angled eyepiece module, the STX straight eyepiece module, or the BTX binocular eyepiece module to form a complete spotting scope. The mount foot is now Arca Swiss compatible and can be used in the Swarovski Professional Tripod Head without a mount plate. The 95-mm objective module yields 30-70x magnification, a field of view of 104 feet to 57 feet at 1000 yards, and a close focus of 15.7 feet throughout the zoom range with either ocular module. When combined with either eyepiece module, the Swarovski 95-mm objective module makes an ideal digiscoping platform.
(And how's that digiscoping platform issue been doing lately?)
2022/09/13
Even today as we look at Swarovski's website and the listings for all their front end ATX glass we're seeing near zilch in the way of Arca-Swiss mounts. The exception:
http://live.staticflickr.com/65535/52353789381_44ae33437f_o.png
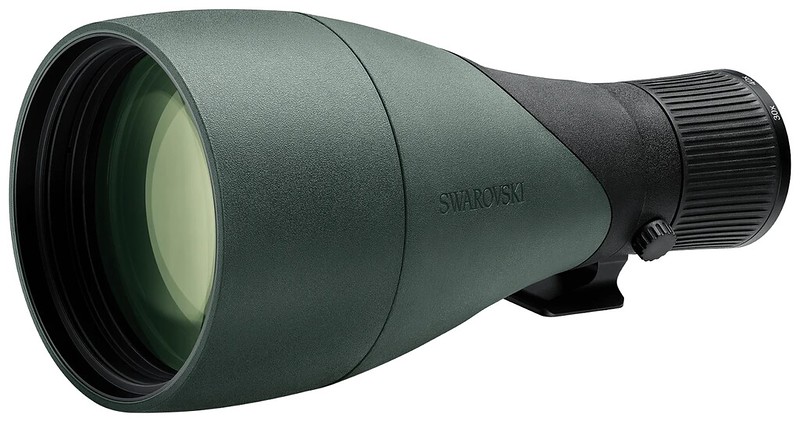
- It has to be 'cause the 115 didn't exist until long after the switch.
- It's so humongous that it dwarfs the FUNCTIONAL Tripod Ring Locking Screw that contrasts so glaringly with its ELEGANT Swarovski Standard predecessor.
----------
Gitzo 2 Way Fluid Head / Swarovski Compact Tripod Head
Found this new CTH "Compact Tripod Head":
http://c2.staticflickr.com/2/1813/43938950722_ab93f46577_o.png
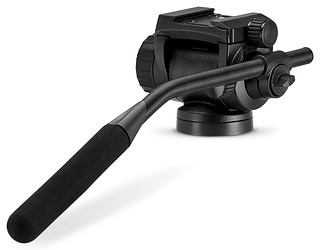
http://c1.staticflickr.com/1/848/43268691534_347a27c724_o.png
on Swarovski's site 2018/08/17. May have some comments when they get around to publishing the Owner's Manual.
2019/03/14 - Gitzo product. The reason the Owner's Manual wasn't up was negligence. They got it up shortly after I wired them about the problem 2018/12/17.
I still can't get my head wrapped around how the counterbalance controls and internal mechanisms work without at least having one in hand but I'm not that intensely interested because...
- I already have a (heavy) PTH which - being a pendulum - is inherently stable.
- It uses this:
11-03914
http://c2.staticflickr.com/2/1794/28948928777_459f8655ba_o.png
engagement mechanism versus the snap-in/out mechanism of the DH101 - which I also already have and is a little lighter.
It's a middle ground compromise but I'd rather stay with the PTH workhorse and DH101 backup/alternative combo.
2019/05/15 - It's a:
http://www.manfrotto.us/gitzo-2-way-fluid-head
Gitzo 2 Way Fluid Head | GHF2W
$320 and a proper owner's manual and schematics minus the Swarovski label.
2023/04/24 - Additional notes on this one...
- Even if the engineering to help keep the glass balanced, operable as needed were the greatest thing since sliced bread it does NOTHING for us in the height adjustment department. And when I'm in the field using my UA-180 and/or PTH all the freakin' time - and really needing to be.
- After having read the reviews on B&H there's no way in hell I'd touch one of these things with a ten foot pole in the first place.
----------
PTH - Professional Tripod Head
http://aa.swarovskioptik.com/download/pdf/5380556-BA.pdf
http://c1.staticflickr.com/1/859/43616064242_2d9f9715b2_o.pnghttp://live.staticflickr.com/65535/32815757747_e03fc5465a_o.png
01 Tripod plate - 1/4" thread standardized
02 Quick lock
03 Clamp wheel - quick lock
04 Dial - rotational resistance tilting axis
05 Vertical rail
06 Vertical slide
07 Clamping lever - vertical slide
08 Clamping lever - handle
09 Handle
10 Fine adjustment - swivel resistance
11 Base
12 Clamping lever - swivel movement
13 3/8" thread standardized - tripod connector
14 Rotary lock
(45066 Quick Release Plate installed backwards.)
That's one HEAVY chunk of metal. Before I'd gotten it fully out of the box upon delivery I'd decided I'd made a big mistake and was intending to return it posthaste. Well, I have it here anyway... Might as well check it out, play with it a bit.
And I soon started gaining an understanding of what one's getting, or should be, for all the extra price and weight - with little thanks to the marketing people. I guess the more they tell us about what we're getting with the PTH the more they're telling us what we're NOT getting with the DH101 - not to mention the "issues" of the PTH as shipped.
By the way... We have to look hard and close to find a Swarovski advertising photo of any one of their ATX Scopes mounted on a PTH. They don't want the prospective customer thinking about any of the nasty little real world issues involved in getting a Scope efficiently, precisely, firmly locked on target.
Also isn't theirs, also MADE IN ITALY, as we even clearly see in their own video:
http://www.youtube.com/watch?v=6itWfnucOV0
Video Tutorial Set up and features of the SWAROVSKI OPTIK PTH professional tripod head
01-00918
before we've gotten to the ten second mark. And the Handles aren't the same. The DH101's has an octagonal circumference and the PTH's is round and won't fit in the DH101's receptacle.
2019/05/09 - It's pretty much a:
http://www.gitzo.com/us-en/gimbal-fluid-head-ghfg1/
Gitzo Gimbal Fluid Head - GHFG1
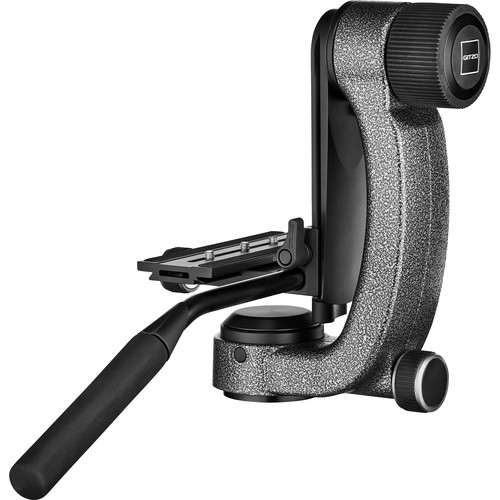
Note the serial numbers on my two copies:
- GZ361445
- GZ391704
Differences... The Gitzo has:
- an owner's manual that actually explains to the owner what's going on with the design
- a great schematics document from which one can:
-- see what's going on
-- identify replacement components for order if/as necessary
- a different finish
- no "Fine adjustment - swivel resistance" (probably no great loss)
- a knob (rather a lever) for (regular) pan resistance control (smaller diameter version of the Tilt Dial up above it)
- a wider (by maybe 18 millimeters) Lens Support (D1108117) which moves our payload out farther to port and will:
-- balance things a little better
-- accommodate a wider payload (irrelevant if we're just doing Swarovski Scopes)
-- make stowage a bit more problematic
- a longer Plate
- a twenty percent smaller price tag
The Swarovski Lens Support aligns the Swarovski Scopes (assuming an Arca-Swiss width Foot or Plate and 12 o'clock roll) dead center over the Tripod.
If we wanted the wider Plate Holder or the whole ready-to-go assembly...
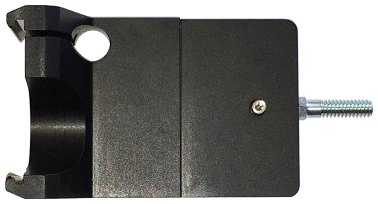
http://www.manfrottospares.com/
Manfrotto Spares and Parts
163.65 - D1108117 - Plate Holder
037.65 - D110896 - Plate Lock
055.07 - D110893C188 - Plate Locking Knob
011.99 - D104418 - Pin - Sold singly not as a set of 10
268.36
http://live.staticflickr.com/65535/50960673401_42e206b9c5_o.png
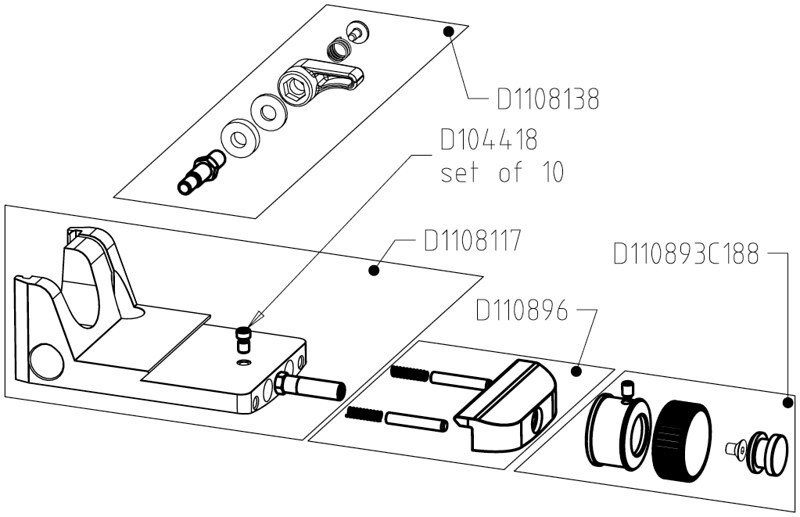
The rubber Grip on the Clamp Wheel is very easily pushed clear with thumbtips.
We're calling Swarovski's Vertical Rail and Vertical Slide the Tilt Arm and Lens Support.
----------
PTH Controls
First off note that all three Swarovski label Tripod Heads have Handles offset to the right and it appears that the assumption is that we'll be targeting with our right hand and operating Focus and Zoom with our left. And that's probably industry standard and the product of an overwhelming right hand majority universe. But does that matter much to a lefty?
After a little experimentation with a "left handed" configuration (see the "FIG. 2 – Find the horizontal balance point" illustration below) I'd say one will easily and reasonably quickly acclimate to whatever happens to be out there. But consistency in gonna be conducive to muscle memory and one wants to be as wired as well as possible when something good comes within range and keeps moving. So if I were not right handed and had the option of configuring for left I'd maintain max distance. And the PTH is about as right handed asymmetrical as one can get.
And there's also the issue that we're hopefully gonna be sharing our equipment with others and they're all gonna be right handed or lefties wired for right handed configuration.
But just for laughs we CAN rig the PTH for lefty - albeit at the expense of a sizable chunk of Tilt Arm range. Install the Lens Support on the Arm upside down, spin the Tripod Ring 180, clamp the Plate, spin the Head 180 back towards target.
But if it were a really good idea to pursue this path...
02-01313-C2R

That's all it would take for an equal opportunity lefty version. And we're just dealing with the "Plate Holder" component - what's in direct contact with the Arm - of that assembly.
---
After we get set up and comfortably locked onto a target the two PTH controls with which we'll be most - pretty much exclusively - concerned are the Pan Clamping Lever and Tilt Dial. We need to practice a fair bit and probably do refresher exercises with these controls such that our right hand moves reflexively and accurately to hit and adjust appropriately. Our left hand can stay on the Focus Collar while we're targeting or anywhere we like if/once the situation's reasonably stable.
And note that with one's right hand fingers and thumb projecting around the base of the Base fore and aft respectively one can adjust tilt with considerably authority and accuracy by applying fore and aft pressure on the bottom end of the Tilt Arm - especially if the Scope is clamped high up towards or at the balance point. Left hand works nicely too when it's not otherwise engaged.
Five mechanisms involved in resistance, balance, stability, targeting, height adjustment.
---
Pan Resistance Dial
At bottom center there's a "Fine adjustment - swivel resistance" - "On <- Fluid -> Off" dial which is absent from the Gitzo label flavor.
31-14002
http://c2.staticflickr.com/2/1835/43832704501_33a4d541e2_o.png

Crank it counter enough and it completely unscrews but reinstalls nearly as easily. As one cranks it clock it MAY do something to press two surfaces together to increase internal resistance a small amount but any effect is dwarfed by what one accomplishes with the Pan Clamping Lever. Nothing "Fluid" is directly involved.
---
Pan Clamping Lever
At bottom starboard there's a Pan Clamping Lever:
29-10919
http://c1.staticflickr.com/1/852/42026652560_a4bf1099be_o.png
That's what we're using in the field in the pan department while we're scanning and locking on. We want it hard locked for transport, backed off comfortably while targeting, stiff after we've zeroed in on something good and stationary. Left hand making a U around the base of the Base (below the Resistance Dial), right hand at that level on or in the vicinity of the Pan Clamping Lever works as well as anything.
Note that while the PTH centers the CG of the Scope pretty well over the Tripod that - because the PTH itself is asymmetrical with most of its mass way the hell off to starboard - the CG of the assembly is off way the hell to starboard.
We don't need or want the PTH Pan Clamping Lever clamped to the max for field ops. So clamp it to the max, pull the Lever out free of the Screw's hex MidHead, reseat it at 03 o'clock. With this orientation we're solid enough - for both target lock and transport between stops - backed off ninety degrees / a quarter turn / to 12. We can still pan if we try hard enough but we're not gonna try hard enough.
---
Tilt Dial
At top starboard there's a Tilt Dial:
30-12215
http://c1.staticflickr.com/1/930/42026651070_6d6134ccf8_o.png
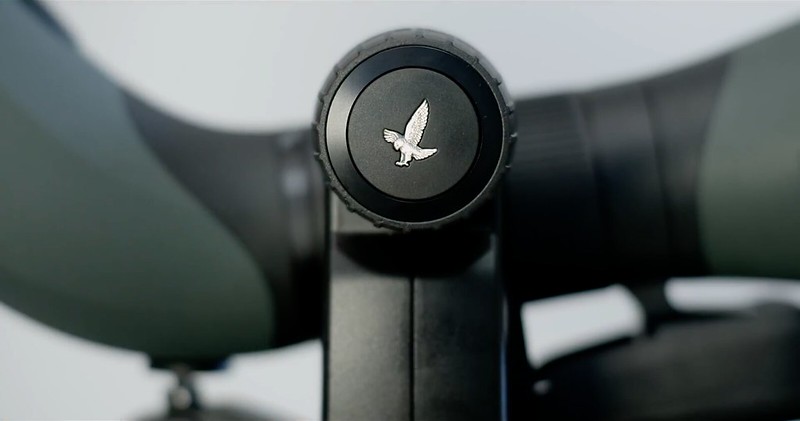
by which we both fine tune resistance and lock things up - right after we've dialed up through the resistance range. When we adjust tilt - via rotation force applied to the Tilt Arm, hand off the Dial - the Dial rotates with the Arm. Includes if/when we've stuck the dial to the hard off end of the range.
---
Lens Support Clamping Lever
Projecting from the aft face of the Lens Support...
02-01313-C2
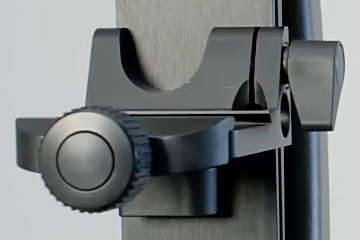
...we have the Lens Support Clamping Lever. With it we set our position on the Tilt Arm with respect to stability, accessibility, comfort, individual situations.
---
Lens Support Clamp Wheel
Projecting out to port from the base of the Lens Support...
05-03308-c
http://c2.staticflickr.com/2/1812/43116100014_cbb6caf538_o.png
...we have the Lens Support Clamp Wheel. Normally/Ideally we want to clamp the Scope assembly's Foot/Plate/Arm such that the CG of the payload is straight above the center of the Lens Support's Clamping Channel with the Tilt Arm vertical (we're perfectly balanced in the fore/aft department).
(Not so much a control, usually just a one time set to predetermined mark thing.)
Note that in 05-03308-c above there's another Clamping Lever - with the identical external/visible component projecting out below the Lens Support. Secures the Handle.
----------
Lens Support Clamping Lever
This one's MAJOR and needs a substantial section all its own.
- employed for mounting and pulling the Scope assembly
- handles Scope height setting for:
-- stability settings
-- access for:
--- different individuals
--- same individual with the Scope at different:
---- tilt angles
---- roll rotations
--- all of the above
- rotation can be (temporarily) blocked by Plates, Scope Focus Collar, Balance Rail components, Handle
- fragile - can fail with normal use
Let's start by establishing a standard (starting) rotation orientation:
- back off to and a bit beyond zero resistance
- rotate clockwise to the point at which resistance is first encountered
- pull Lever out free, rotate to 07, let it engage
- if we can't nail 07 then we'll settle for 06:30
Stow at 10:30. We can quickly and easily get our thumb under/behind the lever and over a Plate projection for clamping operations.
At:
- 01 we're approaching immobility
- 02 we're out of clunk mode
Never go beyond 03.
One issue we're likely to encounter with the Lens Support Clamping Lever that's gonna matter if/when it does... If we're not screwed into the receptacle enough to engage a fair bit of resistance when we pull straight back on the Lever to disengage from the MidHead and turn counter for the desired purchase the Screw just rotates counter anyway as if it weren't disengaged. Remedy... After the Lever is disengaged apply lateral pressure during the reset rotation. That provides the resistance required to immobilize the Screw against rotation.
It takes a bit over eight rotations with the threads engaged before we start getting seated and we can start taking proper advantage of the mechanism.
On the physics involved with the relevant issues with the Lens Support...
We're dealing with a third class lever.
02-01313-C2
We're applying our effort - with the driven Screw - maybe two thirds of the way up from the pivot point (fulcrum) below and our braking contact surface above. At the top of the Lens Support we're putting a longitudinal squeeze on the Tilt Arm across its face. Our lever arm is about 36 millimeters long so we're moving our braking point at the top in one millimeter with 300 degrees of torque rotation on the Screw. With no torque on the Screw the Support is free to move and it will move where gravity tells it to. We need to lift it up to where we want it and the assembly it's supporting. (Or for an efficient assembly catch it on the way down.) When we get it there we need to start clamping to keep it there.
When we're lightly clamped and apply torque to the Scope / Plate / Lens Support assembly to tilt it positive and negative / up and down we'll feel it clunk down the Tilt Arm some fair chunk of a millimeter with each iteration.
---
On the afternoon of 2020/03/08 the threaded length of the goddam Lens Support Clamping Lever Screw - brass - sheared off in its receptacle (which has a depth of 12.5 millimeters) in the component. Good news... I was able to back it out fairly easily using first a regular flathead screwdriver and then a jeweler's size flathead. (The CT101's included combo tool would've worked for the latter.)
(The 20 millimeter Screw only extends a bit over ten and a half millimeters into the receptacle at full clamp so it can't be bottomed out at a failure point and thus extraction should never be a major problem.)
Granted, I'd used, played and experimented with this toy a fair bit in the couple years I'd owned it but I'd never abused it to the slightest degree. And given that it's turned with a short - 22 millimeter - plastic lever it should be impossible to abuse anyway. Note however that while this may be a 5 millimeter diameter screw the short unthreaded span immediately aft of the threading (weak link) is about 3.58 millimeters.
http://www.manfrottospares.com/
Manfrotto Spares and Parts
D1108138 - Scroll Lock Knob - $25.74
Doubled that to have a spare on hand and added six bucks to get it by the end of the next month. That was when they said. They actually got it here (from the UK) in today's mail - just under eight days ((2020/03/16) from the click.
Something of a silver lining... I now realize that I can stay fairly nicely functional regardless. Slide the Scope / Plate assembly substantially forward / nose heavy in the Lens Support (Arca-Swiss) clamp and the resulting torque will nicely hold the assembly at whatever height we choose. Yeah, that screws us over a bit with respect to ease of operation but one can live with that compromise for a while if one must.
Note the configuration of the assembly. On the Screw the steel washer is installed first and the plastic spacer is installed second/last. Nice to screw on a little M05-0.80 nut to keep things together and in order.
---
The threaded/distal length of the screw has a diameter of 5 millimeters and length of 9.5. The unthreaded shaft diameter is 6 - and that shoulder is what limits the depth to which this hardware can project. So there can be no less than 3 millimeters of spare depth in the receptacle when this thing fails.
---
From Home Depot: Everbilt 5 mm-0.8 x 20 mm Plain Steel Metric Socket Cap Screw
http://live.staticflickr.com/65535/49658526211_f6609d4e1f_o.png
Plus a 4 millimeter Allen key. Lubricate the threads with Gitzo Tripod Twist-Lock Grease.
That brass screw failing is bullshit. I'd recommend both ordering a spare and keeping a copy of my Plan B on hand.
---
Gitzo replacement greased and installed. The plastic Lever is a bit different:
- has "GITZO" embossed on the aft/visible face so Swarovski would've had to have gotten theirs from a less incriminating mold.)
- different shape (rectangular profile and note the curve on the clamping side of the lever arm in the schematic below) but identical length lever arm
- not tapered but slightly narrower at its extremity - so if we had clearance with the original we'll have slightly better clearance with the replacement
---
So now we can use the same brass screw for this application in the same manner and expect better results.
I'm somewhat thankful at this point that I had this component fail. It forced me to question/reconsider my SOPs. The way I'd been handling the relevant actions - assuming that I should be unclamping to zero torque and clamping to max / total immobility - I:
- suffered a Repetitive Strain Injury
- totaled a moderately expensive underbuilt but adequate critical system component
Oh well...
----------
Lens Support Clamp Wheel
This one should be simple - we're just clamping a Foot or Plate into a desired position - but isn't. Only on 2021/05/29 (yesterday, at the time of this edit) after a bit over three years of fairly heavy use, practice, experimentation, study with the PTH - did I finally understand how this assembly is put together and supposed to work.
Let's start with everything disassembled and put it together.
http://live.staticflickr.com/65535/50960673401_42e206b9c5_o.png
D1108117 - Plate Holder
D110896 - Plate Lock
D110893C188 - Plate Locking Knob
We're looking at this stuff from in front but it projects out to port. And everything disassembles easily. We'll be lubricating with Gitzo Tripod Twist-Lock Grease.
- There's a 36.5 millimeter (1-7/16 inch) overall length Mounting Stud projecting out from the middle of the Plate Holder. It's designed to stay fully threaded into the Plate Holder.
-- Its starboard end is M06-1.00x11 millimeters. The MidHead by which it's torqued into place is 7 millimeters and we'll just give it enough torque to make it stick.
-- It projects out to port 26 millimeters and that end is threaded at 1/4-20. (06.35 millimeter diameter.)
- Springs and Alignment Pins are installed next.
- Clamp engages the Alignment Pins and is speared by the Mounting Stud.
- Clamp Wheel screws onto the Mounting Stud. At this point we're perfectly functional.
- Next there's a Flat Head Screw screwed into the end of the Mounting Stud - 06 millimeter length but we could do 08 without causing any problems. (I did so.) Makes it impossible to inadvertently unscrew/remove the Clamp Wheel.
- At the far end of the illustration there's a component with the appearance of a spool but is actually just an elegant Endcap. It installs in the Clamp Wheel and over the end of the Mounting Stud and Flat Head Screw and can't be installed backwards/incorrectly.
- Socket Hex Drive Set Screw with a Cup Point - 04 millimeter diameter, 0.70 millimeter thread, 06 millimeter length, 2 millimeter Allen socket. Screws into the side of the Locking Knob and makes it impossible to remove the Endcap. Screw it in just enough to recess beyond the surface. It doesn't need to and shouldn't contact the Endcap wall.
- Grip - rubber cylinder which stretches over/around the Clamp Wheel grip surface. Comes on and off easily. (A good bit TOO easily over time.)
--
Note:
- When removing the aforementioned Flat Head Screw from the starboard end of the Mounting Stud first turn the Clamp Wheel (clockwise) towards compressing the Springs. If that contact isn't eliminated first then good freakin' luck.
- With the Lens Support stowed engaged with the Scope rather than with the rest of the PTH and Tripod... If we're looking at one side of our Scope assembly and not seeing either both the Scope's Locking Screw and Support's Clamp Wheel or neither we're clamped in backwards.
---
With respect to the Mounting Stud... Got that?
- M06-1.00 starboard into the Lens Support Body
- M07 hex MidHead for installation
- 1/4-20 for clamping the Plate Holder
- M04-0.70 internal for safetying the assembly
Good luck getting something like that at the hardware store.
---
I went through hell with / trying to understand this mechanism. Some Manfrotto / Gitzo / Swarovski proxy idiot failed to install the Flat Head Screw in the end of Mounting Stud. That in itself wasn't anything of a field problem but after I acquired a second PTH 2021/05/26 and started trying to take things apart I couldn't figure out what the hell was going on.
I could never achieve a hard clamp on a Plate on PTH-1 and had figured from the Gitzo schematics that there must be some fashion of a clutch mechanism at play inside the Clamp Wheel. But I could clamp hard enough and never had an issue with slippage, movement. But when I got my hands on PTH-2 the clamping was rock solid and I went into fix mode yesterday.
But I couldn't disassemble PTH-2 'cause of the Flat Head Screw I didn't know PTH-1 was supposed to and didn't have. After that discovery things started making more sense.
Eventually figured out that the reason I was able to deliver a satisfying hard clamp with PHT-2 was 'cause the rubber Grip on its Clamp Wheel was newer and fresher than the one on PTH-1 had ever been over the course of my ownership. There WAS, in fact, a clutch effect going on but at a level a lot closer to the surface than I'd been thinking.
Solution... Be aware of what's going on and grip real hard to clamp and un. Less elegant solution... Replace the Gitzo/Swarovski Grip with a bunch of rubber band wraps. Pity Gitzo/Swarovski wasn't able to engineer anything that would be elegant and also effective for more than three or four weeks. (And MOST of this stuff is pretty well engineered.)
---
And about twenty minutes after completing the preceding I pulled the Grip again for another experiment with a rubber band wrap. When I went to reinstall it I discovered it was torn. So it looks like functionality won out over elegance.
----------
Tilt Arm / Lens Support
We've dealt with the mechanisms by which we make adjustments to and lock structural elements involved in resistance, balance, stability, targeting, height adjustment... Now we have to deal with a couple of the interrelated structural elements themselves.
The PTH Incorporates a Tilt Arm / Lens Support configuration:
02-01313
http://c1.staticflickr.com/1/928/43116100114_a7096da9d9_o.png
which, once tilt angle is appropriately set, allows the operator to raise and lower the Scope for height and stability adjustments while remaining locked on target (ignoring the inches of adjustment which is a total zilch issue for anything beyond ridiculously close and chickadee or under sized).
In this illustration - which is a crop of the one all the Swarovski dealers currently use:
http://c1.staticflickr.com/1/859/43616064242_2d9f9715b2_o.png
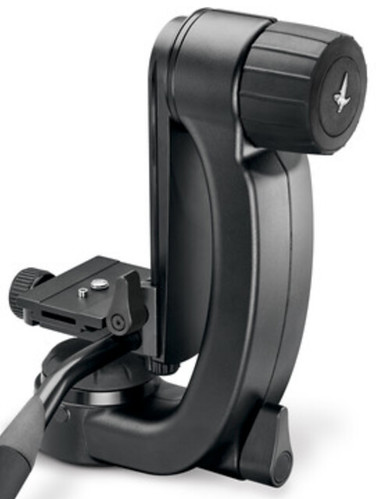
- The 45066 Quick Release Plate, onto which the Scope assembly is secured, is clamped into position (backwards). And not:
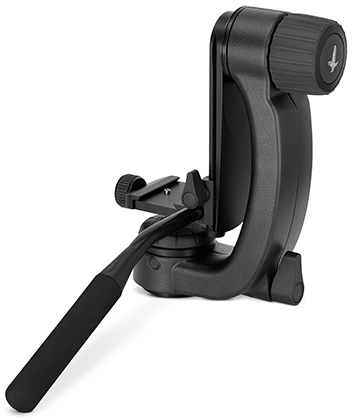
- The Lens Support Clamping Lever appears above the Handle's insertion point and is in upright (implying locked) orientation in both photos above. A better shot of the Support Clamping Lever:
05-03308-c
http://c2.staticflickr.com/2/1812/43116100014_cbb6caf538_o.png
(Note...
01-00918
...the taper, reduction in thickness of the starboard face of the Tilt Arm from top to bottom. Well done.)
----------
PTH Handle
For over three years of PTH ownership and use I'd eliminated the Handle (what Gitzo refers to as a "Pan Bar" (I guess we can't use it for tilt)) from my system and procedures - mostly 'cause I needed to use its installation Cylinder to compensate for the sight elimination Swarovski perpetrated on their ATX/STX Ocular modules to make way for their DRX Digiscoping Adapter Sleeve. Started rethinking that excursion 2021/06/08, did some experimentation...
Bad news...
- There's a fair bit of flex in the Handle so one doesn't score all the mechanical advantage one might have hoped for.
- We:
-- need the Handle Clamping Lever to stay installed and that translates to several minor issues
-- have a problem if we really need our Bore Sight now and not five seconds from now
I wouldn't use or recommend it for situations in which the score is being kept. But for non critical sets... What the hell, another toy to play with.
Relevant issues...
There's an Endcap installed in the front end of the Handle. Pulls out of the Handle easily enough after a while. But don't lose it. Comes in real handy WHEN our Brake Pad (see below) becomes detached from its Handle Clamping Lever.
The little rubber Brake Pad:
D1108139
http://live.staticflickr.com/65535/51218954519_8570367fed_o.png
on the top end of the Screw. It's secured to the Screw by means of a little "Axle" protruding down from bottom center into a tiny receptacle cylinder in the top end of the Screw. And it's backed by a metal washer. After a fair bit of experimentation the Pad and Screw became permanently separate components.
Not a huge disaster 'cause the Pad can now live in the top of the relevant threaded cylinder in the Lens Support. And let's make that SOP if we're planning on using the PTH with the Handle installed at any time within the next six months. With the Brake Pad stranded in the top of the cylinder separate the Lens Support from the Tilt Arm, Scope, Handle, rest of the Handle Clamping Lever then smack it around a bit to get the Brake Pad dislodged. When you can't the test will have been passed.
If we've screwed the Brake Pad up to project into an empty Cylinder it probably won't retract clear even if its Axle is still intact and definitely won't if its Axle isn't. So to minimize the effort and aggravation run some fashion of lower diameter rod into the Cylinder to press the Brake Pad down clear. (A screwdriver shaft can do nicely.) Don't try to force it back down clear with the Handle if it's projecting significantly - the Handle's (front) Endcap is too blunt / not sufficiently tapered to make that effort go very well. Yeah, it's brain-dead easy to push it free into the Cylinder but if the Axle's fried it's a bit of a pain to get things functional again.
If that situation arises... Screw the Clamping Lever back in halfway. Use a screwdriver tip to push the Brake Pad in - fore to aft so's there's no gap to jump - to over the opening and the screwdriver shaft to push it down into. Work the capped Handle in and clamp to finish the job.
Note that at the 06 o'clock rotation we see here:
05-03308-c
http://c2.staticflickr.com/2/1812/43116100014_cbb6caf538_o.png
it's a substantial pain to initiate the unclamping rotation. Note however that at a 06 (or 12) o'clock rotation we can go full down on the Tilt Arm.
About one and an eighth turns from hard clamped to Handle Clamping Lever separation.
In virtually all shots and illustrations of the PTH - as well as the original Gitzo label Head - we see some substantial length of the Handle's front end...
28-10805
http://c1.staticflickr.com/1/929/43116098664_225e0c523a_o.png
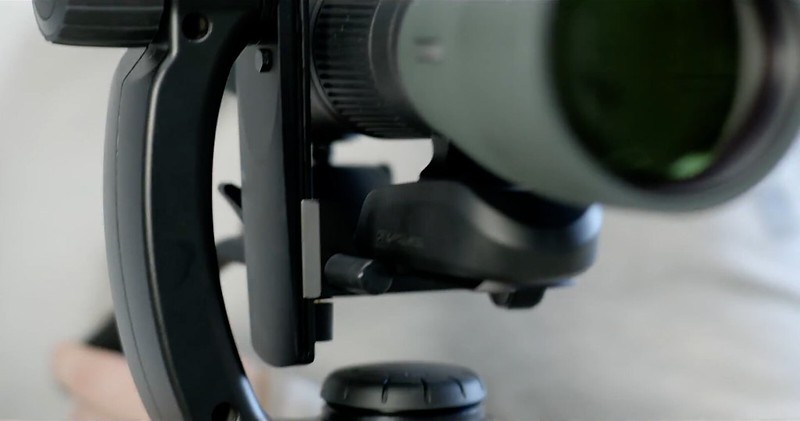
...projecting significantly fore through the Cylinder. Ditto for the DH101 and CTH. So are they making these things too long?
My thinking is that if we already have the length anyway then we should use it to max advantage in the leverage and precision departments. Rather than push it completely through and well beyond the front end of the Cylinder just push it through enough to have a little margin beyond full engagement of the Brake Pad. Front end 22 millimeters shy of the Objective face works for me.
Or to help make things quicker and easier... Shove the end of your left little finger in the front end of the Cylinder and feed the Handle in until you feel contact. I'm firm when the aft three quarters (45/60 millimeters) are filled. Better yet... Make contact then back off a little.
I'm also thinking that users don't like the feel of the flex they get out at full extension and think that they're getting better leverage as a consequence of the over-insertion. (They're not.)
Further recommendations...
In the still above Hans is panning the Scope Assembly counterclockwise / towards a target to the left by applying a force to the right to the aft end of the Handle. The Handle is transmitting this torque force to the Head to overcome its dialed-in internal resistance and do what we want it to. But because of the bend in the Handle he's also applying a torque force which WILL cause the Handle to roll counterclockwise in its Cylinder if the Pan clamping adjustment is stiff enough even with the Handle Clamping Lever cranked as tight as we dare. (And now we understand why the Handle for the DH101 has an octagonal cross section.)
So let's roll the Handle clockwise in its Cylinder ninety degrees to 09 o'clock. Now there's ZERO roll torque that needs to be resisted by the Clamping Lever. We could throw the Clamping Lever away and still effect a Panning adjustment in either direction. And:
- we have the Handle's aft end within easy range of our left hand
- I suspect that rotation works a little better in the stiffness department
But let's compromise a bit to get the back end of the Handle better clear of our face and make our grip a little more comfortable - 08 o'clock. And we won't have a roll problem at any reasonable Pan resistance setting.
With the Handle Clamping Lever we have another brass screw we don't want to shear in half. Twenty percent greater diameter (6 versus 5 millimeter - unthreaded shaft 6.15 versus 3.58) so that's not likely to happen but the plastic lever's the same and that we don't want to distort. First resistance plus thirty degrees will immobilize the Handle out of the problematic zone.
More real world stuff - the kind we'll never hear from any equipment manufacturers and dealers... EVERYTHING between the bare granite surface upon we're set up and the Scope and/or aft Handle end FLEXES to some degree in response to yaw torque applied to the Handle aft end - the Tripod, Head Base/Body, Tilt Resistance Dial, Tilt Arm, Handle... Run the experiment. Set everything up textbook and clamped to nondestructive max, grasp the aftmost half inch of your Handle end between the tips of your thumb and index finger, apply a wee bit of clock-counter effort, watch what happens. This makes things problematic when working on getting a target precisely centered.
But...
- Tilt we can pretty much set and forget.
- Set the Pan Clamping Lever on its MidHead such that you can go from reasonably easy pan to securely clamped between 01 and 04 o'clock. (Thumb up to fore and pushing on the aft face.) As we go up with the Center Column we'll need to adjust that rotation range counter.
- Left hand on the back end of the Handle closing in on target and our right hand on the Pan Clamping Lever simultaneously gradually cranking up on resistance we can effectively deal with the real world issues and achieve a smooth, efficient, and accurate lock. (Kill shot if we were also gonna pull a trigger.)
The Pan Clamping LEVER works real well for this technique, I suspect better than the knob/wheel installed on the Gitzo version of this head. (For $52.47 plus shipping (D1108122C188 - Pan Lock Knob) one could find out for sure.)
For practice... Pick an evening planet and work on repeatedly clamping it in the crosshairs as it drifts down and to the right.
---
Stowage
Things work out such that we can stow our ATX / Plate / Lens Support assembly in our MBAG100PN with the Handle and Handle Clamping Lever with zilch additional volume penalty.
For the Handle measurements let's ignore the (front) Endcap and start from the fore end of the tubing itself. We want to push the Handle through its Cylinder in the Lens Support fore as far as possible without getting into the bend region. If we measure and mark 155 millimeters back we're good. So that mark flush with the aft face of the Lens Support. Also mark at 160. The bend is so slight at that point that it's negligible but there's no advantage to going farther but we can use it to help find 155.
Loosen the:
- Handle Clamping Lever, roll the Handle to 06 o'clock, put your right index fingertip on the 155 mark, push through until you make contact
- Tripod Ring Locking Screw, roll the ATX to 06 o'clock, clamp
Roll the Handle clockwise to bring its Grip into light contact with the Eyecup Cap - about 07 o'clock - and clamp.
Pull the Scope / Plate / Lens Support assembly off the Tilt Arm and rotate the Handle Clamping Lever to 12 o'clock or a bit over.
---
2021/08/14. OK, played with Handle issues for over two months and probably learned everything possible about ins and outs. Major conclusion brings me back to where I'd been before. Anything it has to offer is outweighed by the downsides. Back to the mothballs.
----------
PTH Scope Mounting
http://live.staticflickr.com/65535/50960673401_42e206b9c5_o.png
11-03914
http://c2.staticflickr.com/2/1794/28948928777_459f8655ba_o.png
http://live.staticflickr.com/65535/49704851952_79c75b8241_o.png
We're losing the Safety Stud.
Generally best to standardize procedures and execute, practice accordingly if time and/or effort penalties are zilch or negligible.
Normally we want the Lens Support clamped to our Scope's Foot or Plate and stowed and mounted accordingly. But when we're mounting our Scope onto the Lens Support when the latter is clamped onto the Tilt Arm (Head)...
If our Clamping Channel is gonna be empty for any significant length of time we want it fully clamped. So let's make that assumption.
Widths of what we might find ourselves clamping in millimeters:
- Arca-Swiss - 38 base, 45 degree knife edges:
-- Foot
-- Plate - 32 at the top of the base trapezoid projection, 55 mounting platform
- Swarovski Standard - 45 base, blunt edges
Center Column down and clamped, PTH aimed North/12 at target, Pan clamped, Tilt Arm down vertical and clamped, Lens Support clamped at target height or comfortably down (Handle Clamping Lever - if present - may be problematic at full), standing directly West of Center Column facing East, ATX rolled to 12 and Tripod Ring firmly locked.
Bear in mind as we start lifting the Scope into position that something around 160 millimeters of its length it has stuff that does or can roll - stiffly, easily, freely for the Zoom Collar, Focus Collar, Tripod Ring, Sunshade. The Zoom and Focus Collars should start off set full counter and clock respectively, the Tripod Ring should be firmly locked, the Sunshade should be fully retracted and capped to hopefully make a drop a bit less catastrophic. Ditto for the back end.
We need to lift with our left hand palm-down grasping the barrel of the Objective Module (aft of the Sunshade) and our right hand palm-up stabilizing the Ocular end aft of the Zoom Collar and where we can use the aft end in general for a bit o' yaw leverage and angled aft end in particular for a bit o' roll leverage. 95 and 85 are respectively slightly nose and tail heavy. We're assuming target is out straight North and at our level and keeping the Scope aligned accordingly to the best of our ability.
--
Scenario 1 - Arca-Swiss Foot
Roll clock thirty degrees to engage at fore-aft center the starboard area of the Floor of the Clamping Channel, lower to make contact, push forward/East to contact the gripping/inner surface of the Plate Holder. Roll counter to engage the top of the port knife edge of the Clamp with the base of the Foot's starboard contact area. Shift right hand grip to the area of the Ocular just fore of the Tripod Ring, apply light counter torque and starboard push while spinning the Clamp Wheel counter with the left until the Foot drops/snaps into the Channel. Clamp moderately, ease off, adjust for balance, hard clamp.
--
Scenario 2 - Arca-Swiss Plate
As per Arca-Swiss Foot but with starboard edge of the Plate's Deck underside in contact with the top surface of the Plate Holder well to starboard / inboard of the starboard edge of the Clamping Channel. Slide to port / outboard until the starboard edge of the Plate's Foot snaps into the Channel, push starboard, torque counter, spin the Clamp Wheel counter until the port edge snaps in, adjust, clamp.
--
Scenario 1 - Swarovski Standard Foot
Identical to Arca-Swiss Foot but using the "Swarovski Standard to Arca-Swiss sans Plate" Lens Support Clamping Channel modification.
--
Snap-in to hard lock gets 1.5 revolutions of the Clamp Wheel for Arca-Swiss, 0.5 for Swarovski Standard.
If we wanna quickly verify that we're properly engaged in a Clamping Channel opened a bit wide we can yaw the Scope port-starboard. If the yaw is substantially and solidly limited...
---
2021/07/22
In the courses of developing the Lens Support Clamping Channel modification for the Swarovski Standard Foot and then this documentation of Scope installation procedures I've reached the conclusion that we should be ditching Plates whenever reasonably practical. And it's reasonably practical for the 85 and 95.
- I can run the 85 forward enough to balance and still be engaged in enough Clamping Channel to keep me satisfied. Not ideal but neither is installing a 140 millimeter Plate that protrudes 60 millimeters - 43 percent of its overall length - fore of the point at which it could be of the least possible use.
- Extra weight, altitude, bulk, wind resistance, instability, expense, complexity, potential for misalignment and reduced elegance. (On the plus side kinda nice to be able to plop the Scope down on a tabletop and have it balanced and stable.)
I used the Plate to optimize a combination of pendular balance and Clamping Channel utilization and dismissed all the downsides - false perfectionism.
Note...
While the 95 (Swarovski Standard) Foot nestles rather nicely in the (modified) PTH Lens Support Clamping Channel with the 85 we need to go way fore - 20 millimeters out of the Channel. That leaves only 23 millimeters inside of the Channel which is 07 shy of the halfway point. And that leaves the Clamp cocked wide-fore/narrow-aft - which is a really not good situation for a number of reasons. Two SAE No. 10 nylon washers installed on the aft Alignment Pin (between the Plate Holder and Clamp) and we're clamped rather nicely and safely back to square.
----------
Lens Support / Plate/Scope Assembly Connection
02-01313-C2
Let's work mostly backwards and start with the Scope / Plate / Lens Support assembly off the Tilt Arm, in hand, upside down...
11-03914-f
http://live.staticflickr.com/65535/50916420756_f481836faa_o.png

...port side facing us. We're gonna disengage the Lens Support assembly.
While applying light downward torque on the starboard edge of the undersurface (think seesaw) spin the Clamp Wheel counterclockwise until the near knife edge disengages, tighten the Clamp Wheel back a quarter turn, separate. (Don't worry, you have more than another six and a half revolutions to go before things fall apart. (But for long term clamp it down firmly anyway.))
For reinstallation... Same configuration, hook the starboard edge of the Plate, pull and apply light down pressure, back off on the Clamp Wheel until the Lens Support snaps down onto the Plate, spin clockwise to take up the play, adjust fore/aft position for balance, clamp.
Bear in mind that the Lens Support's Clamping Lever needs to be exposed aft. (Keeps one from installing the Lens Support backwards.)
----------
Tilt Arm / Lens Support Connection
PCT/PTH set up aimed forward / at target, locked. Center Column and Tilt Arm down and locked - as they went into and came out of the bag.
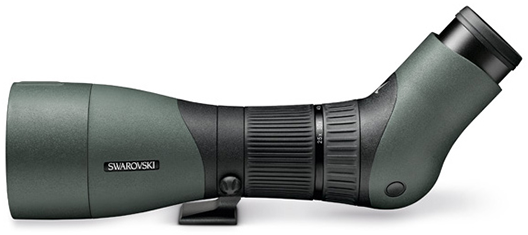
The ATX Scope - Capped, Sunshade retracted - should be rolled to 06 (with respect to the its Foot) for transport. If it is then leave it that way. If it's at 12 (or anything else) then don't worry about it.
Standing close behind Tripod with Scope / Plate / Lens Support assembly held by left hand. We're making a U with our thumb and index finger around the base of the Lens Support, remaining fingers curled below for support, aiming at target.
Right hand on the PTH's Tilt Dial to stabilize Tripod for engagement with Scope assembly.
Come in angled out a bit shy of perpendicular, aim for a bit below the (rounded) top of the Arm, engage the bottom edge of the Support's contact face, roll to flush, drop to neutral point or other desired elevation, clamp.
This procedure can be run in two to four seconds.
Uninstall... Tilt Arm hard clamped at vertical, Clamping Lever loosened back to 10:30, right hand - fingers over the Tilt Dial, thumb and left hand under the Lens Support. Comes off quickly, smoothly easily.
----------
Plates - Arca-Swiss
----
- Conventional
2023/05/28
Swarovski labels and markets ONE Arca-Swiss compatible plate which comes as a component of "their" PTH and CTH Heads. 45066 Quick Release Plate for the sole purpose - in Swarovski's context - of enabling us to engage Swarovski Standard era Glass on heads up to the jobs of being heads. And for that purpose it's absolute garbage.
An Arca-Swiss head clamp totally locks Arca-Swiss glass into a precise and solid fore-aft alignment. It's physically impossible to use a single 3/8-16 screw connection at the center of a Foot to immobilize any glass the way we really need it to be. And the idea that this is a practical solution for getting us properly airborne is totally absurd. It's great for connecting my Canon 10x42 and absolutely nothing beyond.
It's this plate:
http://c1.staticflickr.com/1/859/43616064242_2d9f9715b2_o.png
Swarovski Quick Release Plate for PTH Head
installed backwards in the Swarovski photo of one of the Gitzo heads Swarovski labels as their own.
Manufactured by Gitzo like:
Gitzo GS5370DR Standard Quick Release D Profile Plate
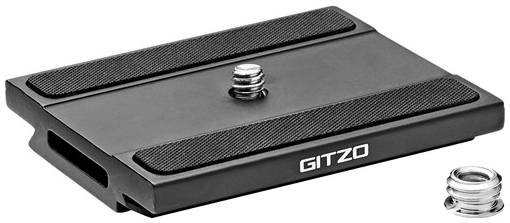
'cept with a 3/8-16 versus 1/4-20 Screw (plus a 3/8-16 Adapter but minus being tapped for an M04-0.70x05 Safety Stud). Although according to the Swarovski PTH Owner's Manual...
(And I'm wondering if that Gitzo label Plate won't take a 3/8-16 directly. Strongly suspect it does.)Tripod plate - 1/4" thread standardized
Swarovski flavor:
http://www.brownells.com/
Brownells - Firearms, Reloading Supplies, Gunsmithing Tools, Gun Parts and Accessories
http://c1.staticflickr.com/1/941/43965137332_07b7d12e6c_o.png
http://c2.staticflickr.com/2/1815/43294926474_41bec4c70b_o.png
http://c1.staticflickr.com/1/933/43107503515_389487887e_o.png
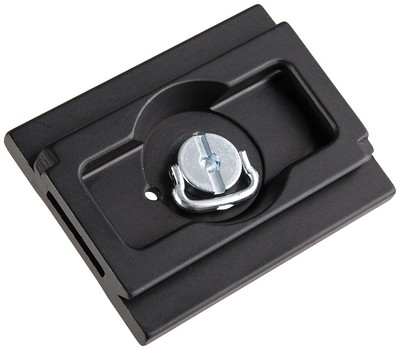
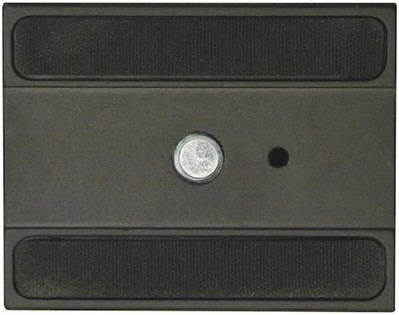
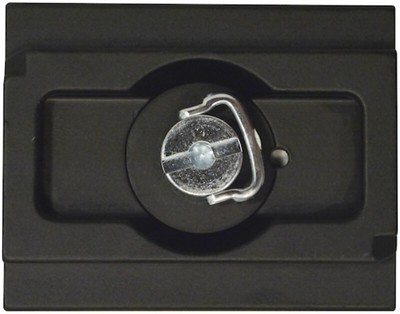

http://www.midwayusa.com/guns/
Swarovski-45066-MidwayUSA
http://live.staticflickr.com/65535/50966441106_80e2b11848_o.png
http://live.staticflickr.com/65535/50966441071_57a6a6d78e_o.png
http://live.staticflickr.com/65535/50966441061_93ae082182_o.png
with the pain-in-the-ass Safety Stud wisely removed by Brownells.
(If for any reason (one I'm so far unable to fathom) we'd like to have the Safety Stud on hand we can screw it in from below to half a turn shy of the upper surface.)
Early (doomed) strategies for getting things properly immobilized...
Flip-handle.
Nickel.
http://live.staticflickr.com/65535/51063101043_1cacf47b2f_o.png - Williams B-70 Ratchet Spinner Disk

http://live.staticflickr.com/65535/49650090083_6b448baf73_o.png - Husky 3/8 in. Drive 4 mm Hex Bit Socket
And the Allen key with all of its leverage advantage wasn't gonna do the job either.
The flip-handle resistance is REALLY STIFF. That's mostly a good thing but DO NOT EVER push it down (up) flush or approaching 'cause it definitely won't be coming back up with a thumbnail. And if it doesn't come back up the Plate won't be separating from the Foot in a civilized fashion minus a reasonably proper tool. Push it over but leave it projecting a couple millimeters then flatten it down to flush with the Plate's bottom surface by pressing down onto a flat surface - like a tabletop or the relevant one of the Lens Support's Clamping Channel.
Length of the 45066 - 70 millimeters. Not even adequate to get all of Swarovski's glass properly balanced in "their" PTH Head. My ATX/85 combo balanced with the Plate shoved fore to the stops (Safety Stud at the time installed in Clamping Channel) and over a third of the way forward out of the 60 millimeter length Clamping Channel. 49 millimeters in, 21 out.
And the only way to do this job RIGHT is to have Arca-Swiss glass and a head with an Arca-Swiss lens clamp long enough enough to balance anything relevant we can throw at it. And for the purpose of this exercise that means all Swarovski ATX configurations at a minimum. And since Swarovski is way more happy to sell us their chintzy 45066 band-aids than they are to retrofit their lunatic Swarovski Standard Tripod Rings and the Swarovski Professional Tripod Head is more optimized for stowing / not using than it is for using...
With the original Gitzo label flavor:
http://www.gitzo.com/us-en/gimbal-fluid-head-ghfg1/
Gimbal Fluid Head
The Plate is twice as long - 140 versus 70 millimeters. Part DE1108145 for 95 bucks from B&H as a:
Gitzo GS5370LDR Long Quick Release D Profile Plate
Swarovski ships with a (3/8-16 version of):
Gitzo GS5370DR Standard Quick Release D Profile Plate
Regarding the 140...
- I wonder how Swarovski figured out that we'd all be fine with one half the length.
- Ships - as illustrated above - with the three Foot Screws installed. One end of the slot is threaded for 1/4-20 for installation/removal. (Would've been nice if they'd told us or illustrated that somewhere.)
And we can get these plates at least up to 200 millimeters: Gitzo Series 1-5 Aluminum Extra Long Quick Release Plate - GS5370XLC
An ATX 95 with an Arca-Swiss Foot clamps directly into the Lens Support Clamping Channel just fine. Both Standard and Arca-Swiss Feet are 43 millimeters long. When we're balanced we're wasting the fore 17 millimeters / 28 percent of Clamping Channel and extending 13 millimeters fore beyond the clamp's centerline. BFD.
An 85... not so much. We have a lot less weight up front so we need to clamp a lot farther aft under the Scope (read on the Foot). At balance the Foot's projecting 20 millimeters fore out of the Clamping Channel and leaving 37 millimeters of aft Clamp length empty. We're clamping 23 millimeters / 53.5 percent of the Foot using 38 percent of the Clamping Channel and falling 7 millimeters short of the Clamping Channel's latitudinal centerline.
Relevant Scope Rule One... For max stability we want to be as low as possible above the Tripod Spider. (And, yes, we understand that there's a trade-off when going up the Tilt Arm to hit our neutral tilt resistance point.) With our PTH configuration that's gonna be with the Lens Support all the way down on the Tilt Arm with the Scope's Foot directly on the Support's Scope mounting surface.
The Gitzo Plates take us up:
- 12 millimeters
The Swarovski Balance Rail takes us up:
- 23 millimeters for a 65 on Step 1 (the configuration nobody's ever actually used)
- 33 millimeters for an 85 or 95 on Step 2
The front end of the ATX 95 projects below the plane of the bottom face of its Foot - such that when the Scope's off the Head and on the table it's tilted up a wee bit with the Sunshade's fore 06 point taking some of the load. With the 45066 screwed in (adequately and no more if we want to separate it again easily) the front end is so clear that we still have air with the Seymour 475 Solar Filter installed. Not a horrible idea to have one available in the Backpack.
---
As we can see from these:
http://c1.staticflickr.com/1/941/43965137332_07b7d12e6c_o.png
http://c2.staticflickr.com/2/1815/43294926474_41bec4c70b_o.png
and other photos above the Trapezoid Projections (which are engaged in all Arca-Swiss Clamping Channels) of all Gitzo/Swarovski Arca-Swiss Plates feature little beveled Notches at all Fore-Port and Aft-Starboard corners which greatly facilitate all slide-in (versus roll-in) engagements. Illustrating with the Feisol UA-180 Lens Clamp and the ATX 95 with a 45066 Plate...
- Pan and Tilt clamped reasonably firmly towards target (or whatever) and level, Fore and Aft Lens Clamp Knobs backed off from hard three or four half-turns, ATX rolled to 09 or 12.
- We're standing at normal viewing position.
- Lift Scope at or reasonably near balance point from above with right hand (palm down), keep Scope reasonably well aligned fore and level and plant a couple inches of the port aft edge of the 45066's bottom face on the top face of the Lens Clamp's port fore edge.
- Slide to starboard until the port edge of the Trapezoid drops into the port side of the Clamping Channel.
- Keep Scope properly aligned fore-aft and slide fore until we're about three millimeters shy of dropping out of the front end.
- Yaw to port enough to drop the starboard edge of the bottom face of the Trapezoid off the fore end of the Lens Clamping Bar.
- Pivot/Yaw from the 45066's port aft corner to starboard to get this Plate's aft edge properly aligned and engaged in the Clamping Channel's fore edge. This is the point at which our Notch really pays off.
- Slide aft to balance point - clearing the Safety Pin if necessary - and hard clamp.
This drill can be run fairly easily by feel - gloves on and blindfolded.
Same procedure for an Arca-Swiss Foot but no Notch so bit more demanding.
----
- BR - Balance Rail
---
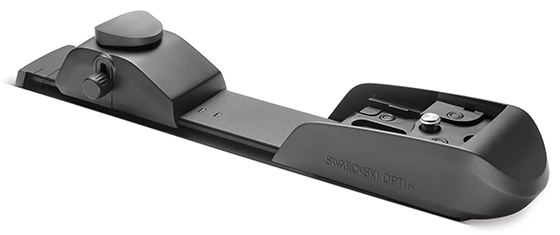

32-14811-14824
http://c2.staticflickr.com/2/1793/43832703131_5091524228_o.png
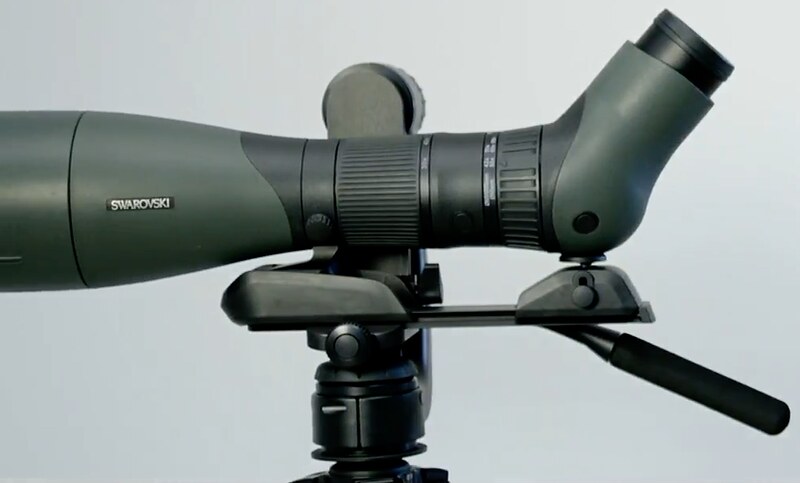
20-05320
http://c2.staticflickr.com/2/1778/43116099914_6c6ae29d10_o.png

http://www.youtube.com/watch?v=KyfpkPSiEUk
Video Tutorial: BR balance rail - set up and mounting of SWAROVSKI OPTIK spotting scopes
---
Another way of saying that we're not likely gonna be able to balance any of our Swarovski glass clamped directly into any of our Swarovski label heads. Also that the only ATX roll orientation at which it will be possible to balance is 12.
---
2020/04/09 - For anything but digiscoping the Balance Rail is an unmitigated disaster. I acquired one very early in the game 'cause I was pretty clueless, knew zilch about Plates, fell for the marketing hook, line, sinker.
---
2023/05/10 - And digiscoping itself is an unmitigated disaster. And nowadays I do damn near all my Scope work using the Feisol UA-180 Carbon Gimbal and my remaining functional PTH setup rarely sees either the light of day or dark of night. And I highly recommend likewise. But I spent so much time and effort getting understandings of the issues and documenting stuff and it's kinda fun analyzing and exposing scams... So...
---
2023/05/29 - And in the single hyped application in which the (or a) Balance Rail makes such a positive difference...
http://www.photoinfos.com/Spektiv/Swarovski-ATX-STX-spotting-scope.htm
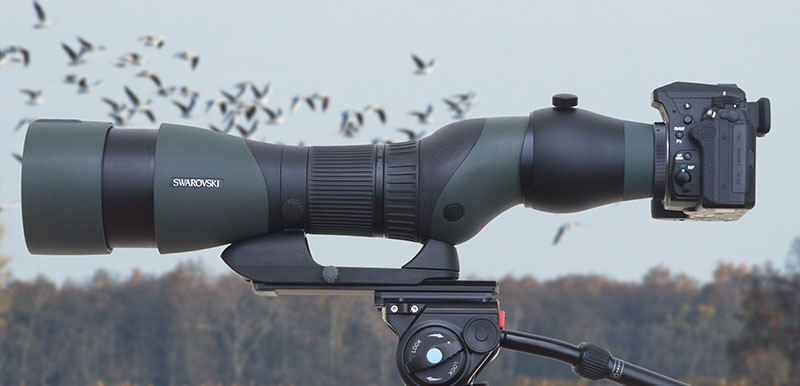
...that it can't be considered optional...
http://live.staticflickr.com/65535/50726899226_df28119ae0_o.png
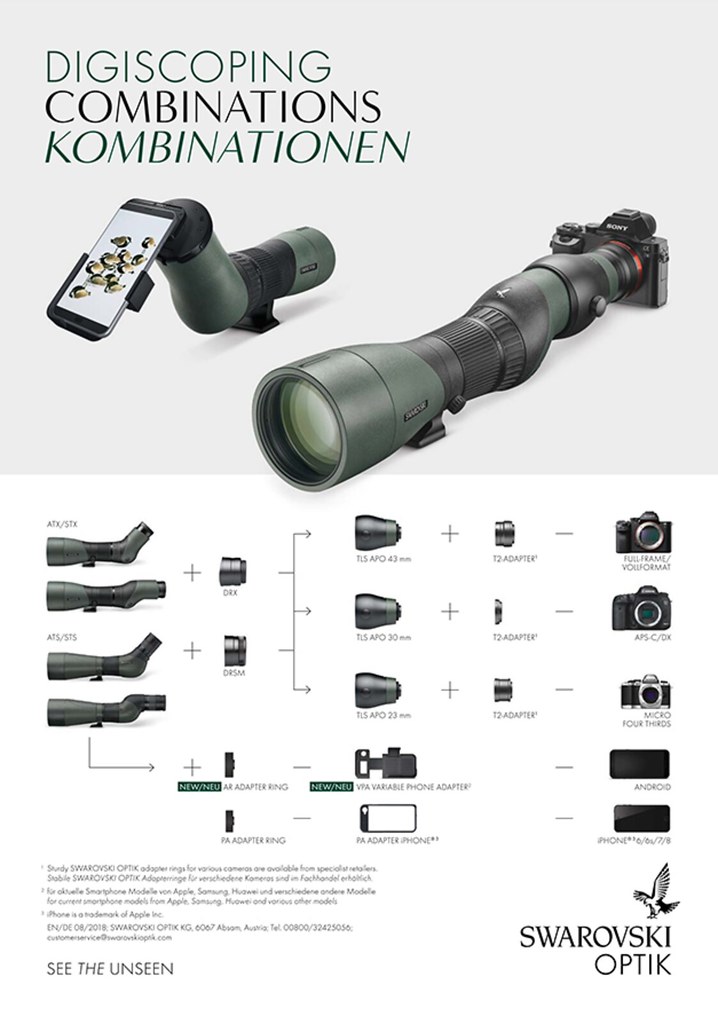
http://www.swarovskioptik.com/binary/10008.614112
...Swarovski makes no hint of a recommendation. Guess they don't want their customers to start thinking about any actual real world issues.
---
To give credit where some is due... Balance Rails DO play semi legitimate roles in some of their videos at:
http://www.youtube.com/@swarovskioptiknature/videos
---
Note that Swarovski won't put it's label on the 140 millimeter Plate - which would be all we'd ever need to precisely balance any relevant Glass we're trying the get clamped into the PTH's 60 millimeter Clamping Channel.
---
Got my hands on a Balance Rail on 2018/04/12 and quickly realized what I should've figured out before - that it wasn't gonna do shit for me in the balance department on the DH101 Head...
19-020119
http://live.staticflickr.com/65535/51387635980_822227dc6d_o.png
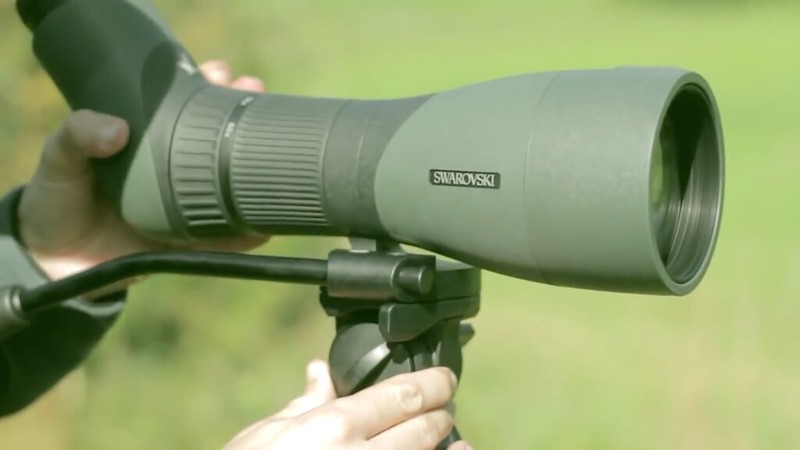
48-051018
http://live.staticflickr.com/65535/51391384843_bb09557938_o.png

...save maybe for when shooting out horizontal or near. So then I immediately figured I needed to bite the bullet and amend my arsenal with the PTH and did so. But first let's look at some DH101 specific issues and general ones not related to the head on which it's gonna be clamped.
With respect to the DH101 - or any other head which mounts glass topside - if we're balanced with the glass level we won't be when we're tilted up or down. We're moving the CG aft or fore respectively and the more we tilt the more the glass will wanna help us. And with the Balance Rail for all Swarovski Glass save for the ATX/STX 65 we're 47 millimeters higher above the DH101's pivot point than we'd be without. On the Step for the 65 we're 10 millimeters lower than that and - to deal with the backwards rotated Foot along with the CG closest to the back end of the Ocular - 38 farther aft.
Balance Rail / DH101 Head Compatibility... The flip side:
1-03401
http://c2.staticflickr.com/2/1833/43949951251_7749d8df63_o.png
Ventilated along the centerline at eight positions:
- 1-011 - 2-025 - 3-039 - 4-065 - 5-088 - 6-102 - 7-170 - 8-193 - millimeters
- diameters:
-- 1/4-20: 1 - 5
-- 05 millimeters: 2 - 6 - 8
-- 10 millimeters: 3 - 4 - 7
1 - 5 -- can be used for connection of the DH101's 44066 Plate
2 - 6 - 8 -- smooth bore, could probably be tapped for 1/4-20 but aren't and serve no function
3 -- mounts the 85, 95, 115
4 -- mounts the 65 (with its backwards projecting Foot)
7 -- ventilation
3/8-16 - Mounting Screw installed - x:
- 1.250 - 3
- 0.875 - 4
The bottom/head ends of the Mounting Screws are:
- slotted for using a Nickel to torque and clamp the Glass
- tapped for 1/4-20 so we could get mildly creative and get a 44066 Plate firmly screwed in at those points
And it's hard not to believe that at some point in the development of this beast those two points were intended to be options.
The threaded area up top of the Mounting Screws - just a bit over three spins - is drilled through side-to-side and accommodates a plastic plug which serves a Nyloc function. How come? We don't have and have seen no downside to not having any resistance enhancing features for any other 3/8-16 connectors for our Glass. So all it does is make it more of a pain for reconfigurations.
Distance between existing 44066 Plate mounting options 1-011 and 5-088 - 77 millimeters.
The CG of the Scope / Balance Rail combo for the:
- 85 - 75 millimeters - 64 aft of Option 1, 13 fore of Option 2
- 95 - 45 millimeters - 34 aft of Option 1, 43 fore of Option 2
So we go with the lesser of the available evils and connect the 44066 at 5-088 for the 95 and 1-011. So we're not and can't be balanced - in any definition of the term - using the DH101 on either of these ATX Scopes.
Or we could just get a fuckin' Feisol UA-180 and clamp at any optimal millimeter increment we could have for the occasion with some sliding of the Glass and twisting of a couple knobs.
Balance Rail Foot Screw Washers...
Note that the Balance Rail is secured to the Scope's Tripod Foot with a (heavy) 3/8-16 screw. Between the Foot Screw's head and the relevant area of the Balance Rail's underside - the periphery of the forward hole...
1-03401
http://c2.staticflickr.com/2/1833/43949951251_7749d8df63_o.png
...for our ATX/85-95 combo - is installed a pair of washers. The washers have toothy and smooth sides. The smooth sides go back-to-back and the toothy sides are exposed. (That's how they ship and the logic works.)
Although... In the how-to video they're only showing one washer installed. I'll advise toothy side up (engaging the Rail rather than the Screw's head) if we go with that option (which is probably the correct one - higher level Screw insertion sounds more solid than extra washer thickness).
---
Note that Swarovski avoids like the plague showing us a Balance Rail with anything mounted on it that DOESN'T include a 1.7x Magnification Extender...
...installed in the configuration. That's 'cause without it our Balance Rail has forty millimeters of ugly useless extension on the back end (including or plus five millimeters of endcap) which makes our configuration a substantial pain in the ass to stow between stops. (And good freakin' luck finding someone employing the Extender. I've seen it in the wild and noticed it in Swarovski users' photos and videos at the same rate as the Aiming Aid. Also note how often we see the Extender in Swarovski advertising and promotional material when there isn't a Balance Rail involved.)
(That photo of the configuration above is from their Balance Rail page in their Spotting Scope Accessories section. Balance Rail, ATX 85, Extender. If it's more power that we want then why aren't we using a 95? The extra cost is about the same and the results will be far superior.)
Also note that nowhere do we see a 65 mounted on the Balance Rail - not even as an illustration in the Owner's Manual. They show us where to put it but not what it looks like. Can't be very elegant. Haven't even seen that configuration anywhere online. Yeah, we're buying this thing a lot more for the way it looks than for what it does. And visualize an ATX 65 with no Extender mounted on that thing. Might start getting a few people thinking.
---
Landed the PTH (Gitzo Gimbal Fluid) Head twelve days after the Balance Rail and briefly played with the Scope mounted on the 45066 Plate. My ATX/85 combo DID balance - but only with the 70 millimeter length Plate shoved fore to the stops (Safety Stud then installed midpoint in the 60 millimeter length Clamping Channel) with 31 millimeters of the Plate airborne out front. And it probably balances a wee bit better another millimeter or two fore with the stupid Safety Stud pulled.
With the CG centered on the centerline of the Tilt Arm we're (with resistance dialed to zero):
- stable when we're clamped low on the Tilt Arm - tilt up or down and the Scope pitches back to level
- unstable when we're clamped high on the Tilt Arm - tilt up or down and the Scope keeps going and accelerates when we let go
- neutral when we're clamped on the Tilt Arm a bit under max height with the CG aligned with the pivot point / axle.
At neutral the tilt stays where we put it and that's where we want it if the height's not problematic for the viewer in the particular situation (which it usually is).
---
2020/03/25
Had originally thought the Balance Rail was an actual Swarovski product - but had been questioning that assessment for a long time. Swarovski Service had gotten back to me the previous day about getting a replacement for the Aft Support (Slide) component that I'd frozen attempting to get to get things rock solid. For the stuff they don't make and just label - everything that's not their Glass - we've acquired new from an authorized dealer we get a two year guarantee that gets us a replacement. And after that we can go fuck ourselves.
And no, we can't just get - or pay to get - the ten dollar component. So they sent me a whole new Rail. Thanks, but what a waste. And...
http://www.swarovskioptik.com/us/en/birding/about-us/sustainability-at-swarovski-optik
Sustainability at SWAROVSKI OPTIK
---ENVIRONMENTAL FOOTPRINT - BIODIVERSITY - SOCIAL RESPONSIBILITY
In their PTH instructional video Swarovski leaves us with the impression that the Balance Rail is pretty much obligatory. 13.2 seconds into the video...
01-00918
...is the last we see of the 45066 Quick Release Plate. They don't even show it being removed to make way for the Balance Rail.
Disassembly. Three main components: Rail and Fore and Aft Supports. Pop out the two Arca-Swiss compatible Collets for the two fore mounting options. The heads of two screws are exposed and a 4 millimeter Allen bit takes them out. The Fore Support slides off the front end and the Aft Support in slide mode can follow it.
On the aft end of the Rail itself are six numbered graduation lines which, in conjunction with the Owner's Manual, indicate where the aft edge of the Aft Support should be set to accommodate the various Swarovski Scope configurations. Ignore them. Just set the fuckin' Support such that the Pad will lock straight up to the low point of the bulge of the relevant ATX/STX Ocular Module. Err on the aft side (end) to ensure that the Pad doesn't interfere with operation of the Zoom Collar. (I prefer it a bit aft anyway.) Pencil mark position of choice.
---
Collets
The Balance Rail accommodates both their older Scope models with their Standard 45x43 millimeter (fat) Tripod Foot and the new/current Arca-Swiss 38x43 jobs. The Collet fits over the Arca-Swiss Foot to eliminate the seven millimeters of lateral slop and keep the Foot centered. (And we can get away without the Collet on an Arca-Swiss if we have to. Just ensure that the Foot is properly centered so we stay properly aligned with our Bore Sight. (And note that an Arca-Swiss Foot/Scope with or without Collet installation is clamped at the same level as a Standard Foot/Scope.))
Collet:
- 33.0 millimeter length
- 02.5 millimeter floor thickness
Minus all that elegant fairing we'd notice that the aft ten millimeters worth of our Swarovski Standard and Arca-Swiss Feet are being supported by air.
In this photo:
the Collet's been pulled from the upper / 85-95 level and left installed (stowed) in the lower / 65 level.
The Collet is fragile.
- We only need to remove a Collet if we need to mount a Scope with a Standard width Foot. (Or disassemble the Rail.)
- The Collets are secured in place by pegs on their undersides at the substantial width areas Fore Port and Aft Starboard.
- The SOP is put a thumbtip in the recess and pry upwards - as indicated by the curved arrows in the illustration and demonstrated in the video. And good luck not cracking the Collet as we attempt to pry the Fore Port peg out of its recess.
- The safest method of removing the Collet is to slide an Arca-Swiss Foot forward fully into it and lift it out. But we can't use this method:
-- if we don't have an Arca-Swiss Objective
-- on the low 65 step if we don't have a 65 Arca-Swiss objective
- Next safest method...
-- note the starboard side recess under the aft edge of the Collet (as per the Owner's Manual illustration above)
-- hands palm sides in clamping the aft run of the Rail
-- thumbtips contacting the aft edge of the relevant step (65 or 85/95), (nails up)
-- starboard thumbnail into the recess
-- carefully, gently apply lifting force just enough to pop the Aft Starboard peg out of its recess
-- port thumbnail into the narrow space we just opened up on the port side
-- press up evenly with both thumbnails to pop the Fore Port peg and completely free the Collet
-- if Fore Port is uncooperative gently encourage it with a flathead screwdriver (or toothpick) inserted underneath the relevant Collet area
- If we're alternating between a non 65 Standard and Arca-Swiss Objective Module stow one Collet on the 65 Step and the other in the spares stash. (Or if we're shooting with a 65...)
Best/Easiest/Safest procedure for installing the Balance Rail on the Scope. (And for simplicity we'll assume either a Swarovski Standard Foot or an Arca-Swiss Foot already wearing the Collet)...
- Balance Rail minus Foot Screw (and Washers) on flat table surface aimed right with Aft Support unclamped and in position. (Or, if the Aft Support is already clamped in position with its Pad at the proper height, leave it alone and disregard further relevant instructions.)
- Properly position the Scope's Foot on its step, with right hand press down to bring it flush - no rocking permitted - the Scope and Balance Rail both parallel and horizontal.
- With left hand set and sufficiently lock the Aft Support's Pad at the appropriate height.
- Rotate the Scope / Balance Rail assembly counterclockwise to bring the aft area clear of the table surface and allow us to grasp halfway between the Fore and Aft Supports positions and hold the two elements firmly together.
- Roll the assembly upside down, insert the Foot Screw, tighten hard with our Nickel (screwdriver).
- Loosen, adjust, set the Aft Support.
---
One-Size-Fits-All...
- Note that up front we have two identical Scope Tripod Foot mounting steps - a fore/high one for the bigger lenses and an aft/low one for the 65 (with its Tripod Ring/Foot reversed to deal with the farther aft CG of the configuration). If we don't have and don't want a 65 we don't need and don't want the aft/low step. We lose the goddam thing and we can:
- drop our Scope 10 millimeters lower with respect to whatever it is upon which we're mounting (think stability and vertical adjustment range)
- connect with the shorter and lighter mounting bolt
- reduce the height - and length - of our Aft Support component
---
Engaging Lens Support / Setting To Balance Point...
We'll start with the:
- Scope glass capped (preferably)
- Scope / Balance Rail assembly:
-- tilted down to vertical
--- Balance Rail facing us
--- starboard side (still) starboard
-- being:
-- supported by the fingers of our right hand between the:
--- Scope and Balance Rail
--- Scope Foot and Balance Rail Aft Support
- Index finger as far up (aft) aft as it will comfortably go - wedged in between the Scope and Aft Support
- Lens Support:
-- Clamping Lever rotated to mildly tight
-- Clamping Channel clamped at minimum width - as things would be for transport
-- oriented to engage the Scope / Balance Rail assembly in the latter's current orientation
-- being held by our left hand using its Clamp Wheel as a handle
Bring the Lens Support across a bit to starboard of the Balance Rail, angle its starboard side away from us / forward a bit, just above / clear of right hand, contact the Balance Rail's starboard edge with the Clamping Channel's surface a bit starboard of center, pull back to port to hook the starboard (fixed) edge of the Channel with the starboard edge of the Balance Rail. Like:
11-03914
http://c2.staticflickr.com/2/1794/28948928777_459f8655ba_o.png
(except...)
Secure that stage of engagement by pressing right thumb onto the middle of the Lens Support's bottom surface.
While maintaining that pressure spin the Clamp Wheel clockwise (from our backside perspective) with left hand to open the Clamping Channel to the point at which the bottom face of the Clamping Channel snaps flush with the undersurface of the Balance Rail.
Spin the Clamp Wheel counterclockwise to mildly tight and back off a hair.
Grasp the Focus/Zoom Collars area of the Scope with left hand and transfer right to grip the area of the Objective Module just below / fore of the Tripod Ring.
Tilt the Ocular end of the Scope down away to near horizontal.
With left hand relocate the Lens Support to bring its fore edge to the balance point pencil marks we have on the Balance Rail's bottom surface(s) and hard clamp.
When we know / understand what we're doing this one can be killed in fifteen seconds. In the video we see Hans eat up ten but he starts with the Lens Support:
- mounted on the Tilt Arm
- already opened up to accept the Balance Rail
To disengage resume final support configuration, press right thumb on what would be the top fore corner of the Lens Support's Tilt Arm contact face, spin the Clamp Wheel loose with left hand until the Slide pops free, spin the Wheel back to full close.
---
Note with respect to 11-03914 above...
The D110896 Plate Lock is held out to port (outboard) by a pair of springs behind the pair of alignment pins. And thus angling in to starboard to catch the starboard edge of the Clamping Channel is OK. But in a configuration minus springs - like what I needed to do for my modification of my Feisol UA-180's Lens Clamp to permit clamping of Swarovski Standard - we need to angle in to catch the mobile edge to ensure that things are flush and full out before rolling to level and completing the engagement.
And I'd venture that that's just a better practice in general if it's six of one and half a dozen of the other. And I can't see a scenario in which that wouldn't be the case.
---
For transport and/or storage screw a 3/8-16 nylon nut onto the Balance Rail's Foot Screw to trap it and its washer(s) in place on the assembly, slide the Aft Support as far fore as possible, lock it down with the Pad depressed using moderate torque.
---
The idea of using Button Head Socket Cap Screw...
http://live.staticflickr.com/65535/49698202922_78183aa578_o.png
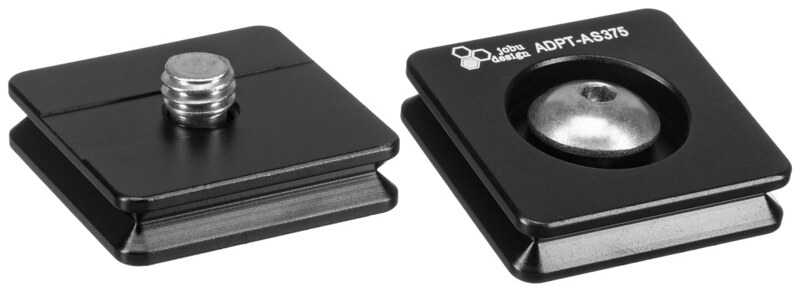
...has an appeal but the stock component has a:
- shaft:
-- with threads projecting out from only at the top end where the engage something
-- substantially hollowed out through its lower range
- head slotted for torqueing up and removing using a Nickel as a screwdriver
while the hardware store alternative weighs a ton (18.8 versus 10.6 grams) and requires us to have on hand some flavor of a 7/32 inch Allen tool.
-----
Swarovski Standard to Arca-Swiss sans Plate
We can jump through some hoops and quite safely clamp a Swarovski Standard 95 Foot directly into the Lens Support's Clamping Channel minus an Adapter Plate (45066) - 'specially if the Lens Support will be dedicated to this glass and live with it in the bag. We have enough width, threading to make this safe - as secure and nearly as elegant as we'd be with the 85's Arca-Swiss Foot in the unmodified Lens Support.

For safety and safety margin we're relying on numbers of Lens Support Mounting Stud threads - in- and out-board - engaged. On this Stud with everything Arca-Swiss we're fully seated in the Lens Support Body after 6.75 revolutions - number of 1.00 millimeter threads - and fully clamped with the Clamp Wheel spun a bit under 8.2 revolutions - 1/4-20 (thread spacing 0.79 millimeters). So threaded depths are 6.5 and 10.4 millimeters.
BUT... The depth of the threaded sleeve which is the heart of Clamp Wheel is only about 6.0 threads (7.6 millimeters) so we're already wasting a significant degree of real estate on that end.
Let's balance things out a little better.
Lose the little Flat Head Screw that plugs into the port end of the Mounting Stud for the time being.
Back the Stud out of the Lens Support Body 3.0 revolutions (millimeters) and now we're hard clamped with 3.5 revolutions (millimeters) worth of Body thread/depth and about 3.0 revolutions of engagement with the Clamp Wheel threads. Nothing will be going anywhere.
Things will be cocked a wee bit counterclockwise. Our spring loaded Alignment Pins are 4x24 millimeters - 8 seated in their Clamp recesses, 11 exposed, 5 back into the Lens Support Body. We'll do better with 30 millimeters.
If we wanna verify that we've backed the Mounting Stud out of the Lens Support Body precisely 3 revolutions... If our Dial Caliper shows about 0.123 inches (a hair's breadth south of 1/8) between the port/outboard face of the Lens Support Body and the starboard/inboard face of the Mounting Stud's MidHead then we're good.
Let's make things semi permanent.
A Number 10 nylon washer has:
- an ID of 0.200 inches - just enough to install with a bit of effort onto the M06-1.00 starboard end of the Mounting Stud
- an 0D of 3/8 inches - small enough to:
-- stay comfortably clear of the Lens Support Body's mounting surface
-- not project below the Lens Support Body's undersurface
- a thickness of 1/32 inch
Let's install four of them on the aforementioned M06-1.00 starboard end of the Mounting Stud and work them all the way in to the port (inboard) face of the MidHead.
Screw the Mounting Stud 3.5 revolutions into the Lens Support Body. The stack of washers won't want us to torque things much more with the wrench and won't allow the Mounting Stud to screw in any deeper without it.
Install the Scope (Swarovski Standard Foot) and we'll be hard clamped with a bit shy of three and a quarter revolutions of the Clamp Wheel.
Let's get those 30 millimeter Alignment Pins to finish up doing things right.
First let's do some measurements (millimeters) so's we know what we're dealing with and how to optimize things. And note that our Springs can be fully compressed and won't be damaged by any sane degree of clamping force.
Arca-Swiss
Plate
- 24.0 - Alignment Pin
- 02.5 - Alignment Pin projection from otherwise empty Plate Recess
- 21.5 - Plate Recess - 24.0-02.5
- 17.5 - Alignment Pin projection from Plate Recess - Spring uncompressed
- 06.5 - Alignment Pin length within Recess - Spring uncompressed - 24.0-17.5
- 15.0 - Spring uncompressed - 21.5-06.5
- 08.5 - Alignment Pin projection from Plate Recess - Spring fully compressed
- 15.5 - Alignment Pin length within Recess - Spring fully compressed - 24.0-08.5
- 06.0 - Spring fully compressed - 21.5-15.5
Clamp
- 15.5 - Alignment Pin projection from Clamp Recess
- 08.5 - Clamp Recess - 24.0-15.5
Recesses
- 30.0 - Total - 21.5+08.5
- 06.0 - Recesses-Pin - 30.0-24.0
Gap
- 00.0 - Gap Min
- 02.0 - Gap Clamp
- 06.5 - Gap Max
Recesses
- 30.0 - Recesses at Gap Min - 21.5+00.0+08.5
- 32.0 - Recesses at Gap Clamp - 21.5+02.0+08.5
- 36.5 - Recesses at Gap Max - 21.5+06.5+08.5
Spring
- 06.0 - Spring at Gap Min - 30.0-24.0
- 08.0 - Spring at Gap Clamp - 32.0-24.0
- 12.5 - Spring at Gap Max - 36.5-24.0
Swarovski Standard
Plate
- 30.0 - Alignment Pin
- 23.5 - Alignment Pin projection from Plate Recess - Spring uncompressed - 17.5+06.0
- 14.5 - Alignment Pin projection from Plate Recess - Spring fully compressed - 08.5+06.0
Gap
- 03.0 - Gap Min
- 11.0 - Gap Clamp
- 12.0 - Gap Max
Recesses
- 33.0 - Recesses at Gap Min - 21.5+03.0+08.5
- 41.0 - Recesses at Gap Clamp - 21.5+11.0+08.5
- 42.0 - Recesses at Gap Max - 21.5+12.0+08.5
Spring
- 03.0 - Spring at Gap Min - 33.0-30.0
- 11.0 - Spring at Gap Clamp - 41.0-30.0
- 12.0 - Spring at Gap Max - 42.0-30.0
So to make sense of those numbers...
Our Springs will only compress down to 06.0 millimeters. When we fully clamp our empty Arca-Swiss Channel we're there - or maybe have half a millimeter to spare. We wouldn't be able to close the empty Channel down to a 3 millimeter gap on our Swarovski Standard version with 30 millimeter Alignment Pins 'cause the Springs can't compress down to half of what it's possible for them to compress. So our Gap Min after we get the 30 millimeter Alignment Pins actually installed will go up to 06.0. (Just coincidentally the same figure for max Springs compression.)
And our Springs stop functioning as Springs at 15.0 millimeters.
With 30 millimeter Alignment Pins our 15 millimeter Springs will be compressed to 11 millimeters when we're hard clamped on our Swarovski Standard Scope Foot and when we're full out only another millimeter for separation or installation we're at 12 with 3 to spare. Not bad. If we went to 35...
Ideally we'd want our Clamping Channel width to bottom out to just a few hair's breadths under Swarovski Standard width. That way when we're full clamped empty - which we'd like to and should be for most situations when the Scope will be disengaged for a substantial period - we don't have to spin the Clamp Wheel a quarter turn shy of seven to open enough to engage the Foot (laterally).
Nylon Spacers - No. 8 Screw, 0.171 ID, 3/8 OD. Two pairs - lengths 3/8 and 1/16 (since there's no such thing as a 7/16). BEAUTIFUL fit:
- ID over the Alignment Pins
- OD off the port face of the Lens Support Plate
- length between the port face of the Lens Support Plate and the starboard face of the Clamp
Now when we're hard clamped empty we have six fewer spins required to open up the Clamping Channel enough to engage the Swarovski Standard Foot. But we really don't want our Clamp seated to the least degree on the Spacers when we're hard clamped 'cause we really want the Foot to be feeling 100.0 percent of that force. With this configuration when we're hard clamped on the Foot we can still rotate the Spacers with a bit of fingertip push.
---
More numbers... Dealing with the Firmware versions of our Swarovski Standard and Arca-Swiss Lens Support stuff to port of the Plate Holder:
95 - Swarovski Standard
- Foot Width - 45 millimeters
- Alignment Pin Spacers - No. 8:
-- 3/8+1/16 inches - Fore
-- 3/8+1/16 inches - Aft
- Stud M04-0.70 recess:
-- 7.71 millimeters
-- 6.25 threads
- 1/4-20 Nylon Nut - 1
--
85 - Arca-Swiss
- Foot Width - 38 millimeters
- Alignment Pin Spacers - No. 8:
-- 1+1 millimeters - Aft
- Stud M04-0.70 recess:
-- 7.62 millimeters
-- 6.25 threads
-- 3.75 threads useable
1/4-20 Nylon Nut - 2
--
Translation, Recapitulation, Amendment...
We're pushing the envelope of the 95 Swarovski Standard assembly 'cause we have five millimeters over the intended capacity. But on the other hand the 95 is a really nice fit from a longitudinal perspective while the 85 Arca-Swiss sucks considerably. The 85 Foot clamps entirely well fore of the Mounting Stud - on longitudinal center - and projects out fore a good bit entirely clear of the Channel.
The 85 Foot in the Clamping Channel and fore of the Mounting Stud cocks the fore end of the Clamp out to Port so we put a couple 1 millimeter thick nylon Spacers (Washers) aft of the Mounting Stud, below the Clamping Channel, between the Plate Holder base and Clamp and over the aft Alignment Pin to keep things nice and square.
We're using identical pairs of Spacers on both of the 95's Alignment Pins only to maintain the Clamping Channel at a width a little shy of what's required for 95 Scope Foot engagement. They have no function when we’re operational.
No significant differences in the machining of the Mounting Studs.
On the 85 we're ditching the Clamp Wheel to prevent accidental dumping the Scope out of the Clamping Channel and replacing it with a pair of 1/4-20 Nylon Nuts. We can also cap the outboard end of the Mounting Studs with a Flat Head Screw to totally safety the assembly from anyone not armed with a 2.5 millimeter Allen Key but if we're on our own and/or gearing for swapping out or otherwise pulling the glass...
The port face of the Clamp features a 9.5 diameter 2.0 depth millimeter recess around the Mounting Stud port into which an inboard flange of the Clamp Wheel normally seats. This is bad news 'cause we're now down to two threads worth of Nylon Nut engagement.
Good news... An 8 millimeter Flat Head Screw happens to bottom out - at 6.25 rotations/threads - in the Mounting Stud's recess at the same point it's clamping our fully engaged Nylon Nut secure. So the Nut threading could be totally stripped and it wouldn't matter in the least - with respect to safety/security.
The Nut - hex so 60 degrees per Face. With the Clamping Channel empty screw the Nut on 420 degrees (one and a sixth rotations). We have just enough clearance to slide our Swarovski Standard Foot in from aft. Another 120 degrees (a third of a turn) clamps us as finger tight as we need and want to be. Then we get our 2.5 millimeter Allen Key and torque the Flat Head Screw in all the way.
The depth/thickness of the 1/4-20 Nut is 15/64 inches / 6 millimeters. On the 85 the length of Mounting Stud projection to port beyond the port Clamp face at full clamp is about 10.3 millimeters. So with everything generously torqued up the nylon only projects 1 millimeter beyond the steel. Given the shape of the Flat Head Screw head and the fact that it permanently distorts the contact area of the outboard Nut's outboard face into a conical depression it works out that we have a perfect fit when everything’s operational. The 6 millimeter Flat Head Screw is as fully screwed in as possible with the Nuts installed as it would be without them.
(If we go to an 8 millimeter Flat Head Screw - the next available size up - it bottoms out after about five and a half rotations and projects out in space over 2 millimeters where we don't want it to.)
The Arca-Swiss 95... Very narrow safety margins with our modification. We're almost totally dependent on side clamping pressure and there's damn near nothing maintaining downward grip with the modification for the Feisol UA-180 Head and considerably less with the PTH. The problem here is that the Quick Lock rolls a wee bit counter due to slop and flex in the assembly and starts providing an upward avenue of escape. Thus we need the extra torque force afforded by the Clamp Wheel.
---
Arca-Swiss Hoops
We're gonna leave our Mounting Stud fully torqued into our Plate Holder. Nonnegotiable. And that configuration - irrespective of other modifications - is gonna leave our minimum Clamping Channel about 1.5 millimeters too wide for Arca-Swiss. (Damn. SO close.)
The issues which prevent us from achieving that figure:
- 30 millimeter Alignment Pins
- Spacers over the Alignment Pins
Lose them - along with the Alignment Pin Springs. But not literally 'cause those Springs are extremely ease to lose even when we're trying hard not to. (A magnet does a pretty good job of finding and recovering them.)
Now for:
- the 85 Arca-Swiss Foot we throw a wooden toothpick in at the inboard/starboard edge of the Clamping Channel
- an Arca-Swiss Plate we stretch a rubber band around the entire lower/dovetail engagement projection.
Regarding the latter strategy... I have a rubber band that measures (millimeters):
- 6.5x1 - cross section
- 190 - circumference
Stretches around the dovetail projection fine, lives there, works great.
Other issues... If:
- we're:
-- anticipating this drill best use the Clamp Wheel minus the Flat Head Screw rather than the 1/4-20 Nut plus the Flat Head Screw
-- using the stock 24 millimeter Alignment Pins we can keep them and their Springs
- time is an issue we'll be OK minus Alignment Pins and Springs when we revert back to Swarovski Standard
----------
Balancing
We're not dealing with frictionless bearings. We're dealing with deliberately built-in and desirable fluid resistance. So there will be ranges in which we find ourselves balanced for the pendular and neutral for the tilt issues. And to identify the middles of the ranges we need to go to minimum resistance on the Tilt Dial and find the two edges of the ranges - the points at which things begin to go south - Scope with Sunshade and Eyecup fully extended.
---
Pendular Balance
Scope clamped at the bottom end of the Tilt Arm.
Loosen the clamp and slide the assembly fore/aft until we have it staying level.
Tilt down until contact is made with the Pan Dial and release. Same deal tilting up. We want the assembly to - respectively - stop rising/falling a little shy of level (given that there will always be a bit of resistance in the system).
Asterisk... With a heavy assembly mounted low on the Tilt Arm (as in on a Plate rather than the Balance Rail) it's possible during testing for the Tilt Arm to swing down and beyond vertical. Reduce your release altitude equally for the fore and aft drops until the Tilt Arm hangs up shy of vertical.
Hard clamp the assembly and pencil mark the tracks on the underside of the...
http://live.staticflickr.com/65535/50966441071_57a6a6d78e_o.png
http://c2.staticflickr.com/2/1833/43949951251_7749d8df63_o.png
1-03401
...Plate or Rail at the fore and aft edges of the Lens Support.
Same routine for our digiscoping assembly - which will move the assembly way the hell fore / balance point way the hell aft.
And if things are moving fast just go for rough. It won't matter much.
Me...
32-14811-14824
http://c2.staticflickr.com/2/1793/43832703131_5091524228_o.png
This is a 95 millimeter ATX configuration with a 1.7 Power Magnification Extender between the Objective and Ocular Modules. And if it's balanced it's balanced about where my 85 millimeter ATX configuration is - with the DRX Adapter (for digiscoping - see below) installed and its Sunshade and Eyecup fully extended.
Also note how nicely the aft points of the Fairing line up with the aft face of the Lens Support.
---
Tilt Neutrality
2019/05/13 - I've just recently (since previous edit) had a MAJOR revelation regarding the Swarovski Professional Tripod / Gitzo Gimbal Fluid Head - much thanks to Gitzo and total zilch to Swarovski.
I knew damn near nothing as I started wading into this game and one of my major issues was to be able to keep the Scope locked on the target while adjusting the height for other viewers. And I'd ASSUMED that that had been one of two primary considerations for this design - the other being stability.
Wrong. This Head wasn't designed with the birding spotting scope in mind. It was designed for photography - one camera, one person.
I'd actually nailed it before. Section (now deleted) titled "PTH System Stability" - in which I discussed how pendular stability goes to zero then negative as we move up the Tilt Arm and how we could use zero to have the Scope stay where we aimed it - just didn't adequately appreciate the implications.
The idea is to first drop our Camera/Scope all the way down with the Tilt Arm free to swing and slide it fore/aft to get the CG centered - like we've been doing...
http://cdn.manfrotto.com/media/catalog/product/manual/instructions-Gimbal-Fluid-Head.pdf
...then go up the Tilt Arm until the CG's colinear with the axis of the Tilt Dial (which isn't quite being done in that illustration). Resistance settings backed off to minimum, our glass stays where we put it.FIG. 2 – Find the horizontal balance point
--Insert the lens and plate from above.
--Holding the lens securely in one hand, unlock the tilt Brake knob "A" with the other hand.
--Put the Lens in horizontal direction and check if it remains horizontal or if it starts to move.
--If the lens doesn’t remain in horizontal position, slide the plate "B" forward / backward until it the balanced point is found. Lock the plate with knob "C".
http://live.staticflickr.com/65535/40873483613_6cdfa2bc4f_o.png
FIG. 3 - Find the vertical balance point
--This setting has to be done only after previous operation (horizontal balance).
--With the Tilt Brake knob released, Tilt the lens about 30°-45° towards the sky and check how the lens moves.
--If the lens continues to tilt further towards the sky, you need to lower the position of the lens unlock the vertical adjustment knob "D", slide down the lens support, lock "D", and tilt the lens again.
--If the lens tilts back towards the ground, you need to raise the position of the lens.
--Repeat until you find the vertical balance point where the lens stays in position at any tilt angle.
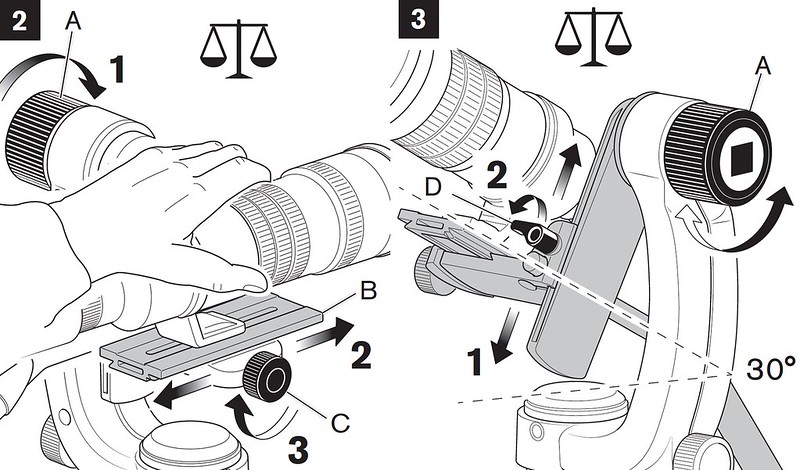
So the lower the CG of whatever it is we're clamping onto our Lens Support the higher up the Tilt Arm we're going. (All this extra engineering, structure, complexity, weight, expense and Swarovski tells us NOTHING in The Fuckin' Manual, its videos, any article I've yet to find.)
My configurations:
- STX Viewing. Heavier than the ATX but with the Ocular Module not projecting high up, lowest CG.
- ATX rolled to 10:30. Lightest weight.
- STX Digiscoping. Same as STX Viewing with a heavy DSLR camera high up on the back end, highest CG.
Note that when we're in tilt mode the assembly with the relevant center of gravity includes everything that rotates around the pivot point: Scope assembly, Balance Rail, Lens Support, Tilt Arm. The latter two don't matter when things are hanging straight down 'cause they're inherently balanced.
2019/05/14 - P.S. If you find the Gitzo manual illustrations above confusing - as I really did when I really started looking at them - it's 'cause the camera's being mounted and balanced backwards with respect to everything we've seen from Swarovski and most of what we can find everywhere else. I'm guessing it's a lefty thing. Does make the Lens Support Clamping Lever a bit more of a bitch to operate though - and it's a rather major bitch to operate when one's configured the usual way with it on the aft/near side of the Tilt Arm.
----------
Pendular Balance - Really Done Right
Although the Lens Support itself is asymmetrical any way ya wanna look at it its:
- fore/aft structure minus the Lens Support Clamping Lever
- Clamping Channel
- Clamp Wheel
are all perfectly centered with respect to the Tilt Dial, pivot point axis, Tilt Arm. So...
Indoors, out of the wind, in front of a window with a rectangular frame (and thus known horizontal reference lines).
Scope mounted on Plate, Lens Support clamped on Plate at previously calculated balance point or best effort at the moment.
Set up the PCT at full extension, O8SW and 04SE at the edge of the floor and towards and at the center of the window, 12NN back in towards our chair, pull the Bubble Level, reinstall the Ballast Hook to light finger tight.
A foot or so of substantial but low diameter - preferably under a millimeter - string. (Or a coil of lighter string.) It's tied to form a loop and needs to fit in between the Lens Support Quick Lock and Clamp Wheel and around the 1/4-20 threaded stud projecting out from the Lens Support Body.
A pillow on the carpet centered straight below the Center Column.
Unscrew the Ballast Hook enough to align it straight towards or away from 12NN. This alignment will require no more than 179 degrees of rotation. (From finger tight to off we have a bit over three and a quarter revolutions. (Let's not use any more of them than necessary.))
Hook the Loop over the Clamp Wheel and suspend the Scope / Plate / Lens Support / Loop assembly from the Ballast Hook - Scope aimed East / Lens Support Clamp Wheel facing South (us).
Loosen the Tripod Ring Locking Screw and spin the assembly such that when we're balanced everything from the front end of the extended Sunshade to the back end of the Ocular Module will be in the same horizontal plane. (For my configurations this is what would be about 04 o'clock in normal viewing mode.) This doesn't affect the balance point and gives us more apparent straight length to visually assess.
Note that we can clamp the Center Column up as we may need to until we start contacting the Legs 04SE and 08SW.
To adjust for a low nose on the:
- 85 with which we're on Plate 140 with the Plate's aft end flush with the aft face of the Lens Support we go aft with the Foot Screw
- 95 with which we're on Plate 070 we back off a wee bit from full on the Clamp Wheel and nudge the Plate aft.
Ideally we'd have a pulley in between the Ballast Hook and Loop (and a longer Loop is better) but we're already pushing the envelope on anality so when we've hit apparent balance perfection, lift the assembly up several millimeters and drop it back down to ensure there's no significant friction issue at the Hook.
----------
Balance and Neutrality Points
---
General info...
- For tilt neutrality we do height up the Tilt Arm - measured in millimeters from the middle of the bottom end of the Arm to the middle of the bottom surface of the Support. We stay put at the bottom or top of the range but we shoot for center.
- The higher the CG of the assembly/configuration the lower we go on the Arm. The STX digiscoping configuration has a higher CG than the ATX viewing (even with the latter at 12 o'clock) so the former balances lower on the Arm.
- Sunshade and Eyecup fully extended.
---
Viewing...
We're mounting for the:
- 95 on the Swarovski 45066 Plate
- 85 on the Gitzo GS5370LDR Long Quick Release D Profile Plate
We're gonna designate these Plates 070 and 140 - their lengths in millimeters - respectively.
The Feet of the 95 and 85 Objective Modules are identical distances fore of (the planes of) their aft ends.
- The 95 ATX/STX balances reasonably well on its Foot, requires little compensation, takes the short Plate.
- The 85 has a lot less mass fore of its Foot, thus balances significantly aft of its Foot, needs the long Plate for extension well fore of the longitudinal midpoint of the Lens Support Clamping Channel.
Plate 070's Foot Screw projects upwards through its center. If we want to adjust the Scope's fore-aft position we need to slide the Plate fore-aft in the Channel.
Plate 140's Foot Screw projects upwards through a longitudinal slot which allows the Safety Stud a fore/aft range of 105 millimeters. So, while fully engaging a length of the Plate in the Channel, between full fore and full aft we have an infinitely adjustable range of 245 millimeters. And we can cheat a fair bit beyond that if we must.
But as of this edit... We've pulled the Safety Stud.
The 95 configurations...
- ATX 10:30 - the Ocular Module is both lighter than and doesn't extend as far aft as the STX. So our balance point is farther fore and thus we need to clamp farther fore / slide farther aft. We'll clamp with 15 millimeters of Plate 070 back beyond the aft face of the Lens Support Clamp. Negative fifteen. Yeah, that's a fifteen into our Focus Collar real estate. Pity there's no 140 flavor slot to play with.
- But... What the hell. We're operating the Focus Collar with our left hand, palm down, forefinger aft. Our opposable thumb is opposing our forefinger so it's also aft. Pretty much a nonissue.
- STX DRX - the one we're not gonna use 'cause this is the excuse for the Balance Rail... One millimeter of empty aft Clamp range.
- Going up the Arm to our neutral tilt range - Bottom-Center-Top:
-- 80-84.5-89 - 95 ATX 10:30
-- 80-84.0-88 - 95 STX DRX
- The numbers show that CGs are at nearly the same level. And we have a slightly narrower range for the heavier configuration - which is exactly what we'd expect to see. (Greater mass of the load overcoming the internal resistance more effectively.)
The 85 configurations...
- We don't want to extend Plate 140 aft of the Clamp AT ALL because we want to stay as clear as possible of the Focus Collar so we clamp aft end flush and measure forward. To the aft face of the Foot:
-- 37 millimeters - 85 ATX 10:30
-- 54 millimeters - 85 STX DRX
- Up the Arm:
-- 80-85.5-91 - 85 ATX 10:30
-- 82-85.5-89 - 85 STX DRX
- Test figures are perfectly symmetrical - a hair's breadth better than what we got for the 95.
- We don't have a flip side shot of Plate 140 so...
http://live.staticflickr.com/65535/50966441071_57a6a6d78e_o.png
- Screw our Mounting Screw into a 1/4-20 nylon nut on the other side where the Scope would normally go. Slide our Mounting Screw to the 37 millimeter position fore of the aft face we determined for 85 ATX 10:30. Tighten up until we're safely set at 37 and our screwdriver slot is perpendicular to the Plate length. Pencil mark off of both ends of the slot. That indicates our set position for that configuration. Repeat at 54 for the STX configuration we'd prefer not to use.
Clamping ATX 10:30 minus a Plate:
- 85 - fore edge of Foot 20 millimeters fore of fore edge of Clamping Channel
- 85 - aft edge of Foot 36 millimeters fore of aft edge of Clamping Channel
- 95 - fore edge of Foot 17 millimeters aft of fore edge of Clamping Channel
- 95 - aft edge of Foot flush with aft edge of Clamping Channel
Up the Arm:
-- 88-92.5-97 - 85
-- 88-93.0-98 - 95
(Note that we can pull the Ocular Module off the back end when we're checking measurements.)
---
Digiscoping...
Table below...
- The base structure of the Balance Rail has a length of 255 millimeters. The fore/aft length (span) of the PTH's Lens Support occupies 60 of those. When we're doing pendular balance (Step 1) we'll have clear Rail fore and aft of the Lens Support. So we measure from one end or the other to hit our mark and clamp.
- The next four columns take care of tilt neutrality.
- The configurations are for the ATX/STX 85 millimeter with the DRX Adapter Sleeve kit installed; the camera's the Canon EOS 6D with the battery, 43 millimeter TLS-APO, RS-80N3 Remote installed; the hood's the Hoodman HLVKIT Live View Kit.
Fore - Aft - Bottom - Center - Top - (Range) - Configuration
Fore - Aft - Bm - Cntr - Tp - (Rg) - Config
---
041 - 154 - 67 - 72.0 - 77 - (10) - ATX - 10:30
047 - 148 - 63 - 67.0 - 71 - (08) - ATX - DRX
107 - 088 - 18 - 25.0 - 32 - (14) - ATX - Camera
122 - 073 - 08 - 16.0 - 24 - (16) - ATX - Camera - Hood
054 - 141 - 70 - 73.0 - 76 - (06) - STX - DRX
136 - 059 - 55 - 59.0 - 63 - (08) - STX - Camera
150 - 045 - 55 - 58.5 - 62 - (07) - STX - Camera - Hood
Note: For ATX digiscoping (which we're never gonna do) we're rolled to 12 o'clock (and pretty much must be). For viewing minus the DRX Adapter at the 10:30 rotation we're dropping the CG a fair bit so we compensate by going five millimeters up the Tilt Arm.
Figures for the 95:
Fore - Aft - Bm - Cntr - Tp - (Rg) - Config
---
009 - 186 - 66 - 71.0 - 76 - (10) - ATX - 10:30
023 - 172 - 65 - 70.5 - 76 - (11) - STX - DRX
113 - 082 - 53 - 59.0 - 65 - (12) - STX - Camera
125 - 070 - 53 - 58.0 - 63 - (10) - STX - Camera - Hood
Note that we're a lot farther forward on the Balance Rail due to the heavier and longer Objective element but that the heights on the Tilt Arm are all pretty close.
----------
Assemblies Definitions: Tripod versus Scope
Let's say that the Tripod assembly encompasses the Tripod and Head and a Scope assembly encompasses the Scope and a Plate. Those two assemblies will come out of the trunk and get hiked into the field as such.
And a good idea to consider the 181.7 gram Lens Support a component of the Tripod - rather than the Scope - assembly.
It doesn't stow very elegantly no matter what we do. We get an unpleasant and potentially dangerous hard bulge either way. But...
Squashed Tripod assembly:
- 84 cm - 3.0291 KG
95 ATX assembly
- 44 cm - 2.2975 KG
What should we start thinking it should be clamped to at this point? It order to get fully operational, if it's a component of the:
- Tripod assembly we have to:
-- open the Channel Clamp
-- install, secure, position for balance, hard clamp the Scope Assembly in the Lens Support
-- raise Scope/Plate/Support assembly to desired elevation on the Tilt Arm and hard clamp
- Scope assembly we have to:
-- install on the Tilt Arm
-- hard clamp at a reasonably good elevation on the way down the Tilt Arm
And catching the Lens-Support-included Scope assembly on the Tilt Arm is twenty times faster, easier, more idiot proof, safer than installing the Lens-Support-excluded Scope assembly in the Lens Support's Clamping Channel.
Using the first strategy we did all the tedious, precision, dangerous, time consuming bullshit in the kitchen two weeks ago. Going industry standard / what's-in-the-fuckin'-manual we do it every stop.
----------
PTH / Balance Rail / ATX Scope Tilt Extremes
We can go to straight up and beyond and straight down and beyond with the ATX Scope / Balance Rail assembly mounted on the PTH. (Asterisk on the straight down... We'll be looking at a lot of Panning Resistance Dial way inside our minimum focus distance range.)
For both...
- Scope rolled to 12 o'clock.
- Scope / Balance Rail / Lens Support assembly clamped at top of Tilt Arm's range, shooting-for-the horizon, tilt locked.
For up...
- Loosen tilt resistance.
- Rotate Scope tilt skyward until just before the Balance Rail contacts the PTH's Panning Resistance Dial.
- Loosen Lens Support's Clamp Wheel, slide Support up/fore enough for its bottom/aft end to safely clear the Panning Resistance Dial, tighten Clamp Wheel.
For down...
- Retract Sunshade.
- Loosen Lens Support's Clamp Wheel, slide Balance Rail full aft, tighten Clamp Wheel. (We'll be balanced mildly tail heavy.)
- Unlock tilt, tilt down.
Another Extreme Tilt Solution... Lose the Balance Rail and swap in the 45066 Plate.
Hard to imagine needing, wanting to look straight up at anything 'cept maybe something in the celestial department or straight down at anything period but it's nice to know one has the range capabilities.
----------
Feisol UA-180 Carbon Gimbal
2021/09/15-30 trip to Italy with lotsa:
- spectacular night skies with Jupiter, Saturn, Venus, Moon appearances
- interested mobs, groups, individuals lining up
Did untold hundreds of acquisitions and centering adjustments and afterwards looked back at all the effort expended and prime time wasted fucking around with the Swarovski PTH / Gitzo Gimbal Fluid Head and an issue in which by the point at which I'd dialed the pan resistance down for comfortable operation the asymmetrical and inherently unbalanced and unbalanceable Head would flop to starboard.
I have two of the Swarovski/Gitzo Gimbal Fluid Heads - GZ361445 and GZ391704. The first/original one gets all the use with my 95, the second lives mostly as a spare with my 85 and pretty much only comes out when I'm running both scopes simultaneously. On the evening of 2021/10/18 I set GZ391704 up on the back deck to hit Venus before going out on the street for Saturn and Jupiter with the UA-180 rig I'd acquired 2021/10/08 and its performance was FINE.
So there was a serious problem with GZ361445 that had crept up on me so gradually that it didn't adequately register until Italy when the situation was unbearable. And keep using the same equipment at the same level of activity and expecting better results...
Maybe other manufacturers have better engineered this basic concept but...
---
http://www.feisol.net/gimbals/feisol-ua-180-carbon-gimbal.html
http://live.staticflickr.com/65535/51546596403_41e54feae7_o.png
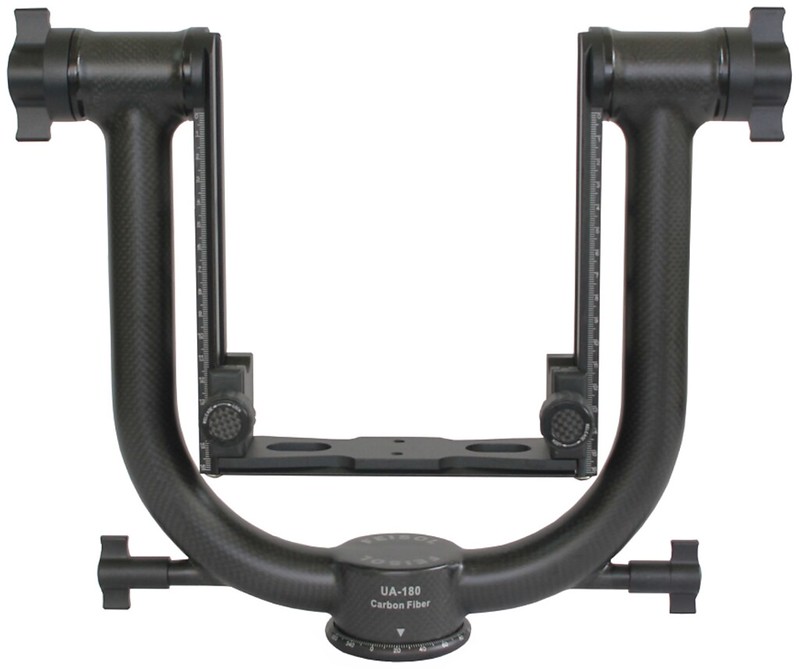
http://live.staticflickr.com/65535/51440418544_dcab2377a9_o.png
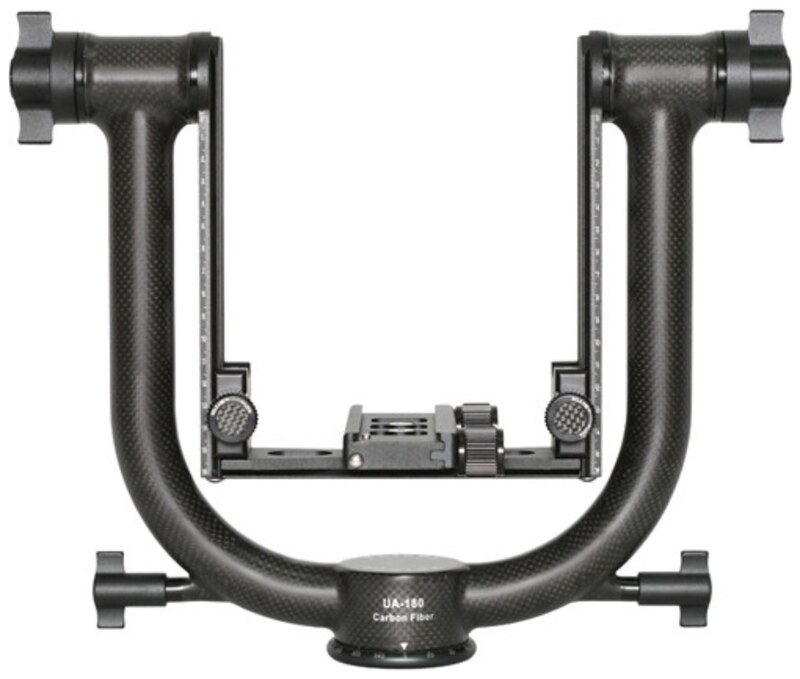
http://live.staticflickr.com/65535/51546351991_9eecdafae0_o.png
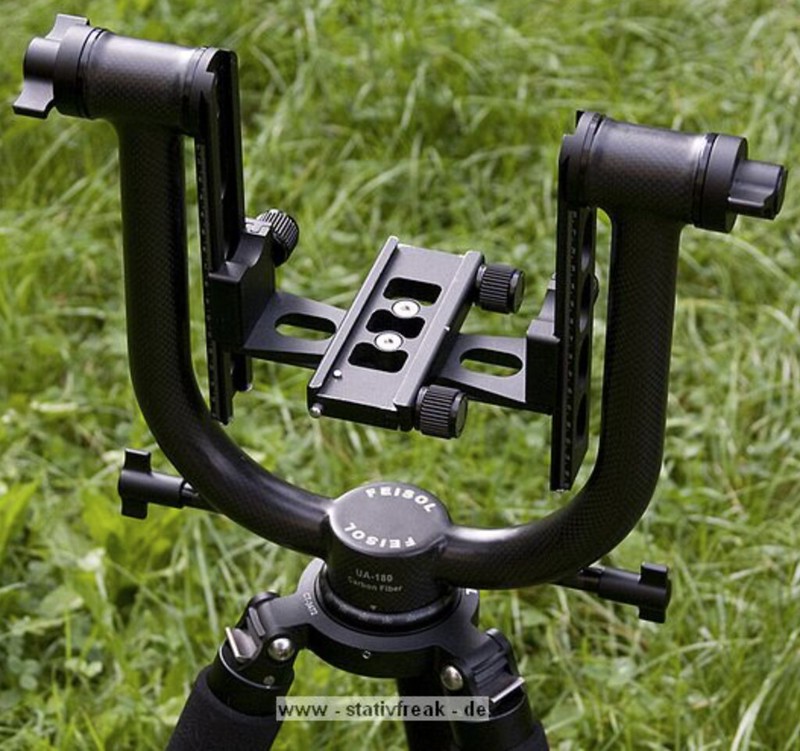
http://www.stativfreak.de/GALERIES/KOPF/FEISOL/UA-180-Gimbal/k_feisol_ua180_02_larsbrueckler.htm
FeisolUA-180-LarsBrückler
Feisol Plate QP-200
http://live.staticflickr.com/65535/51546929403_83382d0a77_o.png
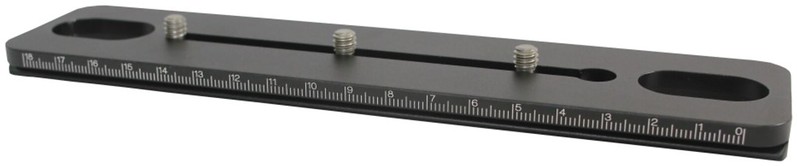
http://www.feisol.net/manuals/FEISOL_Manual_UA-180.pdf
FEISOL U-Mount UA-180 User Manual
Paired Knobs:
- Tilt Arm Lock
- Panning Base Lock
- Lens Support Adjustment - Height
- Quick Release Lock - Plate
Safety Pin - Plate
I'm convinced that this is the way to do things right - if we're not worried much about stowage issues. Millimeters width and height: 348x286. It's designed with humongous camera lenses in mind and can handle a 160 millimeter width/diameter with about 1.5 to spare. The max diameter of my ATX 95 is about 113 so it'll be much too comfortable. But my Canon binocular eats up about 133 so... And wide gives us better leverage and finer control in the panning department.
Note that all Knobs controlling clamping pressure on everything - Foot/Plate, Height, Tilt, Pan - are (identically) paired.
And note that in the Lars shot we're shooting towards the camera and operating the Lens Clamp Knobs left handed. Also gonna have a bit of a hard time clearing the Plate's Safety Pin. Or maybe he's sliding in from the back end and the Pin doesn't intrude on the Foot or Plate's balance position. And we're mounted on a Feisol CT-3472 carbon tripod - minus a center column and similar to the Gitzo Systematic jobs.
---
A real good way to think about the Gitzo Gimbal Fluid / Swarovski Professional Tripod flavor Heads is that they're UA-180s with their port mirrored structures cut off. And for way more obvious:
http://live.staticflickr.com/65535/51608607150_7b18070a95_o.png
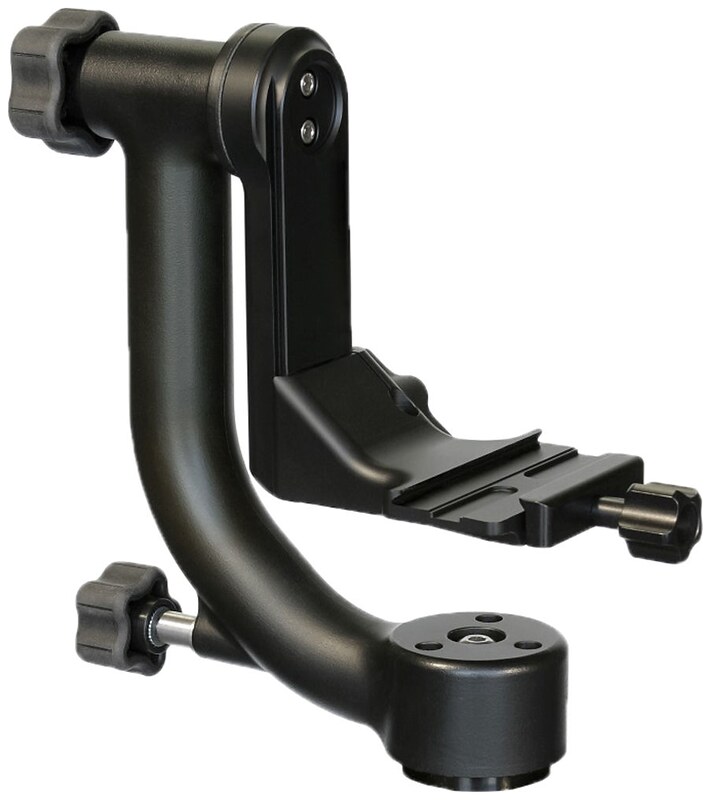
http://www.tripodhead.com/
Wimberley Professional Photo Gear - WH-200
And what possible downsides might we expect to see with that strategy. (But that looks like a pretty good head and is positively reviewed. Endorsed by Art Wolfe and in the Bryan Carnathan video (see below). And if I needed to go that route and chose between it and the Gitzo/Swarovski flavor...)
---
Landed SN/U50160140 the afternoon of 2021/10/08. Taiwan - we find out when and not before we get our hands on the box (for whatever that is or isn't worth). Major space eater, not terribly heavy, packs in the North Face Youth Recon Squash Backpack upside down with little room to spare.
---
When I first assembled my new toy and torqued it onto the top of my Swarovski PCT I checked to see if I'd be able to mount my 95 with its pain-in-the-ass Swarovski Standard Foot sans Plate, no way in hell - in factory configuration anyway. Designed for and handles Arca-Swiss just fine but the Fore and Aft Plate Clamping Wheels are separated by about 96 millimeters so we need to take a bit of care to keep the Clamping Bar parallel - or reasonably close - to the Clamp Body at all times. If we get more than a wee bit cocked things tend to jam and become problematic.
The "Swarovski Standard" Foot was obviously designed with the assumption that all connections would forever be effected by a 3/8-16 screw engagement or the snap-in capture mechanism they incorporated in their DH101 Head. I'm thinking that if they really had their shit together as much as they present they have and always have had there wouldn't be an "Arca-Swiss" standard for this gear. It would be a Swarovski standard.
---
We balance fore/aft and find the neutral point up/down the Port and Starboard Tilt Arms same as with the PTH.
Tilt worked great, panning was an ABSOLUTE TOTAL DISASTER and I was totally sickened - seeing as how I'd just coughed up half a G 'cause I needed something with better panning performance than the crap I'd been getting from my original PTH. I was baffled 'cause I'd read a really complimentary review by a serious bird guy - Tobias Hjorth - and that was definitely not what I was experiencing. Excessive resistance, adjustment had zilch effect, zero resistance slop, the three M03-0.50x10 Flat Head Socket Cap Screws securing a bottom center disc backed way the hell out... The only thing with a positive ring I could say was that it at least stayed level. Got operational enough to do a late afternoon Sun with a really cool bull's-eye sunspot for folk on the street but I'd have been better off with the PTH.
By the next morning I'd found that with the Head separated from the Tripod the panning mechanics seemed to be functioning as advertised and reported. I wonder what would happen if I installed a 3/8 inch nylon washer over the (3/8-16) Mounting Stud to lift the bottom face of the Head clear of the Tripod's Connection Plate...
PROBLEM TOTALLY DEALT WITH!!! Although I didn't really understand why until a few hours later.
The bottom (circular) face of this (any) Head seats on the upper face of the Swarovski/Gitzo Connection Plate / D104215 Assembly Disc.
The Disc is 60 millimeters in diameter and its face is a plateau ringed by a 3 millimeter wide (contact area) rim full out and about 0.6 millimeters up. That leaves 81 percent of what's inside to accommodate the 3/8-16 Stud pulling down at center and the remainder to do absolutely nothing - ignoring the moronic set screws we've pulled.
The diameter of the UA-180's flat (potential contact) area is at least 62 millimeters - so out beyond a bit. Thus after this Head is torqued onto the Mounting Stud of this Tripod there's enough flexing (temporary distortion) to totally overwhelm the Head's panning resistance control mechanics.
And I wonder what total fucking moron Gitzo had working on this "design" and what other total fucking morons they had checking, approving, implementing it.
An Everbilt washer from Home Depot - a little over 7/8 OD (wide, good thing), 25/64 ID, 1/16 thickness - overkill. An Ace flavor had a thickness of about 0.8 millimeters which was enough to put daylight between the Head's bottom face and the Tripod's Connection Plate rim but it always takes at least ten minutes to locate it after it's been dropped on the kitchen floor. And it always gets dropped on the kitchen floor at least once whenever a Head gets separated and/or reinstalled. And one will be going on the Stud regardless of what's below or above it.
---
2023/04/29 - Back then I was still in the hard-clamp-pan-and-torque-the-hell-outta-it installation mindset. With the a-bit-over-adequate approach I now employ I'd have definitely been OK - I've run the test. But the elevated rim design on that Assembly Disc is total crap regardless - along with Set Screws mentality and the total absence of any information in any of TFMs on how these components should be put together. And I'll ALWAYS be seating on a washer regardless.
---
2023/07/24 - No I won't. At proper torque level it doesn't make any practical difference. Although I like the idea of proper load distribution the washer is just one more issue to deal with and worry about losing.
---
2023/04/03 - Advisory
Everything Feisol has to say about tilt and pan ops in TFM:
(And TILT is the control the "Swivel" Arm Lock Knobs lock. And they're not "wing nuts" - they're SCREWS.)1. Swivel Arm Lock Knobs
For locking and unlocking the Swivel arm. The right hand side wing nut and the left hand side wing nut are identical in function. For maximum hold, it is recommended that you tighten both wing nuts equally.
2. Panning Base Lock Knobs
For locking and unlocking the Panning Base mechanism. The right hand wing nut and the left hand wing nut are identical in function. For maximum hols, it is recommended that you tighten both wing nuts equally.
When unlocking the Panning Base Lock, turning the wing nut past the point of resistance may result in damage to the locking mechanism.
On last night's astro mission I rather abruptly started experiencing a serious problem with panning resistance control. After locking onto a target I backed off the port and starboard knobs equally to light moderate torque and met with hard resistance and then a jump. WTF? I muscled it back and forth a couple times until things got sane again - at least temporarily.
This morning I opened up the Pan Housing Cylinder to find shards of metal and scored contact surfaces on the Port and Starboard Brake Shoes and Hub.
This UA-180 sees a lot of use and I've had no problems with tilt operation 'cause the relevant engineering has been done right - with use of lubricated Port and Starboard sets of ball bearings. For pan we're pressing smooth, fixed, unlubricated surfaces together for resistance and that's gonna be problematic. Looks like there's a reason that automobile brakes use phenolic resin to engage metal surfaces.
When I'm in the field changing from one target to another close by and tweaking for centering there are strong incentives to securely lock up targets and without backing off much muscle things for adjustments - way less time and effort than generously backing off and tightening back up. And that's no problem whatsoever with tilt - 'cause that engineering has been done right.
Granted, in TFM these guys DO say "For maximum hold/hols, it is recommended that you tighten both wing nuts equally." But that implies that anything under maximum hold/hols is perfectly OK and my DH101 and PTH Swarovski label heads are designed and intended to be used at ranges of panning resistance from light to a bit shy of locked.
So I've just learned the hard way that for this UA-180 we need to limit ourselves to three panning resistance settings - for:
- installation on and removal from the Tripod's (3/8-16) Mounting Stud, storage, stowage, transport - welded
- locked on target - hard enough to prevent inadvertent movement
- targeting - backed off beyond zilch
Pity I had to damage this equipment in order to reach this level of understanding.
---
2023/08/19
Real good ideas to always:
- stow the UA-180 with pan resistance cranked up hard
- turn hard clock at the beginning at the beginning of a set to verify that pan resistance has been cranked up hard
These mechanisms seem to have gotten a fair bit sticky and at the beginning of last night's set I found myself attempting to back off a Knob that was already backed off.
---
If/When we rather abruptly start experiencing a degree or two of panning slop in the course of attempting to lock up a target we know that our three M03-0.50x10 Flat Head Socket Cap Screws have backed out from our Mounting Base Plate - again. And it's a real good idea to periodically during a set check for play and deal with it immediately if nothing critical is going on. If we're properly organized with a chair or WalkStool set up we can very comfortably go from on target with gloves on through retorqueing to everything properly restowed, gloves back on, ready to retarget in well under five minutes.
The original Screws take a PH2 (Phillips). I replaced them with 2 millimeter Allens I was delighted to find at Ace. I'm thinking less chance of distortion and the relevant Allen key is tiny and virtually weightless.
---
To best understand how the bottom center of this beast is put together and works - and we need to - think of it as something on the order of a horizontally mounted front bicycle wheel. And three groups of elements - fixed, spinnable, resistance. And...
- This is how it would appear in a schematic - zilch to do with the order of assembly.
- The resistance elements are mounted on the main spinnable element - the Frame - and thus spin with it.
- Fixed:
-- The Tripod's 3/8-16 Mounting Stud serves as the foundation of the axle and the Head's Mounting Base Plate - which will be firmly screwed onto the Stud and immobilized - is an outward (upward) extension of the axle.
-- Three M03-0.50x10 Flat Head Socket Cap Screws lock the upward projecting Hub onto the aforementioned Mounting Base Plate / Mounting Stud assembly. The Hub is a cylinder with a flange projecting out at its top end. The profile of the flange is a wedge.
- Spinnable:
-- The Bushing is (has been) installed under the Hub (over it as we're upside down working on the assembly) and trapped in place concentrically in the Head's Pan Housing Cylinder. The top face of the Bushing is dished for flush engagement with the bottom surface of the Hub's flange. (And at this point the Hub is trapped in place by the Bushing with only its (the Hub's) bottom face accessible.)
-- The Frame is bolted to the bottom face of the Bushing courtesy of six M02-0.40x06 Pan Head Screws (PH1) around the circumference.
- Resistance:
-- Into the bottom regions of the port and starboard Panning Frame Arms are installed a pair of Pan Lock Screws. Each inboard end features a Brake Shoe. The Brake Shoes have flat top surfaces which engage the top (inside and horizontal) face of the Pan Housing Cylinder and beveled bottom surfaces which ride flush with and press in and down on the beveled upper face area of the Hub.
So the effect we're getting is one of driving a wedge in between two surfaces to increase pressure on the surfaces. 'Cept what we're actually doing (when screwing clock) is pushing upper surfaces - port and starboard - in and down on a (circular continuous) wedge to increase pressure (and panning resistance) on all contacting surfaces. (Not to mention backing off (screwing counter) to reduce or eliminate pressure and panning resistance.)
Get serious clock and we effectively freeze all pan capable components from the ground up.
Implications for reassembly...
- The six M02-0.40x06 Screws securing the Bushing to the Frame need to be torqued up with the Knobs for Panning Base locking fully backed off. (Otherwise the torqued up Screws will be anything but when we do back off.)
- The three M03-0.50x10 Flat Head Socket Cap Screws securing the Mounting Base Plate to the Bushing don't care in the least whether we're full on, full off, anything in between. But it's best to crank in enough panning resistance to keep things immobilized as we're torqueing up.
---
At the tops of the Posts we have the mountings for a pair of Tilt Arms. Much simpler engineering. Much like bicycle head tubes 'cept horizontal and screw mechanisms to adjust from zilch resistance through stiff to locked. Pairs of M04-0.70x10 Flat Head Socket Cap Screws up at the Axles Port and Starboard. To torque them up we want to be backed off a bit into slop mode.
---
Mounted on and between the Tilt Arms we have a Lens Support Assembly which consists of a:
- pair of Base Plate Clamps (which engage the pair of Tilt Arms)
- Base Plate
- Lens Clamp
---
2021/10/20 - Feisol told me yesterday that I'd be SOL as far as obtaining the Lens Support and Clamp assembly/components I'd been counting on for quick swaps. RIDICULOUS.
(Still hoping I might be able to do something directly through Taiwan.) But something of a silver lining... Got me thinking harder about the best way to effect the Swarovski Standard modification.We stock an assortment of spare parts. If we don't have it, we can probably get it.
---
The two vertical assemblies are damn near identical to the horizontal ones. Everything's milled out of two flavors of stock and is either an Arca-Swiss plate or Arca-Swiss clamp assembly.
Plates:
- Lens Support Base Plate
- Tilt Arms - Port and Starboard
- Plate QP-200
Clamp Assemblies:
- Lens Clamp
- Base Plate Clamps - Port and Starboard
The Base Plate Clamps are just short single point Lens Clamps - identical Studs, Springs, Knobs. Their Studs can be backed out nondestructively (although they've used a thread lock compound that makes things feel a bit scary).
(Gotta admire the thinking behind this aspect of the design.)
---
The Clamps include a critically important tongue-and-groove feature we can clearly see in the Lens Clamp in the second manufacturer photo above.
In the Lars photo above note the two big M06-1.0x20 Flat Head Socket Cap Machine Screws (4 millimeter Allen) securing the Lens Clamp to the rest of the Lens Support Assembly and the implication. We won't be able to separate from our Lens Support Assembly (or the rest of the Head-Tripod setup) our Scope with its Clamp as a unit.
And while we're on the subject... The heads of those two big M06-1.0x20 Flat Head Machine Screws project ever so slightly - about 0.2 millimeters - into the Clamping Channel. And that MAJORLY SUCKS when we're trying to slide in and make fore/aft adjustments with our glass. And my balanced Swarovski Standard ATX 95 Foot is engaged by both of them and that doesn't help the security of our modified clamping configuration the slightest bit. Getting a pair of 12.9 steel copies and will do some file work.
--
2021/11/04 from the MonsterBolts eBay store got a ten-pack of 20 millimeter "M6 Flat Head Socket Cap Screws, 12.9 Steel w/ Black Oxide DIN 7991, 1.0 Coarse" for a bit over five bucks. Pulled the originals and swapped in a pair of the new ones. PERFECT. These were recessed to the same microscopic degree that the originals projected - maybe 0.22 millimeters in versus the same up. Smooth as glass now. The stainless had fat rounded edges and the new ones (YFS (Fang Sheng Screw Co., Ltd) 012.9) are sharp.
And I was so dreading the file work and pessimistic about the quality of the results.
Interesting that there are two other pairs - port and starboard - of the identical stainless screws incorporated in the Lens Support Assembly to secure the ends of the Base Plate to their Clamps. These ARE properly recessed - while if they weren't and projected down another five millimeters it wouldn't matter in the least.
--
2022/11/29 - Lars photo above. We see the Screws properly recessed. They started getting these fasteners from a different supplier at some point and either didn't notice the issue or didn't give enough of a rat's ass to address the problem.
---
To most effectively retract the Lens Clamping Channel's (aft) Safety Pin... Left hand palm up, three or four fingertips engaging the fore edge of the Base Plate, thumb pad on the Release Button, squeeze. (Refer to the Lars photo.) Note that if the Button is up and in contact with the aft edge of an Arca-Swiss Plate or Scope Foot it's gonna stay up until we nudge our glass forward a wee bit.
Sure is a great thing we have this Safety Pin though. Keeping glass from sliding out of the front end and plummeting to the surface is about all we can handle in the field.
---
From the User Manual:
But we're OK pulling the Tilt Arm Locks so let's. We find well lubricated ball bearing assemblies - thirteen balls per side. They're between races and caged so no disaster looming. (But either keep the relevant Axle angled up or pull and stow the cage.) And we can remove the bearing cages and pull the Axles to the inside clear of their Cylinders on the Frame.Warning: When unlocking the panning base lock, turning the knob past the point of resistance may result in damage to the locking mechanism. Locking the knob will cause no such damage.
---
Lens Clamp Modification - Swarovski Standard
We're gonna pull and not replace the two pairs of Springs. We really want them for the Base Plate Clamps and they'd be nice for Arca-Swiss but since we'll be swapping in Swarovski Standard they'll have to be out of the loop.
The original Lens Clamp Studs are M06-1.00x30. 8 millimeters of the fixed/port end are threaded, next 10 unthreaded as we move to starboard, 12 threaded at the starboard end engaged by the Knobs.
The Studs bottom out in their recesses in 5 revolutions/millimeters. It's 9 more millimeters from the outboard/starboard end of the internal threading to the starboard edge of the Lens Clamp Body. 6 more to get us to the starboard edge of the Lens Clamping Bar. With an Arca-Swiss Plate (38 millimeter width) installed and hard clamped our gap is only about 0.3 millimeters. That brings us up to 20.3. So a bit under 10 millimeters of projection for engagement of the Knob at hard clamp. And we'd have a bit under 3 millimeters of projection with Swarovski Standard in the Clamping Channel before we've taken into consideration its blunt edges. Afterwards... Zilch.
For the purpose of the exercise a Swarovski Standard Foot isn't 7.0 millimeters wider than an Arca-Swiss - it's 10.6. (We find that by measuring the widths of the Lens Clamp - with no Flat Head Screw heads projecting up into the Clamping Channel - when we're rock solid on the two configurations.)
Onto the projecting/starboard ends of the Studs:
- 10 millimeter box end wrench
- M06-1.00 nut
- 06 millimeter steel washer
- another M06-1.00 nut
- any kind of 10 millimeter wrench or socket
Torque the nuts together to mash the washer and lock things together. Use the inside / box end wrench to torque the inside nut counter and back the Stud out of the Lens Clamp Body. They come out easy. The technique is referred to as double nutting.
Our Swarovski Standard capable replacement Studs start out as M06-1.00x45 hex heads. For my Version 1.0 I cut near flush with the heads, filed and rounded, ended up with an overall length of 43.5 and about thirteen threads available for the wide blunt configuration.
Unanticipated problem. We can't disengage the Aft Lens Clamp Knob without first disengaging the Starboard Base Plate Clamp Knob - the latter blocks the path the former needs to take.
Second best solution... Hold the Clamping Bar in to keep the Springs compressed and the tongue engaged in the groove, lose the Base Plate Clamp Knob, screw on an M06-1.00 nut to keep things together, pull the Aft Lens Clamp Knob...
Best solution... Replace our 43.5 millimeter Swarovski Standard capable Stud with one eight millimeters/threads shorter - 35.5. Ditto for the fore end. Also saves us untold zillions of unnecessary clock and counter rotations during reconfigurations. Double nut to torque them into the recesses from which their predecessors were pulled.
--
2022/07/22
Best solution implemented. Studs came through the hacksawing and filing at 37 and 36 millimeters. Short one installed aft 'cause that's where we have our clearance issue.
When doing these customized length Studs...
After hacksawing the machine screw shank down to target length we're left with a rather nasty jagged end. Clamp the Stud into an electric drill chuck as you would a bit - factory end in. Spin and file until the end is smooth, rounded, beautiful.
With this implementation I can be in Arca-Swiss Rifle Scope mode with the crosshairs on the Sun and the Swarovski Standard 95 ATX lying on the Backpack, effect the mode change and mount the Scope, still be on the Sun upon completion of the swap.
--
Our Knob cylinders are 20 millimeters long and feature 12 millimeters of threading (starting flush at the port face). But anything over 5 is overkill - since that's all we have at the other end.
Install:
- a pair of M06-1.00 Hex Nuts onto the pair of Studs finger tight
- the Clamping Bar and Knobs.
We're good to go for Swarovski Standard. Minus the Hex Nuts we're good to go for Arca-Swiss.
--
Minus the Hex Nuts for Swarovski Standard we have a major disaster on our hands. As we clamp the Studs flex downwards and the Clamping Bar rolls clock and locks onto the Studs. It's then IMPOSSIBLE to separate the Scope before fully pulling one of the Studs. (Stumbled upon the solution by accident.)
The depth/thickness of the Nuts is 5.0 millimeters, thickness of the Clamp Body is 12 millimeters and the Nut takes a 10 socket so pretty damn close. With the Foot just slideable in the Lens Clamp the Tongue is nearly seated on the starboard face of the nut. A quarter turn on the Knobs is a quarter millimeter of clamping force and - assuming we've adjusted the Knobs evenly - we're rock solid. (Thank you, God.) But we really need to check security before going operational or walking away.
Pull the Spacer Nuts and we're back to factory Arca-Swiss. (And can breathe a fair bit easier.)
Note that when we're clamping an Arca-Swiss Foot or Plate...
11-03914
http://c2.staticflickr.com/2/1794/28948928777_459f8655ba_o.png
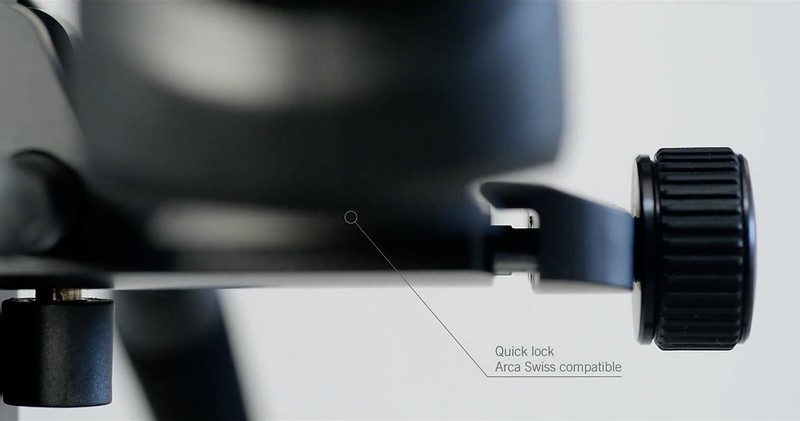
http://c1.staticflickr.com/1/858/28947523557_b02c4000f8_o.png
16-04003
...we're pressing in against its rather sharply angled sides and simultaneously pressing it down onto the Floor of the Clamping Channel. When we're doing Swarovski Standard...
14-012920
http://live.staticflickr.com/65535/51386630011_22df886fd0_o.png
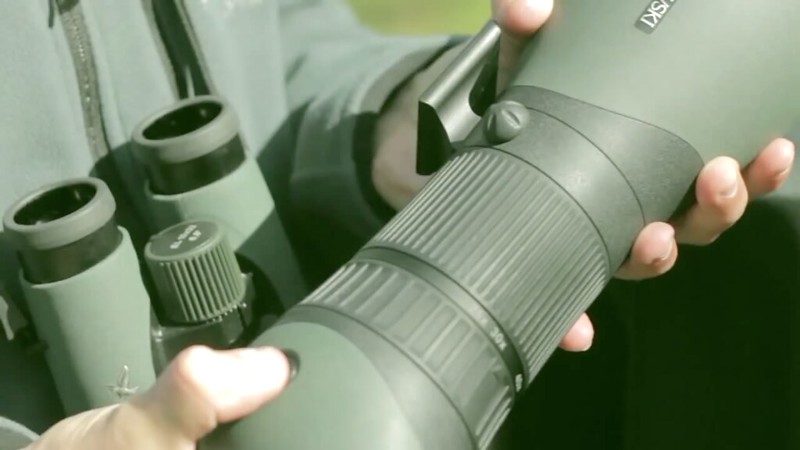
...in our modified Arca-Swiss we're one or two hair's breadths shy of lateral clamping only. We're only holding it in position flush against the Floor - so we have very little in the way of error margin.
--
2022/11/28
With everything hard clamped I was getting a very slight clunk as I torqued the Scope in the tilt axis up and down. Those two M06-1.00 Hex Nuts needed one of their faces shaved down some portion of a millimeter to prevent them from limiting clamping effectiveness. With this Swarovski Standard modification we need everything we can get and more and I have had a couple of incidents of the Scope breaking loose - fortunately in benign low altitude circumstances. Don't know why I missed the issue before.
Filed the thicknesses down about half a millimeter and eliminated the clunk. Was thinking about doing another half to put a little daylight between the starboard faces of the Nuts and the relevant port face of the Clamping Bar to ensure that the Scope's Foot was feeling the results of all the torque I'm delivering but noticed that there's still a flex issue and considered that any gain in clamping power could well be neutralized by the having the Bar moving lower on the side of the Foot. Decided to leave well enough - quite possibly best possible - alone.
To effect the filing...
- M05-0.80x10 Socket Head Screw
- install Nut on end leaving Screw end safely recessed
- file on Jar Lid Gripper Pad on tabletop
- drag Nut from far to near end of file
- frequently:
-- rotate Nut
-- check thickness
---
2023/05/13 - Happy discovery yesterday morning.
On the previous night's astro mission I was out with the 95 and had a couple situations in which I really could've used my Apertura Finder Scope - which had been mothballed for gawd knows how long. Needed to rehearse the Swarovski Standard to Arca-Swiss to Swarovski Standard drill on the UA-180 and found that we can get along plenty well enough with the Spacer Nuts out of the equation. With them we can torque the Quick Release Knobs to the limit of our ability. Without them if we torque too much we have the major disaster described above. But if we just do a bit beyond adequate we're plenty safe enough and in much better shape for switching back and forth between Swarovski Standard and Arca-Swiss. About 70 degrees worth of (clock) turn beyond contact does the trick.
I'm gonna mothball the pair but keep them on hand for any situations in which someone else might be making adjustments to the system.
2023/05/20 - Another solution... Spacer Nuts still off, replace the Quick Release Knobs with a pair of unmodified M06-1.00 Hex Nuts. Torqued to the max fingers only we're safe and solid and it's impossible for anyone to get us into the problem zone minus a wrench.
---
2023/05/25
To install and pull Swarovski Standard efficiently (synonym for max safely)...
- With the 95 firmly, properly clamped, everything square the Lens Clamp (not Clamping Channel) width is 60.5 millimeters. (For Arca-Swiss it's 51.0 (two inches)).
- Back the pair of Quick Release Knobs off to just contact (and no torque). There will be no significant increase in width.
- Back the pair of Quick Release Knobs off another quarter turn. At this point we can roll the Scope clock and separate it. Also install it running the film backwards.
- Using the outboard/starboard edge of the Lens Clamping Bar as a ruler pencil mark the Lens Support Base Plate. And for reinstalling Swarovski Standard after Arca-Swiss has been swapped in match the Lens Clamping Bar to the line(s) angle back in, flatten, clamp.
--
And I'm finding that I'm not having the jamming problem that was the reason for the implementation of the Spacer Nuts. I can start applying an uncomfortably high degree of torque and nothing bad in the flex department happens. And I'm not bottoming the Lens Clamping Bar out on the Lens Support Base Plate (below) - there's still a little daylight left.
---
2023/06/01
Last night I was out trying to hit Ceres under a clear sky but with a Moon three days shy of full blasting out the sky not far from target. For my entire history of Ceres to date I've been star hopping to goal off of Denebola but with that issue it was extremely marginal naked eye. But I was armed with my Arca-Swiss ready Apertura 10x50 Finder Scope which proved to be a major help in getting me started on the road to goal. And I continued to practice and experiment afterwards.
Initially I was adjusting the UA-180's modified Clamping Channel for the swaps but was finding that approach not all that practical in that environment. So dusted off the 45066 Arca-Swiss Plate I pack for all outings, screwed it on the 95, got much better results. Didn't take much to get the 95 misaligned but also took negligible time and effort to square it back up. And all astronomical targets save for Polaris are requiring smallish tilt and panning readjustments all the freakin' time anyway.
Played around again in the morning doing Saturn and Jupiter primarily and found myself way less motivated to get the 95 retrofitted for Arca-Swiss. That connection to the UA-180 has little tolerance for error but I've had a lot of practice and haven't experienced significant problems. For Arca-Swiss I either have to do a substantial bit of Knobs spinning to open and clamp the Channel or feed in and out through the front end to save some spins but that requires a fair bit of precision - preferably with the Sun up to help one along.
With the Swarovski Standard mod the 95 goes from solid to free with a pair of counter quarter turns and back in with a pair of clocks. And I'm very seldom in situations calling for adjustment for Arca-Swiss.
---
2022/07/16
Zillions of exercises in the nine plus months since acquisition. It has been for a very long time now IMPOSSIBLE to torque the Panning Base Locks hard enough to be able to effect stiff panning resistance. That means that there's a very narrow window between adequate panning resistance and what's needed to start unscrewing the Head from the Tripod's Mounting Stud. Not thrilled with that development but it doesn't totally cramp my style.
---
2022/07/25
This afternoon the two Screws at the top of one (sometimes port, sometimes starboard) of the Tilt Arms seemingly abruptly loosened to the extent that that pivot point couldn't be clamped to the least extent. Easy fix but I separated the Arm completely just to refresh my memory of how things worked and were put together.
While we're at it let's take a look inside of bottom center and see if we can figure out why the Panning Base Lock won't come anywhere close. Everything was soaked in an oily looking and feeling liquid. Couldn't have come from the sets of Tilt Arm Bearings 'cause they spin in cylinders isolated from the rest of the frame so I'm guessing that we're getting some lubricant involved with the Panning Base Locks freed up a bit by the summer's hot weather.
Disassembled to the max extent possible, wiped and washed the hell out of everything, reassembled. Now again properly operational.
Recommend periodic checks on screws security and cleaning as soon as slippage is detected.
Back to the loose Screws (M04-0.70x10)...
The more we adjust tilt under high resistance settings the faster our Screws will back out. So we should always be shooting for just enough. (And for pan as I've recently) discovered the hard way (2023/04/03) we need to do all or nothing.)
---
2022/09/10
Panning performance had started getting crappy. Could be locked up OK but with things dialed down panning input would be resisted and jumped. Took the Pan Housing Cylinder apart. All of the set of six screws - PH1 Pan Head - exposed with the bottom disc pulled had backed out substantially and everything was oily again - unsurprisingly.
Good idea to treat this drill as a maintenance operation run in the first window of spare time after the first hint of a feeling that things aren't quite right.
---
2022/12/10
Last night the ability to adjust for stiff panning resistance was once again down the toilet and earlier today I did another disassembly and cleaning. Really thorough and extensive this time though. Sprayed a detergent solution into the Pan Housing Cylinder, wiped thoroughly, rinsed, dried, reassembled. Reiterating recommendations of cleaning at the earliest indication of things going south and not going nuts torqueing onto the Stud. Situation has a potential for real ugliness.
Note... The Brake Shoes are permanently held up very flush with the top surface (ceiling) of the Pan Housing Cylinder and are very good at trapping liquid in between those contact surfaces. If the liquid is the detergent solution I can't see that situation as being problematic but it doesn't hurt to leave the Pan Housing Cylinder open during downtime, work the Shoes in and out, wipe the liquid up as best as one is able.
---
Note that while our Panning Base Locks span 280 millimeters our Tilt Arm Locks span 345. Thus with both hands on both Tilt Arm Locks we get a 23 percent increase in mechanical advantage over what we had with both hands low. And that translates to a substantial boost in panning control effectiveness and precision.
---
2022/12/14
For last night's astro missions I started packing a readily accessible Microfiber Pouch dedicated to a 2.0 and 2.5 millimeter Allen bit. In my humble opinion the fastening of the Mounting Base Plate is under-engineered and the relevant three M03-0.50x10 Flat Head Screws inevitably start backing out - sometimes eventually, sometimes not so much. But so armed with the 2.0 millimeter bit the issue can be quickly and easily dealt with as soon as it's detected or preempted during a bit of slack time.
And in the course of one of last night's missions the weak link screws DID abruptly back out and with the new kit I WAS able to remedy the issue pretty quickly and painlessly.
And it's probably a good idea to run the torque drill subsequent/prior to every mission.
The 2.5 millimeter Allen is available for a Tilt Arm issue and it would be nice to be able to do a Phillips 1 for the half dozen PH1 M02-0.40x06 Pan Head Screws securing the Bushing to the Frame.
---
2023/03/15 - Got tired of dealing with Phillips and took a chance with Monster Bolts that M02-0.40x06 Socket Head Cap Screws would do the job. PERFECTLY. Fly in ointment... They appear to take a 1.5 millimeter hex key/bit which I don't have. (2.0 millimeters which I do is totally oversized.) Good news... 1/16 inch (1.5875 millimeters) got everything adequately torqued in - for the time being - without damaging anything. My relevant joy is not yet complete but I've gotten much closer.
---
2023/03/21 - Yeah, they take 1.5. Thank you very much, Willi Hahn Corporation.
---
2023/06/22
Up to a few days back I'd been using a 1/4 drive Ratchet Spinner Disk with a 2.0 millimeter Hex Bit Socket to torque up the three UA-180's three Hub Screws. The tool assembly ate up little volume (but a substantial weight figure) and was kinda fun to play with but didn't offer enough mechanical advantage to deliver the serious torque it became apparent was required - at least on the Hub Screws. Tried the Allen key but it was flexing to a disturbing degree when I started getting serious. Let's try the bit driven by a quarter inch box end wrench.
Yeah, that appears to be the ticket for feeling and delivering the right degree of torque - with a very modest degree of packing weight. Spinner Disk has been consigned to the retired and duplicate gear bag that lives and stays at home.
I've assembled a dedicated tool kit that lives in a dedicated Microfiber Pouch in the Scope dedicated NFS. Components:
Pair of Craftsman 1/4 inch 12 Point Combination Wrenches
-- 1/4 Drive:
--- Bits:
---- 1.5 - Bushing
---- 2.0 - Hub
---- 2.5 - Tilt Arms Axles
---
2023/05/25
Yesterday's Plan A for parking and biking in SSE a short distance to the ENE end of the Naval Academy Bridge for the Blue Angels performance and afterwards a bit of Scope exercise got blown to hell and resulted in me getting widely separated from the car and my Scope support gear. And even though I'd retorqued my three problem screws the night before it didn't take the UA-180 long to lapse into panning slop mode.
So this afternoon I pulled the 12-03 Extension of the UA-180's Tripod, stuffed in a little plastic bag containing a 2.0 millimeter Allen Key in its top end, reassembled. There won't be a rattle and I will never again be in a situation in which that issue starts kicking in without me having the ability to deal with it immediately.
I may not have been aggressive enough torqueing up on these screws and will give something more a shot but I'm also starting to think about acquiring a tube of Loctite Threadlocker Blue 242.
---
We've established (the hard way) that there are only two acceptable settings for panning resistance - zero and totally immobilized. And for the latter preferably with equal levels of torque applied to the port and starboard mechanisms. And immobilized means for the situation - no inadvertent panning while on target or no fuckin' way for transport or stowing. And the nice thing about panning with respect to zero mode is that nothing changes minus input - deliberate or accidental - from the operator. (As long as the wind isn't ridiculous anyway.)
For tilt (preferably with the Scope balanced in the Clamp) we can go from zero to welded with everything in between and not hurt anything and minus careful tweaking not expect it to stay where we've aimed it at low resistance settings.
Whenever we have glass mounted on the UA-180 we want tilt under control at all times, the glass never free to swing - 'specially back towards or into our face.
In a quickly evolving situation in the field it may be advantageous to hard clamp the - call it - port Tilt Arm Lock Knob but when we're viewing we should dial up to something reasonable on the starboard then dumb down the port to same.
Normally for a stationary target we want moderate equal resistance port and starboard. And in real world situations the glass is rarely trimmed to neutral so we'll be staying on target with right hand holding tilt angle while dialing up port adequately with left then dialing up starboard with right for a close match.
And for retargeting we need to break resistance port, come back clock enough to keep the Scope from deciding the tilt angle to take when we break starboard resistance. Then ditto for that side.
--
2023/08/16 - The above restated a bit better perhaps. (And this one's a biggie.)
I've gotten myself trained pretty well. Four resistance settings - for port and starboard:
- locked:
-- hard - for stowage, transport
-- adequately - enough to safely stay on target
- comfortably adjustable
- loose overshoot
Break lock Port - either flavor - overshoot, come back to moderate. Ditto for Starboard. Order, of course, doesn't matter. But hands on BOTH controls whenever adjusting Tilt and NEVER break a clamp on one side while assuming adequate resistance on the other. If you're on a high target with the Scope low on the Tilt Arms and wrong you'll instantly have a pretty substantial battering ram swinging back into your eye socket. (And I think/hope I've been smacked enough times to erase that particular pooch screw from my repertoire.)
---
It's often desirable to pull a Lens Support / Glass Assembly clear of the Head as a unit. When lifting one clear of and installing one on the Tilt Arms... First drop the Lens Support full down, clamp moderately, hard clamp the Tilt Arms to get them max parallel. This will significantly ease reinstallation. Then back off the Base Plate Clamp Knobs about two revolutions.
To install grip with both hands - middle fingertips in the recesses for the fore Base Plate to Base Plate Clamp Screws, last joints of thumbs under the aft ends of the Base Plate Clamp Knobs. Tilt the Lens Assembly steeply upward - about 45 degrees, establish contact, feel for symmetry, tilt down to horizontal, fully engage, lower with one hand under center, hard clamp.
To install on Tilt Arms that haven't been locked to parallel... Clamp one to something close to vertical and give the other a bit o' freedom. If a hang-up is encountered jiggle loosey back and forth.
--
2023/01/09 - The UA-180 easily stows upside down in the North Face Surge's NFSC-2 compartment. Not a bad idea to separate the Lens Support Assembly as that makes the Head considerably less three dimensional. Will be doing a test flight to Tucson early tomorrow. Everything above the Tripod's Connection Plate will be going in the Surge carry-on.
--
2023/02/04 - The original Surge did the carry-on job well from BWI to TUS and back.
NFSC-1:
- padding - Gortex rain gear
NFSC-2:
- UA-180 upside down minus the Lens Support Assembly
- Lens Support Assembly - separated
- 95 ATX Assembly
- Leitz 7x42
Water Bottle Pocket:
- Port:
-- GOFORWILD Headlamp
-- FIRM GRIP Gloves
- Starboard:
-- Walkstool
And small miscellaneous items in small miscellaneous compartments.
Very heavy - no fun to lug out to gates - and stretched out pretty good but doesn't raise any eyeballs and fits in the overhead just fine. And the Scope gear is ready for action save for a tripod - like the collapsed one that goes in one of the checked bags.
---
2022/07/27 - Safety Advisory
The appearance of UA-180 with Glass mounted, the Lens Support full down, and the Base Plate Clamp Knobs backed off a couple spins is virtually identical to one of same 'cept safely clamped - until we start going upside down to help retract Tripod Legs. I've gotten away with a couple incidents with no damage. NEVER drop full down minus clamping enough to effect just a mild degree of resistance - even if you're intending to go back up an inch or two within the next fifteen seconds.
Also never break a setup under the assumption that you've been adhering to Rule 1. Always assume you haven't been and verify. After the Tripod Legs have been fully collapsed and before lifting the assembly to clamp the Extensions grasp the Scope and apply a little lift effort to check for movement.
--
2022/11/17
In the course of tons of field work over the three and a half plus months subsequent to the moderate scale disaster I've found that:
- I don't have the discipline to adhere to my rule about never leaving the Scope on the head insecurely clamped.
- That strategy is actually worse than useless in guarding against a drop.
- I'm no longer afraid of committing anther drop because I'm always terrified that I'll commit another drop whenever I'm about to start a rotation that will predispose the Scope for disengagement.
The fear of precipitating the disaster is the real solution and that always triggers me to stop, think, verify.
---
More on the Knobs...
- Base Grip surface length is 20 millimeter diameter, sixteen length. With the rubber tubing - which will not slip - installed our diameter is 24 and we're real good in the torque department.
- Little cosmetic cover disc glued onto the starboard or aft end. Pops off easy if we screw way onto our Version 1.0 Swarovski Standard Stud for an Arca-Swiss configuration. Pick it up and stow it in the ziplock. While still in Version 1.0 mode I deliberately blew the other one as well so I wouldn't do it in the field accidentally and lose it. I'm happily leaving the cover discs off however 'cause when installing the Knobs on their Studs an index fingertip on the 8 millimeter diameter opening in the middle of that end helps a lot in getting lined up properly and started in on the threads.
---
Load Centering
Widths in millimeters of support face areas:
137 - Lens Support Base Plate between inboard faces of port and starboard Base Plate Clamps
044 - port limit to port edge of Lens Clamp body (fixed)
051 - footprint of Lens Clamp with Arca-Swiss foot or plate engaged
061 - footprint of Lens Clamp with Swarovski Standard foot engaged
043 - starboard face of Lens Clamping Bar with Arca-Swiss foot or plate clamped to inboard face of starboard Base Plate Clamp
034 - starboard face of Lens Clamping Bar with Swarovski Standard foot clamped to inboard face of starboard Base Plate Clamp
- Cumulative round-offs make our sums a millimeter too high.
- We're damn close to perfectly centered (very slightly biased to starboard) for Arca-Swiss.
- We'd like to slide our Swarovski Standard glass 5 millimeters to port. (And bfd when we consider what we're doing with a Swarovski PTH.)
---
Swarovski Standard to Arca-Swiss Reconfiguration Procedure
--
For Yours Truly Swarovski Standard is a synonym for ATX 95. I won't ever be popping it out of a Clamping Channel prior to installing some other Swarovski Standard piece of glass.
-
We'll be working with the UA-180 mounted on our upright (set up) Tripod, the Lens Support Base Plate installed on the UA-180 clamped level and full down.
-
For reconfiguration either way everything that's on the Lens Clamp Studs needs to come off - always the Knobs and Clamping Bar, for Swarovski Standard to Arca-Swiss also the Spacer Nuts.
-
Spin off the Lens Clamp Knobs, pull off the Clamping Bar without angling it out of parallel (coming off and going on), spin off the Spacer Nuts.
Position the Clamping Bar flush on the upper surface of the Lens Support straight fore/aft and properly aligned with respect to the Studs.
Engage, push to port to flush with the Lens Clamp.
Spin on the Lens Clamp Knobs full - then back off half a spin or more.
Slide in fore to aft, balance, hard clamp.
For Arca-Swiss to Swarovski Standard... Same deal 'cept:
- Spacer Nuts will start off and finish on.
- We'll:
-- back off on the Lens Clamp Knobs a bit more after spinning to full
-- angle our Foot in from port to starboard (starboard edge low)
Note that for Arca-Swiss the Spacer Nuts can live on the Studs between the Clamping Bar and Lens Clamp Knobs with the penalty of a bit of extra effort in adjusting fore/aft for balance.
The clamp onto Swarovski Standard is critical and a proper one requires a bit of extra care and attention. Immobilize panning, hard clamp both Tilt Arms to vertical, angle the Foot into the Channel port to starboard with starboard Foot edge low - at or near enough to the fore/aft balance point. Standing to starboard and facing Port... Right hand on the Fore Lens Clamp Knob, left hand on the aft gradually and evenly increase torque to ensure that the Clamp Bar stays properly aligned. Hard clamp, back off, repeat. Upon completion attempt to rock the Scope in the Clamp by pressing down on the back end. Any play, noise loosen the Clamp Knobs a wee bit and give the operation another go. But we should've been OK before the check.
---
2023/03/04 - If the Tripod/Head/Scope assembly is a bit noisy as it's being handled then we've done a less than stellar job of getting the Scope's (Swarovski Standard) Foot clamped and need to remedy the situation NOW. And as much as I'm always shooting for perfection when executing procedures (unlike Swarovski who won't allow us to swap an Arca-Swiss Tripod Ring in for a piece o' crap Swarovski Standard one) I find myself frequently detecting this warning signal.
---
Balance and Neutral Points
For:
- Balance we're measuring from the aft edge of the Lens Clamp fore to the back end of the Swarovski Standard or Arca-Swiss Foot or 45066 Arca-Swiss Plate
- Neutral we're measuring from the top end of one of the Tilt Arm Channels down to the top end of the relevant Base Plate Clamp
69 - 32 - 85 ATX
61 - 23 - - Solar
34 - 31 - 95 ATX
23 - 33 - - Solar
42 - 21 - Canon 10x42
38 - 25 - - Solar
00 - 14 - Barska 1-4x28
---
All factory fasteners are stainless.
---
Fasteners (Order of Size)
M20-1.00x21 x 2 - Tilt Axles
M06-1.00x30 x 2 - Lens Support Base Plate Clamps Studs
M06-1.00x30 x 2 - Plate Clamping Studs - Double Nut
M06-1.00x20 x 2 - Lens Clamp to Lens Support Base Plate - Flat Head - 4 Allen
M06-1.00x12 x 4 - Base Plate to Base Plate Clamps - Flat Head - 4 Allen
M04-0.70x10 x 4 - Tilt Axle to Tilt Arms - Flat Head - 2.5 Allen
M04-0.70x06 x 4 - Tilt Arm Stops - Pan Head - PH2
M03-0.50x10 x 3 - Mounting Base Plate - Flat Head - PH2 (2.0 Allen)
M02-0.40x06 x 6 - Panning Brake Cover - Pan Head - PH1 (1.5 Allen)
---
2021/10/19
After reading the fine print in the Swarovski "Limited" Lifetime Warranty and dealing with their customer support I'm feeling substantially less horrible about the UA-180 purchase. I'd been thinking I'd be able to just mail this thing in to Providence, they'd replace a cartridge, I'd get it back in a week. But "all non-optical products (i.e. accessories, tripods etc.)" are covered "for two years" during which they're just gonna send us a new inherently defective copy and after which we own an expensive heavy paperweight. They don't and can't repair anything other than the glass stuff they actually design and manufacture. And I'm pretty sure I'd have no better luck with Gitzo/Manfrotto.
It's a real good bet that my identical GZ391704 will degrade at the same rate and to the same extent GZ361445 did and if/when that happens I most assuredly won't be replacing it with a copy. The UA-180 is something of a nightmare as far as packing and transport are concerned but it performs rather beautifully, I can disassemble it almost completely and see how everything's put together and works, and the engineering looks simple and solid.
---
Compass
http://live.staticflickr.com/65535/51546596403_41e54feae7_o.png
On the circumference of the Mounting Base Plate we can see an elegant but somewhat problematic Compass Dial. 0-360, two degrees per graduation, numbered every twenty degrees (as we can make out in the photo (...340 - 0 - 20 - 40 - 60...)).
Primary problem is that when we're in driver position - as in the above manufacturer photo - we're reading plus or minus 180 degrees from where we're aimed. To see where we're aimed without doing the arithmetic we need to walk around to the front side and read what's below the indicator arrow.
- Another problem - more surmountable... The graduations are on the Mounting Base Plate which is torqued onto the Tripod's 3/8-16 Mounting Stud. So to get North on the Compass Dial lined up with North on the planet we need to...
- GT3543LS (Systematic) - unclamp, orient, reclamp the Flat Top Plate
- GT3542L (Swarovski PCT) - orient by rotating the whole freakin' Tripod/Head/Scope assembly and get it (back) vertical
(I only discovered this issue about 2022/05/12 when I'd been going out evenings to watch Mercury hit the horizon and thought it would be interesting to record some actual bearings.)
If we don't care to walk let's do three rows:
- what:
-- we have
-- could make life easier for us
- the difference
000 - 020 - 040 - 060 - 080 - 100 - 120 - 140 - 160 - 180 - 200 - 220 - 240 - 260 - 280 - 300 - 320 - 340 - 360
000 - 340 - 320 - 300 - 280 - 260 - 240 - 220 - 200 - 180 - 160 - 140 - 120 - 100 - 080 - 060 - 040 - 020 - 000
000 - 320 - 280 - 240 - 200 - 160 - 120 - 080 - 040 - 000 - 040 - 080 - 120 - 160 - 200 - 240 - 280 - 320 - 360
- The last column doesn't actually exist - 360 is a synonym for 000 (which is where we started).
- Save for 000 and 180 - the points of convergence - everything on the dial is forty degrees off - one way or the other.
---
2022/12/20
Did my annual Eastern Shore Christmas Bird Count 2022/12/18. There's a Comegys Bight off the Chester River which is damn near ALWAYS loaded with diving ducks - Greater Scaup, Ruddy, Bufflehead - as it provides shelter from prevailing winds. My best available visual access point is at 39°06'45.33" N 76°08'09.12" W - a stone jetty with a small wooden platform out at the end. And I suspect that I'm the only human to have gone out to it in the past decade or two. The walk out to it scares the crap outta me and every year I pledge that no way in hell will I be pulling that stunt again and every year I do anyway.
It starts off OK but many of the large stones one starts encountering about halfway out will move a lot as a foot is planted and for someone who is far from being a little kid a fall could be seriously life altering. And with a very heavy and expensive scope assembly in one hand...
But Sunday afternoon my brain kicked in enough to start thinking about turning the Scope assembly liability into an asset. Tripod fully collapsed and solidly locked with Legs spread full out to the first Stop. Plant the Tripod a bit ahead stable and reasonably vertical, hands on the tops of the UA-180 posts, gradually transfer weight to the Scope assembly, take a step and plant a foot. Repeat. And don't be in a big hurry.
---
2023/03/26 - I think this is a well engineered chunk of hardware and I've had no serious issues with it that I haven't been able to reasonably easily address. But to keep it running I've had to repeatedly strip it down to the last screw. Read the fuckin' manual however and all we need to do is clamp our glass in and adjust a few knobs.
---
2023/06/25 - To really appreciate all the plus side issues one gets in the field with the UA-180 with respect to what one has with a Gitzo Gimbal Fluid Head use the former pretty much exclusively for a year and a half then take the latter out for a stroll. And the price is about the same - Gitzo label a bit less, Swarovski label a bit more.
----------
Uprighteousness
---
2023/05/19 - This:
illustration is the very first in TFM for the for the Gitzo Mountaineer (Swarovski PTH) Tripods. I've rotated it ninety counter:
- to reduce page space waste
- 'cause:
-- it doesn't really matter - in the implied context
-- when I'm freeing Twist Locks everything's horizontal - or damn close
And at either rotation... Boy does that look ergonomic, comfortable, effective, like fun.
Manuals:FIG. 1 - Extending the tripod legs
- Mountaineer:
- Systematic:Turn all the twist locks of each leg 1/4 clockwise at the same time, then pull the leg down and tighten the twists individually.
Relevant components identical. But funny that the virtually identical Systematic illustration shows only the Level 1 and 2 Twist Locks.Turn all the twist locks of each leg 1/4 of a turn at the same time, then pull the leg down and tighten the twists individually.
The threading is right handed, we turn counter to loosen but with tripods we tend to be looking at things from the wrong perspective. And we need to be training our brains to interpret correctly regardless of perspective at any given moment and for any given situation. The set of Twist Locks in the illustration is being turned counter. We can't tell and don't give a rat's ass about where the driver's face is at the point of that operation.
Also... This "Figure 1" is fraudulent. With the original vertical format of the frame and in the context of the succeeding illustrations it's obvious that we already have the two other Legs fully extended, clamped, and planted. An HONEST Figure 1 would depict the:
- full Tripod:
-- angled about thirty degrees from its driver’s upper left to lower right
-- with:
--- a Head of some kind installed
-- its:
--- Legs fully:
---- collapsed and locked
---- angled in to perpendicular to the plane of the Spider
--- driver standing:
---- with his:
----- left hand grasping the top of the fully collapsed and clamped Leg 04SE up at about shoulder level
----- right hand grasping the array of Twist Locks in preparation for unclamping and angling out to the 24 degree Stop
And at this point in Gitzo's Figure 1 the implication is that there's nothing mounted on the Tripod. And later when we see something getting mounted it's a Gitzo GH1780 Center Magnesium Ballhead which weighs in at just under 281 grams and connects via 1/4-20. And nothing ever gets mounted on top of it.
I don't think anybody's going out to a set without his (tripod's) head screwed on and when I'm going out for solar with my 95 ATX and UA-180 my Tripod's fully collapsed with everything angled in and I have a wee bit over four kilograms screwed onto the 3/8-16 Stud. And if I'm not fairly well balanced and doing everything optimally at all times I'm begging for Repetitive Strain Injuries. And I've had my share of moderately crippling ones sneak up on me. And I've had to deal with them - all successfully so far - by backing off on the speed for a couple weeks and rethinking and temporarily or permanently revising my procedures.
This:
illustration again. I NEVER get to do that - as depicted for breaking the clamping of a full set of Twist Locks - as we're evolved to do using near the full power of our entire hand with the load evenly distributed - at the beginning of a set. I have to do one Lock at a time from Level 3 to 1 without applying enough overflow torque to the next Lock up to break its set. If that happens at Level 3 when I snap out to full extension then Level 2 will partially extend and that will put Lock 1 beyond easy reach for reclamping.
Ditto for Level 2. But after that I'm in the clear as far as Level 3 is concerned. But at the beginning I can also loosen a Foot or Spike.
The inclination is to grip with the thumb and index finger but to survive better and longer we need to use the middle (center) finger with a little help from the ring. And when I get distracted and/or start losing focus and revert to index it never takes long for the pain to start kicking back in.
Better yet... Shoot for the bases of the middle fingers or the area of the palm at their bases.
But good freakin' luck finding any procedures like that described in any of the fuckin' manuals or instructional videos.
---
2023/08/26
When we break torque on the Level 2s our grip will overlap on the just reclamped Level 3s and the still clamped Level 1s. It wouldn't matter much if we prematurely backed off a bit on the Level 1s but that pretty much can't happen anyway in real life - assuming we did a half decent job of the previous breakdown. But I worry a bit about the just-retorqued Level 3s 'cause that would be problematic and we'd only discover the issue early or well into the set. And I instinctively go from my middle to index finger to be able to more easily and effectively clear the Level 3s. I shouldn't and need to break myself of the habit.
---
Time on a set can - and hopefully will - be valuable. And if/when it's not we need to be operating and practicing as if it were. ALL tripod/head/scope assemblies when going by road are in the vehicle, fully assembled, tripod legs fully collapsed. NOBODY is getting operational using the sequences illustrated and described in these manuals.
This:
illustration again. Reverse both arrows. Works absolutely wonderfully at the end of the set when we're breaking down and packing up. (But also apply a little torque to the Foot.)
---
2023/02/16
For a long time after I started in this game I suffered under the delusion that there was something sacred about the Leg angle determined by the relevant mechanism for the first Stop and developed a strategy for dealing with sloping surfaces by getting two downhill Legs extended equally and planted at identical elevations and the uphill Leg retracted to whatever it would take to get the Bubble centered when the Foot was planted with its Leg out at the identical first Stop angle.
Eventually I learned to cheat a bit by tweaking the uphill Leg angle out a little to get the Bubble better centered. And that cheating - along with the observation that it didn't take much of a breeze to shake one's image all over the place with a "perfect" set (and the Center Column fully collapsed) - led to adoption of the cheat as Standard Operating Procedure and a major gain in proficiency.
And on the subject of cheating... With left and right hands on UA-180 Starboard and Port Upright Posts and Leg 12 airborne we can apply torque to simultaneously alter Leg angles for 08 and 04 to get the Bubble on the 12-Center-06 Centerline.
---
2023/04/15
And it just dawned on me that there hasn't been a Swarovski label spotting scope related product which has incorporated - or anywhere acknowledged the existence of - a bubble since the DH101 was discontinued just as I was getting started in this game half a decade ago. How strange it is that there are individuals in these games happy to shell out several hundred bucks for accessories dedicated to getting this job done right.
Also... Good luck finding any Swarovski instructions or discussions relevant to the issue. (But if there's anything we need to know about Set Screw issues...)
----
We'll need:
http://live.staticflickr.com/65535/33937775518_d93a147fdd_o.png
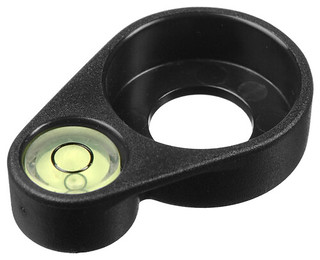
Gitzo Center Column Bubble Level for Series 2 Tripods - GLEVEL2
Installs and lives on the bottom of the PCT's Center Column (can't be installed on the CT101) and is secured by the Ballast Hook. (Fits just fine despite the fact that our Tripod is a Series 3.) Lock it in to project out in line with the (Center Column's Groove) midpoint of the space between Leg sections 08SW and 04SE). It will nestle between them very nicely when things are folded. The Bubble's small and, in low light, a bit hard to see. Need a Headlamp. Failing that... iPhone. Bouncing a green laser off the palm of our other hand held above the Level can also do the trick.
Need to grasp and turn the Level and Ballast Hook together in order to remove the latter (and/or former). And the "good" news related to that issue is that with the Level installed the Ballast Hook is off the Center Column in one and three quarters revolutions. (Without it a bit over three and a quarter.) The threading is 12-1.00 millimeter.
This Bubble Level does not benefit any from UV exposure (I found out the hard way by comparing the one that had been living on the Tripod to another just out of the box). Make it a sunny daytime rule to back off the Ballast Hook a wee bit and pan the projection to the shady side immediately after getting the Bubble centered. And to really do things right... Clamp the Bubble oriented such that the left edge of the mounting (and not any of the viewing circle) is seeing direct sunlight. That'll max out the time we have before direct sunlight will begin encroaching on the right edge.
---
2023/08/01
That only works in the Northern Hemisphere - I found out the hardish way about three weeks ago in Brazil's Pantanal region. Although the Sun still moves East to West our Tripod/Scope assembly - and selves - have been flipped substantially upside down. So we need to start out with the sunlight just encroached on the right edge.
And there will be some region near the Equator in which we'll want our Bubble centered West and East and left in the morning and afternoon shadows respectively.
---
Note that Swarovski says NOTHING ANYWHERE about bubble levels - despite the facts that:
- the Swarovski DH101 Head that they've currently never heard of before has one built in
- these devices have a pretty substantial footprint in the industry
- they're marketing primarily for birders and hunters who are primarily gonna be operating on irregular terrain
- Gitzo - the supplier of the only current Swarovski label tripod - markets a bubble level specifically designed for it
- their advertising is all about perfection, detail, optimization
Guess they don't want potential customers considering the fact that there can be more involved in setting up one of their tripods than extending all the legs out to equal lengths and planting.
If we were to go with a tripod with a center column absent from the design there are nice bubble levels available which install over the Mounting Stud / between the tripod's connection plate and the head's base.
---
2023/04/17
I've swapped the fried Bubble Level from my 95 assembly - which sees action all the freakin' time - out for the one on the 85 rig which stays mothballed pretty much save for occasions when I'm dealing with a substantial astro mission crowd. The pristine one seems to be and probably is easier to read and I've probably had all the reminder I need of my stupidity in letting my original bake in direct sunlight for extended practice sets.
I've gotten myself trained pretty well to pan the Bubble around into the shadow of the Center Column immediately after having gotten vertical so am hoping I can keep this one pristine forever. In daytime overcast conditions however there's little to no shadow and no shortage of evenly distributed UV so I'll have a little Microfiber Pouch arrangement living on my Binocular Harness ready to provide some serious darkness for a long set. (But of course for a really long set in relevant conditions it's not that much more effort to pull and stow the Bubble Level.)
- Cord Lock goes full out to the Drawstring's (knotted doubled) end and the Drawstring goes in the Port Clip.
- The mid span of the Drawstring gets engaged by the Starboard Clip and the remainder of the Drawstring and top half of the Pouch get pulled through the Starboard Clip.
- There's a wadded up Lens Cloth stuffed in the bottom of the Pouch which:
-- prevents the end of the Pouch from pulling through
-- during installation can be positioned over the Bubble to totally block any hint of UV
- For installation the:
-- Pouch kit is pulled from the Harness
-- Harness Clips are clipped together
-- Lens Cloth is pulled from the Pouch
-- Pouch is pulled up over the Bubble Level and bottom end of the Center Column
-- Lens Cloth is stuffed back into the Pouch over the projecting Bubble
-- Drawstring is locked tight up high around the Center Column
The Harness/Pouch configuration can live on me. As long as I don't have to make any clothing layers adjustments around roll time...
---
2023/03/15
Astro mission to the Makkah Center early last night. Not much above freezing and a horrendous wind - gusting probably to forty. Left the Scope for a minute to retrieve something from the car trunk, brain kicked in, thought that that had been a stupid thing to do. Throughout the duration of the rather short mission I never had the feeling that the envelope was being pushed but spent a fair bit of subsequent time thinking about ballast and came up with nothing that was making me happy. So how 'bout angling the Legs out more...
Set up in the kitchen with Legs fully extended. Stops options are 24-52-85 degrees. No shortage of experience with the first and wasn't interested in going belly down as one might be for photography. Angled the Legs out to the middle Stop. I'd have fared well in a hurricane but the Scope was down at eight-year-old-kid level and for astro I need to be able to look up through the back end with the front end pointed straight up. Well, nothing sacred about the stopped settings so let's try something in between (24 and 52).
Hit the rather steeply sloped driveway with 35 degrees in mind and came away pretty happy with the results. (45 degrees is the point at which angling has the maximum effect on Glass height but 35 is about the most with which we can get away before entering the realm of unacceptable skid issues.)
We want Leg 12 planted at our best shot at uphill, 08 and 04 down and angled fairly evenly out, our Scope lowered to a safe yet still comfortable level, our Bubble centered. And with all the Legs free to angle in and out between the 1 and 2 Stops we can be safe, vertical, comfortable, fully operational in near as little time and with near as little effort as we're paying for in doing non howling conditions using the first/standard Stops.
With about 5 millimeters of travel to spare from the 24 to 52 degree Sliding Stop setting a Leg is angled out at about 35 degrees with the Scope height staying fairly reasonable. But no need to break out the protractor and dial caliper, this can be played by ear just fine. Any reasonable lower set will be an improvement and the only halfway critical issue is a centered Bubble at completion - which we can easily do. But we'll use 35 as a synonym for target.
Note that when we start getting into higher angles (lower sets) between Stops the Feet better be feeling some adequate friction/resistance or we can quickly start experiencing angles much higher (and the Scope much lower) than what we had in mind. So if we're trying to get a little kid on target behind the glass we need to break the set, retract the three Level 3 Extensions to some extent, get the Bubble back centered or something reasonably close.
With respect to targets near or at straight up I'd also come to realize that the proper technique for viewing same is to stand to the port (or starboard) of the back end, turn head to the left (or right) to view - and thus there's negligible advantage to having an ATX set high.
Henceforth I'll make virtually all of my sets with the goal of 08 and 04 out at 35 degrees. I can always use the practice, it's good to standardize procedures, I can run the procedure from ready to plant to ready to target pretty quickly and easily, and I'm in better shape to accommodate shorter viewers (at zilch cost to any taller ones).
Pretty much the only tweaks from previous standard procedure:
- Pop all Sliding Stops after fully extending and locking all Legs sections.
- Angle Legs 08 and 04 out at something in the ballpark of 35 degrees.
Current mode of operation for current configuration - Swarovski ATX 95 glass, Feisol UA-180 Carbon Gimbal head, Gitzo Mountaineer flavor tripod with D110601 Spider - from getting ready to roll to locking up target...
---
Scope/UA-180/Tripod assembly normally lives in the kitchen in ready-to-roll configuration:
- Tripod Legs locked fully collapsed and spread to the first Stop
- UA-180 panned to 12
- Glass:
-- on the Tilt Arms down at the 90 millimeter point
-- rolled to 06 (back end pointed down)
-- tilted up with the still fully extended Eyecup in or near in contact with the UA-180's Pan Brake Housing Cylinder
-- front end protected by a LensPouch MW or 475 Solar Filter
For a carry after leaving the house now or for a hike later... Left hand grasps as low as possible on the Starboard Pan Frame Post. Assembly is suspended:
- top end fore / Tripod Feet aft
- port side down
- Scope Objective end angled inboard / to starboard in front of operator
For a longer haul we'll be wanting to flip the assembly and switch hands. And as we're a fair bit Tripod end heavy in this configuration it will help a fair bit to reclamp the Scope higher up on the Tilt Arms.
When we're behind the car and ready to load the Scope-dedicated North Face Surge Backpack and Scope assembly the latter first gets parked behind the car in the same configuration we were using in the kitchen.
The Backpack goes in the trunk fore port (clear of area required for the Scope assembly).
For loading the Scope assembly Legs 12 and 04 again get angled max in and 08 gets angled max out to 85 degrees, assembly goes in laterally - glass end starboard. Glass will be aimed a combination of starboard, aft, and down. Leg 08 will keep things pretty damn stable in the event of abrupt deceleration.
(Leg 08 gets angled back full in as soon as the assembly is pulled from the trunk.)
---
For the set...
Replace left with right hand at our best shot at the balance point.
Ready position... Scope/UA-180/Tripod assembly suspended from right hand which is low on Starboard UA-180 Post, port side down, Tripod Legs locked retracted, Feet ends Port and Aft.
Keep the assembly horizontal. With left hand (if necessary angle Leg out to perpendicular to the plane of the Spider) then loosen Twist Lock, snap Extension out to full, hard clamp Twist Lock in order:
08-3 - 04-3 - 12-3 -- 12-2 - 04-2 - 08-2 -- 08-1 - 04-1 - 12-1
I can run that phase of the drill in twenty seconds.
Next - and assuming a hard and reasonably regular surface...
Face best shot at North/uphill, assembly vertical and airborne, left and right hands on middles of UA-180 Port and Starboard Posts respectively, plant, tilt several degrees uphill.
Use left hand to:
- pop Sliding Stops 12 and 08
- angle Leg 08:
-- out generously beyond 24 degrees
-- back down to best shot at 35 degrees
Transfer left hand to UA-180 Port Post.
Use right hand to:
- pop Sliding Stop 04
- angle Leg 04:
-- out generously beyond 24 degrees
-- back down to best shot at 35 degrees
With left and right hands on the UA-180's Port and Starboard Posts and only Leg 12 planted tilt the assembly down towards North/uphill to angle Leg 12 out. (We'll be straddled by Legs 08 and 04.)
Lift assembly to get Leg 12 airborne along with everything else, lean forward, plant Leg 12 max North/uphill, pull back to angle Leg 12 out to 85 max. (Doing so trips 12's Sliding Stop.)
With Leg 12 still airborne and the assembly tilted back a bit to South/downhill rotate to best shot at getting Legs 08 and 04 planted at equal elevations. If the Bubble is to the:
- left of 12 o'clock get airborne, rotate counter, replant
- right of 12 o'clock get airborne, rotate clock, replant
With the Bubble as close to 12 as possible pitch assembly away towards North then back towards South. If the Bubble:
- clings or stays near to circumference get airborne and adjust rotation
- comes back reasonably well towards center and 06 do not adjust rotation and go to torque mode to fine tune
To bring the Bubble to centerline from:
- port apply torque to the UA-180 counter
- starboard apply torque to the UA-180 clock
With the Bubble on centerline pitch North to bring it (still on centerline) South. (Overshoot.)
Continue holding tilt with left hand, transfer right hand to Leg 12 and pitch it down to surface contact.
Incrementally adjust pitch South to move Bubble North towards center - lightly planting 12 with each cycle.
Bubble centered, 12 planted, slap Sliding Stops 08 and 04 back down - done.
(Sliding Stop 12 is automatically tripped when Leg 12 angle drops to 52 degrees.)
Also doable to hold Bubble centered with left hand while planting 12 with right but this is more physically demanding and error prone.
I can run that drill - including panning the Bubble to the shady side - easily enough inside of thirty seconds.
With respect to applying torque to get the Bubble on center(line)... I find it greatly helps to think in terms of "pushing" the Bubble away from one side to center by "pushing" in the desired direction with my near (high side) elbow.
If setting on a more problematic surface - soft, thick grass - a couple tweaks may necessary.
- For initial contact with the surface have left and right hands on 08-0 and 04-0 respectively, use left and right hand middle and ring fingertips to angle Leg 12 out uphill to the limit possible (several degrees), tilt uphill a bit, plant. (Thus Legs 08 and 04 will be free to angle out.)
- For final plant of Leg 12... After centering the Bubble tilt North/uphill slightly beyond vertical to bring the Bubble a bit South of center and plant. Tilt South/back slightly to bring the Bubble to or closer to center, replant, check. One or two iterations should do it. Avoid overshooting.
For a surface that's irregular but without enough of a slope to be easily identifiable it's best to just quickly and arbitrarily decide and designate an uphill direction and proceed accordingly. If it's actually downhill or cross slope it won't matter in the least with respect to procedures and end product..
--
Legs angled out farther give us better stability but are a lot easier to kick - 'specially with the distractions of getting guests on target during astro missions. Good idea to put a hand high up on a near Leg when attempting to navigate close in.
--
2023/06/11 - I'm gonna start practicing setting up with the Level 3 Extensions less than full out but evenly. Extend 08 to whatever looks/feels about right, lock, match 04 and 12, proceed as usual. Frequently I get guests - adults and kids - who need the Glass dropped below what's possible with everything out full and that situation can be a bit of a time and effort drain. And even with a kid level set I myself can do a straight up target while transferring a lot of my weight to the Tripod via grips to the backside Level 0 Legs sections.
--
2023/09/03
I'd been practicing wide angle sets virtually exclusively over the course of a little shy of six months and I can't remember once being in wind conditions in which I wouldn't have been totally comfortable with the downhill Legs angled to the 24 degree first Stop and the uphill to whatever it took to hit vertical. And I was very frequently kicking Legs while trying to navigate to the back end of the Scope - 'specially with guests around. So let's run a nearly identical drill with 24 as the downhill target and the Level 3 Extensions a fair bit less extended. (And note that with no load on a Leg that's been angled out to a Stop it (the Stop) offers virtually nil resistance additional to what we'd find with it unengaged.) Replacement text:
Use left hand to:
- pop Sliding Stop 12
- angle Leg 08 out to first Stop
- pop first Stop
Transfer left hand to UA-180 Port Post.
Use right hand to:
- angle Leg 04 out to first Stop
- pop Sliding Stop 04
Then we get on to centering the Bubble.
--
For breakdown:
- Lock everything above the Tripod into carry configuration - as described above.
- Position yourself downhill from the Tripod at 06.
- Left hand on 08-1 / Right hand on 04-1
- Walk and pitch uphill to:
-- keep Leg 12 planted
-- get:
--- Leg 12 pitched beyond vertical uphill
--- Legs 08 and 04 airborne
- Angle Legs 08 and 04 back into parallel with Leg 12.
- In order to get oneself lower and in more comfortable working position:
-- bend right knee
-- extend left leg back and downhill at 07:30
- With right hand loosen Leg 08 and 04 Twist Locks in sequence:
-- 08-3 - 04-3 -- 04-2 - 08-2 -- 08-1 - 04-1
- To collapse Tripod - with right hand reach around Leg 04 and loosen Leg 12 Twist Locks in sequence:
-- 12-1 - 12-2 - 12-3
- Resume upright stance.
- Lift with right hand at left hand carry point (on the UA-180).
- With palm of left hand fully collapse all Legs - which will have:
-- fully collapsed after 12-3 has been loosened
-- partially extended during lift and rotation from vertical to horizontal (carry) orientation
- With left hand hard clamp all Twist Locks one set at a time in order:
-- 12 - 04 - 08
And it doesn't hurt to give the Twist Locks sets insurance twists after executing the above breakdown procedure.
Also a good practice to hit each Tripod Foot with some substantial tightening torque. At this end of the operation we're unlikely to be critically pressed for time. And if we make it an element of our routine we should never need to worry about it at showtime.
--
For a reset a short walk away when we're leaving the Legs extended it's worth it to get the UA-180/Scope assembly locked back into long carry configuration - aimed at 12, Scope rolled to 06 and pitched full up. To get the Bubble recentered we're gonna need to have the UA-180 aimed at 12 and the back end of the Scope not blocking our view of the Bubble.
---
2023/01/02 - For carrying on foot the Tripod Legs DON'T need to be "angled full in / to parallel". For long hikes to/from/between sets that load frequently becomes heavy. And with the fully retracted Legs angled out full to the first Stop the scope assembly can be effortlessly plopped down for a two minute recovery period.
---
For the...
...CT101:
http://live.staticflickr.com/65535/47023533954_86cbd78a9a_o.png
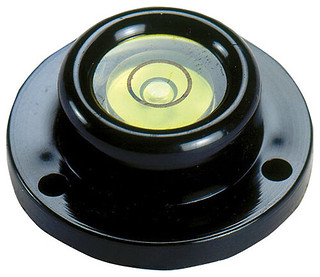
We have to do a bit of jumping through hoops for the spare Tripod assembly but the Kaiser Circular Bubble Level works out surprisingly well for an off-the-shelf solution and everything's much larger diameter / easier to see in crappy light. Also... It's gonna be a lot closer to our face than the Gitzo Level will be.
Note: Whenever installing the Center Column (rightside up or upside down - but we'll use the former for the example) in the CT101's Spider Cylinder:
- Angle the Center Column substantially.
- Insert the low point of the circumference of the Center Column's bottom end in the Cylinder to anchor it in position.
- Tilt to vertical and push through.
For upside down it doesn't hurt to insert an index finger through the Cylinder to help guide in and catch the end of the Center Column. Or just sight straight down through the Cylinder and line up visually.
From the Center Column's Limit Stop we've lost the Ballast Hook and installed a 3/8-16 nylon nut using a 1/4-20 to 3/8-16 Adapter sleeve on the Stud to protect it from other stuff and other stuff from it. Remove the Limit Stop from the bottom end, clean and dry the former - isopropyl alcohol wipe for good measure. Peel the shipping paper off the Level's rubber adhesive base, get things nicely aligned, press the Bubble Level's base onto the top/internal cylindrical rim, screw the amended Limit Stop back into place.
The base of the Level has a diameter that measures 25 millimeters, the Center Column ID appears to be 26 or not much more, the fit is pretty much perfect.
If we need or want to get fairly accurately vertical for a stop - preferably a longer one...
- Do the same initial best guess initial setup we would for the PCT and straddle Leg 04SE.
- Up periscope. Raise the Center Column / Head assembly to bring its bottom end to about four inches below the Spider and lightly clamp.
- With your left and right hands reaching around and in to the left and right of 04SE unscrew the Limit Stop with fingers of your left and right hands - left high and palm down, right low and palm up. Use the rim of the Limit Stop and nylon nut for purchase.
- Pull the Center Column / Head assembly.
- Install the Center Column upside down in the Spider Cylinder, with your left hand start feeding it up to minimal projection above the Spider's top surface and clamp.
- With your left hand position the Limit Stop with Bubble Level up on/in the projecting rim of the Center Column and center.
- Adjust as with the PCT to center the Bubble.
- Pull the Center Column / Head assembly and do the reverse of the above to reinstall the Center Column in the Spider Cylinder and Limit Stop in the Center Column.
- Lower the Center Column and get on target.
Again... Go easy on the torque when reinstalling the Limit Stop back in the Center Column - just enough finger torque to get it to stick. There's zilch risk of it backing out six and a third rotations and disappearing but it's not all that difficult to get it seriously welded in. And make sure that when you're removing the Limit Stop with the Tripod set up and looking down that you start your turn clockwise. Start out with just a thumb and a finger and consider that if you're meeting significant resistance you might be going the wrong way.
Note that once we've effected the adjustments to get our Center Column / Tripod vertical we can use DH101's built-in bubble level to put our Scope on a good horizon reasonably well.
Note regarding setup and breakdown...
On the PCT the structural geometry is such that the Legs don't and can't angle in towards the Tripod's center axis from Hinge to Foot level.
http://live.staticflickr.com/65535/43881852322_1391176778_o.png
Not so on the CT101. They can converge such that with about 14 centimeters of extension beyond full collapse everybody's in contact with everybody else. It facilitates setup and breakdown - minimizes resistance - if the Legs (fully or partially collapsed or extended) are pulled out to parallel.
http://live.staticflickr.com/65535/50763868137_996fdc7cf8_o.png
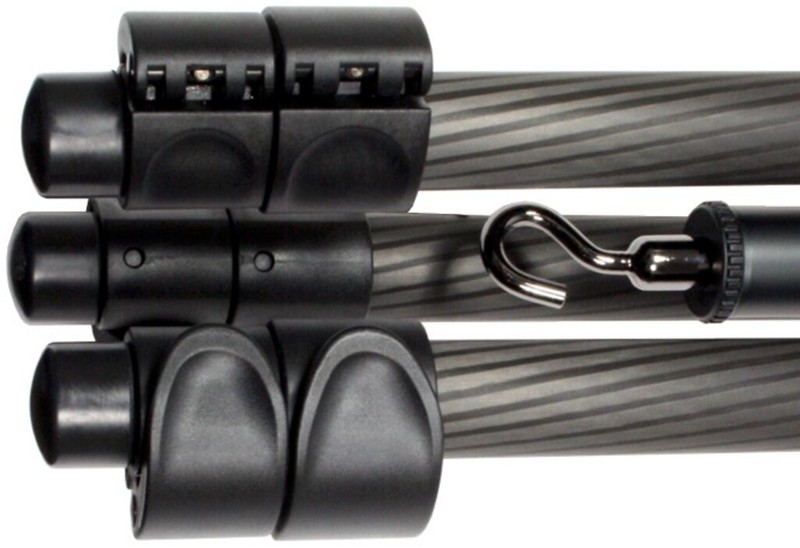
---
The industry produces sophisticated leveling bases to install on the tripod and below the head which allow one to quickly and easily adjust for less than perfectly vertical tripod sets. But I can center the tripod based Bubble quickly, easily, efficiently, accurately without having to pay for, carry, have my glass raised up above the tripod set level with pretty much zilch cost in time and effort.
----------
Tripod Feet
For sixty bucks we can get a set of:
http://live.staticflickr.com/65535/50990076337_414674317b_o.png
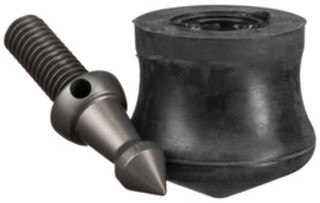
GSF38S - Gitzo Short Spikes and Rubber Feet - 38 millimeter
3/8-16 threaded, 38 millimeter diameter rubber Feet. The Feet pull off and we're good (or at least a lot better) for ice, soft sand, marshy stuff. And they'd do the trick for my gravel road situation (discussed in the "Uprighteousness" section) but so would angling back in to the 24 Stop.
---
On a gravel road surface - like the one I'm using at the Makkah Center for a major percentage of my astro mission time - the gravel works pretty well as ball bearings to blow one's Foot plant and send its Leg angling up/out to the 85 degree Stop. Not dangerous 'cause the more the Scope leans toward the skid the more impossible it is for a topple but one might wanna opt for having everybody angled out to the 24 Stop and centering the Bubble by partially or further retracting Extension 12-3.
---
On the evening of 2023/05/11 at the Makkah Center a Foot skidded and didn't stop at the usual one inch point. Went full out, the other two Legs synchronized as best they could, the Scope went down (but stayed mostly upright - that being its only option).
2023/05/15 ordered from B&H a GSF30S set of Short Spikes plus 30 millimeter diameter Rubber Feet:

Got them just before noon the next day.
One reviewer docked them a star on the grounds that they should've been standard components. Totally agree. Or at least the prospective owner should've been advised regarding the issues one WILL experience in a lot of real world environments operating rubber only if he feels like saving a few bucks getting the rubber-only option. So now I have fifty bucks worth of still surprisingly pristine GSF33 Feet which will be permanently mothballed. Ditto with respect to my standby Tripod I'm also retrofitting.
Specs on these two flavors...
- GSF33- - $51 - 3/8-16x20 millimeters - 33.1 grams
- GSF30S - $76 - 3/8-16x25 millimeters - 27.4 grams
Additional info on the GSF30S...
- 60 millimeters - Overall Length
- 55 millimeters - Spike Overall
- 30 millimeters - Spike Projection
- 35 millimeters - Rubber Foot
- 5/32x15 millimeters - Pin Tunnel
The (threaded) installation shaft is way longer than it needs to and should be but the top 11 millimeters is hollowed out and the Spike component weighs nothing. Still... the GSF33 Foot is seated in five and a quarter turns and nobody's ever heard of a problem with one backing off. The GSF30S requires a dozen minus an eighth. (Keep up the great work, guys.) Thankfully - in theory anyway - we should only need to run this drill once (per Foot).
There was a complaint that it was a pain to install and pull the Foot off the Spike. Not in the least.
UA-180 with Glass mounted is normal beginning-the-set mode, Feet are fully installed on the Spikes, assembly horizontal, right hand low on Starboard Post (at/near balance point), Legs still fully retracted. With left hand pull and twist Feet clock as if unscrewing left threaded nuts. (Twisting counter would unscrew the Spike (while leaving the Foot fully engaged.))
After the set if we won't soon be doing another employing the Spikes... Grasp Level 2 and 3 Twist Locks, press Foot full on with thumb.
With the Tripod out of the equation a pair of 3/8-16 Nylon Nuts screwed onto the Spike's exposed end provides enough extra purchase to get the jobs done.
If the Foot is off the Spike and the Spike needs to be pulled but puts up a fight we can deal with the issue by running something through the Pin Tunnel. The 08-32x1.00 machine screw I keep in my kit (along with its Nyloc) in case my Kijaro chair loses/needs one couldn't fit the bill much better. But with the Rubber Foot installed back on and a little squeeze added to the twist...
The GSF33 responds to a magnet a fair bit, the GSF30S doesn't in the least.
The Color Coding Elastics can no longer live at the bottom ends of the Tripod Legs' Level 3 Extensions 'cause when the rubber is off the Spikes they'll follow immediately. They can now live a level up. But if a Spikes situation isn't on a near horizon they can much more elegantly live on the waists of the Feet.
If we lose one of the six elements of this set - most likely a Foot... GSFSM Gitzo Short Spike and Rubber Feet Set (30mm and 38mm) - two thirds the price of the whole GSF30S set, gets us a 38 millimeter Foot which we don't really want but could use OK.
I've had several skids on the hard asphalt steeply sloped driveway at high test angles. Thinking that rubber would have held just as well, possibly better. And I'd much rather skid rubber than metal.
---
2023/05/18 - I've ordered another GSF30S set for my 85 millimeter assembly.
---
2023/09/21 - I've decided to leave my Tripod Legs' Level 3 Extensions semipermanently extended and clamped 100 millimeters out. When out of action doesn't eat up much additional floor area, Scope/Head/Tripod assembly stows in the car's trunk every bit as well, not much negative effect on balance for short hike-in mode. I'm always shooting partially retracted and never needing or wanting to go higher and the overwhelming majority of my guests are way shorter than I am. And we want the Scope high up on the Tilt Arms such that its CG is aligned with the tilt axis. This approach will save me time and effort for sets and help a bit in the precision department.
---
If we hear a rattle while handling an airborne Tripod then one of the Feet is no longer securely screwed into the bottom end of its Leg.
----------
ATX/STX Overview
---
In order to register / log in to Swarovski Optik:
https://www.swarovskioptik.com/us/en/birding
Scroll all the way down and click on:
Pro Staff
---
http://aa.swarovskioptik.com/download/pdf/5006351-B2-BA.pdf
---http://live.staticflickr.com/65535/47691657471_7d2da506b0_o.png
01 Objective module (65, 85, 95)
02 Eyepiece module ATX
03 Eyepiece module STX
04 Objective lens cover
05 Aiming aid
06 Sunshade
07 Tripod ring
08 Focusing set collar
09 Bayonet fitting cap
10 Locking screw
11 Tripod foot
12 Attaching thread for tripod
13 Bayonet fitting cap
14 Magnification changer set collar
15 Eyecup
16 Eyepiece cover
17 Release button
18 Aiming aid ATX
Note - Also from the manual:
The back end of the Objective Module is male bayonet and its Cap is Model 49250 with a 702-975A identifier on the inside.Bayonet fitting cap objective module
To remove cap, turn bayonet fitting cap anti-clockwise.
Bayonet fitting cap eyepiece module
Remove bayonet fitting cap from eyepiece module turning anti-clockwise.
The front end of the Ocular Module is female bayonet and its Cap is not identified by a model number an actual human can find anywhere but with a 702-941A identifier on the inside.
---
http://www.optics4birding.com/
Optics4Birding
14.00 - Swarovski Bayonet Cover Cap for ATX/STX/BTX - SKU 44128 - CID 158938
---
2023/03/10
The Swarovski Objective Covers consist of seven components - the main disc, two opposing release tabs, two pairs of tiny springs which keep the disc safely seated and are compressed for installation and removal. Each tab features a pair of spring arm catches for keeping the tab engaged and these can be pushed inward to allow separation. But for tab removal they don't get pushed in any more than the do in the course of normal use.
Yesterday I pulled the stock Swarovski Objective Cover for the 95 - 49253 - out of mothballs and one of its two locking tabs and the relevant pair of tiny little springs disengaged - fortunately on the kitchen table where it would be hard to lose anything. The 95 had a previous owner who'd cared for it well and the Cover had probably seen a fair number of on-off cycles but that failure could've been - and for all intents and purposes was - forty bucks down the drain as a consequence of the little spring arms having less than stellar life expectancies.
Henceforth I will only use LensCoat LensPouches for front end protection - way cheaper, way better protection, infinite lifespans.
--
2023/03/12
Checked out the Cover for the 85 - 49252 - today. Doesn't stay together any more reliably than the 95's. The jobs of the relevant LensPouches are in no danger whatsoever.
---
With respect to the Scope's Tripod Ring/Foot component...
- Click Stop Pin
- Spring
- Set Screw
All three can be removed/installed with access only to the bottom face.
With the Tripod Ring/Foot disengaged from the Scope the Pin and Spring can be removed (read fall out) through the top opening.
---
2022/08/07
2022/08/05 I'd noticed a light rattling emanating from my H834427962 ATX Ocular and started worrying. Pulled it, pulled the Eyecup, did what I could with visual inspection. Could find nothing. Dug my H824325090 STX Ocular out of mothballs. Same rattling. Today my H874127378 ATX returned from the shop. Same. Guessing it has to do with the zoom mechanics and nothing to worry about.
---
2022/07/23
I've recently been in contact with Del Lavature - North American Assistant Manager Customer Relations - primarily over the issue of getting a current Arca-Swiss Tripod Ring/Foot to replace the Swarovski Standard on my used eBay 95 ATX Objective. Reasonably pleased with his responsiveness. THRILLED in fact - relative to previous experiences I've had with most other Swarovski reps.
Found out that:
- "We do allow customers to transfer the warranty through private sale if the serial number isn't tampered with, and the product isn't flagged in our system as stolen." And good freakin' luck finding warranty information on their website. So if you're buying used off of eBay make sure that that chain of ownership is established prior to buying it now or bidding.
- "Regarding the Arca Swiss conversion foot, while I can understand how that seems like a trivial repair it's not something that we offer. It has been brought to our attention by a few customers that they would like to have it done but unfortunately, we simply can't fulfill the request at this time. This was a corporate decision and completely out of the control of our repair team."
That's freakin' INFURIATING. The Swarovski Standard Tripod Ring/Foot was - at least in retrospect - an unmitigated disaster, the fix would involve separating (unscrewing) the fore and aft primary components of the Objective module, doing the swap, redoing the nitrogen seal. I figure a hundred bucks should cover it very fairly and owners would be lined up around the block to have it done. But then Swarovski Optik would be forced to reveal that they had a history of executing some engineering way south of stellar.
There is NO currently available head hardware - available from Swarovski or anyone else - capable of directly engaging the Swarovski Standard foot. The last (only) one I know of was the Swarovski label DH101 which was fine for light duty stuff but total junk for any serious scope work. (For that we need gimbal.) So for approaching serious scope work on anything we need to throw in an adapter plate - like the Swarovski 45066:
- extra:
-- weight
-- bulk
-- altitude above the tripod
- reduced stability
- introduces alignment issues
- CANNOT be clamped securely enough to prevent twisting after we've taken our best shot at alignment
The Locking Screw head...
14-012920
http://live.staticflickr.com/65535/51386630011_22df886fd0_o.png
...LOOKS elegant but majorly sucks with respect to the user's ability to effect function.
So if you're halfway serious about this game (and if you're reading this you are) DO NOT purchase one of these white elephant models. A seller who understands the downsides will also understand that Joe Buyer WON'T and thus the selling prices of 1.0 and 1.1 will be virtually the same.
I'm not entirely sorry I inadvertently scored my 49995. (And my seller from Utah loved this glass and I'm sure wasn't trying to pull anything on me.) I now understand the issues and have developed workarounds for the Swarovski Professional Tripod Head / Gitzo Gimbal Fluid Head and the Feisol UA-180 Carbon Gimbal.
If you too are stuck with one of these I highly recommend the UA-180 - if you're OK with the volume issue. With my modifications I can go from Swarovski Standard clamped through Arca-Swiss clamped back to Swarovski Standard clamped in about a minute and a half.
--
2023/03/06 - Rethinking the Tripod Ring Locking Screw...
- When I'm in operational mode locking ATX roll would be totally moronic as I'm damn near constantly adjusting to:
-- make it comfortable/possible hit targets at different or changing elevations
-- accommodate other viewers
- When the Scope's being automobile transported shortish hops from base or the last stop to the next stop I feel much more comfortable having my ATX roll reliably locked at 06.
To work the Locking Screw - Swarovski Standard or Arca-Swiss - as effectively as possible gloves on (or off):
- right hand - palm down / thumb port - grasps ATX body:
-- from aft of Zoom Collar
-- to fore of Focus Collar
- left index finger engages top of Tripod Ring Locking Screw and:
-- pulls aft to lock ATX roll
-- pushes fore to free ATX roll
For Arca-Swiss the effort's gonna be considerably less 'cause the Locking Screw was redesigned to actually do its job.
For either flavor...
- One counter revolution takes us from hard clamped to max out but the Locking Screw won't get any more disengaged after an eighth turn - so adjust accordingly.
- Real good idea to ALWAYS firmly twist clock as Step 1 for backing off. That way we never have to worry about torqueing hard counter on a Screw already backed off to the max extent it can be.
--
2022/07/25 - More thoughts on Swarovski Standard versus Arca-Swiss...
http://www.optics4birding.com/swarovski-modular-scopes-review.aspx
Swarovski Modular Scopes Review
By the way... Those pins don't stabilize a goddam thing. They may help guide you into a predetermined position - which is most unlikely to leave you balanced and will prevent balancing adjustments when engaged - but it's your clamping that will determine proper pan alignment. I pull them whenever I acquire anything that features them.Swarovski spotting scopes have always had a foot design that let the user mount the scope into compatible tripod heads without using a quick release plate. Originally, these feet were compatible with Manfrotto heads that accepted their RC2 plates as well as the Swarovski head such as the DH-101.
Swarovski has recently introduced their PTH (Professional Tripod Head), which is a gimballed head that uses an Arca-Swiss mount. To continue allowing attachment without a quick release plate, Swarovski converted all their spotting scopes to Arca-Swiss feet. In doing this, Swarovski solved one of the only things we found that we didn't like about the original X-series scopes - that the tripod mounting foot did not have a hole for a stabilizing pin from the quick-release plate of most standard tripod heads.
Two options with respect to foot clamping - longitudinal (fore/aft) or lateral. The former...
19-020119
http://live.staticflickr.com/65535/51387635980_822227dc6d_o.png
...is MORONIC.
For design you take your best shot at balance for your most likely operational configuration. So for the current ATX/STX let's say that that's an ATX 95. So if you have an 85 or 115 you won't balance. Also:
- put an STX on the back end
- extend a Sunshade
- slap on a Solar Filter
things change.
So now to balance you need to Rube Goldberg on a plate designed for lateral clamping - something Arca-Swiss perhaps. And the only option you have for amending is a 3/8-16 screw you need to torque up to best manageable - which is always gonna suck.
While with an Arca-Swiss laterally clamped Foot you NEVER have misalignment issues and if a butterfly parks on the front end of your Objective and won't leave you can back off on two clamping screws, nudge your Scope aft two or three hairs' breadths, reclamp at perfect balance within the space of ten seconds.
--
2022/08/05 - As per above - you can register yourself and any relevant equipment you own. Device, serial number, purchase (Swarovski direct or otherwise - new or used), date. And you can go back at any time and edit as you please. I just went in and did all my major ticket stuff. And I wish I'd done it at the times of acquisition 'cause it was a major pain going back years in records reconstructing how and when I'd been putting my collection together.
---
The fundamental name of the game is TRADE-OFF.
Power. It's why you have the Scope. You want closer views of distant targets. Downsides. Hurts you in considerations of price, weight, bulk, field of view, depth of field, exit pupil, target acquisition, stability. There were three Objective component diameter options for my system - 65, 85, 95 millimeters. 65 - no thanks, I want more exit pupil and light gathering and I'll handle the extra weight. 95 - no thanks, the minimum magnification is 30 power and I'm going to gain weight and lose field of view / ability to acquire targets. 85 - Mama Bear, 25 power, 3.4 millimeter exit pupil, just right. I've never thought about looking back.
On the subject of weight - Ocular Modules in grams:
- 818.6 - ATX
- 862.8 - STX
(I WOULD *LOVE* to get a look through a 95 at a distant high value target but for the majority of the daily grind stuff we're doing... (Think picking glider size if you’re only going to own one.))
---
Reconsidering the 95
- 2020/02/19
-- The 95 has 125 percent of the 85's front end glass area.
-- The 85's exit pupil diameter equals the 95's max (3.167 millimeters) when we've zoomed to 26.839 power and its exit pupil at 30 power (the 95's minimum) equals 2.83 millimeters. So - short story - if we've zoomed in at all on the 85 we'd rather be using the 95.
- 2020/02/20
-- I set up and worked the zoom back and forth between 25 (the 85's min) and 30. The difference is pretty negligible - definitely not enough to worry about when considering a choice between the two.
- 2020/03/07
-- Acquired an eBay used but pristine Model 49995 (Swarovski Standard (versus Arca-Swiss) Foot).
- 2020/03/12
After tons of work and experimentation in the house and driveway I finally took it down the road a bit and got it on a few actual birds. Heavy overcast, cool, dismal afternoon. I guess all the migrant Canada Geese have split and all I got was some distant audio but a few Turkey Vultures - parked and airborne - cooperated. And a single airborne adult Bald Eagle added a great deal to the exercise. Zilch trouble targeting, tracking, staying in focus. No complaints zooming in all the way. The only downsides to this glass are price, weight, bulk.
---
Zoom. Allows us to bring difficult targets in closer to help in identification - atmospheric conditions permitting. Small penalties in terms of weight and cost but virtually all spotting scopes have zoom capability so not worth talking much about.
Straight/Angled:
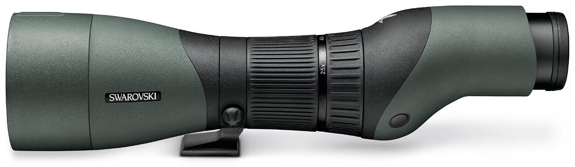
Straight is:
- heavier - 865 to the ATX's 810 grams. (Gotta redirect the light an extra time.)
- more elegant in appearance (gotta admit).
- virtually essential for any halfway serious digiscoping effort.
- easier to stow, transport, store, and... aim. HOWEVER it's virtually NEVER easier to look through once on target.
(I'm guessing that virtually all "straight" spotting scopes feature this double light path redirect is because it permits a shorter overall length.)
ALL astro telescopes are angled. And angled to the max - ninety degrees. Stars and planets are always found above the horizon and one is seldom looking down much at birds. (Assuming one isn't flying a hang glider. And no one uses a scope while flying a hang glider.) We access bird opportunities via roads. Roads follow shorelines, rivers, creeks, drainages; skirt mountains; cross passes.
56
http://c1.staticflickr.com/1/915/42167435665_a9ca2d8bd8_o.png

47
http://c1.staticflickr.com/1/931/41745974020_b2f0391e29_o.png

77
http://c2.staticflickr.com/2/1827/43072566311_0574176f13_o.png
The surrounding terrain tends to be above one. The relevant water surfaces are always going to be below but usually not by much.
We humans are designed to be able to look comfortably forward and reasonably comfortably down. We suck at up while standing. The UTC figures for my E09 2017/08/21 solar eclipse viewing station at 43°54'05.93" N 112°47'22.92" W:
Event (ΔT=68.8s) - Altitude - Azimuth - P - V - LC
C1 - 16:14:33.8 - 36.7° - 111.1° - 286° - 13.0
C2 - 17:31:37.0 - 48.5° - 131.1° - 108° - 07.3 - -0.8 s
MX - 17:32:45.3 - 48.7° - 131.5° - 198° - 04.3
C3 - 17:33:53.7 - 48.8° - 131.8° - 288° - 01.3 - -0.2 s
C4 - 18:56:26.0 - 56.9° - 162.9° - 109° - 07.9
We were using my Canon 10x42 tripod mounted. We were OK from C1 through Max and some beyond. But long before the end of the show that configuration became undoable/agony and we bailed to handheld in the folding camp chairs in which we could comfortably recline a fair bit. And that experience convinced me that you'd have to be whacko to opt for a straight Scope option.
But with the Swarovski ATX/STX/BTX (Angled/Straight/Binocular) series you don't have to totally commit. The Objective and Ocular elements bayonet together/apart.
The Focus Collar is fore, the Zoom Collar is aft, the split line is at the aft edge of the shiny black ring separating the two Collars. (And the focus and zoom mechanics are entirely split between the fore and aft components respectively.) The two components snap-lock together when properly aligned. And depressing the black Release Button on the bottom bulge of the port (near/visible) side disengages the Locking Pin and allows the counterclockwise quarter twist and separation.
In the "Video tutorial: SWAROVSKI OPTIK ATX/STX spotting scopes" above Dale Forbes demonstrates a method of bayoneting the two modules together. We can refine that a fair bit.
Swarovski has alignment dots on the connection faces of the Objective and Ocular Modules - 12 and 10 o'clock respectively. But we're only gonna be able to see - at most - one of them as we bring the two elements together. So they're kinda useless for that critical operation. (The one on the Ocular is rather nice though for bayoneting its lens cap on efficiently.)
But for both the 65 and 85 millimeter Objective Modules there's a 25-60x clockwise zoom guide immediately aft of the Focus Collar at the extreme aft end of Modules' outer diameters. The 95 is 30-70x. And at 12 o'clock near the fore ends of both the ATX and STX Ocular Modules we have lovely little Swarovski Goshawk logos.
And if you approach your target with your Ocular Module rolled counterclockwise and the Goshawk lined up with 25x or 30x depending or a wee bit counterclockwise of it you're gonna score a direct hit. (Note that in the above shot there's a 1.7 Power Magnification Extender installed between the Objective and Ocular Modules to confuse things a bit. Sorry 'bout that.)
Encircle your left hand's thumb and finger tips (palm down) around the circumference of the Objective's face to help with proper alignment and make contact.
Note that the Ocular Module's spring loaded Locking Pin will be projecting out at 06 o'clock when we're at 25x alignment. So the now bottom position on our module will be pushed out pretty hard as we're engaging. So 12 o'clock will contact first and we'll need to firmly grip the back end of the Objective and torque down as we're pushing forward to flatten the surfaces against each other.
After that's done we roll clockwise until we can't. Then if the black Release Button on the Ocular isn't popped out flush we give things a little wiggle so that it does and there's no question about the Locking Pin being fully engaged. And exercise care in disassembling - there's no need to overshoot the 25x point for separation.
Note the Tripod Foot, Ring, Locking Screw assembly immediately fore of the Focus Collar.
And here's ALL of what Swarovski has to say concerning the Ring feature:
Another way of saying that the Scope will freely roll 360 degrees with eight click stops at (even) 45 degree / 90 minute clock (hour hand) increments.http://live.staticflickr.com/65535/49719514033_c4d6c7bd96_o.png
2.9 CHANGING THE VIEWING ANGLE
- Turn the locking screw to the left (anti-clockwise) to unlock the tripod ring.
- Turn the spotting scope mounted to the tripod on the tripod ring into the desired position. The ATX/STX will click into place at: 0°, ±45°, ±90°, ±135°, ±180°.
- Turn the locking screw to the right (clockwise) to lock the tripod ring in position.
And...
- To nitpick a bit...
- They only illustrate 0°, +45°, +90°, +135°, +180°.
- -180 degrees is zero degrees.
- They don't waste ANY bandwidth ANYWHERE I've discovered to date discussing WHY one might desire to deviate from the "standard" 12 o'clock (weak link) option we see in all their presentations, advertising, instructional videos.
With respect to the latter I'm thinking two reasons...
- The more we roll away from 12 the less elegant the setup LOOKS. And Swarovski wants everything they market to look elegant. It's the reason there's almost always a Magnification Extender and absolutely never a 65 included in a Balance Rail illustration. We'll note in the graphic above - the only illustration we'll find anywhere of an ATX deviating from 12 - the perspective is from directly aft and with the multiple exposure effect symmetry and elegance of appearance is maintained to a level of virtual perfection.
- The ATX/STX system is designed as a digiscoping platform. An ATX 12 digiscoping configuration is a moderate disaster and at any other roll is an unmitigated disaster. They don't even want us to start thinking in the direction of that road.
12:00 for max height and targeting, 03:00 or 09:00 for the lowest one would normally wanna go for a target out horizontally or over, 06:00 for looking close to straight down into the Grand Canyon from the rim and stowage are useful and nice to have.
Also - let's note - while they TELL US we have three click stops below horizontal (04:30 - 06:00 - 07:30) they conspicuously don't ILLUSTRATE those options.
With the Locking Screw backed off the ATX we can roll between 12 and 06 (clock or counter) to adjust the height of the back end for access and/or comfort as we're altering tilt. Downside... If we attempt to adjust the Zoom we can find ourselves adjusting the Scope roll instead. Fix... We can use our left hand to hold Scope roll as we're adjusting Zoom.
STX
- Hunters tend to opt for it.
-- Even at long ranges they'd rather not be seen by the target.
-- There's no such thing as an angled rifle scope. They WILL be in STX mode at the critical moment.
-- They're flying solo and not worried about accommodating, adjusting for multiple users.
- Digiscoping... Straight is virtually mandatory. (And it's a bit like hunting - solo effort and the object is usually to get off a single killer shot. (Although with modern digital photography we're using a machine gun that's not affecting our target.)
The Swarovski angled spotting Scopes are angled to 45 degrees. And if we look back at the passage on our eclipse experience we didn't start really hurting until beyond 50 degrees. So that means that we can use a 45 degree angled scope to look straight up for a somewhat prolonged period without hurting too much. (Once we've figured out how to configure the PTH for straight up.)
Note that with the ATX Scope / PTH configuration while we CAN roll clockwise to 01:30, 03:00, 04:30 we probably SHOULDN'T. The PTH...
http://c1.staticflickr.com/1/859/43616064242_2d9f9715b2_o.png
...is already starboard-heavy before we've taken it out of the box and clockwise roll leaves the operator with unnecessary obstruction in front of him and moves him to starboard such that operating the tilt and panning resistance controls is less comfortable.
The Foot - old Standard or new Arca-Swiss - is tapped 3/8-16 to a depth of 6 millimeters. So a 1/4-20 to 3/8-16 Adapter should be no more than that. But if there's a little head projecting when we're full in it won't matter if we're using either of the Plates discussed here.
---
2021/11/04
Had the 95 set up on the back deck to catch the last of the Sun and try to catch Venus - but clouds had the last word. Temperature went down fast through dinner but the sky situation improved and had Jupiter high and blazing. Still way too many leaves left in the canopy, brought the Scope back inside in preparation for going down to the street for a clear shot. Instantly picked up a pint or so or condensation. Fired up a space heater to speed things up. Took care of the condensation on the OUTside of the Objective glass pretty satisfactorily but then a problem on the INside was revealed. So I guess we have stuff other than nitrogen beyond the "seals".
And now we have a good explanation for the halos I've been seeing a lot around Jupiter lately.
Serious problem - one I don't feel I should've needed to worry about for another two or three decades. Hoping I can get it dealt with for well under the 2.1K price of a new 95. Also hoping that I can get it back with an Arca-Swiss Foot replacing the original Swarovski Standard - despite all the effort I've put into modifying Arca-Swiss Head Clamps to take Swarovski Standard.
---
2021/12/19
And then a few weeks later while on a birding mission...
Extended the 95's Sunshade and a fair portion of a black fabric strip remained behind the Sunshade's trailing edge. It was what had been keeping the Sunshade properly aligned and firmly seated at full retraction and extension. I partially extracted it on site and it spent the rest of the afternoon secured by one end waving in the cold breeze.
Back home I analyzed the situation a bit more, got insistent, fully extracted it in one undamaged piece. 305 millimeter length, 5 width, about 0.4 thickness. Slightly elastic.
Leaves a tiny bit of flop at full extension, no effect on view, not a major setback. However...
--
2022/07/29
In TFM we're told:
(The "sunshield" is what they identified as the "Sunshade" seven pages back.)The sunshield is best slid out and in with a slight rotary motion.
I'd been making a habit of just pulling it straight out for extension. And nothing is said about retraction and it's a no-brainer to just swat it straight back. And they say nothing about anything regarding life expectancy.
And this obviously ain't one of their better engineering executions but I'm thinking we'll be better off down the road if we DO employ a twist at the starts and ends of pulls and pushes.
Better yet... Don't extend it minus a passably good reason.
---
2022/06/28
Made it through the rest of the fall, all of the winter and spring, one and a half days of the summer using the compromised 95 as my primary and mostly only without too much glare annoyance. But with lotsa rain and no sky 2022/06/23 I was working with my gear, separated my 85 ATX components, attempted to separate my 95 from my H874127378 Ocular. Wasn't happening - pressing as I could on the Release Button while twisting counter.
SOMETHING soon happened however. The Ocular Module separated at the interface of two of its three main Assemblies - the:
- Fore with its 95 millimeter convex lens and Sunshade
- Aft with its sealing glass and focusing glass and mechanics
The Tripod Ring will stay mounted as per its normal installation on the Aft Assembly until we've gone to the effort of working it off the front end.
In retrospect I'm thinking I serendipitously maybe discovered the or a procedure the Swarovski guys use back at the shop for separating the Fore and Aft components of the Ocular - grasp around the fore/wide area of the Ocular's barrel with one hand; disengage the Locking Pin, maintain contact pressure to keep the contact surfaces at the bayonet connection flush, torque counter using the upward (aft) extension of the ATX as a lever arm. That's how WE can effect this operation anyway.
Wasn't distressed about the unexpected disassembly in the least.
- The nitrogen seal had long since been history.
- I knew I hadn't damaged anything.
- It would be really cool to see how this element was put together - since we'll never get shit from Swarovski.
- The Ocular I'd purchased new from a Swarovski authorized dealer and would be covered under their lifetime warranty.
A bit more Button pushing efforts and I managed to get the Locking Pin retracted enough to separate the Aft Objective Assembly from the Ocular.
By 2022/06/25 I got to start seriously thinking about the Ocular's sticking Locking Pin issue. I don't yet understand what's going on inside and didn't want to risk blowing another seal on a separate, even more expensive, warranty covered component but let's try this... Spray down the Button and Pin with an Ivory dish washing detergent solution and keep working the ends. That process restored things to a fair level of functionality in reasonably short order and emboldened me to remount the Objective.
For a while I thought I'd effected a cure but soon started getting erratic results. I THINK that starting in disaster mode I'd be able to get things freed up adequately by spraying the Button end only but this issue is SERIOUS and not one with which I feel like living.
Can we live without the fuckin' Pin doing its fuckin' job? Maybe a bit better than we can live with the fuckin' Pin safetying an Objective and Ocular Module together in permanent lock mode. So choosing the maybe lesser of two evils let's disable the Pin function by plugging up its Receptor Cylinder - diameter 3 millimeters, depth a wee bit shy of 2 - and do some test driving. A 13x13 millimeter square of newsprint (corner from a newspaper page) soaked in water, wadded up, stuffed in the Cylinder works like magic and will present zero issues for removal.
I'd always been concerned that in order to swap out the pain-in-the-ass Swarovski Standard Tripod Ring / Foot assembly for the Arca-Swiss one would need to blow the nitrogen seal. Confirmed. It's the interface of the Fore and Aft Assemblies.
Three glass elements in the Objective Module - the two we can see and touch (but shouldn't with anything other than a brush and/or lens cloth) and another in the middle that we move fore for planets and aft for chipmunks.
- The Fore Element is the 95 millimeter diameter convex lens we're using as our magnifier. No surprises there.
- The Aft Element is just a 27 millimeter diameter window which seals the back end. Minus considerations about contaminants we could throw it away.
- The Middle Element is a 40 millimeter diameter concave lens which bends the rays concentrated by the Front Element back to parallel for our viewing pleasure.
The Middle Element is connected to a short strut which projects through a fore/aft slot in the cylinder - 6 millimeters wide and 40 millimeters long - on which a small brass "Shoe" - is mounted. Be advised that there's nothing holding it in place on its little axle - on which it can rotate freely once the Focus Collar's been pulled. It's a little 7x5 millimeter rectangle 'cept the ends are rounded and it tends to fall off a bit frequently when one is getting distracted.
The inner surface of the Focus Collar features a left hand spiraling channel in which the Shoe is engaged. This geometry permits two full revolutions plus about 327 degrees (33 degrees shy of three full revolutions) between max in and out.
To reinstall the Focus Collar...
- align the Shoe such that its length is aligned perpendicularly to the Scope's fore-aft alignment
- engage the Shoe with the Collar (installed over the fore end of the Aft element)
- turn the Collar counterclockwise to draw the Shoe well up into the Collar's channel
- pull the Collar full aft and turn it clock to thread it onto the relevant Aft Element threads
- continue turning clock (which would be counter from normal viewing position) to focus the concave Middle Element for max out.
A Torx 08 removes five screws - Flat Head, 2.5-45 x 6.0 millimeter, Stainless - which secure the Bayonet Plate to the rest of the Aft Element. We now have access to both surfaces of both Aft Element glass elements for cleaning.
With the Bayonet Plate removed the heads of three more small screws are exposed. A Phillips 1 takes them out but that action alone apparently doesn't give us further access to anything. I chickened out at that point and replaced them.
Test driving...
With the Locking Screw backed off backed off full we're either rotating the Ocular towards disconnect or coming perilously close when we're using the ATX to roll counter. As long as we're wired to be aware of the issue we'll be OK. And even if we lapse we're gonna feel that something ain't right IMMEDIATELY. And even if we WERE to make it all the way to disconnect we're disconnecting with and because of a firm grip. Not seeing a significant threat here.
Where we COULD have a problem would be when we're running our station for a group. But when that happens for an astronomical target I'm ALWAYS stationed at the Scope and retargeting after each individual has scored. And as a new individual approaches the back end I'm adjusting the back end roll for as comfortable as possible a height. And I don't ever recall a typical guest adjusting the roll him or her self for a more comfortable setting.
And even if we were to score a full drop and the surface weren't asphalt, concrete, granite...
Numbers - weights in grams and dimensions in millimeters...
1013.0 - Fore Assembly
0178.4 - Aft Assembly
0033.0 - Bayonet Plate
0087.3 - Focus Collar
0092.0 - Swarovski Standard Tripod Ring / Foot
99 - Aft Assembly length
53 - Focus Collar length
--
2022/07/30
Was shooting the morning Sun using the 95 and H874127378 Ocular and noticed a suspicious pattern in the black stuff outside of the disc. There's always bright white reflective ghosting over surrounding blackness which I attribute to reflection off of the viewer's cornea, off the back end glass, back to the retina but that stuff moves as the viewer adjusts his position and here we had distinct dark areas which were consistent and totally stationary. Pulled the Ocular for inspection.
Noticed a little shiny chunk of something - probably metal, possibly glass, about one and a half millimeters in length and a bit less in width - on an internal glass surface. Position - about halfway down on the center to edge 06 o'clock radius. And moderate tapping doesn't move it. The sticky Pin I could live with, this I can't, it's going in.
And as long as I'm doing that much I might as well send the 95 back in with it to have the nitrogen seal issue dealt with - even though that means I'll be getting it back with the same pain-in-the-ass Swarovski Standard Foot.
At the moment I'm not sure when I'll be sending it in 'cause Swarovski Service has sent out an advisory that they'll be doing a computer system overhaul somewhere in the "August/September 2022 timeframe" which could seriously gum things up for a while. But whatever... I'll be mothballing H874127378 with my 85 and using H834427962 on the 95 for whatever the time being turns out to be.
And I'm stowing H874127378 fully engaged with the 85 Objective. While the Locking Pin performance is still problematic I'm now confident I can deal with it.
- Objective aimed straight up - meaning so is the Pin and we've optimized our gravity assist.
- Twist clock and counter to find the play limits of the lock.
- Go halfway between to eliminate any lateral force on the Pin.
- Fully depress the Release Button and twist counter.
- If first you don't succeed do some more jiggling and try again.
--
2022/08/02
H835129769 and H874127378 are now being FedExed to Rhode Island for warranty covered service. And Del Lavature was kind enough to have the shipping label covered.
I'd gone to a grocery store with the Scope assembly in hand and inquired in the produce section about a cardboard box. A stocker beelined to the Washington apples and handed me one. Took some modification work but the end product couldn't have been a more perfect match and not a square inch of material was wasted.
- All the cuts were effected with a hacksaw.
- For new 90 degree bends I marked straight lines on the insides with a pencil, indented them with a screwdriver, effected the folds.
- Scope assembly laid in diagonally on its side, empty space filled with wadded up sheets of newsprint.
--
2022/08/07
Stunned to find that the large box the FedEx guy handed to me when I intercepted him at the bottom of the driveway at 13:10 EDT was mine and contained the glass that Swarovski had only received 09:58 four days prior. Loaded the car with everything I needed to do simultaneous sets with it and the 85, got both filtered and on the Sun at my primary Observatory station. Everything checked out fine in that mode. Pulled the filters and tested on cattle, Starlings, soaring Black Vultures... No complaints there either. Thanks much, Swarovski.
High direct Sun and heat were brutal. Lucky to have survived packing up and getting outta there.
----
2023/10/04...
Tad Eareckson - 2023/07/27 12:07:23 UTC
ATX 95 servicing
info-us@swarovskioptik.com
Recently completed Naturalist Journeys tours to Brazil's Itatiaia National Park and the Pantanal.
For the former our hotel was at 3700 feet and nights were cold. On one of them - about 2023/07/06 - I noticed condensation on the aft (inside) surface of my 95's (H835129769) front end glass. Had the same issue last year and just under a year ago sent it in for servicing. I wasn't too worried about the issue then and wouldn’t have sent it in 'cept a couple other problems came up with my ATX Ocular - H874127378 - one of which was difficulty retracting the Locking Pin with the Release Button.
And after the Pantanal tour was completed and we were headed back to airports a push on the Release Button of my other ATX Ocular - H834427962 - left Pin and Button welded down in retraction mode. (Déjà vu...)
I'd like to get those issues taken care of (and am still in the market for getting the 95's Swarovski Standard Tripod Ring/Foot swapped out for Arca-Swiss if that's now a possibility).
Thanks much for your attention...
info-us@swarovskioptik.com - 2023/08/02 16:20:18 UTC2023/07/31 10:45 - 02920 - Front Desk/Reception/Mail Room
We have received your product
Shouldn't that be increasingLY?Dear Tad Eareckson,
We have received the product that you registered for repair.
Case number: 00259999
Product: ATX Modular Ocular
Serial number: H834427962
Your product will be initially evaluated and service will be performed by our repair technicians just as soon as possible. Lead time for most repair services will be approximately 6 to 8 weeks from the date of this message. All product evaluations are done immediately upon arrival (1 or 2 days from receiving this email) and an email will be sent. It's important to note that most repairs are conducted free of charge under warranty however, we may contact you with a repair estimate. We are extremely thorough and we will make you aware of any issues that aren't covered under warranty. Should you receive an email regarding an estimate it's very important that you contact us as soon as possible so that your repair process is not held up in any way.
FAQ: Q: When is the best time to send in my products?
A: Whenever you can be without your product for 6-8 weeks.
Q: What is considered the busy season?
A: Typically speaking repair times get increasing difficult from Sept - Feb.
The TIMES don't get increasingly DIFFICULT. They get LONGER - typically speaking.
September through February. That's half the year. The times get more and more difficult until after we've hit February and then they abruptly drop off to average - which excludes the data from September through February.
So how come on your website you say:
http://myservice.swarovskioptik.com/s/article/How-do-I-send-in-my-device-for-repair?language=en_US
How do I send in my device for repair?
And obviously in that version of reality the clock starts when the box lands. In this one I have to wait two days for you to tell me you'd received my product - which I already knew from the USPS tracking number - and then another 1 or 2 days for you to IMMEDIATELY get around to evaluating my product and tell me what I'd already told you six days ago. And now the clock is starting approximately 6 to 8 weeks from the date of this message.Repair times on devices that are sent in from the US, Canada and Costa Rica are about four to six weeks if repaired in the US...
Approximately 6 weeks is approximately 42 days. I have been living without my two products since the late afternoon of Friday 2023/07/28.
SONA Customer Service - 2023/10/03 15:25:10 UTC
info-us@swarovskioptik.com
And the same for the back end 2023/10/03 15:25:56 UTC. Signed for at the bottom of the driveway 2023/10/05 18:50 UTC.Dear Tad Eareckson,
We are pleased to inform you that we will return your device to you.
Case number: 00260000
Product: 95mm Telescope Objective
Serial number: H835129769
If you have any questions about our products or service, please visit My Service or contact us at info-us@swarovskioptik.com. We will be happy to assist you.
Sincerely,
Your SWAROVSKI OPTIK Customer Service Team
Great, I'm glad that this pleases you. Pleases me too. I'm getting my devices back after 69 days. Who wouldn't be pleased. And several days shy of a year before I shipped this one - when you were several days closer to the period in which your repair times get increasing difficult - when you got my 95 and other ATX back end for the same issues - that shouldn't have been issues in the first place - I think you turned the glass around several hours after you landed it.
Really? Then how come you're still listing your worst case busy "season" times as both 42 and 56 days? And not keeping your customers informed and apologizing if/when you get bogged down?We are extremely thorough...
info-us@swarovskioptik.com - 2023/08/03 16:54:47 UTC
We will start the repair work shortly
Define very soon. I've already found out what your concept of "immediately" is. What are we talkin'? Months? Years?Dear Tad Eareckson,
Thank you for confirming that you accept our cost estimate.
We will start repairing your product very soon.
We will let you know as soon as your device has been repaired and shipped to you.
Case number: 00260000
Product: 95mm Telescope Objective
Serial number: H835129769
Sincerely,
Your SWAROVSKI OPTIK Customer Service Team
And when will you FINISH repairing my product? Decades? And what about the ATX Ocular H834427962 with the small but serious problem I shipped to you bayonetted onto the Objective in the same box - Case number 00259999 - and you received 2023/07/31 10:45 EDT?
And the issue with the 95 Objective was a blown nitrogen seal. You're gonna START dealing with it soon? I'm guessing the time required for addressing that issue is something in the ballpark of five minutes. Last time the turnaround was damn near instantaneous. But now you have a new improved procedure which involves over eight weeks of skilled labor?
I wonder what you guys think you're accomplishing by sending me a message that your gonna start repairing my product "very soon" then following up with absolutely nothing over the course of the next eight weeks.
--
Just got off the phone with Customer Service Greg - 2023/09/06 14:30 UTC. Primary mission - NL Pure Binocular parts. Inquired about the status of the Scope repair. Yeah, they're working on it, this is our busy season... Bullshit. (Wasn't your busy season (as you defined it in your 2023/08/02 16:20:18 UTC) a couple days after I got them to you.)
USPS says you landed my glass 2023/07/31 14:45 UTC. That's when the clock starts. So eight - or six if we believe what you have up publicly on your website - weeks MAXIMUM. Your busy season worst case scenario. So that means that if it wasn't boxed up and ready to go 2023/09/25 14:45 UTC then you were LYING about your service. And you were. (And yeah, I'll check for revisions of your worst-case scenario.)
Oh... You've encountered unexpected and unprecedented issues which are requiring hundreds of hours of expert technician team work currently in effect? So how come you haven't contacted me, explained the situation, thanked me for my patience, provided me with an ATX 95 loaner while you doggedly plod on towards the success of this mission?
--
On 2023/09/12 I landed a new (as opposed to used) NL Pure 8x42 to prep for and transfer to my sister. Test drove it for a few days, did a front end cleaning... There was a persistent little particle low on the starboard objective glass. Really persistent - I soon came to realize - 'cause it was on the INSIDE face - at about 07 o'clock from a back end perspective and about 13 millimeters out from center.
One of my high requirements and preferences is that the inside glass surfaces are cleaned and checked before nitrogen purging, sealing, passing through quality control, shipping out to dealers and customers. Seems to me you guys put way more time, effort, resources into pushing images of how magnificent you are and way too little into manufacture, quality control, customer support. I do a better job than this on the outside glass surfaces I always clean between the end of the last mission and the beginning of the next.However high your requirements may be when it comes to binoculars, the NL Pure 42 will meet every need and preference.
Yeah, nobody's ever gonna be able to detect a problem by looking through back ends and comparing with other copies and it's not worth it to me to ship it to Cranston - at my expense - and have it out of service for two months out of the rest of my life.
http://www.bhphotovideo.com/c/product/1574324-REG/swarovski_36008_8x42_nl_pure_binoculars.html
Swarovski 8x42 NL Pure Binoculars 36008 B&H Photo Video
**
And this is how companies and individuals need to be judged. Not by all the dime-a-dozen five star crap. And we don't forgive in the absence of apologies, restitutions, recalls, design fixes. And I'm thinking that we're paying Swarovski the extra bucks less for superior quality and more for their campaigns to create illusions of superior quality.Carol - 2022/06/04
Extremely Poor Quality and Customer Service
The Swarovski NL Pure 8x42 have been a disappointment from Day 1. Out of the box the left integrated objective lens would not stay in place. I had trips coming up, so decided to keep them and figure this out later. The lens covers fell off almost immediately. The most critical issue did not appear until after talking to a Swarovski rep who recommended I clean the objective lens area and run the binoculars under a tap, since of course they are sealed, right? Wrong. Kirtland Warbler day I wake up to find the left barrel clouded with internal condensation, making them unusable. (Ever try to use only one barrel of a binocular all day?) Sent in; Swarovski Service sent replacement pair (8x42 EL) : broken, would not focus. No replacement for replacement from Swarovski. A new trip In six days. NOT a B&H issue, but wary binocular buyer should beware.
--
http://myservice.swarovskioptik.com/s/article/How-do-I-send-in-my-device-for-repair?language=en_US
How do I send in my device for repair?
The condensation I might be able to forgive - but probably shouldn't. But please explain to me why we should be tolerating Dust, dirt inside.Binocular
- Left Tube - Right Tube
-- Dust, dirt inside
-- Condensation
--
----
2022/02/23
The Eyecup... Need to create some terminology. Two elements:
- Body - all metal with an:
-- outer cylinder which screws onto the back end of the Ocular Module
-- inner cylinder which we twist full:
--- clock to retract for stowing and transport
--- counter to extend for viewing
- Contact - glued on rubber cap we engage with our eye socket to get ourselves properly positioned and centered on target
The Contact of my Eyecup of my original ATX back end...
49137 - Eyecup

...had started separating from the Body and I finished it off and settled for the loose fit. (Replacement component is fifty bucks.)
We want the Eyecup fully retracted and capped - 44127 Eyepiece Cover - for stowage and transport and fully extended for viewing but the counterclockwise twist required for extension is the same action which can start unscrewing the component if not firmly seated. And I'd made a practice of gripping and torqueing the Eyepiece Cover clock with every breakdown to ensure that seating. Unintended consequences.
Strategy revision...
Lose the Eyepiece Cover, extend the Eye Cup about halfway to provide clearance from the back end glass, cap with the LensPouch.
---
2022/03/07
http://eclecticproducts.com/products/amazing-goop-adhesives/
Amazing GOOP All Purpose

Says to give it 24, max set may not happen before 48 to 72. Give it 24 and be gentle for 72. Not a critical connection and not a BFD to redo. (If we can smell it then it's sill curing.)
Also says "Product can be used between 50 and 90 °F / 10 and 32 °C." And it's safest to assume that means until full curing is attained and it's a fairly safe bet that we'll be best off in the middle of that range or a bit above.
---
2022/08/10 - Crap. Just realized why Swarovski service replaced the Eyecup before returning my H874127378 after needed repairs. They'd noticed my handiwork for keeping that one going. Wish they hadn't. Mine was perfectly functional and undoubtedly just got tossed in the trash.
---
2022/09/07 - A week or under ago I had another separation issue with another Eyecup and executed another Goop restoration. Probably not a bad idea to have a spare Eyecup on standby to swap in and stay operational for the duration of the curing period.
---
2022/09/23 - Found myself at destination minus a Gooped-back-on Contact last evening. Wasn't in the car's trunk, had to be somewhere between the front door and top of the driveway. Found it hours later back home on the walkway not far from the front steps. Thinking that while the Goop may do a good job while it's holding it will eventually fail and when it does will increase the ease with which it falls off.
Cleaned off all the cured Goop, will see how I fare just using it with no adhesives and keeping an eye on it (so to speak).
---
2022/09/28 - The above strategy has worked through a lot of exercises just fine. I've pulled the spare Eyecup out of the field bag and returned it to mothballs.
---
2022/11/20 - Very cold short astro mission early last evening. Had a lot of trouble getting my eye centered and acquiring the target. Thought maybe something serious had gone wrong with the glass. When I was behind the car about to stow the Scope I luckily caught the Contact on the ground in the headlamp light. Must have done something to strip it but don't recall any issue.
Hadn't noticed its absence even with my eye socket skin in contact but if I start experiencing similar symptoms again...
---
2022/11/28
Thanksgiving holiday trip to New York, Massachusetts. Arrived Tarrytown 2022/11/21 with Scope minus Contact and would live and operate without until second astro mission of last night after getting back home. Used a spare, haven't been able to recover the original, no freakin' clue how I managed to lose it.
Got a lot of practice making do without, even had good results getting guests on target. Scanning was something of a bitch but after a bit o' practice didn't get slowed down too much.
Another Gooped together assembly had started to fail and I finished it off and reGooped. What the hell, seems to work well for a while and I probably have another couple decades left in the tube to use up. Eyepiece Cover back in play.
New plan...
Tripod erected, UA-180/Scope assembly in carry configuration - Scope:
- locked full down on the Tilt Arms
- rolled to 06
- aimed north and full up
Lark's Head the Eyepiece Cover's bungee tether loop around the bottom of the UA-180's Frame to the port of its Pan Housing Cylinder.
Fully retract the Eyecup and cap it.
So if/when the Cover's adhesive fails the Cover WILL remain secured in the Eyepiece Cover - and it'll take a little effort to extract it.
We know that Swarovski knows that there's a major problem with this component 'cause they noticed my Goop repair during their lifetime warranty service on my ATX H874127378. But they've never gonna:
- fix the problem
- acknowledge that they have a problem
- make the 702-940A Contact available so's we can cheaply and easily deal with the problem
Big freakin' surprise.
This Eyepiece Cover strategy is way better than my 2022/02/23 LensPouch SM plan:
- back end glass is better protected
- if there's an adhesive failure we're gonna catch it immediately
- whereas the LensPouch needs to be stowed the Eyepiece Cover lives in place on the UA-180 pretty much issue free
- on and off related procedures are near effortless
- it's virtually impossible for the Cover to vanish from a set area unnoticed
---
2022/12/01
The Contact mounting only gets significantly stressed when the Eyecup is torqued on for use and torqued off for cleaning the back end glass. And I do frequent back end cleanings during periods of frequent use. Starting now I'll be hosing down, brushing, wiping, drying with the Eyecup mounted.
And if I ever have to send an Ocular Module back in to Swarovski for service I'll swap on a factory condition Eyecup so's they won't take one of my repaired ones and toss it in the trash.
---
2022/12/02
Fly in the ointment... I like to rinse the back end under the faucet in the kitchen sink and the mounted EyeCUP is really good at trapping and retaining water and it doesn't shake or get mopped out very easily. Will probably start using the rinse procedure sparingly and effect it prior to longer downtime periods. I can do safe and effective light cleaning using light mistings from the sprayers. But then again I'm not seeing the back end glass getting contacted by my little puddles and this is probably more of a worry than an actual issue.
When I'm driving to a site the Tripod is collapsed and the 95 is mounted on the UA-180, rolled 180 (Ocular aimed down), all the way down on the Tilt Arms, tilted max up, LensPouch MW on. And to accommodate the full length of the MW (keep its trailing edge clear of the leading edge of the UA-180's Lens Clamp) the 95 is in the Clamping Channel a bit fore of the balance point (a bit nose heavy). We happen to be good when the Tripod Ring is coplanar with (straight over) the center (fore/aft) of the Lens Clamp .
---
2022/12/02
Again...
I've been torqueing these Eyecups on like they're mostly permanent components of the Scope and:
- won't need to come off sooner than six months from now at the earliest
- will be in serious danger of falling off and being lost forever in the field if I don't go totally nuts on the installation force
Let's get grips on reality and sanity, ditch the instinct, start doing things right.
We want the Eyecup torqued on just hard enough to keep it from unscrewing when we twist counter to extend it from full in for stowing and transport to full out for viewing. And BFD if we err a bit on the gentle side. We'll immediately detect the problem, correct, proceed with near zilch costs in delay and effort.
Duh.
And now we have to question the value of the strategy of bringing into play the Eyepiece Cover as described a bit above.
---
2022/12/07 - Although Swarovski never anywhere breathes a whisper regarding the Eyecup torque issue we can at least get a feel for what Dale Forbes is doing (light to moderate) in the "Video tutorial: SWAROVSKI OPTIK ATX/STX spotting scopes" dissection above.
---
2023/02/08 - About two weeks ago during a 2023/01/08-31 birding trip to Arizona and New Mexico I noticed a bit of cracking of the Contact rubber. Wasn't and may never become problematic but it's more incentive to keep a spare Eyecup on hand.
----------
Zoom and Focus
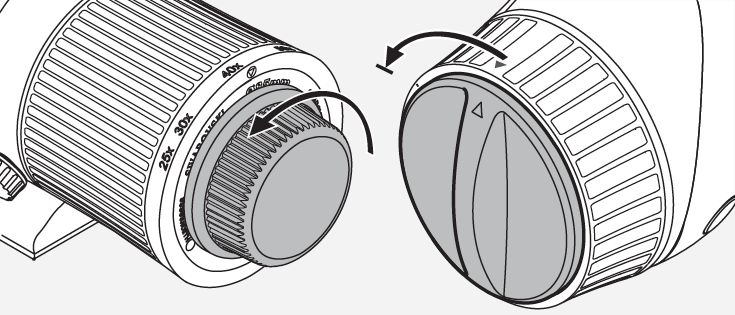
http://live.staticflickr.com/65535/49719514033_c4d6c7bd96_o.png
Note that in all three illustrations immediately above we're looking at an 85 - which has the same 25 to 60 power zoom range as the 65. The 95 and 115 run from 30 to 70. (And the power indicator ring scale is Objective Module dependent so we know that's the aft-most visible extent of the Module.)
The Focus and Zoom Collars are engineered - quite appropriately - for light and substantial resistance respectively. (We don't need or want the zoom to be too easily adjustable, we're finely adjusting focus all the freakin' time, and we want to know immediately when we're on the wrong Collar.) It's pretty much impossible to accidentally alter the Zoom but the Focus changes if we breathe on it too hard.
Real good idea - 'specially when doing astro - to start with one's (gloved) hand(s) fore on the Focus Collar and slide aft to cleanly engage the (conical) Zoom Collar. It's way easier to feel the transition to target with this approach than it is going the more intuitive aft to fore. With the latter approach it's easy to overshoot and screw up the focus in the process of adjusting zoom.
Note that the Ridge/Valley count on the Objective Focus Collar is nearly twice as fine as what we have on the Ocular Module's Zoom Collar - 60 versus 35. 34 actually for the latter - 'cause the Arrow Ridge (second illustration) eats up a Valley and constitutes a Mega-Ridge.
The circumference at the critical junction - measured around the ring immediately aft of the Focus Collar (with the Zoom Power indicators) - is 227.6 millimeters. Translates to 3.793 millimeters per Ridge (or Valley) at that point.
When we're on target, viewing, and zooming in and/or out it's intuitive to slide a hand onto the Zoom Collar from aft-to-fore but if it's cold and we're gloved accordingly getting onto the Zoom Collar without overshooting onto the Focus is a fair bit problematic.
I'm finding it most effective to engage with left and right hand fingertips in opposition the body of the port and starboard sides of the Ocular a bit aft of the Zoom Collar, slide forward until the Zoom Collar's Ridges are felt, press in and adjust as desired. Thumbs extended aft and up on the ATX Ocular prevent the Scope from rolling.
It's pretty much mandatory to stow our Scope assembly zoomed down to minimum - spun counterclockwise to the stop. In a time critical viewing stop we're gonna hit our target a lot faster and easier at min zoom. And it's also good practice to periodically verify that we're actually at min zoom when we want to be and/or think we are when we're bringing zoom into play. With the Scope roll at 12:00 the Arrow Ridge is at about 10:00 and it's easily detectable by touch - even while wearing unlined leather gloves.
Advise stowing at min zoom (no-brainer) and our focus tuned to infinity for our eye of choice.
Let's establish standards and find our personal infinity setting for our chosen eye. Hard to beat the Moon or (using a solar filter) Sun in a clear sky for a calibration target.
On the 85 if we spin the Focus Collar to max clockwise we'll find a Ridge aligned with the "0" in (max power) "60x". (We're using max power 'cause it gives us the max range of zoom range indicators). This we'll designate as "Ridge 60.0". (Ridge Number - nothing to do with the zoom power. That was just a coincidence.)
- Valleys to the left and right are "59.5" and "00.5" respectively
- Ridges to the left and right are "59.0" and "01.0" respectively
We'll differentiate Ridge 60.0 by using a toothpick to "paint" about three millimeters worth of glue stick glue into the aft ends of the two adjacent Valleys - aforementioned 59.5 and 00.5.
We hit our infinity target at min zoom, center and focus, zoom in to max, refocus, record an alignment. I'm good when Ridge 60.0 is aligned with the "0" in "40x". If we count clock to find what's now aligned with the "0" in "60x" is Valley 11.5 - and we paint it.
Now we can look at our Focus Collar and tell where we are and about where we need to be for moderately distant stuff and beyond. But let's do one more paint job. Go back to full out (Ridge 60.0 aligned with the "0" in "60x"), what's now aligned with the "0" in (the Objective Module's) "40x" is the Focus Collar's Valley 48.5. And we paint that one.
So now if we've been parked full out we can see where we'll need to spin Ridge 60.0 to hit infinity.
With our 95 bayoneted onto our Objective our max out finds a Ridge aligned with the "x" in "70x" and - since we don't have a Ridge alignment with the "0" - we'll designate that one as our "Ridge 60.0" for this Objective. I'm good when Ridge 60.0 is aligned with the "x" in "40x" so our corresponding Focus Collar numbers are 15.0, 60.0, 45.0 (all Ridge's) so we're painting Valley's 14.5+15.5, 59.5+00.5 (again), 44.5+45.5.
Quick check infinity reference:
85 - 60x - 60.0 > 40x
95 - 70x - 60.0 > 40x
We're spinning counterclockwise for the:
- 85: 11 Ridges / 0.183 revolutions / 66 degrees - 41.7 millimeters
- 95: 14 Ridges / 0.233 revolutions / 84 degrees - 53.1 millimeters
One scenario when it's real useful to have jumped through these hoops... Scanning through an area of dawn or dusk sky for a faint astronomical target when there's nothing available on which to focus - star, planet, moon, cloud edge, horizon, aircraft - to determine infinity focus.
From min to max stops for both the 85 and 95 - about 5 Ridges shy of 3 revolutions. Probably identical internal gizmos. (Like what we have for the visible stuff in this neck of the woods.)
For birding we're gonna be working the focus a lot and likely staying zoomed out. For astro we're gonna glued onto infinity and likely working the zoom more frequently. To avoid accidental contact with the Focus Collar when working the Zoom it's a good idea to come onto the Zoom Collar from its aft edge.
----------
Objective Modules Field Guide
Three not-to-scale shots (the smaller it started out the more it got blown up (note the steadily shrinking labels)) from Swarovski's website in ascending order of Objective lens diameter, length, weight, price tag: 65 - 85 - 95.
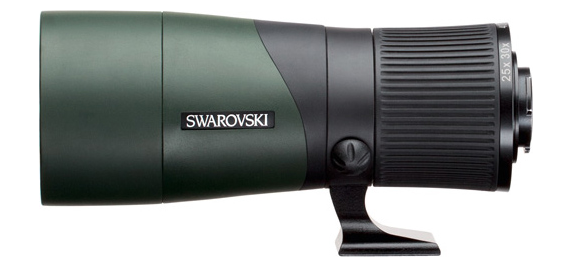
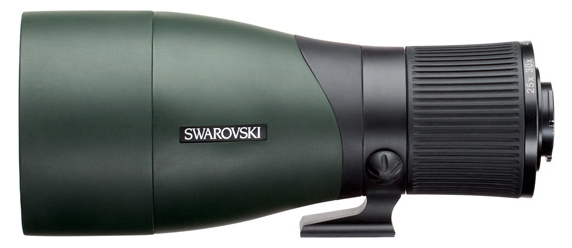

The 65's a no-brainer. Just a bit up from cylindrical, Foot is extended down from the 68 millimeter OD Ring 28 millimeters and projects aft while those of its bigger brothers are identically short - 18 millimeters - and project fore. But anyway... Note that the label's about three and a half times the length of the green behind it.
The 85 and 95 can be a bit trickier. But note that the length of the green run aft of the 85's label is a bit less than the label's whereas on the 95 the green run is about 1.6 labels worth. (Label's actual length is about 40 millimeters.)
Also note the lowest extents of the front ends (Sunshades) relative to the base of the Foot: twenty millimeters above, dead even with, five millimeters below.
When they're in their bags I can quickly differentiate the two by grasping around the Objective ends (retracted Sunshades). If I can get my hand around the barrel enough to safely and comfortably lift with the other hand on the other end it's the 85. If I can barely do the top half of the circumference it's the 95. Same technique for differentiating their solar filters when they're in their bags.
The 65's Foot is reversed for better balance when amended with the Ocular element and extended down to keep it compatible with Swarovski's one-size-fits-all Balance Rail. (The height of the Aft Support is the issue.)
Note that the dimensions of everything visible from the leading edge of the Tripod Ring aft are identical. (Not down so much. The Feet of the 85 and 95 are identical. The Foot of the 65...) That means that the Aft Support of the Balance Rail stays in exactly the same position under the Ocular Module (ATX or STX) regardless of what you're using for an Objective (and/or digiscoping configuration. (What DOES get adjusted is the Lens Support position on the Balance Rail.)
2020/12/16
Swarovski has amended its fleet with a...
http://live.staticflickr.com/65535/50918935551_c16ddeb034_o.png

http://live.staticflickr.com/65535/50919068057_262195b8b6_o.png

http://live.staticflickr.com/65535/50727627116_ec8591ff64_o.png
http://live.staticflickr.com/65535/50918936961_d1a4fa5a67_o.png
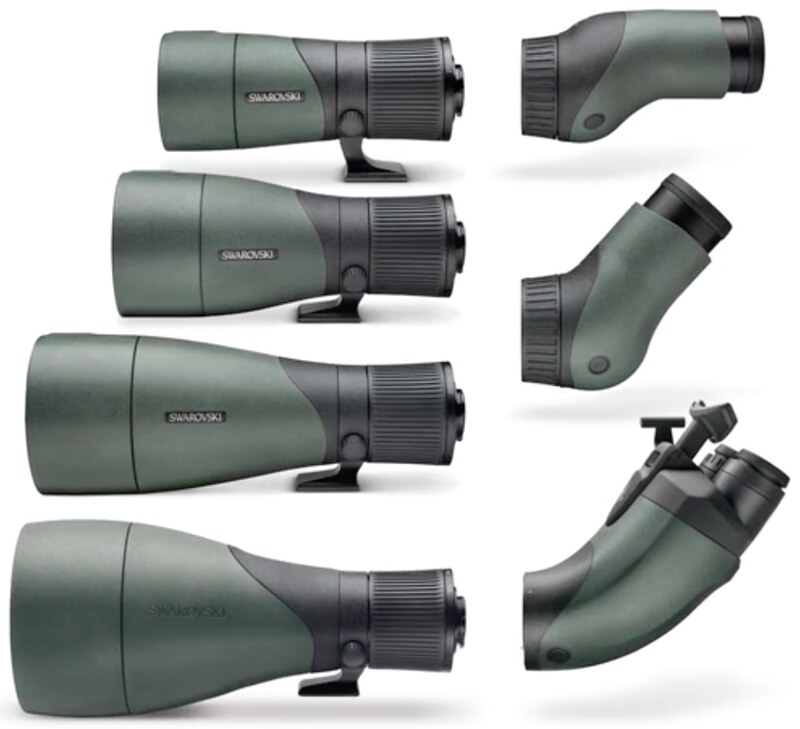
...115. Retails for a wee bit shy of $3K.
While we're looking at these photos let's note with respect to the Swarovski ATX Scope assemblies...
- The weight of the 115 Objective is 1.9 times the weight of 065 Objective.
- The three sub 115 assemblies balance at some point on the lengths of their Feet.
- With the 095 being a bit nose heavy it's highly unlikely that the 115 will balance at any point on its (identical) Foot.
- For parking on a tabletop the bottom of the fat end of the:
-- 065 easily clears
-- 085 is flush
-- 095 projects below the plane of the Foot contact surface - but with a Plate mounted you're on par with the 085
-- 115 is totally out of the ballpark
Note the alteration of the "Swarovski" label.
Sour grapes? I'd love to get a look through one of these but Swarovski has a definite pattern of not alerting their customers about some of the substantial downsides that come along with a lot of their expensive upgrades.
Do I wish I owned a 115? Not really.
- My 85 has been spending most of its life on standby since my acquisition of the 95 which is a bit sad.
- I enjoy the challenge of hitting a target with the 95's higher power / reduced field of view and lower diameter exit pupil
- One tends to notice the weight of the 95 in the course of a longish birding hike
If I were starting from scratch however...
2020/02/29 - Buyer Beware
There are two flavors of the ATX Objective element series - I've very recently discovered. And you won't be able to tell what you have in hand by looking at the back end information.
http://www.photoinfos.com/Spektiv/Swarovski-ATS-STX/Swarovski-85mm-STX-Spektiv-201a.jpg
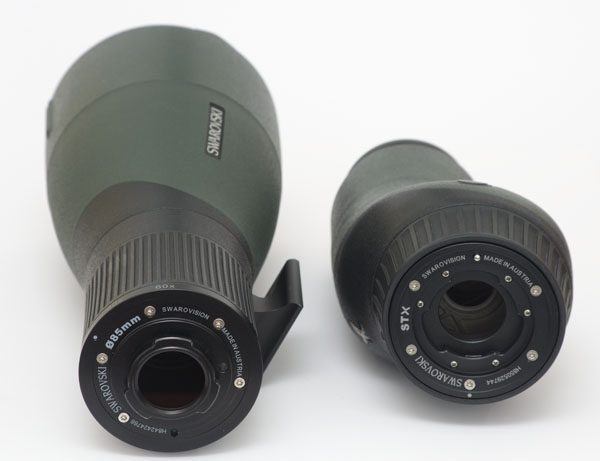
The only place you're gonna see anything in print is on the box in which it was originally shipped.
Model numbers for:
- 1.0: 49965 - 49985 - 49995
- 1.1: 48865 - 48885 - 48895
(A bit odd that the more recent model series has lower model designation numbers - dontchya think.) And the current Swarovski and dealer websites are using photos of 1.0 - as a bit above in the field guide. In the stills I've pulled from the Swarovski video...
32-14811-14824
http://c2.staticflickr.com/2/1793/43832703131_5091524228_o.png
...you're seeing 1.1.
Two differences, probably/hopefully only two, both associated with / components of...
http://live.staticflickr.com/65535/47691657471_7d2da506b0_o.png

...the Tripod Ring (07), only one of which you're gonna be able to see in most photos and videos. On 1.1 different:
- (better, easier to operate) Locking Screw (10) head
- Tripod Foot (11) - Arca-Swiss compatible (versus "Standard")
(In the photo revealing the back ends just above we can verify that the 85 Objective is a 1.0 by looking at the Foot.)
The earlier Locking Screw head kinda sucks. Requires substantially more effort/strain to firmly clamp. If you're wanting a bit then count on the Scope rolling inside the Tripod Ring rather than the zoom being adjusted when you make the effort.
Good idea to attempt a Scope roll twist (clock or counter) before attempting a clamping or unclamping twist on the Locking Screw. I've wasted a lot of time attempting to loosen Screws already full off and tighten Screws already full on.
The Arca-Swiss issue merits some concern. If you're only gonna mount the Scope using the Balance Rail or a Plate it won't really matter. But if you need to go to a Plan B you'll need (or at least want) an adapter. (And no, you can't swap out the Foot. The little recessed slotted Set Screw you'll see compresses and retains the spring which is a component of the click stop mechanism for Scope roll.)
Note that in the third shot in this 2020/12/16 entry...
http://live.staticflickr.com/65535/50727627116_ec8591ff64_o.png
...they're using the old 49965 model 65 - with the Standard versus Arca-Swiss Foot and the pain-in-the-ass-to-operate Tripod Ring Locking Screw.
----------
Power and Cost
If we want/need more power then we want/need more front end glass. Below is a chart showing the four:
- ATX/STX Objective options
- zoom ranges without and with the 1.7x Magnification Extender
- resulting exit pupil diameters in millimeters (to two decimal places).
- areas of front end glass in square millimeters
MM - Power - Exit Pupil - ME - Power - Exit Pupil - Objective Area
065 - 25-60 - 2.60-1.08 - 1.7 - 42.5-102 - 1.53-0.64 - 03318.3
085 - 25-60 - 3.40-1.42 - 1.7 - 42.5-102 - 2.00-0.83 - 05674.5
095 - 30-70 - 3.17-1.36 - 1.7 - 51.0-119 - 1.86-0.80 - 97088.2
115 - 30-70 - 3.83-1.64 - 1.7 - 51.0-119 - 2.25-0.97 - 10386.8
So - minus the Extender - our smallest exit pupil is our maxed out 65 with a dusts particle's worth under eight percent of the area of our largest - from the 115 at minimum.
And put an Extender on our 115 at min zoom and we're down to 34.6 percent of our original exit pupil area.
Here's a table of fictional Swarovski ATX/STX Scopes (065-085-095-115) with top and bottom ends extended to cover the power range encompassed by all the actual individual Scopes - fictional figures in red but everything else is real world. Provides a nice comparison of the real world performances.
MM ~ Power ~~~~~~~ Exit Pupil ~~~~~~~~~~~ ME ~ Power ~~~~~~~~~~~ Exit Pupil
065 - 25-30-60-70 - 2.60-2.17-1.08-0.93 - 1.7 - 42.5-51-102-119 - 1.53-1.27-0.64-0.55
085 - 25-30-60-70 - 3.40-2.83-1.42-1.21 - 1.7 - 42.5-51-102-119 - 2.00-1.67-0.83-0.71
095 - 25-30-60-70 - 3.80-3.17-1.58-1.36 - 1.7 - 42.5-51-102-119 - 2.24-1.86-0.93-0.80
115 - 25-30-60-70 - 4.60-3.83-1.92-1.64 - 1.7 - 42.5-51-102-119 - 2.71-2.25-1.13-0.97
Using the middle two as examples... The fictional 095 hits the real world (or fictional) 085's (min 25 power) max exit pupil of 3.40 millimeters when zoomed to a wee bit under 28 (27.94) power. And at that power on the real world 85 we're down to an exit pupil of 3.04 millimeters.
Magnification Extender? It doesn't EXTEND the magnification range, it SHIFTS it. We chop off low end, which is where I'd guess most folk spend most of their time, to pay for high end, which I'd guess most folk avoid like the plague. On the 65 and 85 we lose 25 to 42.5 to pay for 60 to 102. On the 95 and 115 we lose 30 to 42.5 to pay for 70 to 119.
---
Exit pupils for my binoculars:
6.00 - 07x42 - Leitz
5.25 - 08x42 - Swarovski NL
4.20 - 10x42 - Canon
4.00 - 08x32 - Swarovski EL
May be something to be said for putting someone having a lot of trouble behind the Canon clamped up on a tripod.
---
Objective Diameters - Millimeters to Inches:
065 - 02.56
085 - 03.35
095 - 03.74
115 - 04.53
----------
Fields of View
Fields of view in degrees for the models from min to max zoom:
065-085 (25-60x)
2.37-1.30
1.98-1.09
095-115 (30-70x)
At Seventy we're seeing the full disc of the Sun or Full Moon and very little else.
Distances:
- 1° 41' 06.2" -- Vega - Epsilon1 Lyrae
- 2° 04' 38.9" -- Epsilon1 Lyrae - Zeta2 Lyrae
- 1° 56' 59.1" -- Zeta2 Lyrae - Vega
So the long side of that triangular asterism translates to a bit shy of 2.08 degrees and the triangle fits within the field of view of the 85 at min zoom with precious little to spare.
----------
Moving Targets
On the afternoon of 2018/08/16 some errands had taken me to within convenient range of the Chesapeake Bay Foundation - on the Bay downstream of the mouth of the Severn River. Good excuse for another Scope system field exercise.
The place is lousy with Ospreys - they have nest platforms everywhere you wanna look and a fair wind was coming straight in off the Bay so lotsa ridge soaring.
I set up out at the end of their dock - 38°55'55.27" N 076°27'41.66" W - and checked out some Great Black-Backed Gulls and Cormorants, the Chesapeake Bay Bridge, Kent Island... Then tried something I'd never done before to any extent worth mentioning. Gave tracking large close-in soaring birds - bunch of Ospreys and a single Turkey Vulture - a go.
Normally this would be a no-brainer binocular task. It was virtually impossible to get a lock on stuff moving through the compass points so quickly. But occasionally I'd blunder onto somebody or catch a platform touch-and-goer - and the lighting was reasonably good and the views were pretty spectacular.
I was:
- in my usual 10:30 configuration. And that's not what you want when your target's getting up to high viewing angles.
- at my usual bottomed-out-on-the-Tilt Arm level. And that cost me a lock when the tilt angle got so high that the aft half of the Balance Rail bottomed out on the Panning Resistance Dial.
I had the Center Column locked up high for comfortable viewing of birds soaring above the building and tree line with appropriate Scope tilt angling. And guess which direction the eyepiece goes when the Scope tilt angle goes down to track a bird doing same.
And I noticed some really annoying clunk slop manifesting itself whenever I'd make a tilt angle adjustment.
Lessons learned:
- If you're anticipating high viewing angles (and it's not raining) roll your ATX to 12.
- Go halfway up the Tilt Arm. Clears the Panning Resistance Dial and, bonus, reduces tilt stability - which you don't want when not shooting at reasonably close to your level. Two birds, one stone.
- It's a lot easier to bend over a good bit to look through a low eyepiece rolled to 12 at a high bird than it is to hover over a little bit over the same eyepiece to follow a bird who's dropped down into the wind to a lot closer to Bay level. So plan ahead accordingly.
- The Support clamping that's perfectly adequate to hold vertical position on the Tilt Arm isn't for smooth tracking involving major tilt adjustments. (If you're bottomed out on the Arm the clunking at moderate clamping torque isn't an issue. But you don't wanna be bottomed out on the Arm for this exercise.)
----------
ATX/STX Field Packing
We're not using the Balance Rail or, save for air travel, any Stay-On Case elements. If we're using a Plate we definitely want it bolted onto the Foot in optimal balance relative position and the PTH's Lens Support stowed where it's least problematic and most stop ready.
Clamp the Lens Support to the Plate in balance configuration, spin the Tripod Ring to your 12 (upside down), set the Locking Screw. This Foot / mounting assembly now projects into the real estate between the front end of Objective Module and the upward projecting structure of the Ocular Module.
And we can throw the assembly in this configuration on the PTH and roll to something likely more useful at our leisure.
----------
Video tutorial: SWAROVSKI OPTIK ATX/STX spotting scopes
The bulk - and least legitimate chunk - of this one is on targeting...
http://www.youtube.com/watch?v=Cbe4VQqoJtI
...and let's do a section on it.SWAROVSKI OPTIK Nature - 2012/12/05
Dale Forbes explains how to set up a SWAROVSKI OPTIK ATX/STX telescope step-by-step.
The ATX / STX series takes functionality to a new level. For the first time, you can change a telescope's performance through the size of the objective lens, allowing you to adapt it exactly to the relevant viewing situation. You can construct your own telescope by interchanging the straight or angled version of the ocular module with an option of 65mm, 85mm or 95mm objective modules thus providing you with a telescope that offers a varying zoom range and dimensions.
01-00420
- 01 - chronological order
- 00 - minutes
- 04 - seconds
- 20 - frame (25 fps)
Note the sun/shadows directions, fog, clouds, contrails and presence/absence of the table to get a feel for how and when sequences were shot. There's a small tree close in stage left casting shadows on the boxes and gear on the model table which we'll see starting at 80-091300 during the Aiming Aid demo. I have yet to be able to pinpoint the location but it's close to Absam, looking north, early May maybe, late morning.
The meadow area is pretty pancake flat so we can easily get away with setting the Tripod up with its Legs at equal (probably max) extensions and say NOTHING about the Tripod and the rather critical importance of getting it set up vertically.
00000
Everything we could possibly need to understand about these systems.SWAROVSKI OPTIK MODULAR ATX / STX TELESCOPES VIDEO TUTORIAL
000221
Which won't actually come up until 53600. Probably should've read "Assembling and Mounting the Components". Keep up the great work guys. Really helps us appreciate just how much you care about getting everything right.SETTING UP THE Aiming Aid
Note the low clouds still clinging to the foothills. This is earliest in the shoot.
01-000420
http://live.staticflickr.com/65535/51387365644_82f92dc34f_o.png

Yeah Dale. Thirty frames into the filming and here's the title shot:So we're in the Tyrolean Alps...
02-000524
http://live.staticflickr.com/65535/51411502190_9b63fe98a6_o.png

selected by the incompetent bozo who edited this video. Great shot of the Tyrolean Alps, Dale Forbes, his binocular. But what we see of the subject material is either boxed or mounted with an STX - about which we're gonna hear ZILCH - way in the background at a worse than useless attitude mostly blacked out in the shadows.
Here's the frame I'd have selected from the material I have at my disposal:
24-023212
http://live.staticflickr.com/65535/51410518816_5ed7cfbb81_o.png
So less than half a dozen seconds into the video we already have a minimum of two glaring examples of how little Swarovski gives a rat's ass about getting and doing things right.
Stunning scenery. Occupies a disproportionately high percentage of the screen for most of the duration of the video. Helps a lot to distract us from all the issues that need addressing that aren't being addressed or acknowledged....just a few kilometers from the Swarovski Optik factory.
I got both, Dale. An 85 and 95 for the front ends. Also two ATX Oculars so's I can run both Objectives at the same time. And I fully appreciate the reasons the airtime we're giving to the STX on this one is near zilch.And if you just bought a new ATX or STX telescope then congratulations.
Any chance y'all could do another video of yourselves playing with them? 'Cause what we're seeing here doesn't even cover all the basic normal operations.I hope you have as much fun with it as we had building them and as we have playing with them.
- With even less reference to ATX roll than what we get from the little user manual in the box.What we're gonna do is do a little user manual for the ATX and STX telescopes.
- Dale's second and last reference to STX.
Note the STX Module on the back end of the 95.So I have a box... And I'm gonna take the objective module out...
03-002902
http://live.staticflickr.com/65535/51386630021_8b087a7b3a_o.png
The lighting on it can make it appear as though its "north face" is dished. It's not.
Angled up close to thirty degrees. That would be agony to use as a spotting scope. But fear not for Dale. He's smart enough not to.
But let's also note that it's angled up close to thirty degrees not far off the Sun, uncapped, Sunshade retracted. Never in a million years would I pull a stunt like that. The Hubble won't even shoot Mercury 'cause an angle that close to the Sun would fry it. (Maintains a solar avoidance angle of fifty degrees - meaning no closer than.) In a worst case scenario would it be likely to do any actual harm? Probably not / I doubt it. But how much effort would it be to cap it, extend the Sunshade, tilt it back down to horizontal?
Also imagine a human standing behind it attempting to view something through that configuration.
Best look we're gonna get of the 85's integral Aiming Aid:It's protected in cardboard halters... And the objective cover you can just snap off like that... And store it in the box for now.
04-004308
http://live.staticflickr.com/65535/51388468473_780e345522_o.png
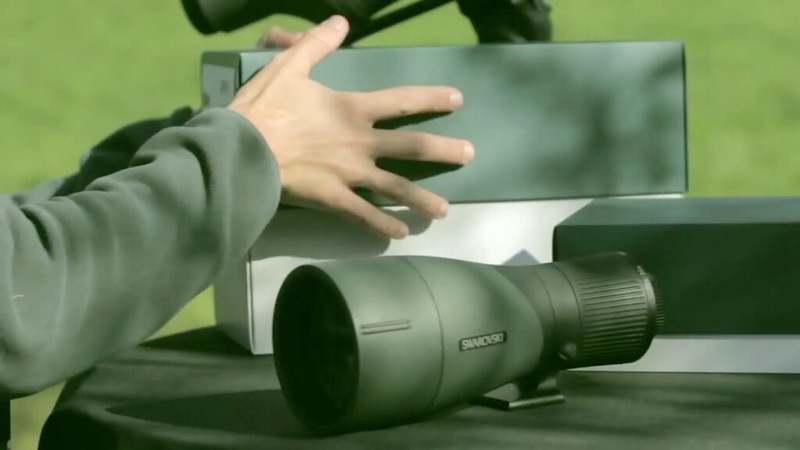
that would be reasonably effective if Swarovski would permit us an ATX roll other than 12 o'clock.
05-010305At the back is a little bayonet... And I can open up the bayonet enclosure.
http://live.staticflickr.com/65535/52544079180_fb7714e53e_o.png
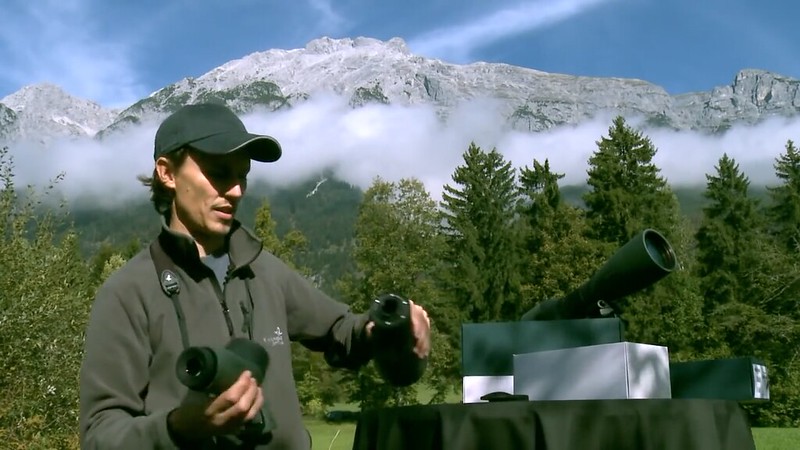
06-010322
http://live.staticflickr.com/65535/52543594016_f9dd5528d2_o.png
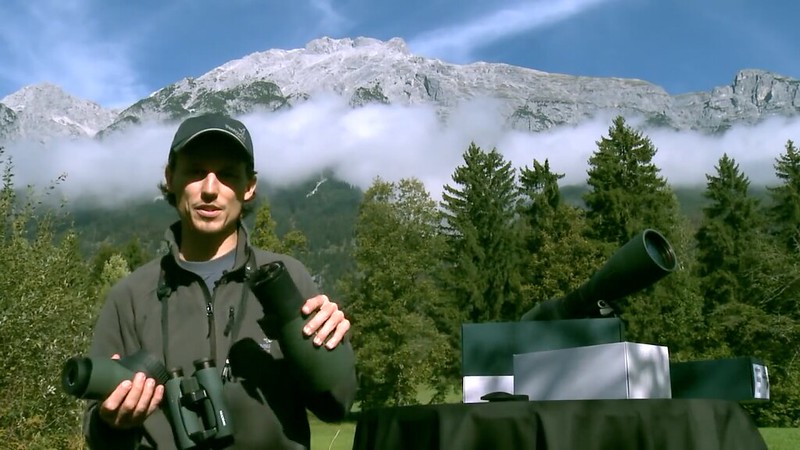
07-010815In the other box I have the ATX ocular. Also with the bayonet... I'm gonna open that up... Open up the other side... And to put the two together it's actually quite easy... What you want to do is... There's a little dot here...
http://live.staticflickr.com/65535/52353589351_7c9d99dd0b_o.png
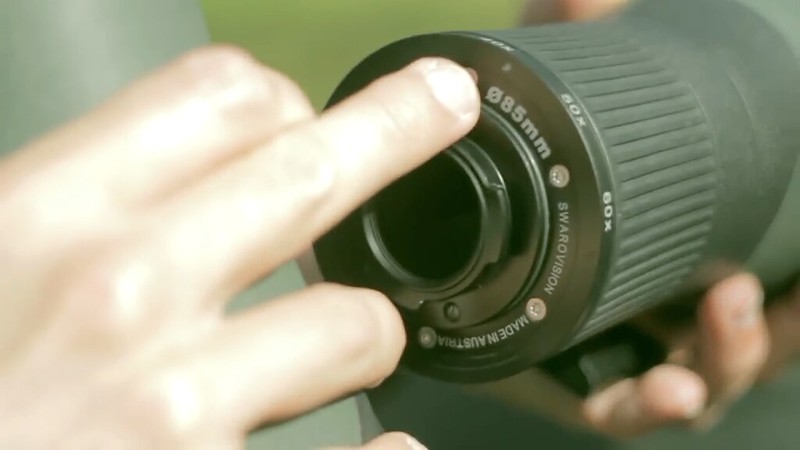
08-011202And a little dot here...
http://live.staticflickr.com/65535/52353912524_60d0b9ae2a_o.png
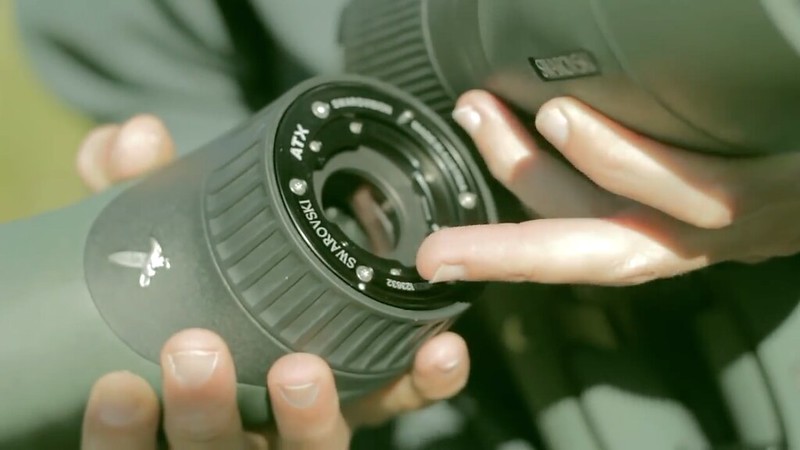
09-011611So you would put those together... But to put it... You just hold it up like that...
http://live.staticflickr.com/65535/52544079150_01365cc94d_o.png

(To rotate the back end counter.)...twist the right hand towards you...
10-011901
http://live.staticflickr.com/65535/52543133802_a4e1e9b113_o.png
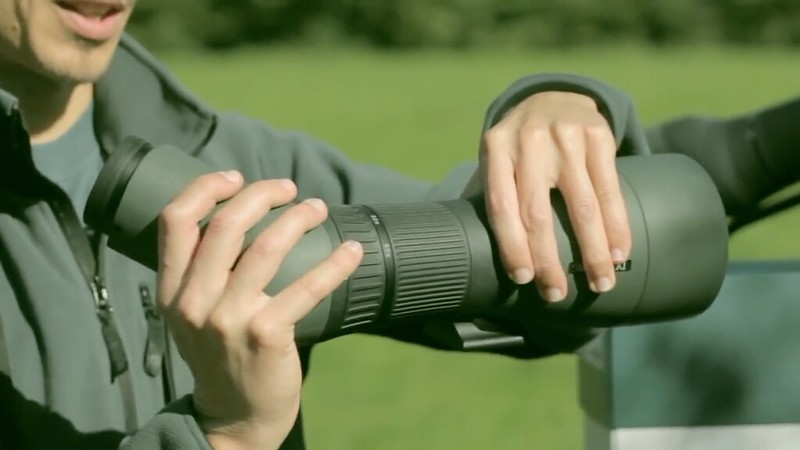
Or if you wanna do things way better than both of those options you line the Swarovski Goshawk logo on your back end glass up with your min zoom figure (25 or 30 depending) on the back end of your front end glass, engage, twist....and it's just going to slide on.
11-012124
http://live.staticflickr.com/65535/52543888579_c187aba0e3_o.png

12-012320And you'll hear the little click as the knob...
http://live.staticflickr.com/65535/52544142043_d1b4f78994_o.png

Button.
It actually pops back out....drops into place.
But before you begin this procedure make sure your Pin is extending and retracting smoothly and consistently. 'Cause if it's not...So it's now fixed.
...and your locking mechanism is still functioning properly...If you want to disassemble it again...
13-012623
http://live.staticflickr.com/65535/52543593971_1747811321_o.png
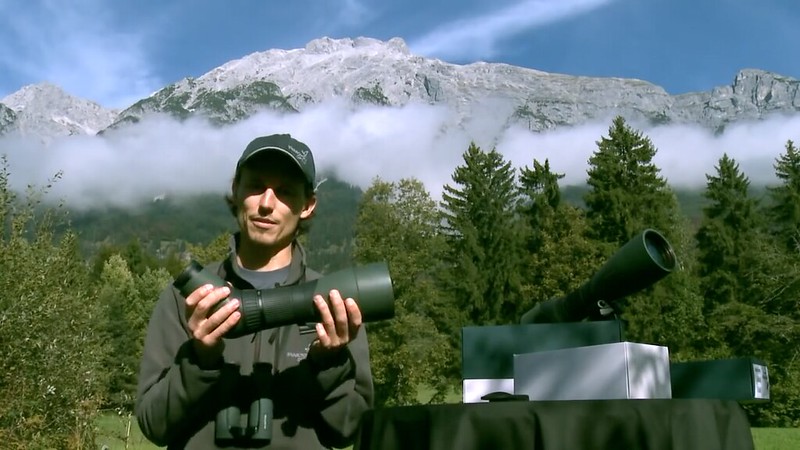
Excellent looks at the pain-in-the-ass-to-use Tripod Ring Locking Screw and Foot. So without looking at the video date we know the era (pre Arca-Swiss) with which we're dealing. And we will very conspicuously hear NOTHING about the Tripod Ring and/or its Locking Screw.
Right thumb's on the Modules Release Button. Zoom's halfway between the 85's 30 and 40.
14-012920
http://live.staticflickr.com/65535/51386630011_22df886fd0_o.png
Dale's binocular - which he never once raises - is a discontinued EL 10x32. We can just about decode the printing at full rez. And it's not harnessed - and even when they are there's something of an issue with them swinging into tripod legs.
And this is the only decent look we're gonna get of the Tripod Ring, Foot, Locking Screw. Certainly none of this is worth the slightest degree of discussion. And we certainly wouldn't want any of it cutting into any of our Aiming Aid bandwidth. (And note that we're keeping our scope mounted on the tripod aiming right the whole relevant time - port side totally blocked.)
Super. Transporting separately the two parts with the bayonet caps has to be WAY safer and less problematic than transporting the Scope as a unit with everything locked together....you can just slide it apart... Any you have the two parts again to transport with the bayonet caps.
Yeah, I have one. Bought into the digiscoping fad/scam, discovered that the ATX was pretty much useless for same, it's being very nicely preserved in a LensPouch in a bag with the Canon DSLR and other related gear.If you have another objective...
15-014317
http://live.staticflickr.com/65535/51390889854_3d2561ec3e_o.png
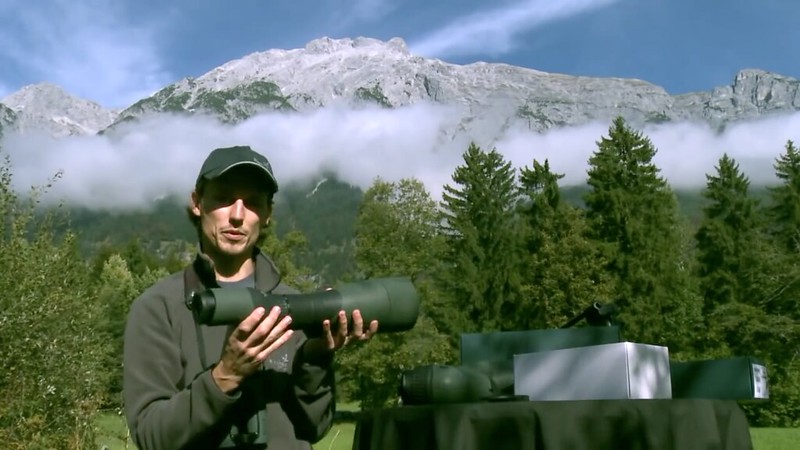
16-015012...and you want to switch between objectives... you can do it in exactly the same way. Just switching out sizes.
http://live.staticflickr.com/65535/51387636020_cd72072b51_o.png
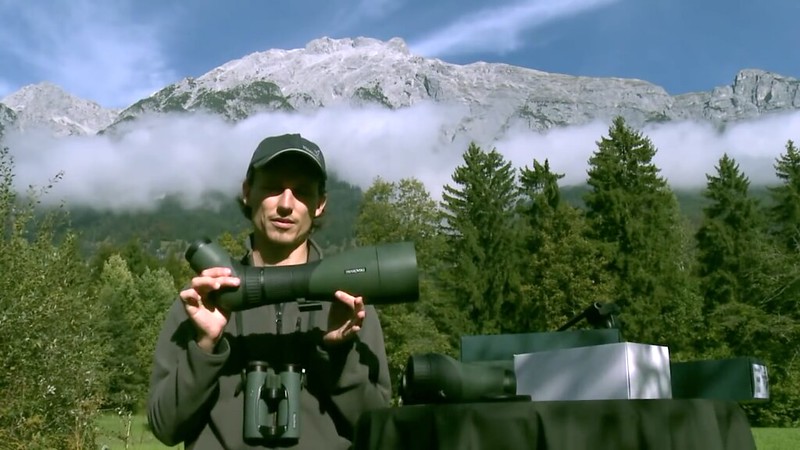
Cool. So how come you're not showing us the STX on the back end of anything you'll have mounted on the Tripod and be actually looking through? (Just kidding.)
And this is the last we will ever see of the STX Module - parked on the model table and ready to go back in the box for until the end of time.
---
Low clouds have mostly lifted and burned off. An 85 going on the Tripod and a 65 and 95 on the table - aft ends up and uncapped. The Tripod is their disastrous CT101 - Center Column full down we'll note. And this is the most we're ever gonna get to see of the Tripod.
17-015723So in order to attach your... or mount your telescope onto a Swarovski Optik tripod head...
http://live.staticflickr.com/65535/51387095361_914d5fdffc_o.png

18-020108...all you need to do is just... put it straight in...
http://live.staticflickr.com/65535/51386876753_cd72072b51_o.png
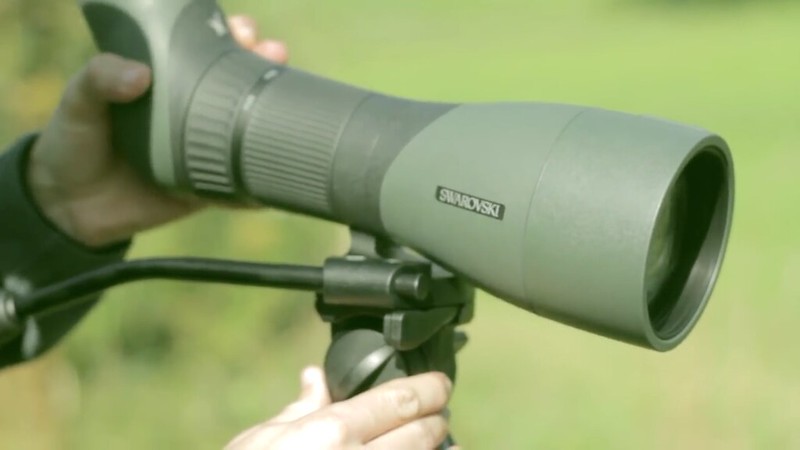
SNAP.
19-020119
http://live.staticflickr.com/65535/51387635980_822227dc6d_o.png
- Note the Release Lever snap-back. We're solid. Solidly locked anyway. As long as the CT101's Connection Plate doesn't come unglued and strip anyway.
- A centimeter or more of excess Handle front end projection fore out of the DH101's Handle Clamping Cylinder.
What place? The place at which whatever we're using for a Swarovski ATX/STX spotting scope configuration will balance?...and it clicks into place.
- Why would anybody ever want to use another tripod head? This one has a Swarovski label and even if it DID have a few issues with respect to the real world you'd have told us about them long before this point in your presentation.If however you have another tripod head...
- Like what? At this time the Swarovski contracted DH101 is the only head on the planet that accepts a Swarovski Standard foot. And it's nice for light duty for light equipment but for serious heavy duty stuff - like most of what we're seeing here - it's garbage. And you'll be discontinuing it not long after I'm seeing this video for the first time. You'll be sweeping it under the rug as quickly as possible in order to suppress awareness and discussion of this issue.
- Any other tripod head is gonna be Arca-Swiss. Yeah, what elephant?
20-021606...then underneath there is a screw and a little conversion thread...
http://live.staticflickr.com/65535/51386876738_c885ac2012_o.png
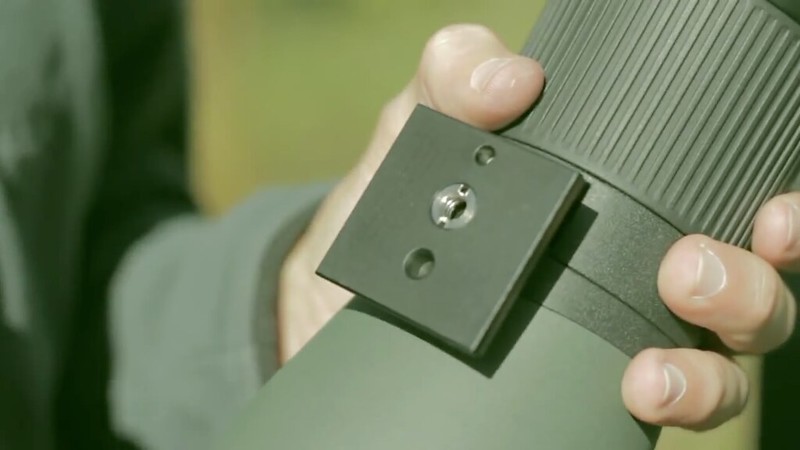
- We don't need much more confirmation that we're dealing with a Swarovski Standard Foot. 43 millimeter fore/aft, 45 millimeter width. (Note the aft recess through which the click-stop spring screw is accessed.)
- Oh great. A little conversion thread so's we can screw a 1/4-20 into a 3/18-16. Can't imagine any circumstances in which either of those wouldn't be massive overkill for doing the job we need it to with this gear.
- Oh, lucky us. Our conversion thread takes the same 1/4-20 screw that our Swarovski Standard 44066 adapter plate delivers. Look how beautifully it works. I wonder what total moron decided it would be a good idea to thread some of this equipment at 3/8-16....so you can either screw off the conversion thread or, if you have... if your tripod head uses the same screw thread size...
- Tripod heads don't use screw thread sizes. They use PLATES.
21-022420...you can just screw it on...
http://live.staticflickr.com/65535/51387365584_74cc263323_o.png
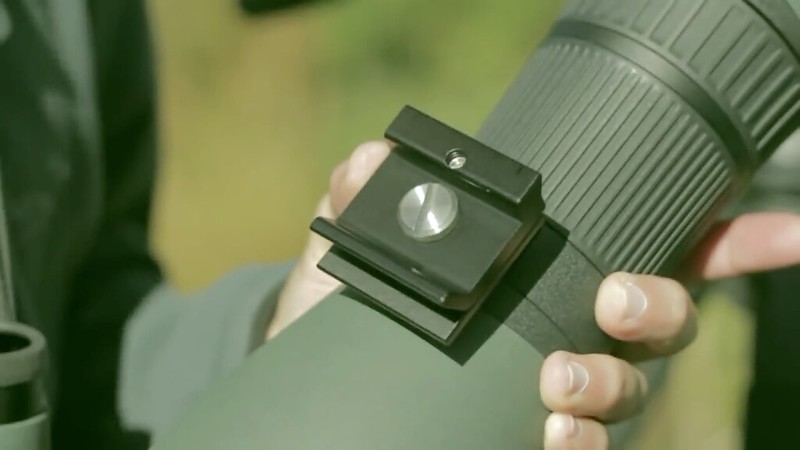
- 44066 Plate. Clamping dimensions identical to the Swarovski Standard Foot. Note the misalignment we just introduced.
- Screw what on? A Swarovski Standard adapter plate onto a Swarovski Standard spotting scope foot? And the point of this exercise is...?
22-022619...tighten it with a coin...
http://live.staticflickr.com/65535/51391384778_b933d350ee_o.png
23-023117...and that'll then clip straight in...
http://live.staticflickr.com/65535/51386629931_224eb47880_o.png
Note that viewing the above photo as a stand-alone we can tell we're using a Plate 'cause the Foot's visible fully above the Head's top plane.
24-023212...to your...
http://live.staticflickr.com/65535/51410518816_5ed7cfbb81_o.png
- Certainly sounds rock solid to me. (But make sure you use a big coin. This is a critical job we really need done right.)...tripod head at home.
- What tripod head do you have at home, Dale? And how come you didn't bring it in to us for this video tutorial production?
- Not to my tripod head at home.
And our balance will be just perfect for whatever glass combinations we're using and tilt angle at which we'll be shooting.
Although after Dale finishes clamping with his coin screwdriver we're still crooked, the Plate will be lined up fine as far as we can tell by the visual inspection.
23304
TELESCOPE FEATURES
...and the STX Ocular Module of which we'll see and hear nothing more...So once you've got rid of the model table...
25-024809you can then get back to using the spotting scope.
We have a great big focusing ring here, made large and smooth so you can do fine adjustments...
http://live.staticflickr.com/65535/51387365549_7a191e52dd_o.png
Large? The diameter - which tapers down a bit from aft to fore - was determined by what was packed in internally. So what we're really talking about is the longitudinal dimension....and very quick adjustments with the same wheel.
- I'd go with higher resistance.Next to it we have the zoom ring... which is a higher tension... so that you never get the two confused.
- Good luck with that - cold, darkness, gloves, fleeting target, stress, lack of currency... Not saying they could've done better but you WILL occasionally hit some of the wrong collar out here in the real world.
26-030214You'll also feel that it's slightly bigger, with a different texture.
http://live.staticflickr.com/65535/51386876673_563aef86bb_o.png

Which he's cranking full out and will leave there - same way I always do.Zooming up to sixty power... and back to twenty-five power.
With the eyecup...
Which should be fully extended whenever we're using the Scope.We have an extendable eyecup...
27-031015
http://live.staticflickr.com/65535/51387365539_096d9ec273_o.png

Table's gone but the low clouds are thick.
Focusing.So that normally you would extend it out...
28-031418
http://live.staticflickr.com/65535/51387635835_ffa4079f03_o.png
29-031714...and look through... and it should hold your eye in...
http://live.staticflickr.com/65535/51387365469_de09287e97_o.png
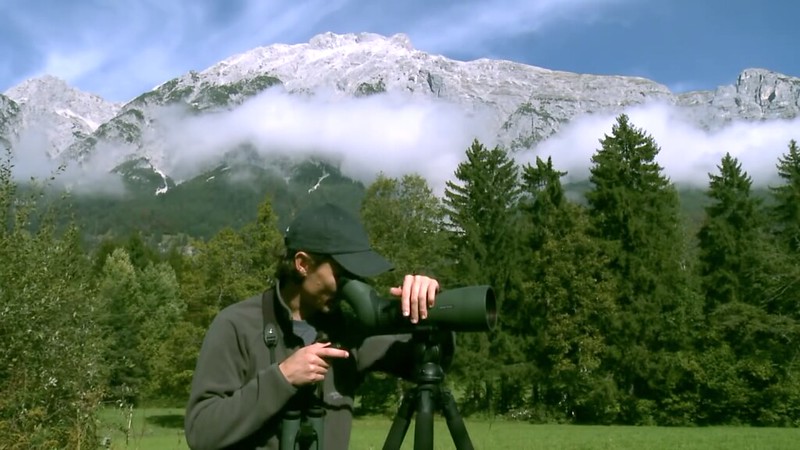
And if it IS "HOLDING" your eye in the "correct position" you are by definition moving the Scope and degrading your view....the correct position.
If however you wear glasses or sunglasses then they need to have been off and suspended from your neck by your retainer strap. PERIOD.If however you wear glasses or sunglasses then you can always twist the eyecup in and look with glasses to give you just a little bit more space for your glasses so you can get the whole field of view.
Like the back end of the Eyecup you just told us to touch?I also use this when I'm sea watching or there's a wind and you don't want to touch anything...
Demonstrates viewing hands off the Tripod and sans contact with the Eyecup. Also not saying anything about the fact that he's not making contact with the Eyecup....you can hang a backpack from the tripod...
30-034318
http://live.staticflickr.com/65535/51388009220_dd1ac103fe_o.png
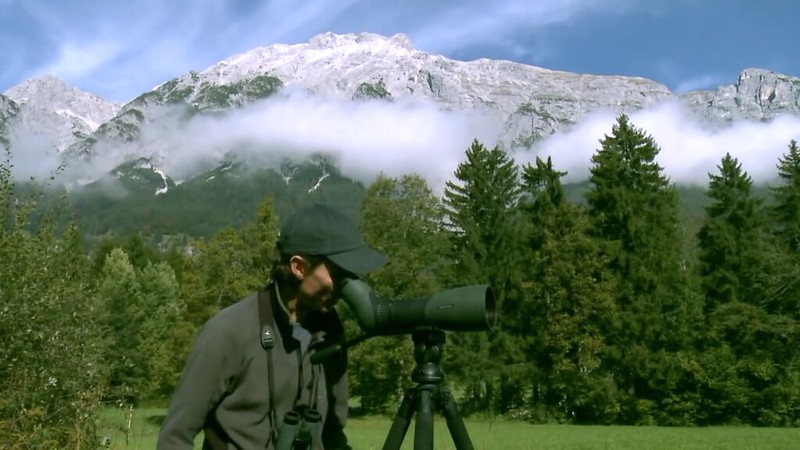
Correct. If we ARE TOUCHING ANYTHING - eye socket or glasses on Eyecup and/or a hand or two on the Tripod - we ARE shaking the spotting scope and getting a degraded view. We don't wanna be in physical contact at any point of the Tripod/Scope assembly after we've zeroed in to target....and then without touching anything you can not disturb or shake the spotting scope and get a clear view.
Good freakin' luck.But for some people they have very big sunglasses or they... because their facial structure their eyeglasses are a little bit further away from their face. So we've made another little eyecup. This you can get from your dealer.
Here's what it says in TFM (which (2022/07/21) is no longer available as a PDF at Swarovski's website):
And please do specify a choice retailer for us 'cause:Tip for spectacle-wearers:
The SWAROVSKI OPTIK special eyecup offer additional viewing comfort, now available at choice retailers.
- B&H Photo
- Optics4Birding
- Honey Creek Bill and Beak
have never heard of it.
But here's what it says at:
http://www.swarovskioptik.com/us/en/outdoor/products/spotting-scopes/atx-stx-btx
ATX/STX/BTX
Yeah, it has been. But all the people who own and use this equipment - and make it available to others - don't EVER get an eye close behind the back ocular end with eyeglasses on. So they never sold any to anybody.EYE RELIEF PLUS
LARGE FIELD OF VIEW EVEN FOR EYEGLASS WEARERS
Even eyeglass wearers can enjoy a large field of view, not to mention the inimitable edge sharpness. An additional eyecup has been specially developed for eyeglass wearers to further increase viewing comfort.
In watching this video we can get a reasonably good feel for the torque Dale's employing to secure the Eyecup on the back end. Not much. Pity neither he nor Swarovski has ever bothered to discuss the issue.What you need to do is just switch it off and you'll see the difference between the two...
31-040507
http://live.staticflickr.com/65535/52544079085_45386c510f_o.png
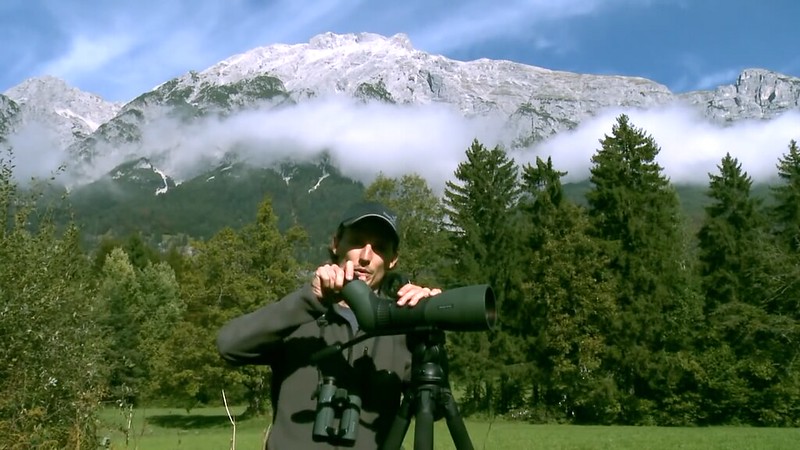
32-040522
http://live.staticflickr.com/65535/52543593926_564d2e621c_o.png

33-040605
http://live.staticflickr.com/65535/52544141973_833d66b89f_o.png
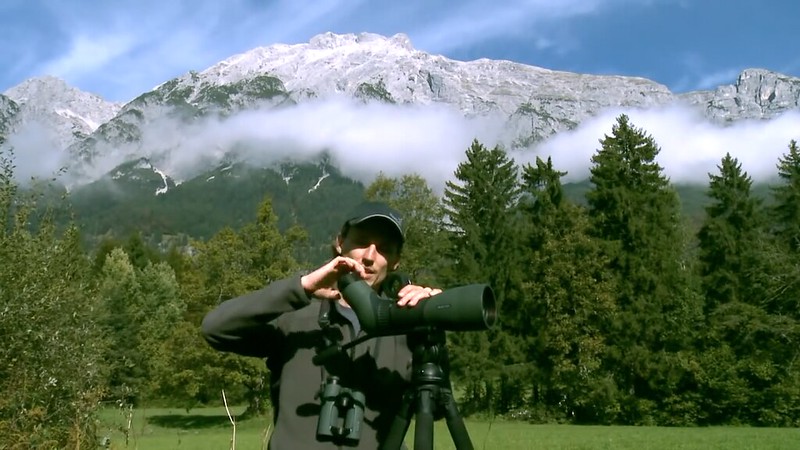
34-041214
http://live.staticflickr.com/65535/51385870242_e933fb959a_o.png

I sure as hell don't wanna be using sunglasses to REDUCE the brightness of the view I'm getting courtesy of all that front end glass. And the Focus Collar takes care of any corrective issues and for max quality I don't wanna be looking through any more glass than I need to. I get the glasses out of my way and advise guests to do likewise.That we kind of shaved off the top of the rubber bit here. Which means that then your sunglasses or glasses would lie flat almost against that ocular lens there. Just to give you a little bit more space for your glasses. And you can still use it normally.
35-041913
http://live.staticflickr.com/65535/52544141963_0fc15537ba_o.png
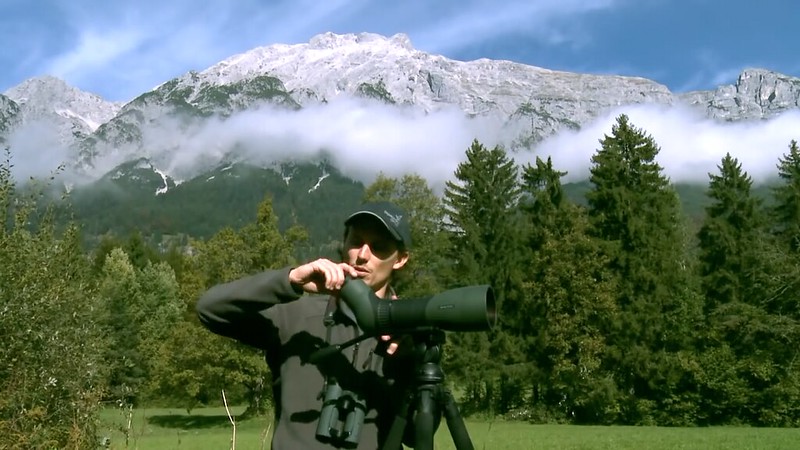
And you're up there on a brilliant clear day at around two or three thousand feet mostly facing the sun not wearing sunglasses - which I find a bit odd.
Above - regular (49137) near, eyeglasses far. (And as of 2022/05/14 it appears that the other is no longer available.)
36-043615One other thing we have is a sun shield...
http://live.staticflickr.com/65535/51391407863_f3234a99b0_o.png

37-043723So right now the sun is coming from that direction...
http://live.staticflickr.com/65535/51392144585_0c33c91d94_o.png

Not more than a small fraction of the degree to which your 95 was back at 01-000420....and so it's shining straight onto my objective.
Aiming Aid inadvertently being rolled towards line-up.What you want to do is just twist it...
38-044522
http://live.staticflickr.com/65535/51400265935_d7c815ef87_o.png
Another look at the Aiming Aid ridges. (Rolled to about 10 o'clock.)... and you can pull out the sun shield.
39-044801
http://live.staticflickr.com/65535/51387635715_f7124c5ec6_o.png

40-044823If you're gonna try and push it or...
http://live.staticflickr.com/65535/51390368817_eb41c00e42_o.png

41-045217...pull it out straight it's always gonna be tough but...
http://live.staticflickr.com/65535/51390368807_c7911f10ff_o.png
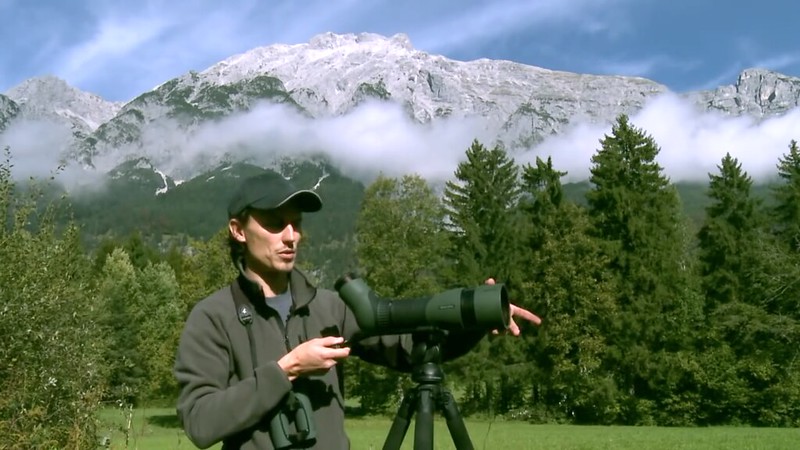
42-045220...twist it...
http://live.staticflickr.com/65535/51391862329_51616180d3_o.png

43-045300...and...
http://live.staticflickr.com/65535/51390368782_67f4e7db16_o.png
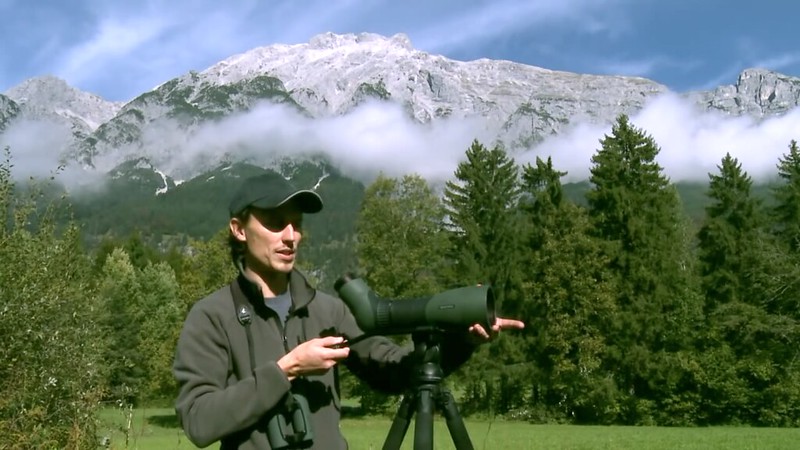
It requires a little bit of effort to pull it straight out without twisting but I find I can spare it easily enough. And swatting it straight back for retraction is close to a no-brainer option. I prefer to have my Aiming Aid ridges at 12 at all times regardless of ATX roll and twisting the Sunshade to "unclamp" it from full retraction and extension......it will just slide back in again.
And by the way... You have TWO sun shields - one for your Objective and your hat brim is doing a pretty good job for your eyes with the current high sun angle.
Aiming Aid ridges make it past the censors once again - at or close to perfect position.
44-045522
http://live.staticflickr.com/65535/51387635685_6916a4363c_o.png
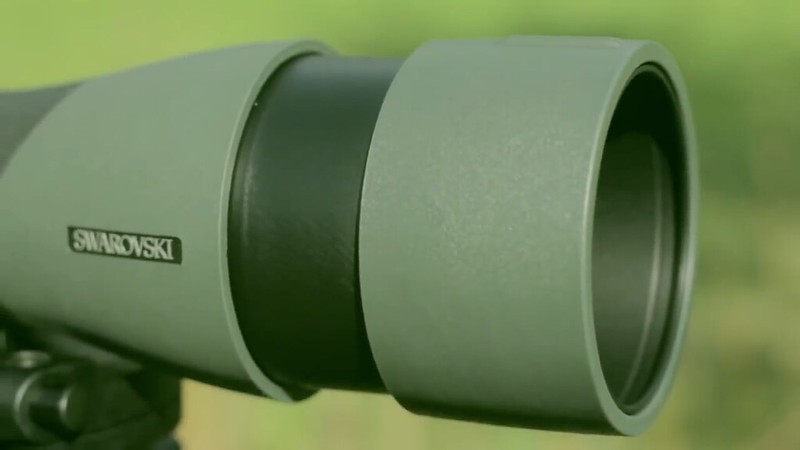
45-045706So this is perfect conditions...
http://live.staticflickr.com/65535/51399253231_621a773dac_o.png
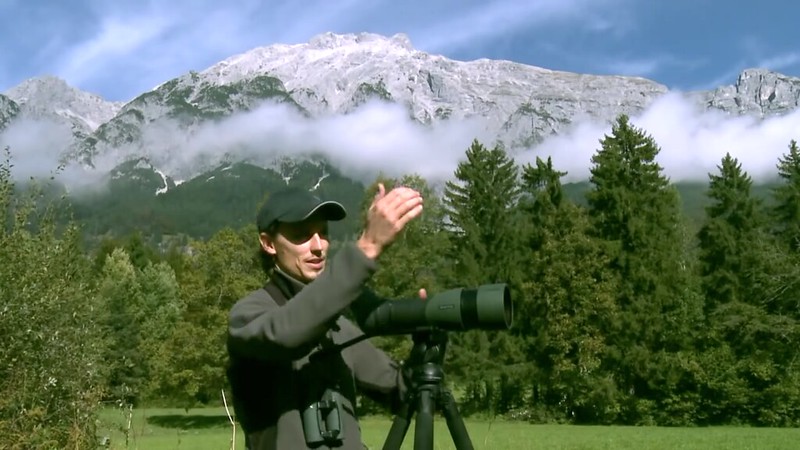
46-050112...with the sun coming from the side, or if it's raining or you got a sea breeze you wanna pull out...
http://live.staticflickr.com/65535/51398502407_54288d6390_o.png
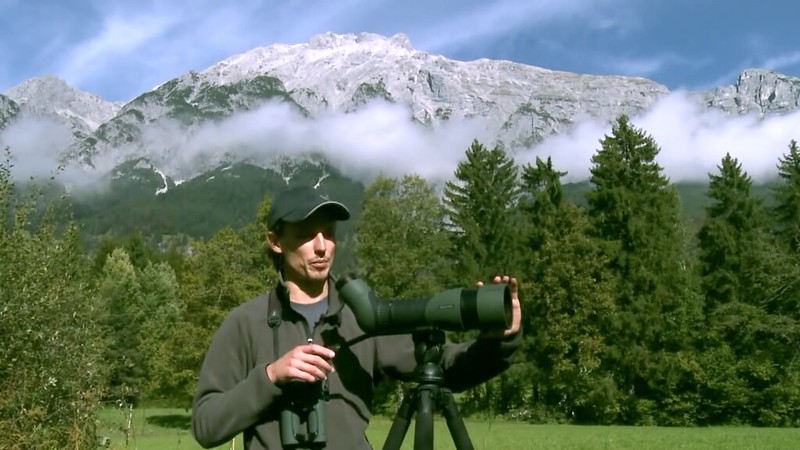
If it's raining isn't the Ocular glass gonna get splattered the first millisecond after we cease protecting it with our head? And I guess it's impossible to mitigate things by rolling the ATX to 09 or you'd have discussed that option in your next breath....the sun shield to protect your objective lens and keep it clean.
In the next frame the clouds are gone, the Sunshade is retracted, and the Scope has been raised several inches - via Center Column extension as we'll see at below at 54-054504.
47-050900So with the eyepiece module you'll get a little rainguard that looks like this...
http://live.staticflickr.com/65535/51404148888_28757ab57c_o.png

48-051018That you can just slip over...
http://live.staticflickr.com/65535/51391384843_bb09557938_o.png
49-051409And it'll protect the lenses with the hard center and soft outside to keep it on nicely.
http://live.staticflickr.com/65535/51404164343_ae1cde1799_o.png

50-052913If you spend time out and there's a lot of wind you can always stop the ocular cover from flapping around by just hooking it into the elasticated bit.
http://live.staticflickr.com/65535/51387365364_8b6d438f44_o.png

It won't bounce but that isn't making the Scope itself any less wind resistant. I normally bungee it to a Tripod Leg just over its Level 1 Twist Lock but if there's enough wind to bounce it then it goes to a lower Level or in the bag.
Focusing instinctively.
51-053409
http://live.staticflickr.com/65535/51385870127_703be09dae_o.png

52-053513
http://live.staticflickr.com/65535/52543133697_5f1a2b3df1_o.png
53-053524
http://live.staticflickr.com/65535/51392144500_4256414d62_o.png

53600
Dissipating later low clouds back. Table's back.SETTING UP THE Aiming Aid
54-054504
http://live.staticflickr.com/65535/51387394338_5e5807b777_o.png
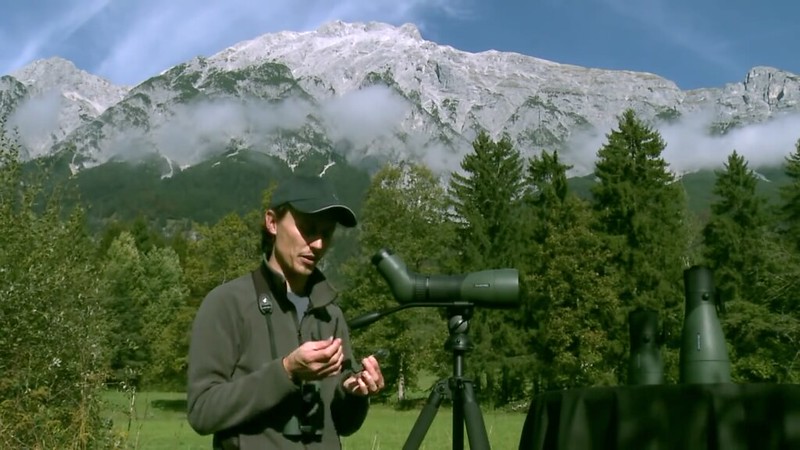
And immediately after Dale's discussed using the Eyepiece Cover with the hard center to protect the upward facing back end exposed glass and soft outside to keep it on nicely we see the 65 and 95 Objectives parked on the table noses down and uncapped back ends facing straight up. I get uncomfortable doing that inside on the kitchen table for more than ten or fifteen seconds. And there they will remain as examples for all the world to see until the end of time until the film totally cuts out after 11:18:00.
So what happens if my telescope is an 85 and a 95? Am I gonna see two of those in the box? I notice you're packing all three flavors.If you bought an ATX angled module for your... for your telescope then you would've seen one of these in the box.
How 'bout I just roll my ATX to 10:30 and use the built-in Aiming Aid ridges on the Sunshade like we're supposed to do if we bought an STX straight module for my telescope? Can't talk about that 'cause corporate policy is to stay as clear as possible from that can o' worms?
- But we haven't yet actually verified that it helps any people who are struggling to find their deer or their bird through their spotting scope. So if you find that it helps you to any degree please get back to us so we can get some feel regarding the usefulness of continuing to throw them in the box.It's not a Wi-Fi connection. This is an Aiming Aid. And this is just something that we thought that might help some people if you're struggling to find their deer or their bird through their spotting scope.
- Yep. And just the losers who are STRUGGLING to find their deer or bird through their spotting scope. But how 'bout Yours Truly, Dale? I seldom have the least trouble hitting a deer - which is ALWAYS gonna be on the ground - or a perched, floating, or distant airborne bird. But how 'bout a high faint astronomical target with nothing close by to use as a reference? How's this gonna work in comparison to your ATS/STS peep sights?
55-055000
http://live.staticflickr.com/65535/51386876523_cde0f9a5c2_o.png
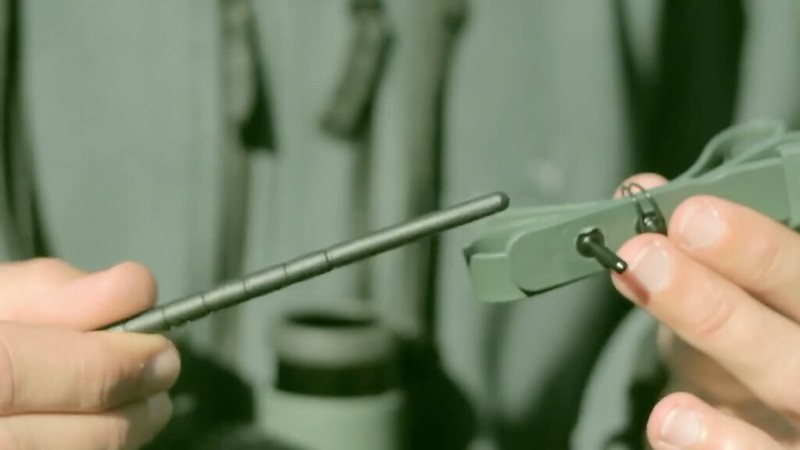
56-060424
http://live.staticflickr.com/65535/51387365324_f34966483c_o.png
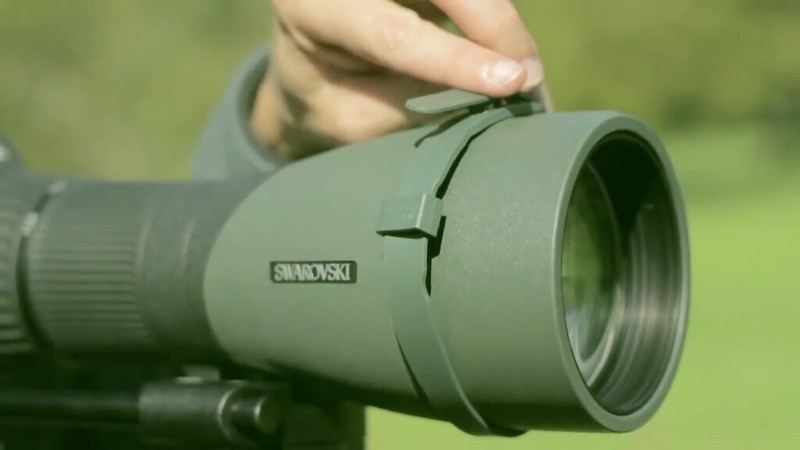
57-061920
http://live.staticflickr.com/65535/51385870072_b540cbf4e2_o.png
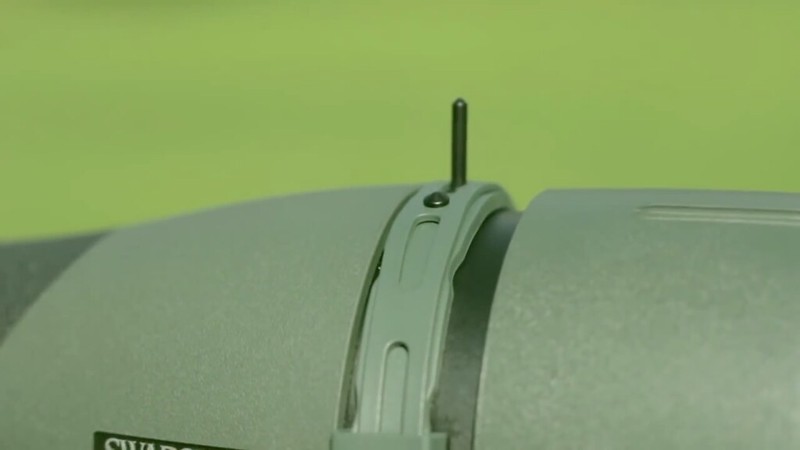
Six notches. So, counting uncut, Seven extension options. My new and improved Arca-Swiss era copies are 74 millimeters with three notches a centimeter apart (from the bottom up).
58-063208
http://live.staticflickr.com/65535/51387635605_a08156bfd8_o.png
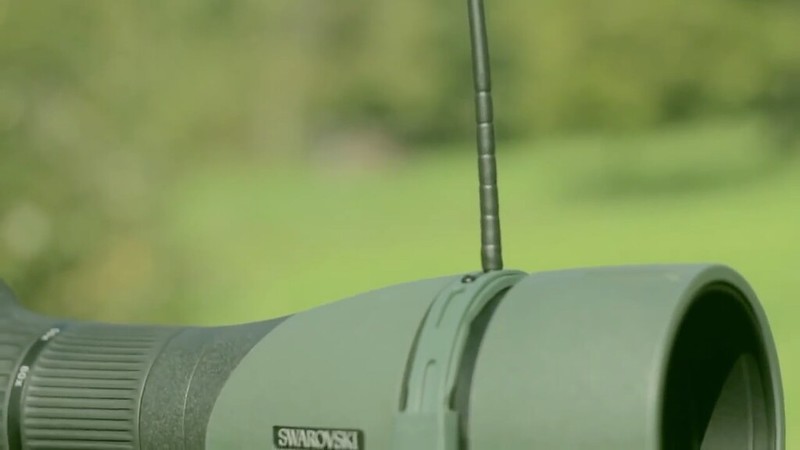
If we go to full rez on this still we're damn close to actual size. They've eliminated the bottom three notches.
Got any actual data to support any of these claims? Just kidding. I'd say all the individuals who really have their shit together on this equipment are using things in pretty much exactly the same manners.Now we gonna adjust it to fit your eyes. Now... everybody uses their spotting scope slightly differently, everybody would like an Aiming Aid in a slightly different place.
How 'bout the peep sights you have welded in place and on target for your ATS/ATX scopes? Must be catching lotsa flak on that issue from those customers.So we've allowed it open for you to set for your eyes.
Deliberate legitimate focusing.I found something out at about thirty meters or a hundred foot away and I'm gonna look through my spotting scope and find that object... So there it is...
59-070223
http://live.staticflickr.com/65535/51386876453_78f5c617eb_o.png

And this is the last time we see you focusing on anything at any point in this video.I'm gonna focus on it...
And what's NOT legitimate is that if this "system" had the least degree of legitimacy to it Dale would've zoomed in all the way to get the aim as precise as possible. And he'd have thought of that.And that object is in the very center of my field of view.
And note that we just spent 6.7 seconds acquiring, locking onto, focusing on, and viewing the sapling canopy Dale has selected as the target to use for cutting his antenna to optimal length.
60-070306Now without moving my head... I'm gonna raise my eye level... And look straight over the top here...
http://live.staticflickr.com/65535/52544078995_23c212d549_o.png
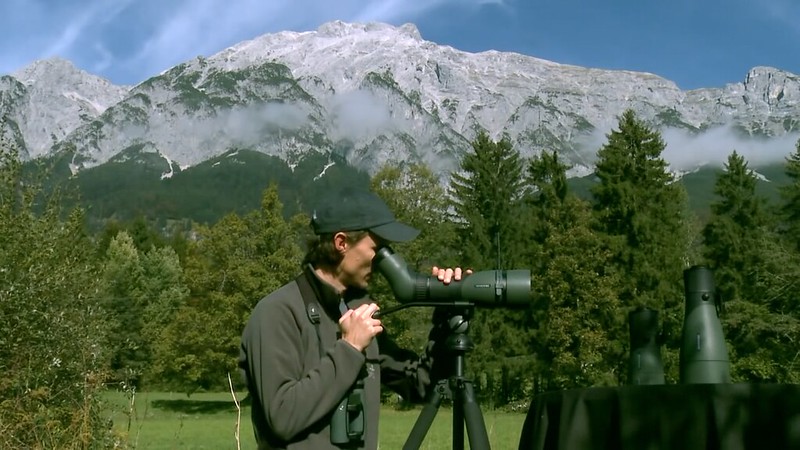
61-071601
http://live.staticflickr.com/65535/51387635580_6557380cb7_o.png

Any remaining doubts about the back ends of the Objectives on the table having been left uncapped?
62-071805At...
http://live.staticflickr.com/65535/51387635575_9dc152889a_o.png

63-071821...my...
http://live.staticflickr.com/65535/51385870037_13a47f321c_o.png

To the lower right in 61-071601 we're looking at the back end of the 65 Dale has stood on the table along with his 95....antenna.
64-073312You might wanna close your other eye that's not looking through... But I'm just looking straight through... And where is that object when I look over here?
And right now it's about there.
http://live.staticflickr.com/65535/51386629596_b0e4406022_o.png
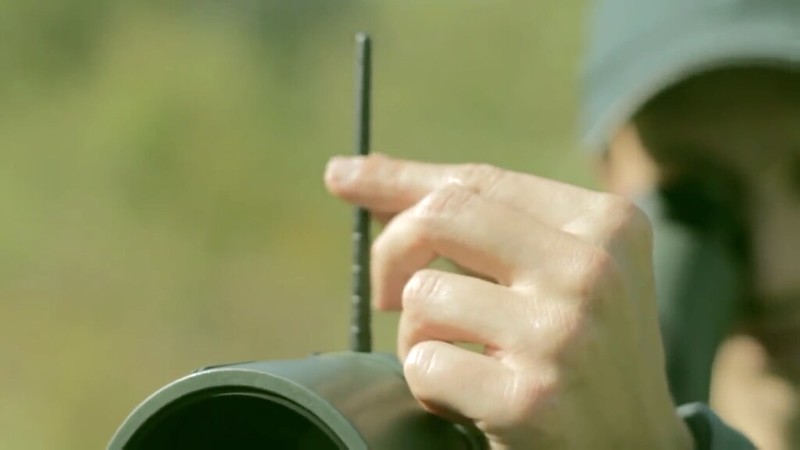
65-073618Yeah. So if I look straight over...
http://live.staticflickr.com/65535/51386629571_c8accd5d1b_o.png
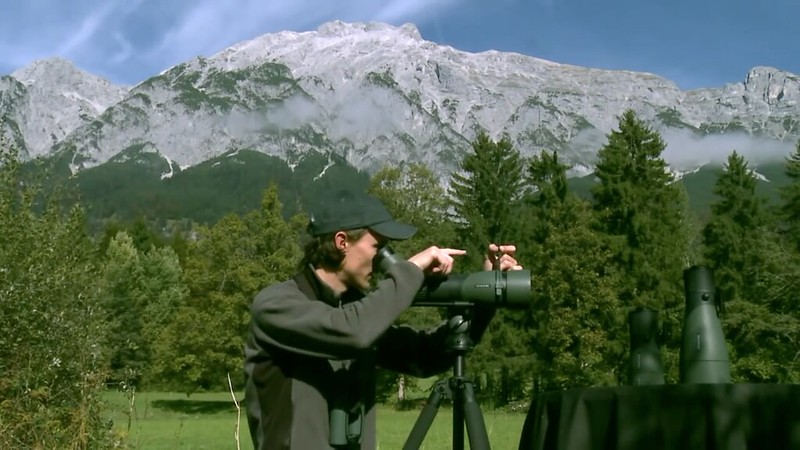
66-074909...at this point here I'm looking at that same object as is... is set through the telescope.
Now what you're gonna do is you're gonna measure this length here...
http://live.staticflickr.com/65535/51387267982_983f4bbd96_o.png
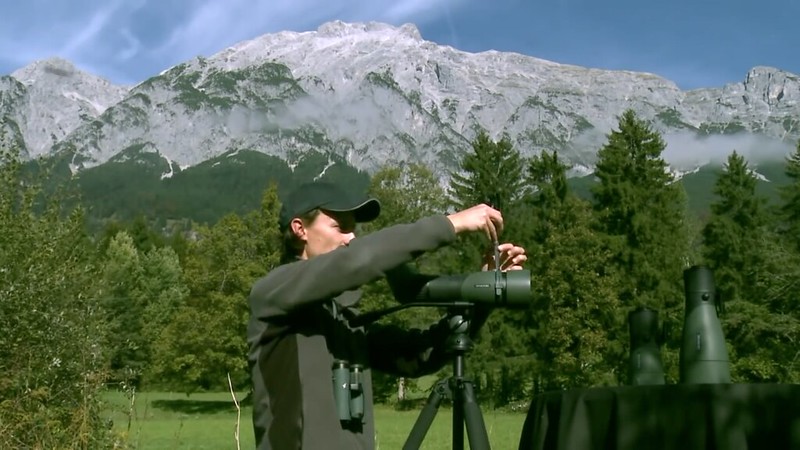
Start of a large insect fly-by. Appears just below the left (far) peak on the horizon and disappears behind Dale after four more frames. No other visual or audio evidence of terrestrial, arboreal, airborne wildlife at any point in the video.
67-083203...and the unwanted bit we're gonna cut off... from the bottom.
Which means that I could cut it off there... Which is one... two... three notches up... Just gonna cut it off one... one, two... Actually, just to be sure I'm only gonna cut off two... and then I'm gonna test it again. So...
There. Look through again... That's my... Same object... It's still a little bit too long... It's one notch too long... So I'm gonna cut off one more...
http://live.staticflickr.com/65535/51387635490_98566ba3da_o.png
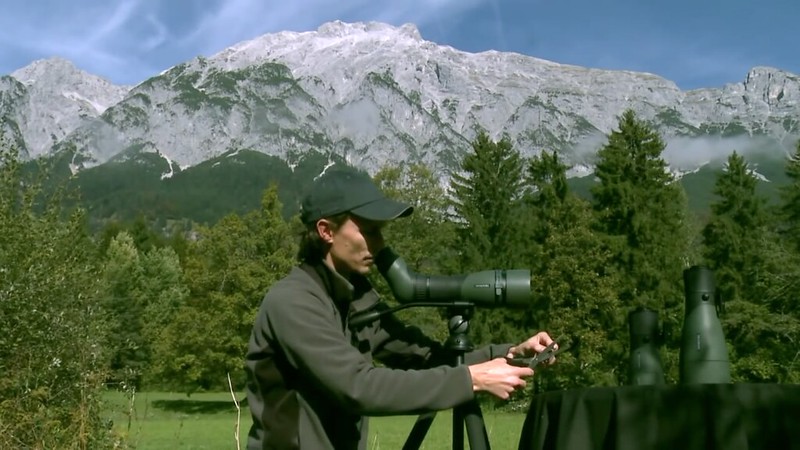
So If I were to take a shot with your 85 setup what would I need to do to get it just about right for me? Couldn't we just cut our own antennae for the 65, 85, 95 and swap them in as needed?Make sure it's nice and vertical... And now when I look through... It's just about right for me.
68-084906
http://live.staticflickr.com/65535/51387635475_6216c3ffa7_o.png
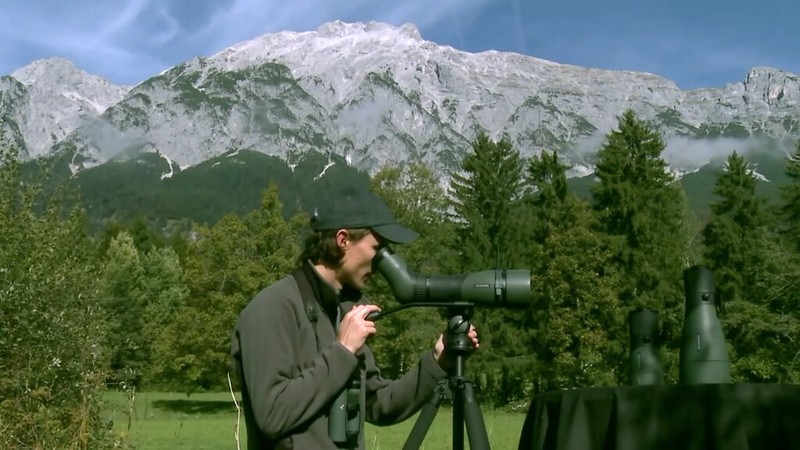
And here Dale's left hand goes - pretty much on autopilot - to check the set on his Tripod Ring Locking Screw. Astonishing how little discussion it gets in this SWAROVSKI OPTIK ATX/STX spotting scopes video tutorial. Odd that that feature is something I'm using all the fuckin' time and have used the ATX Aiming Aid only once for a very disappointing test drive. (Pretty sure that lines up extremely well with Dale's field experience.)
69-085013
http://live.staticflickr.com/65535/51386876298_09ddee93ae_o.png
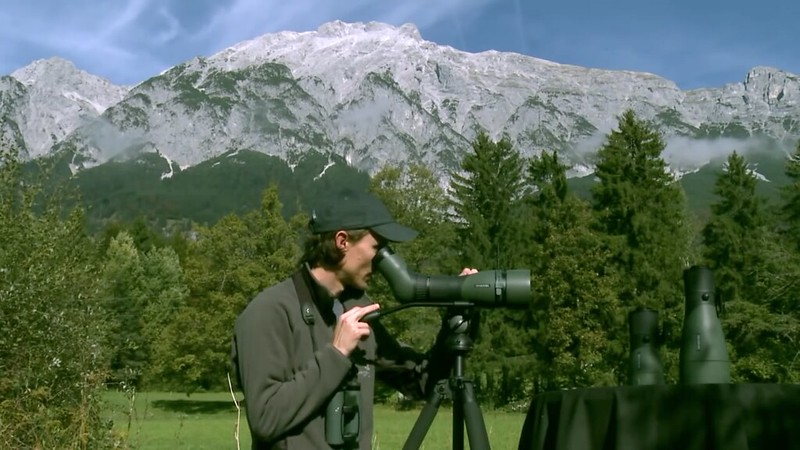
70-085322So that's how I've set it up for my 85.
http://live.staticflickr.com/65535/51387635440_97dd7885ac_o.png

How 'bout the 65 and 95?This is gonna be fine for the 85 now...
Here's a thought... You're not all that thrilled with this junk but have been pressured to do the video, And you have the 65 and 95 on the set to help tip us users off to some of the glaringly obvious shortcomings? That's what I think is going on.
Yeah Dale, let's retract our Sunshade to snug things up a bit with our Aiming Aid. We have Sunshade extension available for much more than we're ever likely to find advantageous.
71-085720
http://live.staticflickr.com/65535/51387365109_33663d1b83_o.png
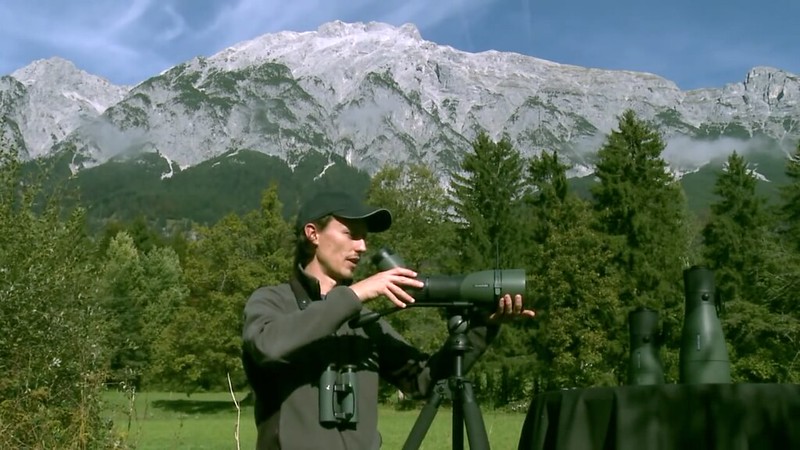
72-090106Which means that when I have a flying bird... I have some flying crows up there...
http://live.staticflickr.com/65535/51387365099_abd4041e0e_o.png
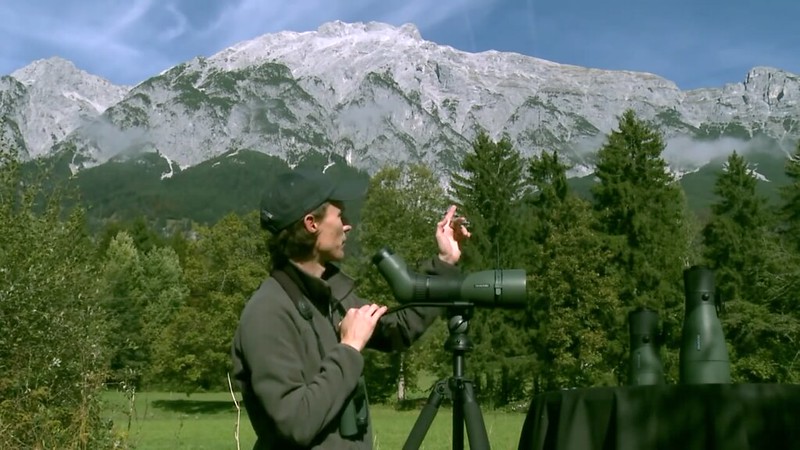
- How fortunate. We've been watching the sky, trees, ground and listening for nine minutes now and haven't seen or heard a single indication of animal life of any kind - beyond our bug buddy back at 53-074909. And yet at the precise moment you need a legitimate birding target...
- Funny your camera guy doesn't pan over and zoom in. Must've just left the camera running and taken a lunch break.
- What kind of crow? You're talking to birders.
- We don't use spotting scopes to hit flying crows. We use binoculars. We're gonna use the scope to hit a Lesser Spotted Woodpecker working an exposed dead limb or trunk in a situation like that. But to get a legitimate situation like that just a few kilometers from the Swarovski Optik factory would likely take some time and effort. Better off faking it.
73-090212
http://live.staticflickr.com/65535/51387635330_e34d621784_o.png
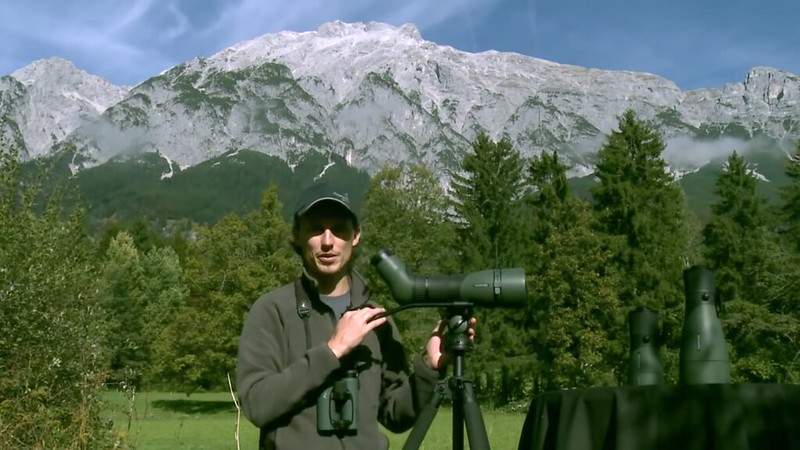
74-090418...all I need to do is just put my head on...
http://live.staticflickr.com/65535/51387635300_f3063fdc9f_o.png
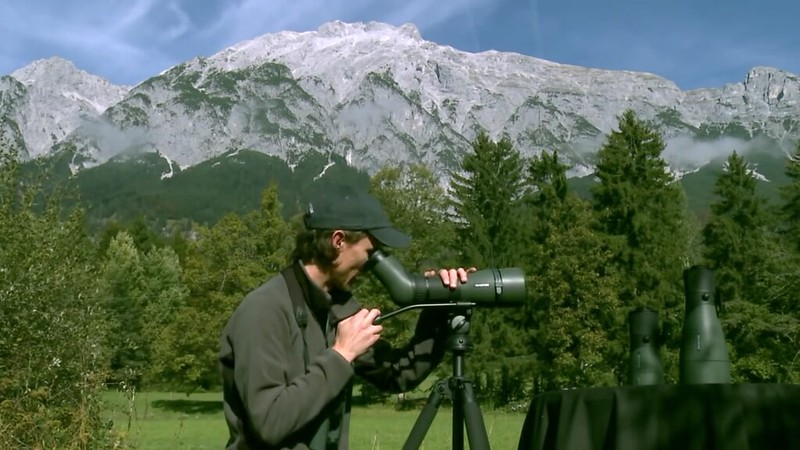
NOBODY's gonna do that for ANY kind of targeting feature. We're first gonna get the scope lined up towards the ballpark of our target.
75-090811...follow... find the bird looking OVER...
http://live.staticflickr.com/65535/51386876178_95eda8d00c_o.png

76-090917
http://live.staticflickr.com/65535/51386629366_bcce3fff88_o.png
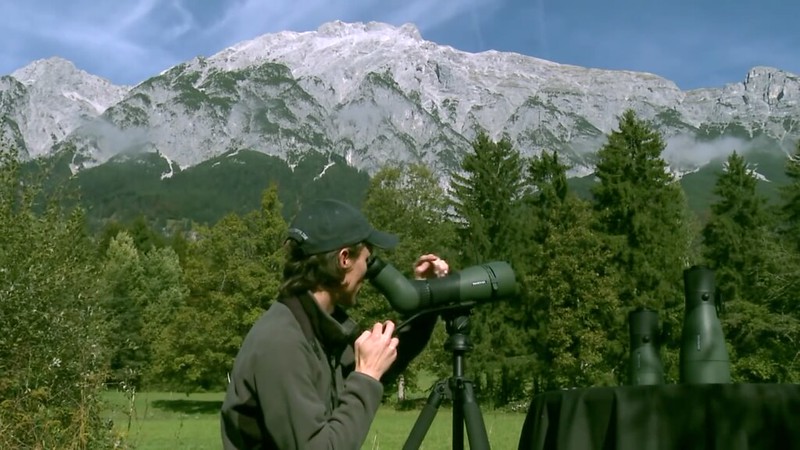
77-091001
http://live.staticflickr.com/65535/51385869742_3178e395df_o.png

78-091014...and then the bird should be...
http://live.staticflickr.com/65535/51385869712_0a4036aae0_o.png

Well fuck yeah. The bird SHOULD BE in our field of view so there's absolutely no need to look through the Scope to verify that the bird actually IS in our field of view, get him centered, FOCUS, maybe zoom in a bit, track him for five or ten seconds. And it's just a dime-a-dozen CROW ferchrisake. Why waste the time when we've barely scratched the surface on all those saplings out at thirty meters....in my field of view.
My technique of bore sighting through my empty Handle Cylinder is, I'd wager, a fair bit superior to this antenna crap. And I've gotten pretty effective using it. But I don't just sight and assume that my stationary target, flying bird, planet will be nicely centered in my glass after I've done my best. I frequently have to spend a few seconds looking around my initial field of view.
He stops just short of lying to us. He doesn't say the bird IS in his field of view. But this is a serious misrepresentation of what's going on - at a minimum.
Often when I've done astro missions for solar, late evening, early morning targets I've not been harnessed up with a binocular. And whenever something airborne and interesting suddenly appears I can count on a Scope lock requiring a lot of speed, skill, and luck. If it's low and close it can't be hit in time and if it's high and soaring there's rarely gonna be a useful starting point - like a tower, horizon, feature, distinct cloud. If we wanna see the bird we want relatively low power and wide field of view. And stabilization is nice but Swarovski doesn't do it.
79-091106
http://live.staticflickr.com/65535/51386629321_3271dc505b_o.png
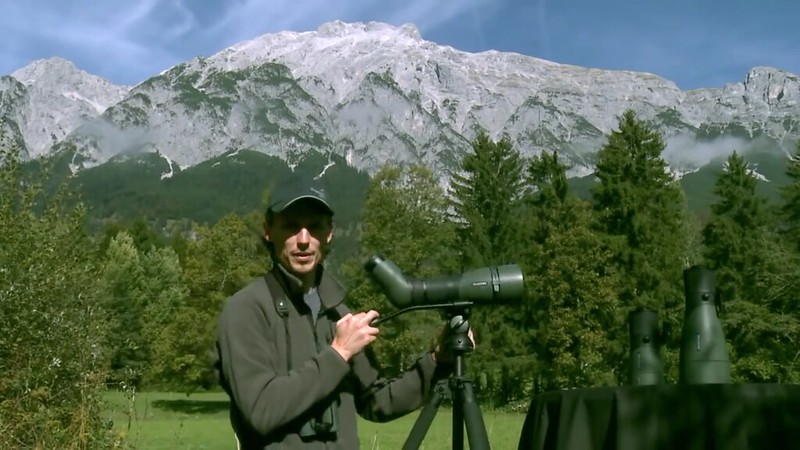
You know that we know that this is a shoddy con job to sell this shoddy excuse for a targeting device serving as a replacement for those nice peep sights you had before shitcanning them to make way for your digiscoping adapter. And you're not the least bit proud of your part in this shoddy scam.
80-091300
http://live.staticflickr.com/65535/51387635140_9c35655948_o.png

Wow, that looks remarkably like a continuation of the sequence being shot back at:
63-071821
http://live.staticflickr.com/65535/51385870037_13a47f321c_o.png
before we trimmed our antenna down to get its tip even with the top of our ATX at 12 roll.
Oh really. It's just a rough guide to get us CLOSE to our bird or subject but your crow SHOULD HAVE BEEN in your field of view. You were so certain that you didn't take an extra half second when you were in THIS:It's just a rough guide to get you close to your bird or your subject.
77-091001
http://live.staticflickr.com/65535/51385869742_3178e395df_o.png
position to verify.
Yeah, it's just a rough guide to get us close to our target. That statement has way more accuracy than the actual Aiming Aid under discussion. But there are BETTER options and techniques for getting us close to our target that don't involve any supplementary gear. And you're using at least some of them but telling us about none of them.
81-091411
http://live.staticflickr.com/65535/51386876083_8db60c7077_o.png

And look at the expression on your face in the last frame from this sequence.
82-091621
http://live.staticflickr.com/65535/51386629266_ddbd09e86c_o.png
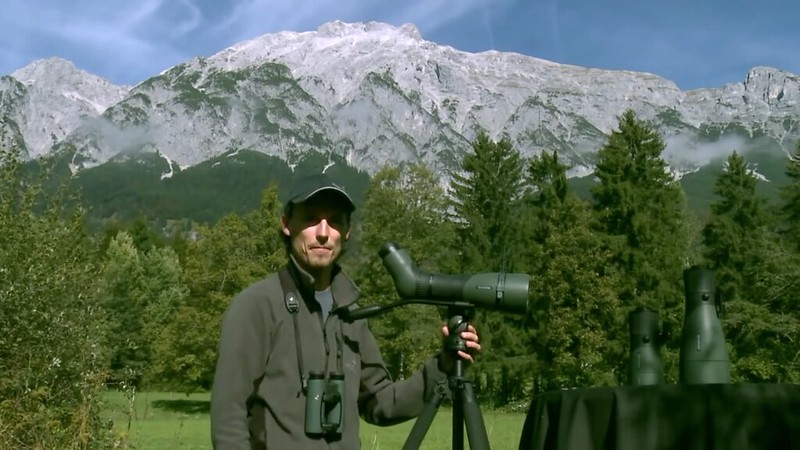
You don't like what's going on, you know the "crow(s)" scam was totally transparent, and you're embarrassed by and ashamed of your part in it.
091624
CARE AND CLEANING OF OPTICS
83-092813Your Swarovski Optik telescope is waterproof down to four meters and is nitrogen purged. So the insides will keep nice and clean.
http://live.staticflickr.com/65535/51391862389_1c6b53a861_o.png
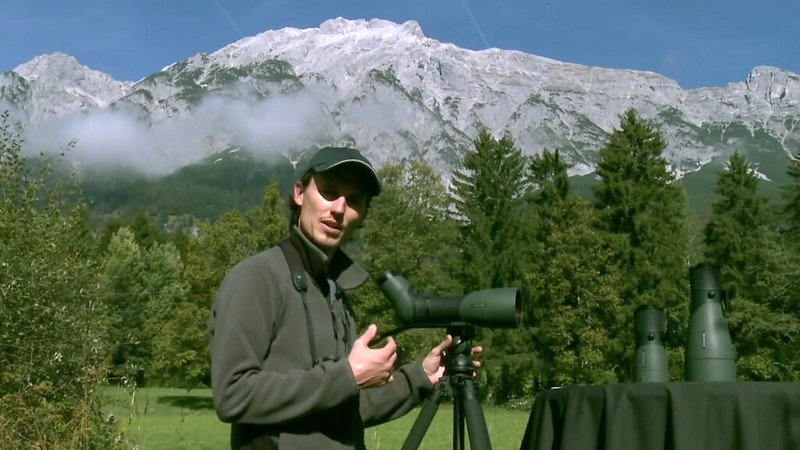
Dale's happy here 'cause he's once again giving us legitimate information.
84-093420But lots of people ask about how to take care of the external parts of their telescope.
http://live.staticflickr.com/65535/51391885309_7574766546_o.png
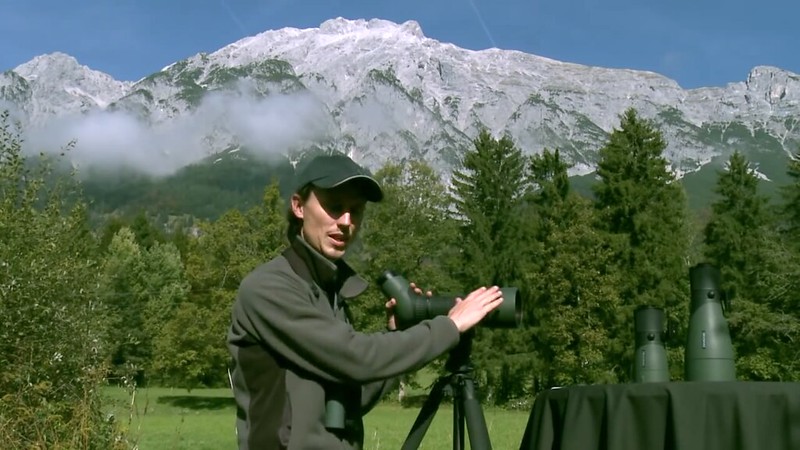
85-093519It's important that you do keep it clean, that you maintain it...
http://live.staticflickr.com/65535/51391407823_c6dcced065_o.png
86-093617
http://live.staticflickr.com/65535/51391407793_2a72a027e6_o.png

87-093700
http://live.staticflickr.com/65535/51391152176_ec6a675e54_o.png
88-093714
http://live.staticflickr.com/65535/51390392167_83f15b3dd8_o.png
89-093908And that the lenses are clean.
http://live.staticflickr.com/65535/51385869592_975afa2038_o.png
And it's hard to go wrong if your first move is to swing your scope - uncapped and Sunshade fully retracted - around towards the Sun.
Which is another way of saying that ANY and EVERY cleaning is detrimental to the lenses. Also that if we just use our scope at a modest rate and clean sparingly over a number of years we're damaging our lenses. I'm not buying this. I clean the back end frequently but extremely carefully and my feeling is that my glass would be indistinguishable from the same piece just out of the box.Don't clean them too often 'cause too often is also not too good for the lenses.
...which we're not doing here...But the best way to do it is to get a little bit of running water...
90-095319
http://live.staticflickr.com/65535/51390392152_21b577db09_o.png
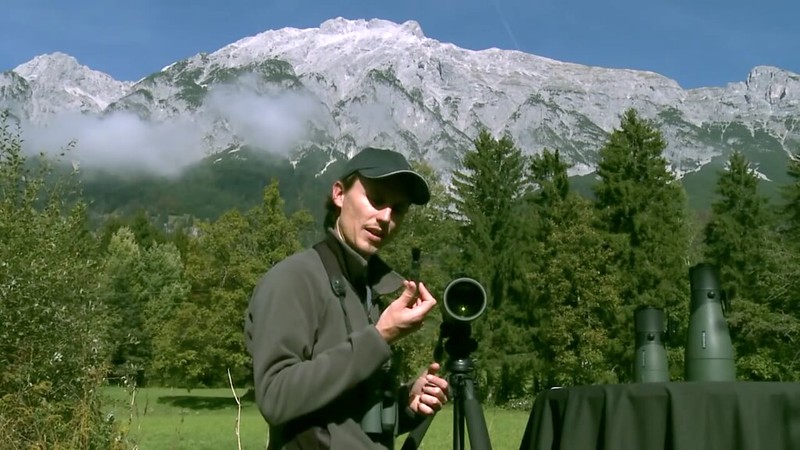
...since we totally missed the first trick......at a tap and you can just gently wash off your lenses with a little bit of running water.
Another good trick...
91-095505....is...
http://live.staticflickr.com/65535/51407828617_64ab1f6374_o.png
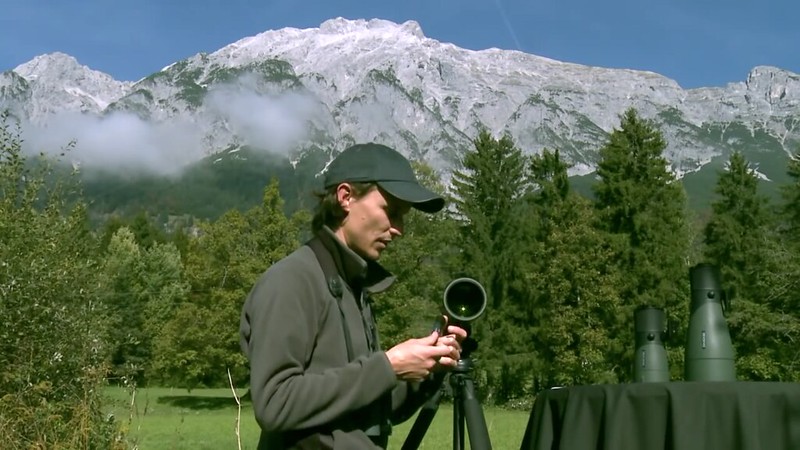
And it's a good idea to run your thumb over the tips of the hairs prior to each use 'cause that helps keep it properly oiled.There's a brush...
92-095619
http://live.staticflickr.com/65535/51391407708_42e07acfb1_o.png

93-100222...that you can brush off the larger particles off of your lenses because, no matter how good your cloth is...
http://live.staticflickr.com/65535/51390392087_ee552ea832_o.png

94-100513...if you've got sand or...
http://live.staticflickr.com/65535/51393601775_c659d9ce7b_o.png
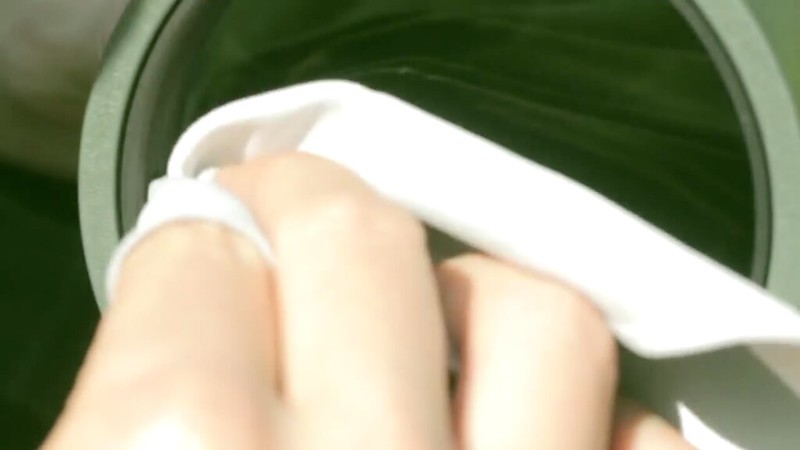
If we have sand or dirt particles in the vicinity of the glass we've either made a handling mistake we shouldn't and can't afford to have or we're operating in an environment we shouldn't be. In the latter case we're operating in a sandstorm and that means we've exposed our glass to sandblasting or a risk thereof and it's ridiculous to discuss proper cleaning in that context. If there's a sandstorm the Scope needs to be capped, bagged in its case, stowed in the tripod bag, and locked in the trunk of the car....dirt granules on there...
95-101002...and you're rubbing it with a nice smooth cloth it's gonna be like sandpaper....
http://live.staticflickr.com/65535/51393601760_cba61181e7_o.png
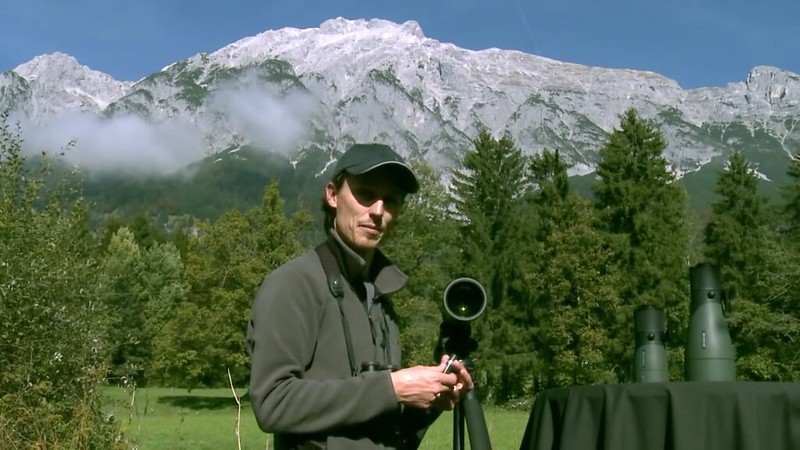
And anybody who needs to be told this should not be permitted to own any optical gear north of a three dollar pair of drugstore sunglasses - if that much....and you're gonna not do well for your lenses.
I have with me at all times a little lens cleaning kit I put together and store in a little Microfiber Pouch in a Backpack compartment. Two 30 cc spray bottles, soft bristle stub toothbrush, lens cloth. Way more likely to be used for my eyeglasses than binoculars or scopes but if there's no running water nearby...All of the external lenses have got Swaroclean coating on them which will help to expel dirt to keep the lenses nice and clean. They've also got the anti-reflection coating - Swarodur - which is a really tough coating which will help to protect the external lenses.
Hose the glass down with an Ivory dishwashing detergent solution, drag the brush over the glass with bristles trailing, rinse with water from the bottle (not bottled water - by the way), spray lens cleaning solution, wipe clean and dry with lens cloth. Lens cloth is handled carefully and washed frequently.
96-103409The eyecup you can twist off... And sometimes when you've been dragging it through the dirt or when you've been using it a lot you can get dirt granules in here...
http://live.staticflickr.com/65535/52544078970_105321eef8_o.png

Note torque effort.
97-103413
http://live.staticflickr.com/65535/52544141878_3323021b27_o.png
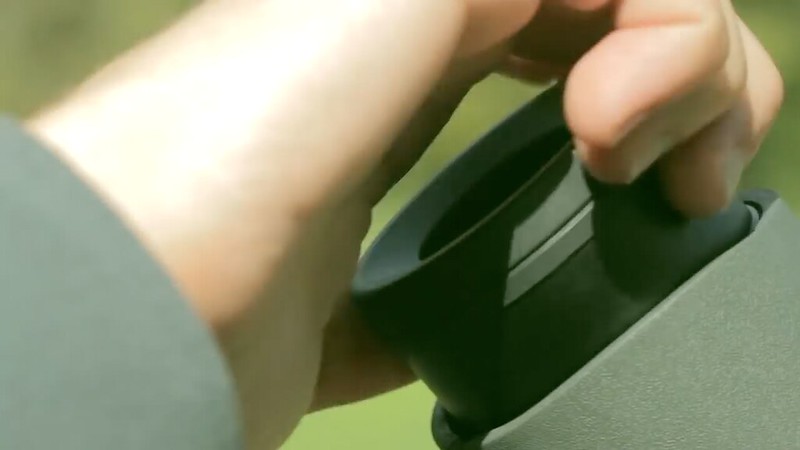
98-104408
http://live.staticflickr.com/65535/52353589341_aea912ee1f_o.png
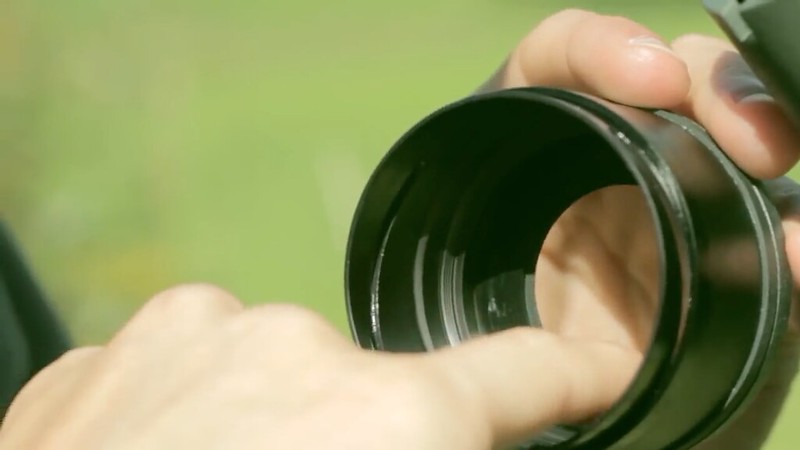
99-111715...or in there... This you can take off and wash under running water... Wash it out nice and clean... And then there you can use a cotton bud just to clean out everything on the inside... So it's nice and clean.
The same goes for the joint here... That you can clean these lens surfaces and make sure you don't have a build-up of dirt around the O-rings here. 'Cause if everything is nice and clean then this will be nicely water sealed and you won't have any problems in the rain.
http://live.staticflickr.com/65535/52354850263_ec97edd6cf_o.png
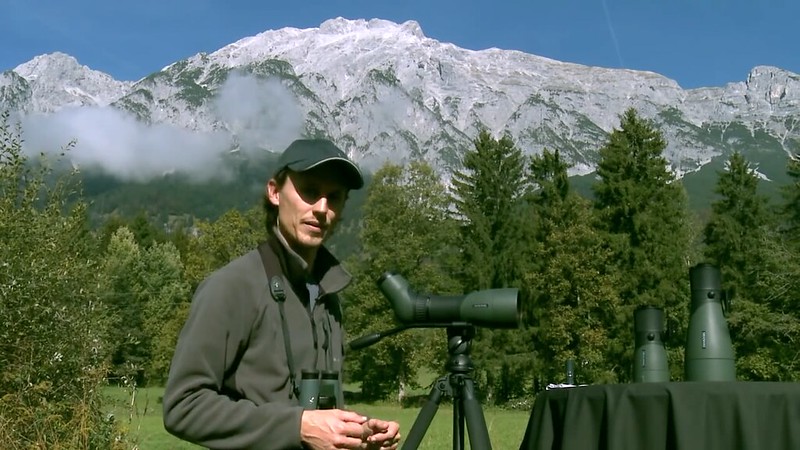
Folk who use this equipment all the freakin' time are almost inevitably gonna become pretty effective, efficient, skilled at handling, setting up, targeting. And it's blindingly obvious that the enthusiasm level Dale has for demonstrating, advertising, promoting, pretending to target with this abortion of a sighting device is down at about a negative ten.
We use this equipment primarily for enjoyable recreational experiences and scientific pursuits and we want it to be FUN. And it's fun to develop legitimate techniques, gain proficiency, nurture others along the paths. Third sentence in Dale says:
And he obviously isn't having any fun promoting the snake oil and running instructional sessions on how to get the best possible results from it.I hope you have as much fun with it as we had building them and as we have playing with them.
And by the way... Building and playing with them? How 'bout designing, refining, innovating?
----------
Finder Scopes
Targeting is a BIG issue with spotting scopes. We'll note that in "Video tutorial: SWAROVSKI OPTIK ATX/STX spotting scopes", embedded and discussed in excruciating detail below, Dale dedicates precisely one third of his (Swarovski's) eleven and a third minutes of airtime dealing with "SETTING UP THE AIMING AID", a take he tells us ain't all that great - while studiously ignoring angled Scope rolls that aren't standard 12.
With our spotting scopes we're doing pretty much everything a deer hunter is with his rifle and scope shy of pulling the trigger. Also accuracy is a way less critical issue and we're worried very little about range and not at all by gravity and wind.
Note that for both the Barska Riflescope and Apertura Finder Scope we're clamping Arca-Swiss and swapping in/out Swarovski Glass for targets which are always gonna be above the horizon and will damn near always well above it. Thus damn near always when we're unclamping we're at risk of having something expensive sliding out of the back end of the Clamping Channel and falling to the surface - usually asphalt. In any other application that comes to mind we'll have the tilt at zero when unclamping and be safely and efficiently using both hands to simultaneously back off both of the UA-180's Lens Clamp Knobs.
----
- ATX/STX Stock
2021/08/21
http://live.staticflickr.com/65535/47691657471_7d2da506b0_o.png
The "Aiming aid" on the "Sunshade" we must assume can only be of any possible use on an STX configuration - which we'd only ever wanna use for digiscoping - 'cause we also have an "Aiming aid ATX" which physically removes the "Aiming aid" (not ATX) from the equation. And when I started in this game I almost immediately dismissed it as having zilch in the way of actual value. Played with it a bit, rapidly concluded that there was no way in hell I'd be able to do well enough with elevation to be able to hit the right atmospheric level consistently, went nuts on my Handle Cylinder strategy.
05 Aiming aid
06 Sunshade
18 Aiming aid ATX
Length is 36 millimeters, unless the Sunshade is fully retracted it can and almost certainly will tilt/flop down and I only want it fully retracted when I have a Solar Filter on the front end.
But it eventually dawned upon me that if we can hit pan then finding tilt is virtually always a no-brainer. And this afternoon as I was roasting in the sun at my Observatory station with not much of interest around I decided to give the "Aiming aid" another test drive. Still totally sucked on elevation BUT...
Make sure the Sunshade's rolled to 12, lock the ATX at 12, sight from well behind the ATX, get your eye, the high point of your Eyecup, the Aiming Aid groove, your target all lined up. Your Scope will be shooting way high but so the hell what. Lock your pan, go to your Scope, tilt down, roll your ATX if necessary as your back end goes up... You will NAIL your target. For astro the Headlamp on red helps enormously.
Using our Handle Cylinder will probably get us on target faster but tends to demand more skill and judgment. Using this Aiming Aid technique costs us some time and would substantially suck for a substantially moving target but in the accuracy department we're totally deadly.
Astro... Probably won't be able to do much with the twin ridges but I'm finding it doesn't seem to matter in the least. Get our target, the high points on the diameters of our Objective and Eyecup, eye all lined up and start tilting down.
---
2021/09/06 - Found that even with the ATX rolled off of 12 one can do a pretty good job of getting the pan properly set just by lining up the high point of the front end with the target.
---
2023/03/08
Last evening I determined that the "Aiming aid" was nothing but a distraction and decided that I will henceforth use and stow the Scope with the Sunshade rolled to 06 to keep the Aiming aid out of mind and the way as much as possible.
- With it visible (in the 09-12-03 range I was constantly feeling compelled to tweak it to 12 so things would look right but where I'd never use it.
- With my very successful targeting technique of getting the Tripod vertical and the ATX on the 12 click stop, lining up the tops of the front and back ends and target, looking through the glass and tilting down to acquisition the Aiming aid was nothing but an element to throw me off a bit. I want to be lining up the tops of the discs - not trying to tweak the Sunshade roll for my best shot at vertical perfection.
At best it was harmless. Big picture it was a significant detriment.
----
- Scope and Mounting Features
Discussing three Swarovski label heads - two of which I own and one of which I use for serious scope work.
http://c1.staticflickr.com/1/935/42133017970_f219f617fa_o.png
http://c1.staticflickr.com/1/848/43268691534_347a27c724_o.png
http://c1.staticflickr.com/1/859/43616064242_2d9f9715b2_o.png
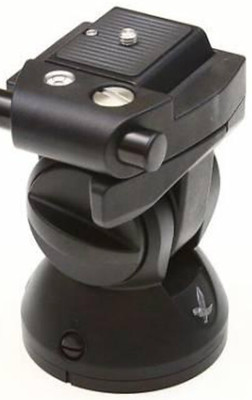
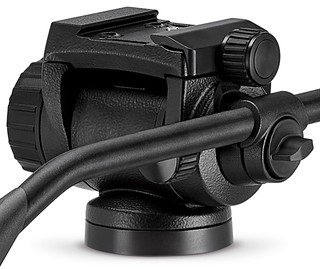
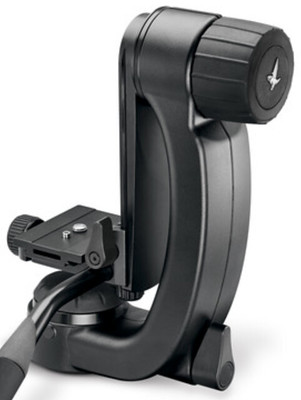
One thing all three have in common is a handle whose front end is clamped in a cylinder below, starboard of, and precisely parallel to the scope's ocular module's centerline. (And the two Gitzo heads use an identical (D1108107) handle. The handles do nothing significant for me and I've pulled both of them.
So now let's start thinking of our handle cylinders as rifle bores and ignore the fact that they aren't rifled and we'd prefer that they were a lot longer and of a caliber a fair bit under the 13 millimeters we have at present. So rifle or head with riflescope or spotting scope respectively and ignoring gravity and wind for the former combo... Assuming proper machining - if our bore is centered on target then the mounted glass will be as well. And the machining on our heads and scope mountings is spot on.
Of course if we put a plate in between our head and scope we introduce a potential for pan misalignment but we can tune that out easily enough.
The rifle - as we've noted - demands way more precision than our spotting scope does and Step One for those folk is bore sighting. They either pull a bolt at the back end and look through or stick a laser in the barrel to lock onto target and tweak the glass to put the crosshairs on the same point. Then they start putting lead through and further tune if/as necessary.
But we're OK just bore sighting. If our eye, cylinder, and target our all properly lined up our scope will be on target way more than we need it to be. But our cylinder/bore is short and fat and it's a major bitch trying to operate in nighttime darkness so we're gonna need to practice and develop some skill.
If we install our handle backwards into our cylinder we can see along its tubing prior to the bend what a forward projection of our cylinder would look like.
The max diameters of our Objective Modules occur halfway fore (or aft) on the (extendable/retractable) Sunshades. For the 85 it's 105. For the 95 it's 115 (big surprise. The 85 has a 38.0 millimeter wide Arca-Swiss Foot. The 95 has a 45.0 millimeter wide Swarovski Standard Foot. So when it's clamped into the PTH's Lens Support Clamping Channel its centerline is 3.5 millimeters (half the width difference) out farther to port that the 85's is. But due to its greater diameter the 95's periphery is 5.0 millimeters farther back to starboard so the clearances we get to our Bore Sight extended cylinder are pretty close to each other - 5.5 for the 85 and 3.0 for the 95. (For an Arca-Swiss 95 the we'd be encroaching half a millimeter into the extended cylinder.)
Anyway... The proximity of the Objective's max circumference edge at its 04:30 to our extended Bore Sighting cylinder's 10:30 provides us a tool for helping get us properly lined up. If we're seeing a wee bit of intrusion with our sighting eye we're close but need to move it a wee bit towards 10:30.
2021/09/03 - I've found the GOFORWILD Headlamp in red strobe mode to be enormously valuable in low light Bore Sight situations - 'specially for high angle astronomical targets. Doesn't wreck our night vision and pulses on to let us see how well we're lined up behind our Bore Sight and off so's we can totally clearly check our target. Real game changer.
----
- Barska 1-4x28 Riflescope
http://live.staticflickr.com/65535/51753262103_4becdab2ef_o.png
http://live.staticflickr.com/65535/51753262083_f5183b239c_o.png
http://live.staticflickr.com/65535/51753901440_2688d8158d_o.png
http://live.staticflickr.com/65535/51753028396_7b87a58fd0_o.png
http://live.staticflickr.com/65535/51753028356_ce8b10a90d_o.png
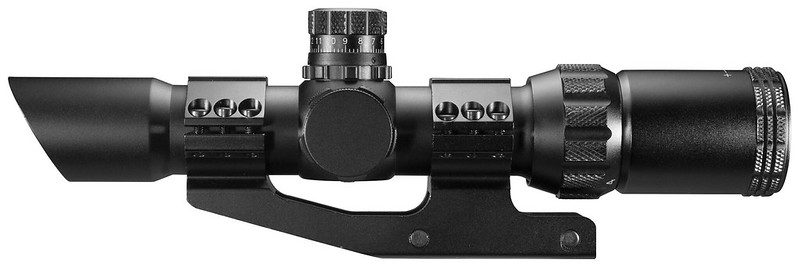

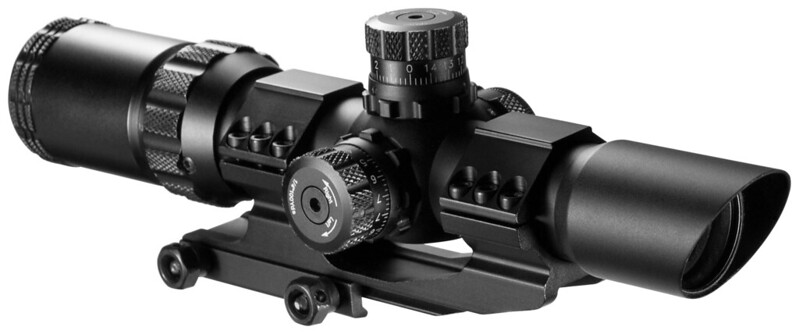
From one to four power zoom, under $170.
This was a major project down a misguided path. Had my head locked into an assumption that I should be building on the concept of the peep sights present on all the scopes not geared for digiscoping. Needs to be totally written off as a rather expensive and labor intensive learning experience.
---
Cantilever Ring Mount designed to clamp onto AR (ArmaLite Rifle) rifle barrel rails. We need it to clamp onto something - a Rail - that can be bolted down onto a Gitzo GS5370LDR Plate - overall length 140 millimeters.
The Scope itself is supported by fore and aft Clamps centered 80 millimeters apart. A 3 millimeter Allen key and we can remove twelve socket head screws - 4 millimeter diameter, 0.70 pitch, 10 length; lift the two Caps; and completely separate the two main components. (Scope mid section barrel diameter 80 millimeters.)
If we separate the Scope from its Ring Mount it's a substantial pain to get it properly reclamped with everything properly centered and squared.
Seems like we'd want the turret structure centered fore-aft between the Mount's two Clamps but mine shipped with the Scope clamped fore of that - as in the photos. Maybe they had something rifle related in mind. I moved it back to centered. Whatever... That part's easy enough.
Get the Scope upright and hard clamped... difficult and tedious. Recommend very careful and gradual tightening alternating side to side and diagonally fore and aft. When fully tightened port and starboard gaps remain between the Caps and the Base element and the gaps need to be kept and finished even. Constant checks and adjustments need to be made to prevent the Caps from torqueing the Scope clock or counter from proper alignment.
---
The mounting clamp is the same basic design as the PTH Lens Support's Arca-Swiss clamp 'cept fore and aft screws - 50 millimeters apart - rather than one central. Also upside down. 5 millimeter diameter screws are permanently fixed with heads fairly flush in the port face, 0.80 millimeter threaded starboard ends project out 8 millimeters beyond the adjustable clamp jaw when it's full in. Let's name this clamp Arca-Swiss-Mini.
The inner lengths of the (fore and aft) screw shafts are unthreaded over the minimum width of the Clamping Channel - about 21 millimeters. The shafts project below (bulge out from) the face of the Mount's Clamping Channel about 2 millimeters such that they'll constitute the contact surfaces.
Let's designate the position of the fore screw as Ground Zero and measure fore and aft from that line. The second screw is at Ground Zero plus 50 (and we'll position the front end of our Rail (see below) at Ground Zero minus 70).
The Scope's overall length - Endcaps included and Focus Ring turned full clock to min - is 273 millimeters. Focusing full out adds 10. Max width - at the Rheostat and Windage Turrets - is 72. Height - 80.
All of our fasteners will be either M05-0.80 or SAE No. 10 nylon Washers or Spacers. No. 10 is a tight fit for 5 millimeter and the Spacers' length is 3/8 inch - a little shy of 5 millimeters.
The mounting clamp screws' starboard/threaded ends are engaged by really cool special nuts that can be tightened by hand, a small diameter (a bit shy of 4 millimeter) pin/rod which can be run through the nut from side to side (take a close look at the fore nut in the above photo), a 12 millimeter socket. Good news - lotsa mechanical advantage. Bad news - prevents us from being able to plop the assembly down flat on a tabletop. But let's keep them 'cause after we've built up our Finder Scope Tripod Mount Adapter (Rail/Plate Assembly) the issue won't matter in the least. Also throw in a pair of Washers.
21 millimeter Clamping Channel minimum width assumes we're clamping to a rail with a dovetail cross section. But if we get a length of 0.125 x 0.750 inch (3.2 x 19 millimeter) Steel Flat Bar (rectangular cross section) from the hardware store we can achieve a less elegant but very satisfactory and - for the purpose of this application - totally secure clamp. (We could file to produce the more elegant fit but...)
The GS5370LDR Plate Slot's length has a length of 110 millimeters. Let's make our Rail 150 and drill through 10 in from the fore and aft ends - Ground Zero minus 60 and plus 70 on the centerline.
Problem... We now have a spread of 130 millimeters and we need to engage the aforementioned Slot. The clearances - even with the button head socket cap screw (3 millimeter Allen) we're gonna use for Screw 1 - are such that we can't get away with drilling to utilize the full length of the Slot. So we'll need to jump through some additional hoops.
Bolt the Screw 1 into place on the Rail and through the Plate at the fore extreme of the Slot. Oops... We don't have enough Slot left to accommodate Screw 2. We don't even have very much Plate. So let's name our Rail Rail 1 and cut and drill a duplicate Rail 2. Then let's drill duplicate Rail 2 at Ground Zero minus 30.
So now we can mount our Scope via its Arca-Swiss-Mini clamp to Rail 1 (Ground Zero properly aligned), put Spacers 1 and 2 between Rails 1 and 2 a centimeter in from the fore and aft ends, install a Screw 3 down through Rail 2 at Ground Zero minus 30, bolt Rails 1 and 2 together, bolt the Rails assembly to the Plate, clamp the Scope to the Plate/Rails assembly.
Note that we have just enough clearance between Rails 1 and 2 to be able to get an 8 millimeter open end wrench in to engage the hex head of Screw 3. And we'd be pretty screwed ourselves minus that or a similar capability. (Some wrenches are too fat. A Master Mechanic from True Value Hardware makes it with a couple hair's breadths to spare.
The above instructions are all backwards from Plan A. While fine tuning after about a week's worth of test driving I once again discovered that I couldn't get the wrench in to immobilize the head of Screw 3 with the Scope mounted, did a 180 as a temporary measure... WHOA! Much better geometry, clearance between the Scope's factory Mount and the head of Screw 1.
---
Yeah, this project looked much simpler when I started envisioning a solution.
Another strategy... Special order - for over thirty bucks more than the Scope to be mounted upon it - a Gitzo Plate GS5370XLC - 200 millimeters with a Slot length of undoubtedly 170.
Make the (single) Rail 180, drill (as above) 10 in from each end (160 span), 12 millimeter button head socket cap screws, same Spacers between the Rail and Plate.
---
Configuration stuff...
Rails 1 / 2:
- 0.125 x 0.750 inch x 150 millimeters
-- GZ-70 - End - Front
-- GZ-60 - Screw 1
-- GZ+70 - Screw 2
-- GZ+40 - Screw 3
-- GZ+80 - End - Back
Screws:
- 1 - 16 millimeters
- 2 - 20 millimeters
- 3 - 12 millimeters
Positions:
- GZ-60
-- Screw 1
-- Rail 1
-- Spacer
-- Rail 2
-- Washer
-- Plate
-- Washer
-- Nut
- GZ+70
-- Screw 2
-- Rail 1
-- Spacer
-- Rail 2
-- Washer
-- Nut
- GZ-30
-- Screw 3
-- Rail 2
-- Washer
-- Plate
-- Washer
-- Washer
-- Nut
We're doubling the Washers near the bottom end of Screw 3 just to leave a bit less exposed threading.
Our goal is to get our Riflescope assembly tuned panwise such that when clamped into the PTH's Lens Support it'll hit the same flagpole three hundred yards out that the Spotting Scope will be centered on when it's clamped in - directly via its Foot rather than with a Plate interceding.
So with the Spotting Scope Foot clamped - minus any Plate - pick a suitable distant, distinct, fine, stable target; focus; zoom in to the max; center as best as best as possible. We don't have crosshairs at this stage but we don't need that level of precision anyway. When things are looking optimal clamp hard.
On the Riflescope mounting assembly - Rails, Plate, Screws, Spacers, Washers, Nuts - bolt everything together firmly. Go all the way with Screw 1. Screw 2 goes a couple hair's breadths fore of the aft end of the Slot. As per Screw 1. Clamp the assembly into the Lens Support. If you drilled carefully enough your crosshairs will be close to target - almost certainly a bit off to the left or right.
Tighten Screw 3 to stiff and torque the front end (pivoting off of Screw 2) accordingly. If the fit's too tight a few file strokes may be called for. When you've scored your bull's-eye finish off with the wrenches.
Swap in the Spotting Scope with the Plate installed on the Foot, adjust alignment as necessary, done.
If we're a bit off on Tilt then so what.
Fun to play with the Elevation and Windage adjustments but I'd rather not use the latter as a compensator for sloppy workmanship.
Note that the Riflescope isn't the slightest bit angled so targeting at high angles will be a major bitch.
---
For my 95 with its Swarovski Standard Foot I've configured the Lens Support Clamping Channel hardware to optimally accept the extra seven millimeters of relevant width and can't clamp anything Arca-Swiss (like the our GS5370LDR Plate) without jumping through too many hoops to make for a practical option. Good news... Just plop the Riflescope assembly in the Channel and press the starboard edge of the Plate into the starboard edge of the Channel.
But if we're in a keeping score situation we'll want an Arca-Swiss clamping channel and a 45066 Plate on our Swarovski Standard Foot. And it ain't all that easy to get the Scope clamped down hard on the Plate nicely aligned. Torqueing the Screw also torques the Plate. Small increments, frequent swaps to check.
---
The Elevation and Windage adjustment turrets project respectively up vertically and out to starboard horizontally from the center of the Scope body. They're both capped by centered socket screws driven by a 3 millimeter Allen bit (same as the Mount clamping screws) - as we can see in the above photo. As per the fuckin' manual don't go beyond the counter and clock points at which resistance is met if you aren't interested in trashing the mechanisms.
The port turret houses a CR2032 battery which lights up the crosshairs in five graduated powers for red and green. Click-stop dial immediately inboard of the battery cover. Works but I can tell only for low illumination fields. I'll leave the plastic disabler disc in place until I encounter a situation in which this feature would work to my advantage.
When targeting the Sun and trying to nail it with the crosshairs (reticle) count on getting an offset duplicate of what's actually there. It's a reflection off of the Filter. We don't need to worry about it in the least but... There are long thin rectangles at 03, 06, 09, 12 o'clock starting off the ends of the horizontal and vertical crosshairs lines. In the legit image the rectangles are white. Black in the reflection. (Crosshairs lines in both are black.)
In the manufacturer's illustration:
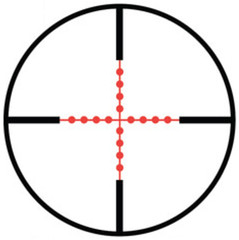
the rectangles are depicted as black and the crosshairs are being illuminated in red for low light situations.
---
Riflescope stows very nicely in a LensPouch XL. Granted, it would stow a lot more nicely minus the turrets cluster which isn't doing us any good.
---
Solar Filter
Probably the best real world excuse for having this device available is getting glass mounted on the UA-180 or other Gimbal Head locked onto the Sun. Problem... A few hoops must be jumped through to get a Seymour Solar Filter properly mounted on its front end.
The smallest Filter in the line is the 200 which is intended for an optical tube (outside) diameter of 41 to 47 millimeters. Ours is 33.5. Thus to get it properly installed and centered we need set screws at 12, 04, 08 o'clock like they have for the big guys instead of just 12 like they have for this one and the other little kids. We also need slightly longer set screws than the stock (10 millimeters).
- With the Scope tube fore end's undercut profile our 04 and O8 will be dangerously close to the relevant leading edge area.
The stock Filters are drilled 5/16 fore of the trailing edge. Let's double the denominator. Now even after a 180 rotation we'll still have 12 on solid ground (just barely).
Let's deburr and screw the stock screws in from the inside. Now instead of a bit shy of contact we're a bit shy of doable. So let's flip 12 back to normal and we're solid a hair's breadth high from perfectly centered.
And we have a little tab of tape on the sunshade's nose to prevent glass to metal contact.
(Thanks much to Tegan at Seymour Solar who took an interest in this project and did the customization at no extra charge.)
For a set...
- Tripod/Head assembly up.
- Install ATX Scope, pull LensPouches and Caps, install Solar Filter.
- Pull Scope, install Filter on Riflescope if it isn't already, mount Riflescope, get Sun in the crosshairs, clamp.
- Stow Riflescope, mount ATX Scope.
The glass items can be laid on the Backpack before and/or after being swapped in or out - ATX at 12 roll on one of its sides, Riflescope any way one likes.
I don't like having a Scope aimed in the general direction of the Sun uncapped and minus a Solar Filter so in one of these set situations I stand at 12 (facing aft), tilt down a bit, pull the Cap and install the Filter with the front end in my head's shadow. Yeah, a bit anal, but is there a quicker easier way to run this swap anyway?
Note that when we're stowing the Riflescope with Filter installed objective end down in a LensPouch. Up - as I initially practiced - there's gonna be a strong inclination to pick it up by the concealed but bulging Filter. Tried training myself to only extract grasping the drawcord or midsection structure but was reverting to being human over half the time.
Note that of course by the time we've swapped out the Riflescope and swapped in the ATX our astronomical target won't still actually be in the crosshairs - but plenty close enough.
Also note that at 1x - which is what we want and all we need for solar acquisition - we'd be perfectly OK throwing away all the glass aft of the Filter. But I don't know of a better, easier, cheaper strategy for getting an empty properly aligned tube configured for getting locked into our Head's Arca-Swiss Clamping Channel.
Asterisk... With the glass we have focusing capability. Could be an advantage to some for non solar applications.
---
Solar Filter needs to have a Microfiber Pouch for safe stowage when doing non solar targeting.
---
2022/07/24
With the technique I eventually discovered/developed for locking onto the Sun I'll always come out way behind using this contraption but it was an interesting project and fun to play with for a while.
---
2022/02/06
Was trying to hit a five day old high angle Moon with the 95 shortly after sunset. With a dark sky if one gets reasonably close one can pick up a glow that makes homing full in a cinch but the relevant sky area was anything but and I was getting nowhere fast. Riflescope made very short work of the task.
----
- Apertura 10 x 50 Right Angle Finder Scope
2022/08/15
Really needed a proper astro geared right angle finder scope for high angle targets with zilch distinctive in the vicinities to use as starting points. Needed to clamp into my Arca-Swiss channel which astro gear doesn't. This solution makes previously discussed strategies - archived above - mostly garbage.
http://agenaastro.com/william-optics-dual-sided-vixen-arca-swiss-110mm-dovetail-plate-red-m-prc110rd.html
William Optics Dual-Sided Vixen/Arca Swiss 110mm Dovetail Plate - Red # M-PRC110RD
https://live.staticflickr.com/65535/52353894731_eeb4433439_o.png

That looked like it would get me started. Then maybe:
http://www.highpointscientific.com/apertura-50mm-right-angle-finder-scope-package-white-50raf-w
Apertura 10 x 50 Right Angle Finder Scope with Illuminated Reticle Eyepiece - White - 50RAF-W
http://live.staticflickr.com/65535/52353300609_486b453b1d_o.png
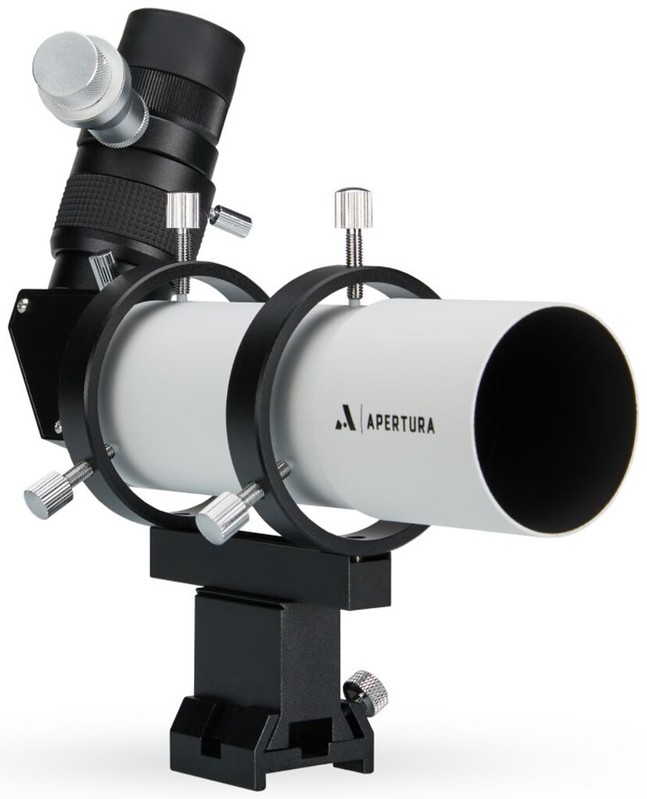
http://live.staticflickr.com/65535/52352904332_8d9ca8d972_o.png

http://live.staticflickr.com/65535/52354166799_4743c01f71_o.png
Partially stumbled upon the solution. Worked out better than I could imagine.
The Finder Scope comes without a word of components identification or assembly or use instructions. OK, we can figure everything out easily enough.
All of our Screws save for two are M05-0.80 threaded. The four connecting Screws (which we're dumping) are all Socket Head of 12 millimeter length which are driven by a 4 millimeter Allen. The six Scope mounting/adjusting screws are thumb driven and of 20 millimeter length.
The two exceptions are M04-0.70x10 on the back end.
- The first - immediately aft of the Scope Barrel and offset a bit shy of 12 o'clock - locks up the Eyepiece roll and is backed off to allow it.
- The second - just "above" the rubber grip of the Focus Collar - clamps the removable "aft"/"top"/ocular element of the Eyepiece into the rest of the assembly and allows its removal to facilitate stowage.
There's an Illuminator which may or may not be screwed in - M08-0.75 - at the lowest exposed level of the removable element. Mine won't be for the foreseeable future and the rubber plug which seals the threaded port in the Illuminator's absence will remain.
We're throwing away everything below the Support Beam. Also the pairs of Screws driven up to connect the Fore and Aft Mounting Rings to the Support Beam and down to connect the Support Beam to the next element below.
We now get hold of a pair of M05-0.80x25 Socket Heads, clamp them into an electric drill chuck, file the threaded ends to rounded. Each of these Screws then goes up through a No. 08 Steel Washer. These measure 7/16 inch OD and 3/16 ID. That ID translates to slightly under 5 millimeters so a bit of work with a round bastard file is called for.
The Fore and Aft Screws then go up through the fore and aft slots of the M-PRC110RD (Arca-Swiss face down) then are screwed into the Finder Scope's Fore and Aft Mounting Rings. Center Fore/Aft and Port/Starboard and torque solid.
The Steel Washers install nicely with little to spare laterally. The heads of the fully torqued up Socket Heads are recessed up into the slots of the Plate two or three hair's breadths worth and their smoothed ends project up into the IDs of the Rings about the same. Unbelievable.
Shy of really tweaking things with the crosshairs our Finder Scope will be nicely centered in the Fore and Aft Rings with the Adjuster Screws projecting outside of the Rings 20 millimeters. Set the 04 and 08 o'clocks for 20, screw in the 12 to when it feels adequate for immobilization.
The Illuminator doesn't need to be mounted and the port can stay sealed with the rubber plug which we find installed when we open the box.
OD of the front end is 58 millimeters and it takes a Seymour 250. Hitting the Sun is brain-dead easy...
- aim low
- if available get the shadow on the surface behind symmetrical
- put the shadow of the Fore 12 o’clock set screw on the aft 12 o'clock set screw
- view through and tilt up to target
Ten power is enough to get a half decent spot or two.
With the Eyepiece pulled and everything capped and the back end rolled down to 06 o'clock everything stows easily (somewhat too easily) in a LensPouch 2XL.
And we can - and will - make this thing WAY more stowable by swapping out the stock centering and resistance setting screws for nylon socket heads just long enough to do their jobs - six M05-0.80x10 and two M04-0.70x08. After these substitutions we'll stow in an XL as our best (and much better) match.
---
2022/08/26
Maybe a day and a half or two ago the removable ocular end element fell to the kitchen floor from waist level when I was in the process of extracting the main assembly of the Finder Scope from its big LensPouch. It was in its own little Microfiber Pouch and I wasn't much worried about damage. But now the drawcord of the little Pouch is Larks Headed onto the drawcord of the LensPouch.
Yesterday I went out to the top of the driveway for some test flying and the view was horrible. It seems that some debris left over from machining had dislodged and planted all over the face of the element with the reticle and was thus in sharp focus. I flushed the element out with my Ivory detergent solution and rinsed with water but failed to accomplish much positive and went into disassembly mode.
The rubber Eyecup pulls off easily enough. Then three microscopic set screws needed to be backed out with a 3/32 inch flat head jewelers screwdriver. DO NOT completely unscrew them - like I did on my initial effort. It was a minor miracle that I was able to not lose any and get all reinstalled. Just back them out generously. Maybe totally unscrew one to find the limit, maintain pressure and alignment, re-engage 1.5 turns.
Unscrewed and separated components to the max extent I found possible, sprayed, rinsed, wiped, dried, reassembled, retested. Many cycles, still a wee bit o' crap showing but not bad. Quite possibly better than it had been just out of the box but then I wasn't looking for such problems.
But in any case... Not acceptable. That wasn't a huge jolt that assembly took and there shouldn't have been any crap in the interior around to dislodge and become a substantial issue. Oh well, I've gotten really good at the dis- and re-assembly procedures.
----
2023/02/24
These were interesting projects / learning experiences but the two products have been living in mothballs since shortly after completion. In zilch time and with zilch effort I can:
- get on the Sun with zero retinal abuse using my shadow tricks
- hit a straight up astronomical target by:
-- getting my:
--- Tripod planted with its Bubble centered
--- ATX rolled on the 12 click
-- standing to port of the back end and:
--- turning my head head hard port for sighting
--- lining up the top points of my back and front ends and target
--- tilting down while looking through the glass (at min zoom)
----
2023/05/28
Reality has once again reared its ugly head and I've recently been finding myself in situations in which I could've really used the Finder Scope but had left it back home in mothballs. Crappy skies, Alberta wildfires, light pollution hell, high faint targets with nothing in the vicinity to start a star hop... I could get the target area in the binocular but couldn't efficiently get a match with the Scope.
Yesterday afternoon I took the Finder Scope down to the street and ran some solar exercises to get back up to speed and beyond.
The Swarovski Standard 95 cannot practically be swapped in and out in conjunction with the Arca-Swiss rigged Finder Scope. Swarovski Standard needs to be rolled counter into a really wide Clamping Channel and Arca-Swiss needs to be slid into the Clamping Channel cranked down to real near min. By the time one gets finished with all the Fore and Aft Lens Clamp Knob spins required the target went down in the trees two minutes ago. So we need to have a goddam 45066 Plate screwed onto the Foot, adjust the alignment, take tons of care to not fuck up the alignment.
But we CAN make this work.
Another option... Use the Arca-Swiss 85. And if we wanna stay with the target for a while we can do the spins and swap in the 95. 10x50 to serve as the finder scope for the 25x85, 25x85 to serve as the finder scope for the 30x95, then we can zoom the final product in to 70. Thanks once again Swarovski for not allowing us to retrofit the old crap and make our lives a lot easier and safer.
Normally when we're swapping glass we'll have tilt arms vertical / lens clamps horizontal and can fully unclamp, grab the replacement, effect the swap. If, however, we're on a highish target and unclamp then that glass can become airborne before the next heartbeat. Yeah, a Safety Stud or Pin could arrest the progress of the disaster but there are lotsa configurations in which that crap isn't even doable. So we need to have one hand on the Scope before fully unclamping with the other. Regarding the UA-180 configuration right and left respectively.
----
- Canon 10x42 L IS WP
When packing lightish for a trip the Canon 10x42 binocular mounted on an Arca-Swiss Plate can serve as a Finder Scope for the Spotting Scope - as long as the target isn't up at a neck breaking high angle.
----------
Solar Filters
Seymour Solar Helios Solar Glass Filters
http://www.seymoursolar.com/
http://live.staticflickr.com/65535/52884658249_99f5a30cb3_o.png
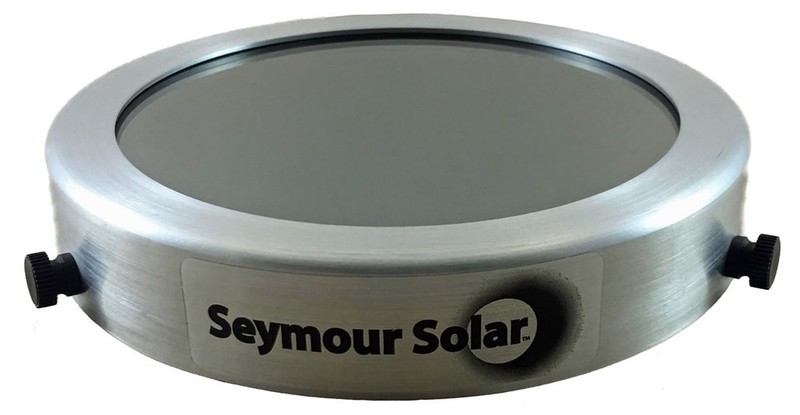
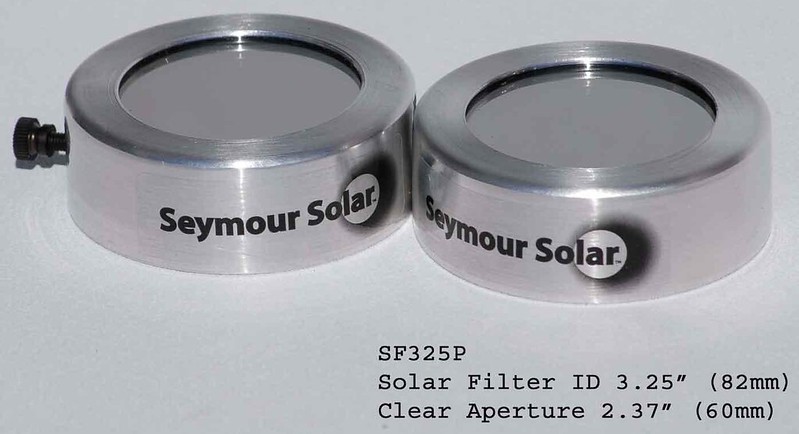
https://c2.staticflickr.com/8/7483/26817256462_51ccd4b1b2_o.png
Neutral Density 5 - block 99.999 percent / transmit one one hundred thousandth of the light intensity. Quarter inch increments from two to sixteen inches. The 95 requires a 475 (4.75 inches).
To fit you're supposed to match the OD of your barrel then add several millimeters in accordance with the numbers they provide. Although I've been able to go a step low for a couple of my toys no problem in hindsight that was a stupid strategy. One can virtually ALWAYS mount an oversized Filter on the front end of the optical tube using overlength fairly inexpensive and easily obtainable nylon set screws.
---
2022/08/29 - They no longer provide those numbers - just say measure and go bigger. And I'd find myself inclined to go with a 450 for the 85 rather than the 425 I have and would have if going by the current book.
---
Thickness of the mounting cylinder aluminum measured at the aft edge (the only place it easily can be) is 1/16 inch. Save for the special case with the Barska Riflescope recommend not deburring. The burr is threaded and we can use all the threading length we can get in this application.
---
Acquisitions to date - 2022/08/22:
Objective-OutsideDiameter - Model/InsideDiameter - Smallest-Largest ~ Weight - Glass
Ob-OD ~~~ Mdl/ID ~~ Sml-Lrg ~~ Grams ~ Glass
28-035.5 - 200/050 - 041-047 - 032.8 - Barska 1-4x28 Riflescope
42-054.0 - 225/057 - 048-053 - 049.9 - 42s - Leitz, Canon, Swarovski
50-058.0 - 250/063 - 054-067 - 035.0 - Apertura 50RAF-W
60-076.0 - 300/076 - 068-073 - 075.4 - Swift 60
85-103.0 - 425/108 - 099-105 - 121.8 - Swarovski 85
85-103.0 - 425/108 - 099-105 - 078.3 - Swarovski 85
95-113.0 - 475/121 - 112-117 - 146.9 - Swarovski 95
95-113.0 - 475/121 - 112-117 - 091.0 - Swarovski 95
When everything's centered and snug on the two Swarovski Scopes we'll have outer projections of:
- 14 millimeters for the 85 (425)
- 13 millimeters for the 95 (475)
Note that while we're adding a fair bit of weight to Scope front ends we'll be shooting with our Sunshades fully retracted ('cause extending them would be stupid (as I eventually figured out)) so our CG will be little affected - if at all.
Note the out-of-sequence weight for the 250 and substantially lighter weights for the 425 and 475 later date duplicates. Discussion a bit below.
Weights exclude the Nylon Knurled-Head M05-0.80x10 Thumbscrews employed for retention - which are 0.8 grams. The three little ones take one, the two big ones take three. (And note that for binoculars we're only seeing half of what we'll be packing.)
We can obtain greater lengths of these screws - albeit with socket heads rather than the ones designed specifically for finger tightening - from China through eBay. (Good experiences with superiorsell2014 so far.) 16 millimeters allows us to properly utilize the 95's 475 on the 85 Objective.
Minimum length available for M05 is 8 millimeters. (Two shorter for M04.) The 475 is centered on the 95 with a measurement of close to 6 millimeters all around between the ODs of the Sunshade and Filter. So M05-0.80x08 x 3.
The stock set screws are M05-0.80x18 but a 10-32 (3/8 hex) nylon nut on an end gets us by fairly well. 0.8 millimeters, 25.4 millimeters per inch - 31.75 threads per inch. #10 = 0.190 inches (close to but not 3/16 (0.1875) as I'd always assumed) = 4.826 millimeters. So slightly more coarse on the thread count and slightly smaller diameter. And thin - only 0.1035 inches. So goes on a bit stiffly but threading doesn't get distorted/damaged. Makes for a reasonably good locknut. So install (10-32) nuts on both the 04 and 08 Screw ends to better distribute the loading/stress. But too little clearance, not possible on the 85's 425.
For stowage of the two Swarovski Scope Filters adjust the two Screws bracketing the Filter's label - 04 and 08 - accordingly and floor the odd one out - 12. At installation back 12 out adequately, install filter, screw 12 in for adequate security. Avoid overdoing things out of consideration for the Sunshade's rubberized coating.
It doesn't work to install a padding nut on the 12. It starts turning with the stock set screw and seats on/in the coating while the screw continues to bore in. And makes installation and removal problematic. So just stay with the stock screw and go easy with installation torque.
In order to lock onto the Sun without frying one of our retinas...
We'll be aiming straight at the Sun with our ATX at 12 roll. Filter on before we start targeting.
On 2022/05/20 I noticed a phenomenon while centered and locked on with the filtered 95 12 rolled ATX. Note on this 85 (with the same back end)...
...the black armoring extending aft and up from the aft edge of the Zoom Collar and encompassing the Swarovski Optik Goshawk logo - something of a fat U shape with the "open/top" end running fore and down.
With the Sun centered the front end shades the rest of the Scope save for the portion of the back end projecting back and up into full exposure. The shadow edge when viewed from operator perspective forms a much fatter U shape with the open/top end running aft and up. With a clear sky the bottom center edge of the shadow is very sharply defined and happens to fall precisely on the top center edge of the black armoring U. Hallelujah!
(If the description is too tedious to follow just get the Sun centered in the Scope however and observe the way the shadow's falling.)
With the 85... smaller disc, smaller shadow. At sweet spot the shadow's sweet spot falls about seven millimeters below/fore of the black armoring top point. Our Goshawk's left/near wingtip is slightly off center to port but if we have our shadow symmetrical and down a millimeter or two onto our wingtip we have a total kill shot. (For a few seconds anyway.)
We can also nail the Moon real well whenever sharp shadows are being cast.
Bad news - with respect to the Sun... Made writing up those other procedures described below and acquiring the custom filter for the Barska Finder Scope substantially wastes of time and effort.
With the Scope / shadow pattern properly lined up the shadow pattern will stay (briefly) lined up with rolls counter or clock away from 12. And we can acquire at 09 or 03 rolls just as easily as we can at 12. In between can be done but a bit of skill is required.
When one side of the back end is more broadly lit than the other pan towards that side. (If we recently had the Sun centered it'll be the starboard side - in the Northern Hemisphere anyway.)
As the Sun gets substantially obscured by clouds the shadow fades and its edge becomes poorly defined but this trick is still doable in surprisingly crappy conditions. Also in crappy conditions if one gets into the Sun's ballpark one can usually home in pretty effectively by navigating into brighter and brighter glare. (Ditto for a Moon at night.)
Other techniques which can be of some value as supplements to our primary and may be of value with other configurations...
Hopefully we'll be set up on a clean regular surface - deck, road, trail, beach - so we can look downsun behind us at the Tripod/Head/Scope shadow. Pan and tilt as necessary to get the shadow of the Scope minimized as a disc with the ATX projecting straight up at 12. With a little luck we're there already. Otherwise...
When using the PTH we can use the palm of our left hand as a movie screen. Hold it a foot or whatever behind the Lens Support and if we're in fair shape we'll see a shadow of the Lens Support with some attempt of a sunlit disc lined up behind our Bore Sight (empty Handle installation cylinder). Adjust aim to maximize the size / optimize the shape of our disc.
We can use the same trick for a bright Moon. But we're gonna get our night vision trashed but good anyway unless we're using a lunar filter.
Additionally, if we're using a 45066 Plate...
http://live.staticflickr.com/65535/50966441061_93ae082182_o.png
http://c2.staticflickr.com/2/1800/28947526087_8df2d00e0a_o.png
06-03802
Ignore the sagging Scope Foot Screw, incoming Balance Rail, and (for good measure) Safety Stud. Also note:
- that:
-- we:
--- are looking from in front backwards
--- will have lost the Handle and its Clamping Lever
-- the visible lower surfaces of the Plate and upper surfaces of the Lens Support are reflective
- the front end of the cylinder currently plugged by the front end of the Handle which will be our Bore Sight cylinder
We're making a dovetail connection. There's a vertical gap between the top faces of the Lens Support's gripping structures and the bottom face of the Plate's Scope (Foot) support platform - a horizontal slit about a third of a millimeter high to the port of our Bore Sight cylinder and about two thirds up its height. Also daylight angling up from the Plate's inboard bottom corner but let's mostly ignore that issue.
We're pretty good on pan but a wee bit low on tilt. The disc on our movie screen looks as round as we can get it and we have our line from the slit but a bit above it there's a noticeably dimmer ghost line. It's the result of sunlight reflecting back up off of the top horizontal surface of the Support. As we carefully adjust tilt up the ghost line drops and converges with the direct sunlight line. Time to start looking through the Scope.
Likewise if the ghost line is low. We're seeing sunlight that's been reflected off of the bottom of the support plane's underside. Adjust down.
In the unlikely event we don't have the Sun at this point we need to make a very slight port or starboard panning adjustment.
Once we have our lock it's pretty easy to reacquire if we've been away for a few minutes by considering what will have been going on with the trajectory. (To the right and climbing, steady, falling.)
Also... Once you have the Sun and a spare moment get it totally centerpunched and then check the shadow on your movie screen to capture or refresh a memory of what target should look like.
Always when I'm doing the Sun or a bright high Moon in a dark sky I get ghost reflection - a large bright disc with dark fine lines flowing through it - trying to stay in centered in my view. My best guess is that it's a reflection of the target bouncing off my cornea to my aftmost glass surface and back through to my retina.
---
2022/08/11
I've been using my 95 ATX with its 475 Filter for solar multiple times daily weather permitting almost exclusively since I-can't-remember-when. And I'd always gotten a ghosting effect obvious in what would've otherwise been the darkness - or often glowing clouds - outside of the solar disc. Figured it was due to a reflection bouncing in some pattern - possibly sourcing off my cornea. Wasn't noticeably degrading my view of the target though and I could live with it OK.
Then yesterday I was running the 95 and 85 side by side and found, somewhat to my horror, that the latter with its 425 was showing nothing but Sun surrounded by perfect darkness - just as it should've been. So obviously there's a coating issue with the old Swarovski Standard era glass that the Arca-Swiss vintage line doesn't have. (And this is the 95 I'd just gotten back from Cranston after a full overhaul three days prior.) Crap.
But is it possible that the 95's FILTER could be the issue? On 2022/05/20 (as described below) my original 425 Filter had sacrificed itself on the driveway asphalt in order to save the 85's front end after I'd omitted a clamping check and had been replaced. Put some nylon nuts on the inside ends of three mounting screws and got enough extra to properly install the 475 on the 85... And the ghosting issue transferred with it.
Also - in hindsight - I realized I could've just loosened the mounting screws a bit and misaligned the Filter to identify the source of the problem.
And it's not an issue involving some aft face coating with the glass inadvertently installed in the mount backwards. Aim the Scope down, pull the Filter, hold it in front of the Objective with one hand while tilting back up target with the other... Same reflection issue.
Need to talk to Seymour Solar. May be worth it to get a new 475.
---
2022/08/15
Took the 475 and 425 filters minus other glass out under a high clear Sun and compared. The only difference between the yellow images I could detect was that the 425's was a bit towards white and the 475's was a bit towards yellow/orange. And the difference was prominent enough such that with those two filters in hand I could easily identify glass from the same batches.
2022/08/18
Seymour Solar got back to me, said they'd switched to a stronger and thinner glass. (And nothing about the reflection issue.) Ordered a 475 replacement.
Guess I couldn't expect a substantive discount. A precedent like that would put them on the hook for every glass filter they'd ever produced prior to this apparently very recent switch. (And we don't know when this current flavor of glass first became available.)
2022/08/22
475 and - for the Apertura Finder Scope - 250 arrived in today's mail. Test flew both, no trace of an issue. Not the least bit unhappy with my decision.
We know that the 250 is New Glass 'cause its weight is well under that of the 225 and just over that of the (slightly modified) 200. And thus we know to a near certainty that the 200 is old glass.
And thus we also have a real good feel for the timing of the transition 'cause I acquired the 200 2021/11/15.
----------
Astronomy
And by astronomy - for the purpose of most of this discussion - we mean low light. For solar see above. (Ditto for Finder Scopes.) And astro scopes have ocular components angled at 90 degrees. So if our target is straight up we can view it without having to tilt our head back a single degree. The ATX is a birding scope with the ocular angled at 45 degrees (as best as I'm able to determine with a protractor - not documented in any specs I've been able to find). So if our target is straight up we can pretty much forget about tilting our head back enough to see it while standing and before going to any glass.
Target Acquisition.
Not a bad idea to don the Binocular Harness before heading out.
First off... Regardless of what head we're using we need to start off with our Bubble centered reasonably well.
For targets too faint to be acquired naked eye and a fair bit or better above the horizon... Acquire with binocular and check the horizon directly below. Hopefully it will have some distinctive feature which can be easily hit - like a projection or dip on the top of the tree line. Center it, hard clamp the pan, tilt and scan straight up.
Tip... If we're looking:
- west our target and Objective end will be going down while our Ocular end will be going up so we'll need to set our Tripod up on the low side
- east our target and Objective end will be going up while our Ocular end will be going down so we'll need to set our Tripod up on the high side
---
2023/05/26 - In my light polluted neck of the woods I can never get Megrez (Big Dipper - apparent magnitude 03.32) naked eye. This morning I was doing Jupiter with a cold clear sky and thought about the trick of fixing one's gaze on a nearby target - like Alioth or Phecda. Bingo.
---
For an astro mission we're probably gonna be at one position for a substantial length of time and I'll go on the record saying a folding chair is not optional. Can't use it while using anything mounted on a tripod but:
- allows one to scan naked eye and binocular straight up and a bit more without much pain
- one occasionally really needs breaks
- great place to safely park glass while breaking down and stowing gear - in zilch or light air conditions anyway
Mine's a Kijaro Dual Lock...
http://live.staticflickr.com/65535/52106364462_003b15d004_o.png

...which was well reviewed and has given me no cause for complaint.
Makes for a reasonably good step stool (for kids lined up behind the scope) minus a proper one on hand. Oriented facing backwards. And the WeatherTech AVM rubber back seat floor mat I pulled from the Passat looks like it was custom made to fit and protect the chair's seat surface. First effort, what an amazing coincidence.
iPhone 5s in an Otterbox case and a naked iPhone 13 fits nicely in either of the two cup holders. 13 in a Smartish Gripmunk doesn't. So suspended from the starboard edge of the seat we have a zippered cell phone pouch.
Bags just barely into a Vidpro TC45 Padded Tripod Case - but make sure your iPhone isn't still in one of the cup holders before you fold and bag it. The chair's construction is such that when folded the backside frame elements - chair back and legs - project farthest. the starboard armrest needs to go over the port. And I find it best to have the back face of the folded chair facing up / the top face of the bag.
Disable the bag's zipper at the halfway point, bag on the ground. We'll start working the fabric/fat end of the chair into the boot/bottom end of the bag - backside up 'cause that way all the frontside snaggy projections become nonissues. I use water and a toothbrush to clean the feet after operating on a surface that presents an issue.
A recliner could be real useful for scanning for high targets.
--
2022/12/01
My chair's just given me cause for a smallish complaint. There are port and starboard steel machine screws a bit up from the bottom ends of the fore port and starboard legs connecting same to the ends of diagonally running bracing tubes. We can see them well enough in the above photo. Today my port one turned up missing - along with its Nyloc. We can live pretty well without one of them, two gone and we're screwed (by virtue of being unscrewed).
Pan head Phillips PH2, 3/16-32x1.00, 3/8 worth threaded, nut takes a 5/16 socket. After pulling the remaining one for specs I was able to immobilize the screw with the Phillips and screw the nut full on fingers only. Need to do checks before bagging.
Optimistic about recovery of the screw. May need to write Kijaro otherwise barring a suitable match at the hardware store. (Not much of a problem if the nut remains lost.)
2022/12/02
Found it - somewhat to my surprise.
Last evening (2022/11/30 EST) was brutal windwise - as brutal as it's ever been for me at the Makkah site. If I wasn't sitting on it the chair would be blowing over within the next fifteen seconds and the Scope would've needed some serious ballasting to be of much use. They have a really serious landscaping project going on and the monster dump truck was parked at the usual a few yards away to the southwest - bow frequently into the mostly west wind but there was enough eddying to flip the chair a few times before I found something of a sweet spot.
Back on site late in the afternoon, struck out where I first parked and pretty much always park the chair. The truck was way gone but very shortly found the screw in that suspect area. No nut (yet) but I figured it had separated long before. A lot of the screw threading looked pretty beat up but seems to be enough good stuff on the end where it matters to get me back in business.
And I found two more pairs of these screw/nut installations - fore and aft seat corners to frame points. The aft ones run through two framing tubes and are three quarters of an inch longer. Several had backed off Nyloc issues. Regular inspections required.
2022/12/21
On 2022/12/14 I wrote Kijaro describing the issue and requesting the part(s). Got a prompt reply from Jennifer who said they would need the following information in order to process my replacement parts:
for fucking 38 cents worth of screw and nut that shouldn't have come loose in the first place and the shipping address I'd included in the message.- Photos of the damaged parts
- Two separate photos of the 2 warning labels attached to your Kijaro product
- Your shipping address and contact number
Just tried their customer "service" number (08:00-17:00 Monday through Friday - but they don't reveal their physical location anywhere so ya have no clue as to what time zone they're talking about) and got a recorded version of the same bullshit. I despise these people - but it seems the whole goddam planet is devolving into this state.
--
2023/02/22 - And on last night's mission the rivet - 1/8 diameter spanning 3/4 - connecting the bottom ends of the aft starboard leg and port chair back spar failed. Keep up the great work, guys.
--
From Ace Hardware we need to get a PH2 10-32x1.25 as a replacement screw 'cause the available Nyloc is fatter - 3/8 versus 5/16 hex - and longer than what was shipped - 1.0625 - and we need to be able to see a bit of threaded end exposed. (#10 = 3/16.) For the rivet 08-32x1.00 and the Nyloc is 11/32. We don't need to carry spares for the bigger screw if we keep an occasional eye on the stock screws to check for back-off but we do need to pack at least one rivet replacement set 'cause one of those can fail without warning.
--
In windy conditions two modes for the chair:
- sitting in it
- on the grass upside down and sideways to the wind
---
In civilized conditions the Walkstool can serve as a table for the laptop between SkySafari consultations. (It's a bit scary but so is setting it down on the chair - despite its visibility.)
---
2022/12/05
For quite some time I've been targeting very successfully and efficiently naked eye acquirable stuff as follows.
- Bubble reasonably well centered.
- From well aft of Scope carefully align target, high points of ATX's front and back ends, eye.
- View through Scope (min zoom and focused (to infinity)), tilt down, acquire, center, lock.
- Go back to gunsight mode to confirm I'm on the right point of light and note elevation of target above front end.
- For faint targets - like Uranus and Neptune - gunsight something easy in the neighborhood and star hop to goal.
---
2023/08/24
2023/07/26 I landed a Swarovski NL Pure 8x42 Binocular and started looking for interesting test driving targets. A reasonably good night sky fit the bill pretty well and I went pretty nuts in that venue. Not much difference from the Leitz and Canon Glasses which had been accompanying me on those missions but I'd been using them for little beyond scanning for Scope targets and thinking about them in that context.
And yeah, for planets one wants to get into Scope mode in pretty short order but for stars, asterisms... Wow!
So lately I've been spending a high percentage of my on-site time in the chair with my laptop, scanning around the sky, matching patterns of what I'm seeing with SkySafari, getting much better wired into this little neck of the galaxy.
---
Evening of 2023/10/24 at my cattle farm station operating as per above. Elaboration... Aim chair towards primary target area, park butt, pan body 90 port and starboard and using arm rests as chair backs and legs rests for wide area coverage with minimal chair resets. Also neck twists port and starboard and tilts way back to really push the envelope. Neck started hurting and targets available had been beaten half to death. Called it quits.
Next day neck was in really bad shape and I had to treat it like I'd broken it. Substantially better today - 10/26 - but this isn't an experience I ever wanna chance repeating.
---
On the evening of 2023/06/12 I stumbled upon my first spectacular look at the SpaceX Starlink satellite train. Sky was quite dark but the train was up in full direct sunlight and moving primarily from my left to right. I was able to lock it up in the 95 (not the whole thing at once) by aiming a little high and to the right and tilting down after the leading end passed my tilt line. (Stayed on it until stuff reddened in the twilight zone, faded, disappeared.)
The next day it occurred to me that I'd have done a little better (with the ATX at 12 rotation) by aiming right and minimally high and sighting using the Scope's port or starboard Swarovski label. Did a little daylight target practice on treetop features. Yeah.
---
2022/07/21
Jupiter minus Star Walk 2...
If we're seeing fewer than four Galilean Moons somebody's either transiting (in front of Jupiter) or in opposition (being eclipsed, occulted) behind it. If somebody reappears just off the:
- right edge it was transiting
- left edge it was behind
http://skyandtelescope.org/wp-content/plugins/observing-tools/jupiter_moons/jupiter.html
Jupiter's Moons
Really cool/useful tool for seeing and understanding what's going on with the Galilean Moons. And for Saturn:
http://skyandtelescope.org/wp-content/plugins/observing-tools/saturn_moons/saturn.html
Saturn's Moons
And what things looked like when Kite Strings was first lit up:
http://live.staticflickr.com/65535/51667661654_9361fcd10c_o.png

http://live.staticflickr.com/65535/51667853775_a7591f4169_o.png
Also available as iPhone apps for three bucks apiece. I now have both. (And the Jupiter app version is a lot better than the web page version.)
These are must-haves. On site it's very useful to see what's going on with moon orbits and the Jupiter flavor has an "Events" button which tunes us into schedules of transits and eclipses.
Note that on the web versions we need to click on "Calculate using entered date and time" when we wanna see what we were seeing through the Scope four hours ago before altering the clock or it reverts back to now in several seconds. On the mobile versions there's no option and things stay put until otherwise instructed.
They both feature:
- a bar to select time increments from one second to one year
- an inner pair of buttons to rewind or advance one touch at a time
- an outer pair of buttons to play backwards or foreword in movie mode
I've gotten fairly good at calling the Galilean moons.
- Ganymede is so big and bright that it's a virtual no-brainer.
- Callisto is big but its surface is so dull that it can usually be called as the dimmest. And its orbit is huge so if it's way out to the East or West...
- I can often tell that Io is brighter than Europa and Io spends a lot more time appearing close in.
As best as I'm able to figure from observing and researching...
The Galilean moons all orbit in a manner similar to what goes on with our planet and its moon - north pole up/north, one orbital plane, everybody going counter. Orbital plane currently cocked a bit low on the Sun/Earth side / high on the far side. So the greater the misalignment when close in from Earth perspective...
Jupiter disc diameters for assistance in making calls. Max out for moon:
- 03.0 - Io
- 04.8 - Europa
- 07.7 - Ganymede
- 13.5 - Callisto
But it's hard to beat the screen for a final word and the forward and rewind buttons are great for seeing in an instant what's currently going on with orbits.
Note that neither of these apps asks for or knows our location so neither reflects the tilt we'll be seeing in the sky. Jupiter is displayed horizontally - as we'd see it at maxed out altitude - and Saturn is tilted up to the right a bit - as we'd see it shortly before it maxing out.
Both of these apps display time to seconds level - which is nice for setting clocks and watches. But both go from :58 to :00 - skip :59 and start displaying :00 a second early.
Note that a moon which will be invisible in the Scope 'cause it will be crossing in front of or behind its planet may appear well clear in the display - undoubtedly due to some modeling issue. When things aren't adding up check "Events".
It's a good idea to hit Jupiter as Target 1 for a relevant set 'cause in another couple minutes the opportunity to get a moon may be vaporized for hours during the transit or occultation it was about to commence. Not so much for Saturn 'cause it only has one relevant, its orbit is huge, and tilt has to be such that we're seeing the rings edge-on.
Currently (2022) Saturn's ring disc is tilted near edge low (and rising). That means if Titan is:
- low it's near to us and heading right/west
- high it's far from us and heading left/east
- way out from and level with the:
-- left/east edge of the rings it's about to start coming back around in front
-- right/west edge of the rings it's about to start coming back around behind
--
In-The-Sky.org pronounced Jupiter for my Annapolis specified location last observable 2022/02/15 and I got it easily - albeit minus moons - on that setting. Then I continued every evening I wasn't getting totally screwed by the weather and scored. On 2022/02/23 I had a warm evening and excellent sky and picked it up at 17:55 EST with the 95. Seven degrees behind the Sun and totally invisible with the Leitz 7x42. Stayed with it until 18:14 maybe twelve seconds shy of my horizon. Would definitely have scored the following evening but got seriously rained out. 2022/02/25 iffy sky, six degree separation, 18:18 set time, couldn't do it and probably not doable.
---
A bit after 2023/08/23 04:00 UTC I was on Jupiter and trying to call its four Galileans. East to West my call was Ganymede - Callisto - (Jupiter) - Io - Europa. I got the no-brainers - Ganymede and Callisto - right, also Io. But my Europa was actually Sigma Arietis and actual Europa was being occulted. Both the position and apparent magnitude of the star were right freakin' on and I couldn't detect an issue with the color.
In all the zillions of Jupiter observations I'd done before I'd never come anywhere close to being faked out by a star. I'd never even had anything observable in any slightly suspicious position.
---
2023/08/26 - Sigma Arietis was still in reasonably good fake out position at about 09:15 UTC this morning. And yeah, it was blue.
---
2022/08/24
The opposition date for this year's Saturn was 2022/08/24 and the culmination local time (EDT / UTC minus 4) for this morning was 00:31. Sky was very good and at about 01:10 for my first time ever I got one moon more than Titan. I was zoomed full in - 70X - on the 95 and picked up Rhea. On the 85 maxed out at 60X it was very marginally doable and if I'd been operating on that scope alone there's no way in hell I'd have caught it in those conditions.
---
2023/04/11
With respect to Saturn In-The-Sky.org reports it last observable as an evening object on 2023/01/22 and first observable as a morning object on 2023/04/10. (And I've always found it easy to push the hell outta these figures with not much in the way of glass.) This morning I got my first lock on Saturn (along with Titan almost immediately) for this new cycle and was astonished - and a fair bit disappointed - to be seeing the rings nearly edge-on. Previously I'd been seeing the planet with the sunny side of the rings disc tilted distinctly down / astronomically south and was always able to see and point out to others the east and west areas of black between the planet and its rings - but not this trip even though I stayed with it to high in the sky and thinner atmosphere.
According to Wikipedia we've been in this cycle since 2009/09/04 and will be crossing the plane on 2025/03/23. And we can manipulate the Sky & Telescope app to get a real nice animation of what's going on.
---
2023/04/19
Got my best shot of Saturn this morning prior to 06:00 at which time it was still feeling a bit of atmospheric turbulence - despite the cold and a very good sky (which and given me Mercury all the way down to the horizon last evening). Scored Titan and a little black still between planet and rings.
---
If it's a cold night and we suddenly see our high bright target surrounded by a small white disc and nothing but blackness surrounding it then we've exhaled through our nostrils onto the ocular glass surface. Real easy mistake to make (and not all that easy a problem to identify on one's own) with the ATX rolled to 12.
--
2021/12/12 - After having identified the issue and attempting to train myself not to effect this screwup...
WHEN we effect it while locking up a reasonably valuable target... Go ahead and pull the Eyecup and wipe the glass dry with a lens cloth. The night will be mostly over before the condensation evaporates on its own.
We need to sight our target by getting it aligned with the high points of our front and back ends and eye. We can't use as effectively non 12 ATX roll. Thus this is an accident waiting to happen and it seems it seldom has to wait very long. I think the best solution is to train ourselves to keep the back end capped while sighting and adjusting and pull the Cap only for checking until after we've gotten locked on.
--
2022/08/25
And in good summer viewing conditions - clear sky, low humidity, rapid and substantial temperature drop - it doesn't take too long for our glass gear to become soaking wet from condensation. Well known issue with the amateur astro crowd and there doesn't seem to be much we can do about it but I find I can still stay pretty functional.
And when I get home I unpack all the relevant gear, pull Caps and LensPouches, let things dry over the course of what's left of the night.
2022/12/20 - Seems to be a zero issue in the winter (although we all know what happens when we bring our cold glass back inside after a mission).
---
Really cool effect one gets with a total lunar eclipse I never noticed (or knew anything about) before in the course of the 2022/05/16 UTC... We can see undiminished stars immediately outside of the shadowed disc. When it's full or substantially lit the glare is horrendous and wipes out everything in the immediate vicinity. When it's a thin crescent it's close to the Sun (either just before sunrise or just after sunset) and the relevant sky area is substantially washed (regardless of one's latitude).
The preceding day's and evening's weather had been pretty wet and unsettled and clouds prevented me from getting a shot off until shortly after the total began at 2022/05/16 03:30 UTC. I very quickly picked up the stars and noted that one at about the 07:30 position would very quickly be run over - given the high speed of the Moon's orbit. Did close very quickly but an ill timed cloudy patch robbed me of an adequately clear view of the event.
Moon went full clear of the penumbra at 02:51 EDT and the glare had well before trashed everything in a very wide neighborhood. But when I locked it back up two mornings later at about 04:30 local in a colder and drier sky I was able to hit a star about half a 95 field (min zoom) out from an edge - about one degree.
Pretty sure this is the only circumstance possible for this effect from this planet. Total solar maybe a not too distant second. Shortly before had learned that all the Galilean moons would be naked eye doable minus Jupiter's substantial glare.
---
For ungodly hour night missions set the alarm clock app on the iPhone for 03:00, 03:15, 03:30... That way if you just wanna close your eyes and lie there for another two or three minutes...
---
When I get people lined up behind the Scope at night for an astronomical target - especially an uncomfortably high one - I not all that infrequently get an individual incapable of getting his/her eye centered well enough to score. I'm thinking that if time, circumstances, concern for the public good allow it may help to lock onto something low and easy - like a well lit building - and help the individual get a feel for what needs to be done and how to do it.
Another thought... With the Scope locked onto target hold the Headlamp - in normal steady red mode - up in front of the Scope in the line of fire. If the subject can get centered on the Headlamp he'll be centered on target when the Headlamp is withdrawn. (I do have people who have great difficulty locating a centered Sun but I don't recall any who've totally struck out.)
---
When a guest is on a bright Moon we can a bright disc reflecting off his cornea and centered on his pupil. Doesn't work for solar however - I think because of a combination of the effectiveness of the filter and the brightness of the ambient lighting.
---
2022/09/23
Last evening I had a guy who really wanted the blazing four-day-shy-of-opposition Jupiter but couldn't get an eye properly positioned. I moved him back a foot to where he could see the bright spot on the back end just fine and told him to move in while keeping it centered. That's gotta be the ticket to dealing with this issue.
The Scope is gathering and concentrating light. 95 millimeter front end, 30 power, 3.17 millimeter exit pupil. Close behind we don't need to be lined up worth a damn to see/acquire it and on a reasonable daylight target I can see that gleam literally from across the street and more. Close (Cloze) in, keep it in view... We're gonna end up dead centered.
If it's night and a non light emitting target - like Neptune - get a red headlamp or lit iPhone in front of the Scope to bring the viewer in.
--
2023/03/01
I use this technique - almost exclusively with the iPhone - all the freakin' time with outstanding success. Once you get a guest on target he realizes this trick CAN be done and almost instantly learns how to get himself properly positioned. Previously I would occasionally get individuals who would give up in frustration.
--
When doing solar I not infrequently get a guest who's staring through the Scope and not reacting. These guys think that the disc upon which I have them centered is just the Scope's entire field of view on an empty sky - sunspots not registering. From the other 95 percent you're gonna get an immediate "Wow!" If it's been five seconds and you're not seeing and/or hearing a reaction that's what's going on and your guest needs to be clued in.
Undoubtedly get this issue cropping up more frequently with a crisp / non hazy sky.
---
2022/08/05
Well within a twelve hour period from the evening of 2022/08/02 to well after sunrise 03 I got everything gettable in this solar system with this level of equipment - ATX 85. Sun with spots, five day old waxing crescent Moon, Mercury going down for twelve minutes from 20:40 EDT, Saturn with Titan, Jupiter with its four Galileans, Mars, Venus until long after sunrise when it was well out of the thick turbulent junk low on the horizon and it was a distinct white apparently perfect disc, Uranus, and... NEPTUNE. I'd never thought that last one would be possible for someone with my level of expertise with birding equipment (top notch albeit) near the epicenter of East Coast Light Pollution Hell.
Uranus was very close to and near straight up from Mars and thus pretty easy. Neptune was about thirty percent of the way from Jupiter (east) to Saturn (west) which was a big spread. I'm really weak on constellations and they're not good for much in these skies anyway. But I was able to very slowly and carefully work my way over from Jupiter by matching star patterns from Star Walk 2 on the iPhone with my Scope.
I'd done Mercury from my nearby cattle farm station, returned to there about 01:00 for a short set, do the easy stuff, verify sky quality, then bailed for the Westfield Annapolis Mall. Its main parking garage has three levels, I'd checked it out the previous morning when I was in the neighborhood for another mission, noticed that I had no worse than pretty good horizons in every direction. I'd gotten pretty close to Neptune goal when the security guy politely kicked me out - informed me that it becomes trespassing after the last of the movie crowds disperses, pointed out a parking lot five hundred yards to the ENE where I'd be OK, left me to pack up and relocate.
That's where I rebooted, finished closing in, nailed it. My steppingstones were HIP 159, 29 Pisces, HIP 44, 27 Pisces, 24 Pisces, 20 Pisces, HIP 117112, Neptune. And Neptune stays pretty nicely parked relative to background stars so that pattern should serve me well for many moons.
Also noted two more pretty enticing parking garages associated with the Anne Arundel Medical Center close into the East and did sets at both to practice more on the planets, pick up Venus, ID some strongly blazing stars, listen to some nearby probable Coyotes, go into filter mode for the rising Sun, track Venus way the hell up.
Next evening a previously scheduled event put Mercury out of reach but I got everybody else - then nearly died from sleep depravation issues.
---
If it's been awhile since one of our Ice Giant buddies has been scored it ain't a bad idea to check position relative to star patterns on Star Walk 2 before heading out.
---
2023/03/19 - Uranus and Neptune DON'T stay all that nicely parked relative to background stars. From the position on a given date one week or one year to that on the next - yes. But about two months ago I started really understanding and appreciating what apparent retrograde motion is all about. None of the five other other planets viewable from this one are problematic 'cause they're mostly naked eyeable when they're doable but the two ice giants can and do pull confusing moves.
---
2023/10/05 - Got Neptune last night with the 8x42. Had previously thought that a feat not possible. Local cattle farm sky was pretty high quality, target was high and just two weeks beyond opposition. Thinking that in decent dark sky conditions this would be a total no-brainer.
---
2023/04/26 - In order to determine whether or not a planet is in retro mode...
Astronomical west is defined as the direction all stars appear to move (as a consequence of Earth's rotation on its axis) across the sky - 'cept for Polaris and Polaris Australis 'cause they're aligned with the axis and appear to stay put. (And astronomical north is defined as the direction towards Polaris.)
Pick an easily identifiable star in the near vicinity of the planet, center and lock it up in the scope, give it a minute or two to determine its direction of movement (and thus astronomical west). We want this star to be moving to the west and leading the planet. If it isn't then find another one nearby that will lead the planet.
Check back a night or several later. If the:
- planet is closing on the star we're in apparent retrograde mode
- star is walking away from the planet we're in direct (prograde) mode
- planet's position with respect to the star appears the same we're transitioning from one mode to the other and will need to check a reference
---
I'm not infrequently on morning targets which will be impossible to reacquire once lost in the continually brightening sky. Really nice to have two scopes running in those situations when there's other stuff of interest around. Even just one scope and two tripods could work for a quick swap-out.
---
From http://image.gsfc.nasa.gov/poetry/venus/q89.html - distances out from the Sun in Astronomical Units:
00.387 - Mercury
00.723 - Venus
01.000 - Terra
01.523 - Mars
05.203 - Jupiter
09.538 - Saturn
19.819 - Uranus
30.058 - Neptune
39.440 - Pluto
---
25 most massive Solar System objects - planets, planet moons, dwarf planets, dwarf planet moon - after the Sun in order:
Jupiter - Saturn - Neptune - Uranus - Terra - Venus - Mars - Mercury - Ganymede - Titan -
Callisto - Io - Luna - Europa - Triton - Eris - Pluto - Haumea - Titania - Makemake -
Oberon - Rhea - Iapetus - Gonggong - Charon
If we go by diameter:
Jupiter - Saturn - Uranus - Neptune - Terra - Venus - Mars - Ganymede - Titan - Mercury -
Callisto - Io - Luna - Europa - Triton - Pluto - Eris - Haumea - Titania - Rhea -
Oberon - Iapetus - Makemake - Gonggong - Charon
---
I'm reasonably fortunate to have a couple of decent astro sites reasonably close to home:
http://live.staticflickr.com/65535/50771437858_c6f97aa51c_o.png

39°02'54.00" N 076°39'05.75" W - 125' MSL - Church View Farm
We're looking uphill WSW / 241 degrees with that road.
http://live.staticflickr.com/65535/52381125784_5d6f3dcc76_o.png
2019/10/17 - 39°02'37.71" N 076°39'49.70" W - 145' MSL - Makkah (Islamic) Learning Center
Miles from home respectively - crow flight and driving:
- 0.35 - 1.0
- 1.00 - 2.0
The cattle farm I started at forever ago. The Makkah Center I first hit when Saturn was only an hour plus nine minutes ahead of Jupiter the evening of 2021/09/11. But on that occasion I failed to consider and grasp its superiority as a resource.
The Center is very probably on the divide between the South and Patuxent River drainages and has excellent horizons in every direction save for north where a tree line intrudes a bit. The Farm is reasonably good from SSW to NW but I'm mostly looking uphill.
At the Farm I'm no more than 25 yards away from 40 mph auto traffic, bikers, runners, dog walkers. The percentage of those with curiosity enough to break stride is microscopic - although I've scored a few high quality encounters over the years.
At the Center space - for the purpose of the exercise - is unlimited. The Google Earth imagery shows the parking area packed and traffic streaming out on Brandy Farms Lane. And a tent set up SW of the building. Freak shot. That concentration is an extremely rare event. (Not so much during Ramadan - I've recently come to realize. This shot is midday but could well be something related.) But when they DO have something going on I'll have both Scopes set up and be running myself ragged and having a blast.
Much more modest concentrations show up for basketball and cricket games and I've gotten a lot of interest from those sources.
To the immediate west of the property there's a Comcast relay facility with a tower at 39°02'40.34" N 076°39'57.13" W. If I'm doing a dawn exercise I can count on seeing my local Eagles pair coming in from overnight roost to park and soak up some rays.
---
Washington Post - 2023/05/07 - Page A07... Really excellent and depressing opinion piece by Dana Millbank on light pollution. Although I've despised and been disgusted by it my whole life - ditto for its dickheaded perpetrators which is damn near everybody - being out doing astro virtually every night when I'll be able to get a reasonably clear shot at some stars keeps it near perpetually in my thoughts.
---
2023/10/28
They love me at Church View Farm - and have zilch problem with me parking and setting up at 39°02'51.22" N 076°39'12.83" W. Puts me up nine feet higher and a couple hundred yards back from the neighborhood treeline to the east of Cecil Avenue. The light pollution situation is probably as good as I'm gonna get in this substantial chunk of Maryland.
Bad news... The cattle have little to no interest in what I'm doing and I'll never get a nosey human with whom to share some targets this isolated from the main drag - as I did on rather rare occasions at the public property entrance position before. Oh well...
---
2023/02/19 - Star Walk 2
I'm heavily reliant on this app and it's served me well - until...
It's supposed to allow one to manually plug in a location - anywhere on this planet - and time - anywhere between BC 0999/12/31 19:00 and 3999/12/31 19:00. Very useful and I use the functions frequently. However recently - it seems - I'll start dialing in a date and time of day (night) and the "OK" button dims and I'm in inert mode until I cancel or dial in something that meets with its approval. And of course no way to contact anything in the way of customer/user support.
May have to purchase, learn to use, hope the capability exists on SkySafari 6 Pro.
--
2023/02/20
I now suspect that my problem is that my iPhone is an antique 5s with the operating system recently updated to 12.5.7, the current stuff is 16.3.1, and I'm left in the middle permanently dead in the water with respect to the issue.
SkySafari 7 Pro for phones is thirty bucks but "Requires iOS 14.1 or later." But there's a Mac version "SkySafari 6 Pro" for twenty bucks which fits on my MacBook Pro (Retina, 13-inch, Early 2015) just fine with which I've been playing around since early this morning and I'm finding it ASTOUNDING - also moderately user hostile. It's gonna be majorly useful for identifying and improving efficiency in hitting targets.
--
2023/02/22 - I've gotten myself reasonably functional on SkySafari and am finding it massively useful. I'm able to get its sky looking like what I'm seeing when I'm on site and it's already helped immeasurably with respect to mapping out the sky, identifying prominent stars, practicing star hopping patterns.
--
2023/03/19 - Star Walk 2 update...
Behavior... If I'm in the:
- 01 to 12 hours range I can jump to anything in the 01 to 12 hours range
- 13 to 00 hours range I can jump to anything in the 13 to 00 hours range
Otherwise "OK" is dimmed and inert.
Not a bug but I've always found it maddening to try to get it to accept the year month day hour minute selection for which I'm shooting. Drag it into position and carefully center and it spins to something else it wants to do. Solution... Drag to get it in range above or below, let go, touch it.
--
2023/03/30
Started thinking I could get on dwarf planet Ceres - which averages out in the Asteroid Belt at about 2.97 AUs and had been at opposition 2023/03/21. Apparent magnitude 6.70 - about halfway between Uranus and Neptune which I can hit pretty easily. And not far from Denebola - a super easy target. Had a good sky save for a day past first quarter Moon. And a good perch at about 39°02'37.47" N 076°39'39.61" W.
Using Star Walk 2 on the iPhone I was able to get into the neighborhood without much difficulty but struggled for about an hour getting no better than 80 percent confidence that I'd bagged it. And at about 01:00 EDT I said fuck this and buzzed home to grab the PowerBook with SkySafari. Case closed after several minutes.
SkySafari gives one a really excellent representation of what one's seeing in the glass (to belabor the point a bit). I'll make a point of throwing the laptop in the bag for missions on which I have an expectation of encountering difficulties.
---
2023/02/28
There are times in night ops when I really want the Scope to be seen and others when I don't.
When I'm near the side of a neighborhood street and a car is approaching I'll take a short break from whatever I'm doing and aim some red headlamp in the relevant direction. But when the Scope's parked safe from traffic and I need to take a bit of a walk to scout another set position I'd rather it would be as close as possible to invisible.
Hillman Reflective Safety Tape - 847335 6x1.3 inches - 4 Red Strips.
- Leave the paper adhesive backing paper on.
- Center Column:
-- diameter - 28 millimeters
-- circumference = diameter x π = 88 millimeters
- Strip length = 152.4 millimeters
- 152.4/88 = 1.73 wraps
- Releasable Nylon Cable Tie = 8 inches = 203.2 millimeters
-- trimmed down to 127.5 millimeters
The Strip is coiled, the Cable Tie loop is installed over the coil and near its bottom edge, the assembly is worked onto the bottom end of the Center Column, next... The array is parked with its bottom edge on the flush with the top surface of the Gitzo Bubble Level where it will be least visually blocked by the Tripod Legs. And if I'm running both Scopes in a relevant environment each will get a pair. And I'm really pleased with the appearance and effectiveness of this solution.
When adjusting position up/down on the Center Column gotta be careful to slide the Strip and not the Cable Tie. Doing the latter will waste a fair bit of time and effort.
A black Microfiber Pouch with a Cord Lock on its drawstring goes over the bottom end of the Center Column and puts me back into stealth mode. LensPouch also does the trick.
--
2023/03/01 - Test drive results. A pair of coils started bouncing the high beams at about 160 yards.
2023/03/23 - And I've found that it bounces a red Headlamp beam real nicely to allow a reduced time and effort trip back to a Scope set up out in a field.
---
http://www.naturalistjourneys.com/tours/2023/07/07/brazil-s-pantanal-jaguars-and-more
Brazil's Pantanal: Jaguars Guided Wildlife Safari & Birding Tours July 2023 | Naturalist Journeys
Discover night birds under intense southern sky constellations
Yeah, the southern sky constellations were intense and the skies were clear but they were no match for the artificial lighting blasting throughout every night in all possible directions from every facility at which some or all of our thirteen member max strength group were camped for the duration. (And yeah, that question mark is theirs. Freudian no doubt.)We check into our boat cabins, have dinner, then have a briefing on safety and wildlife we hope to see. If skies are clear, star viewing is impressive?you can see the Southern Cross!
São Paulo, Campo Grande, Cuiabá. Cities.
Hotel do Ypê, Parque Nacional do Itatiaia. 3700 feet on a steep densely forested mountain slope. At night and well into the morning you had to wear every layer you brought and then some. The swimming pool had a great sky to the east. A couple weeks past their winter solstice but they kept it and everything around it lit like there were gonna be hordes of sweltering guests lining up for refreshing dips all fuckin' night long. Oh well, there will be tons of other totally awesome opportunities.
The Pantanal...
Porto Jofre houseboat. Lit up like Christmas on all four decks and blasting out to illuminate all the riverbanks as far as the eye could see up and down stream.
Pousada Aguapé, Pousada Puival, Hotel Pantanal Mato Grosso. Mini Vegases. And we weren't allowed to leave the compounds 'cause of the (statistically nonexistent) threat of being eaten by a Jaguar. And Jaguars are only interested in eating Jacaré Caiman on the river edges and zebu cattle in the pastures.
On the early part of the night of 2023/07/15 at the last place we ventured out on a safari truck with our guides blasting spotlights out ahead and to the sides to pick up eyeshine. (Bagged us a nice Puma and lotsa other cool targets.) At one point a meteor came straight over from aft to fore looking like a softball a hundred feet up before burning out. They stopped and killed the search and head lights and engine shortly thereafter and from everyone there was a collective WOW!!! the likes of which nothing had held a candle to at any other point on the trip. There wasn't a square centimeter of sky anywhere shy of twenty or thirty stars. We soaked it in for seven minutes or so before resuming primary mission mode.
And we could've had unlimited hours of skies like this if the industry establishment designers and operators of these ecotour facilities hadn't decided that what we patrons all really wanted was lighting that never fell below twenty percent of midday levels out at least a mile in all directions including every imaginable angle of up.

Yeah Naturalist Journeys, the southern sky constellations were intense and we could see the the Southern Cross! - which was slightly more challenging than seeing a full moon in the northern hemisphere. But we were totally fucked over in terms of those virtually unlimited hours of indescribably spectacular views we could and should have been having. And that was a totally sickening disappointment.
---
I not infrequently get guests way off in the 20/20 department and totally clueless with respect to focus adjustment. Strategies...
- With the Scope on the astronomical target crank the Focus Collar full clock (to infinity and beyond) and have them gradually come back counter.
- If the target's a bit marginal and we're not getting anywhere then try the Moon or a distant distinct surface target.
---
2023/09/29
For astro - and pretty much life in general for age six and up everywhere on the face of the planet most of this century - an iPhone (or Android) is not an optional accessory. My Five was starting to get a bit obsolete - even for me - and I'd started thinking about getting something substantially less obsolete late last spring.
More on the 2023/07/15 Hotel Pantanal Mato Grosso safari truck excursion referenced above... Our guides, Benedito Freitas and Wes Larson, are standing up front with searchlights blasting the local savanna area ahead and laterally for eyeshine - Puma (my first on visual) was the most memorable hit.. We clients are seated behind on benches. I'd been a bit rushed at departure and got myself perched aft port. At conclusion back at base I was disembarking and reached for my pair of tripod gloves and iPhone I thought I'd parked on the bench to my left. Nope. Ditto for the immediate deck area. Must've set my stuff down on a bench or sumpin' in the central/staging area a bit prior to rushing aboard.
Truck took off. Pretty quickly ran out of sane search targets. Must've given up too quickly on the truck option. Wes says driver and truck will be back at base in the morning and he will have probably have found and secured the items. Yeah probably.
But I'm not gonna be sleeping and just wander and explore with eyes, headlamp, binocular for hours. Eventually I find myself in a sector which is a bit fenced off from the guest accommodations. There's the truck! Oh, this is were the staffers are quartered. I'd naturally assumed - since Wes had indicated that checking truck possibilities wouldn't be an option before things started ramping up in the morning - that the driver had gone home several miles down the road. And Wes must've assumed that that was the case.
I see my gloves hard port just inside the fencing that encloses the passenger benching! Phone must be underneath them.
But there's only my left glove and nothing underneath it and my heart sinks as I realize what had happened. During the ride in the dark I'd been thinking of the sides of the bed as walls - rather than the fences they were. And to items the thicknesses of my gloves and phone they weren't even fences - they were just atmosphere. And my phone and gloves had bounced off the bench and migrated port. And the phone and my right glove had gone overboard pretty certainly at very separate times. And if it had been daylight that wouldn't have happened 'cause I'd have noticed what was going on.
In the morning I got to Wes after he'd been stirring in his room a bit and tuned him in. Clients aren't permitted off compound other than as parts of guided groups 'cause the industry is scared shitless of the one in thirty billion chance of one of them being eaten by a Jaguar. And if the "logic" were applied to the continent to the north think of all the acreage which would be out of bounds due to threats of Cougars, Grizzlies, Rattlers, Bull Sharks...
But we're safer in groups? Jaguars only attack Capybaras and Zebu cattle when they find them separated from their herds?
And funny that in the Cockscomb Reserve in Belize with the world's densest Jaguar population nobody gives the least flying fuck about Jaguar threat. And I've been there and seen extremely fresh tracks - no more than an hour old - on the muddy rain forest trail within a couple hundred yards of the visitor center. I delightedly reported back at the center as we were wrapping up and they didn't fire up the Jaguar alert sirens and deploy a heavily armed response team to get other visitors safely back to base. (Damn I wish I'd thought of that and pointed it out at the time. (Not that our guides really believed there was any legitimacy to the idiot protocol.))
Wes soon goes out on foot. And so how come it's OK for guides to go out singly? It would be much less of a global publicity disaster if a guide were eaten? Guides are extremely skilled in defusing situations in which Jaguars are assessing them as meals?
And when we were with Naturalist Journeys on the Seward Peninsula, in Denali National Park, in areas around Anchorage and Seward we were potential Grizzly meals and there were records of attacks. But there was never any issue of us hiking solo away from base and/or groups.
http://www.naturalistjourneys.com/guides
Bird Tour Travel Guides - Tour Planners | Naturalist Journeys
Yeah Wes, you knew that.Wes Larson is a wildlife biologist who specializes in some of the most beloved and threatened species around the world. His primary research has been on polar, black, grizzly and sloth bears, but he has been lucky enough to work on conservation projects with myriad other species, including Golden Eagle, African Wild Dog, Green Sea Turtle, Elephant Seal, Spotted Eagle Ray, Burrowing and Flammulated Owl, American Kestrel, Temminck's Ground Pangolin, and American Alligator. Wes also has a passion for wildlife conservation education, and hosted the Mission Wild series for CNN's Great Big Story, and regularly shares his travels and field work with his large social media following. He credits his love for wild things and bears to an upbringing in Montana, where the forests and mountains are a last refuge for his favorite species, the Grizzly Bear of the Rocky Mountains. Wes's passion for all things wild is infectious and the only thing he loves more than seeing wildlife in its natural habitat is sharing those experiences with other people.
And there was a potentially serious bull Moose attack on the GROUP near Anchorage on the Eagle River. People had to dodge behind trees.
And I've had a somewhat scary encounter with a Cougar - whom I never saw with my unadjusted eyes in the pitch blackness fifty yards from the door at my sister's house. Kitty was on the barn roof interested in the chickens whose alarm calls got me out of the kitchen. Soon after I figured out what was going on I turned and walked away slowly until I got within sprinting range of the lit steps. Grabbed a flashlight and Moki - my sister's family's mutt - and went back out.
Moki went clock and I started going counter. When Moki hit the far corner she caught a whiff of what the issue was and it scared the crap outta her. (And she chases Coyotes.) With the flashlight I wasn't much afraid 'cause I figured that I'd be able to make Kitty think about issues if he/she gave up on the chickens and started considering other options.
My sister's husband had a University of Idaho faculty colleague who'd beaten to death with a stick a Cougar who'd desperately needed to make a meal of him. It was a starving juvenile who'd run out of other options and wouldn't/couldn't break off the attack. Far from an unheard of scenario.
And when my niece and nephew were bite sized they weren't to go farther into Moscow Mountain than the back yard. And not 'cause of the Black Bears who were real problematic with respect to the beehives.
--
2023/10/03 - And back to Grizzlies... There was a woman killed at the western edge of Wes "Griz Kid" Larson's home state (west of west Yellowstone) several days after the tour broke up and a couple and their dog (I suspect the dog was the catalyst) were killed at Banff four days ago.
--
Anyway... Actual threats - no problem. One in a zillion for the whole fucking continent - go nuts.
And speaking of actual threats... Wes never suggested the possibility of the glove(s) and phone having gone overboard - which means that he, and undoubtedly Benedito as well, weren't tuned into that vulnerability any better than I was. And at the time I did point out that there was all this emphasis on lifejackets for the untold tens of thousands of clients who'd boarded the Jaguar boats while never in the history of these ops no one had ever had the slightest use for one while I probably wasn't the first client who'd had a small item escape overboard on one of these searchlight exercises. And that if we'd been advised of that risk...
And were I a guide on these ops I'd be announcing and checking. And will anything change with respect to Naturalist Journeys protocols?
So Wes goes out and comes back empty - but miraculously alive and unharmed. Presses his luck a second time and returns with my right glove.
After breakfast the group does the regularly scheduled daylight flavor of the route. And I do a pretty good job of scanning for the phone. Bad news... I don't see it. Good news... It's not in a position to get run over by a truck in the dark. Also hasn't been run over by a truck. And it's gonna get found - intact. Groups of birders are doing this route all the freakin' time doing nothing but looking for stuff.
That was sent sixteen minutes after we'd docked at BWI.Wes Larson - 2023/07/19 15:23 UTC
Tad's phone.
Hey Jim, just writing to let you know they found Tad's phone at the Mato Grosso hotel. I don't have an email address for him, but if you guys want to arrange to have it shipped to you, contact Xavier at info@neblinaforest.com who I've copied here.
I think you may know Xavier already from a trip to Alaska? He's got the phone and is ready to figure out a way to get it to you. Hope your trip home is uneventful and easy!
Yeah, we know Xavier.
http://c1.staticflickr.com/1/939/43624442891_0353e66445_o.png
Fourth from the right on the Seward Peninsula not far from Siberia. Yours Truly in the back with the Foreign Legion hat.
Back then - 2018/06 on the Naturalist Journeys Alaska trip (first time for both of us) - I had a lower back issue (which eventually faded away to near zilch) in which a misaligned and/or compressed disc would start pressing on my spinal cord and anesthetizing and paralyzing me from the waist down. Continue upright beyond a hundred yards or so and the paralysis would advance to total and I'd fall down. Sit down on the Walkstool for a minute and I'd decompress and be good for another hundred yards. But also the condition wasn't helping me any in the endurance department.
Xavier was a huge help to me. At every stop of his van we worked together as a well oiled machine getting my Scope up, vertical, locked on target. He's from Quito, had been doing Pantanal tours, told us if we wanted Jaguar and linked up with him he'd make sure we scored. And when we started gearing up for the Pantanal trip I'd been really hoping that would work out.
So the group assembles with Wes in São Paulo 07/07, we fly out to Campo Grande the next morning and assemble out on the sidewalk in preparation for going into road mode, link up with Benedito. Wes and Benedito start conversing in Spanish and/or Portuguese with someone who's obviously a colleague, we hear him addressed as Xavier.
"What's your last name?" "Muñoz...?" "XAVIER!!!" "???" "Tad, Jim! Alaska - 2018!" Both of us think that he'll be on board with us for at least the upcoming segment of the tour but a while after the van starts rolling for Pousada Aguapé I notice he's not on board and figure that we bumped into him when and where we did 'cause he'd just finished guiding an earlier Pantanal tour.
I guess I should've had my guard up a bit 'cause Xavier wouldn't have needed to wait for Yours Truly to provide a shipping address. Could've had it in the blink of an eye by contacting Naturalist Journeys and if I'd been in his shoes I'd have been delighted to have had it on its way within an hour or two of being back in significant civilization.
Wired Xavier 2023/07/22 11:48:35 UTC - over two months ago and nothing but crickets. No responses to Wes either.
Sorry Xavier. But if you're not dead or majorly incapacitated you're no longer the good friend I had in Alaska. You're the guy who stole property of enormous value to me and worth no more than twenty bucks to you. That loss was and is very painful and seriously marred my experience and memories of the trip. Hasn't done Alaska much good either. But even at this point a lot of damage could be reversed if you take the action you agreed and were entrusted to. And as a Naturalist Journeys guide I'd say you had a duty to follow through on that action. And they're gonna be hearing from me on this one.
So 2023/09/27 after near two and a half rather unpleasant months of doing without and a couple of unsuccessful efforts to acquire something used I said fuckit, got myself over to the Annapolis Apple Store, got a 13 adequately operational, started working to get myself up to some fractional level of competence.
I was amazed to see the way all the apps I’d had on the 5s were automatically restored - with the original undoubtedly tucked thousands of miles away and totally inert.
Early orders of business... Get a Smartish Gripmunk with MagSafe for iPhone 13 and purchase ($50) SkySafari 7 Pro. I so did love Star Walk 2 but I now was able to compare the two on the same device and Safari blows Walk totally outta the water. Safari on the phone - just as on the laptop - looks exactly like the sky. With Walk the modeling is such that one needs to do a fair bit of work to match what one sees on the screen to what one sees in the sky.
In the absence of a phone I've been doing the laptop for missions. Nice to have all that screen space but use on site is a fair bit problematic. Clouds will be shutting me down prior to the night of 09/30-10/01.
Need to start looking into iPads.
--
2023/10/10 - Amended with an ykooe Cell Phone Holster. Disabled half of the velcro on the flap. Can be suspended from the Port D-Ring of the Cotton Harness low and clear of the Binocular. Phone can go in the Holster upside down for charging.
--
2023/10/26 - Liking the Phone in an Eastern Mountain Sports cotton pouch - 3.5x7.5 inch with a drawstring and Cord Lock, discontinued eons ago.
----------
Headlamps
Astro mission or not... We really need a decent light option for setting up, operating, breaking down when the Sun's substantially below the horizon.
http://coastportland.com/products/hx4
On a 2021/06/11 B&H order (Barska Riflescope) I got a free fifteen dollar COAST HX4 Dual-Color Utility Beam LED Clip Light - whether I wanted one or not. I didn't really but there was no option for stopping it. 80x45x30 millimeters, 53.8 grams including a pair of Triple A batteries. Shipped separately in a 12x10x6.5 inch cardboard box with plenty of bubble wrap to make sure nothing could happen to the manufacturer's elegant 125x75x45 millimeter box. (Thanks bigtime for helping us keep the planet green, B&H.)
But that being said... I LOVE this thing - so far anyway - and don't know how I managed to live without it or something similar to date.
I clip it in front of my left shoulder to the elastic strapping of my Vortex...

...Binocular Harness above the relevant adjustment slider - on/off switch fore, LED aimed straight away off the end. Spring clip is magnetized, LED cylinder rotates - from that (my) perspective - about 200 degrees clockwise from full counter to full clock desired rotation. Moderately watertight.
First push on the switch gives you blinding white, second - if under five seconds - switches to red and preserves your night vision if you haven't already wiped it out with the white. Five seconds or more switches the white off. (Bypasses the red.) A click after red switches off.
Great for centering your Bubble after a Tripod set or reset, lighting the Scope body to see how it's lined up with the target you're attempting to score, breaking down and stowing gear, checking to ensure that nothing is left in position to stay behind and get run over.
Doesn't take much to click the switch so when intending not to firmly grip it from the sides of the body or ends of the LED cylinder and I stow it with the positive-out battery positive in. I've practiced to the point that I can do everything blindfolded - totally by feel. Reinstalling the (watertight) batteries compartment cap (bungeed to the rest of the unit) requires a bit of precision. Get everything properly aligned and pressed together, turn the screw counterclockwise until you hear/feel a click, go clock to clamp.
To best preserve your night vision switch it on only when it's aimed straight up. You can hold your other hand off to the side to check for function and color.
Wouldn't be a bad idea to have a spare one of these stowed in the case with the Scope assembly.
--
Better yet... My brother got me a GOFORWILD Rechargeable Headlamp - Sx G03005 B07KG5LGRZ.

Can't really push my eyeglasses up on my forehead to go for an ocular end though so they go down on my chest.
It does:
- white: bright - dim - flashing
- red: low power - flashing
- sensor mode for on/off with a hand wave - bright white only
This toy - or something like it - should be mandatory for anyone who might be deliberately operating in or getting caught breaking down in a sun way down environment.
There's no website so in case we lose the piece of paper that comes with it...
I didn't attempt to open the battery compartment, I just opened it no problem. I guess one only precipitates damage in an attempt. Lithium battery with a two wire connector, secured on a foam adhesive pad.GOFORWILD
If you have any questions please contact us via email: gfw-cs at ohopeglobal dot com
USB Rechargeable Headlamp
User Manual
White/Red Button - top starboard
Sensor On/Off Button - top port
Sensor Receiver - middle port and starboard
White Light - center
Red Light - middle port and starboard
USB Charging Port and LED Indicator - bottom center
Light Mode Sequence
White/Red Button
Long press to switch between Red and White
Light Modes
Click - Mode - Hours
White
1 - Max - 04
2 - Dim - 10
3 - Strobe - 20
4 - Off
Red
1 - On - >40
2 - Strobe - >80
3 - Off
Sensor On/Off Button
Click - Mode
1 - Activated for White Max
- Blue LED top center
- Hand Wave:
-- 1 - On
-- 2 - Off
2 - Deactivated
Specifications
- ABS - material
- 74 grams - weight
- 60x40x35 millimeters - size
- 04-20 - working hours
- 02.5 - charging hours
- Built-In Li-polymer 3.7V/1200mAh - battery
- Mini-Portable / Sensor Control / USB Rechargeable - Features
Charging Instructions
1. Insert the micro-USB end of the cord into the Charging Port on the bottom of the headlamp.
2. Insert the normal USB into a power source to start charging. Charging is indicated by a Red LED.
3. Charging is finished when the Charging LED Indicator light turns Green. Disconnect the cord.
Charging Instructions Continued
- The headlamp is a fully rechargeable USB headlamp so you don't need to buy any batteries.
- With just a 2.5 hour charge, the headlamp can provide up to 20 hours of constant light.
- Batteries come 80-90% charged so they can be used right away, however it is recommended that you fully charge the battery when received.
- Try and charge the battery BEFORE it's fully discharged.
- Once fully charged, be sure to fully disconnect the USB charging cable.
- Keep battery away from extreme temperatures especially heat.
- DO NOT attempt to open battery compartment.
WARNING!
Children under 6 years old should not use this product without adult supervision.
On the evening of 2021/10/16 I ran the battery all the way down for the first time after many weeks of moderate use since an early top-off charge and nothing since. I was pretty sure it was dimming in both white and red modes and then it rather abruptly quit. Fortunately had a blazing Moon to facilitate breakdown and didn't need to resort to the iPhone for anything.
For access to the Charging Port one needs to pry the rubber cover out of seal mode with a fingernail under the port end. (A close look at the area will tell us the end that needs the peeling.)
The sensor idea is cool but it only works for White Max. We'd rather it only worked for Red Steady 'cause we don't want our night vision trashed until after we're fully bagged and loaded and are doing a final check for missed items.
Very nicely designed and engineered headband which separates from and reengages the Headlamp quickly and easily. Easily adjustable and comfortable - returned from a mission and watched the TV for an hour or two before realizing I was still wearing it. Best to make a point of pulling it before forgetting it's on 'cause all of these elastic bands and straps start distorting with use.
The component which engages the headband hinges at the bottom end and is detachable.
I stow the Headlamp in a Microfiber Pouch with the headband wound clockwise around the periphery about one and a half wraps then secure with one heavy rubber band over the equator and another doubled, perpendicular, centered. The light transmitting elements are recessed about half a millimeter from the headband's clean side.
--
2021/11/14
Acquired another one (Amazon, different model, COB Enhanced, the first one's been discontinued) for occasions when the setup's on asphalt and I need to move out of immediate range for a minute or two.
http://live.staticflickr.com/65535/51680700016_e1d1c1d0d2_o.png
The original is now the spare and can go on the tripod in Red Strobe mode.
The new one I like 'cause the motion sensor on/off switch works in all modes - including red steady which is my primary by miles. Its red steady is a lot brighter than that of the Sx G03005.
Note with respect to the illustrated headbands that:
- their images are identical and have been Photoshopped onto the different models
- they're not in the configuration in which they ship and the illustrated configuration is problematic if used as a model
Here's the manual with lotsa duplicate stuff covered in G03005 omitted:
"Fuction" is not my uncorrected typo and I left in some of the pidgin English and worse. Isn't necessarily a reflection on the integrity of the product but certainly doesn't bolster one with a lotta confidence either.User Manual
USB Rechargeable Headlamp
Model GFW3006 / GFW3006-2
Light Control Button - top starboard
Sensor On/Off Button - top port
COB * Low Beam - high pair
Sensor Receiver - mid pair
LED * High Beam - middle
--
Light Mode Sequence
-
Light Control Button
Light Modes
Press:
- 1 - Middle LED White Light on
- 2 - COB White Light on
- 3 - Middle LED & COB White Light on
- 4 - COB Red Light on
- 5 - COB Red Light strobe
-
Memory Fuction
Release after long press the button more than 3 seconds to turn off the light.
And the next time you turn on the headlamp, it will display the mode you selected last.
--
Sensor On/Off Button
Press sensor button, blue light on the button you can control the 5 light mode as you like.
Blue LED when activated
--
Specifications
- ABS+PC+Aluminum - material
- 74.1 grams - weight
- Cree XPG + Irregular COB (White and Red integrated) - bulb
And after running down to dead battery or opening up and disconnecting battery we start at the top of the cycle with "Middle LED White Light on".
--
2022/07/23 - Battery performance seemed pretty impressive at first. After several cycles not so much. Have acquired another GFW3006 to live in the Backpack so's when one abruptly totally quits I can quickly swap and stay operational.
Printed on the exposed face of the battery:
2 Pin JST-PH 2.0 millimeter connector.- HL 103040 3.7V
4.44Wh 1200 mAh
+ 20210119 1 9ZV
--
2022/08/12
- I make an effort to stay with a primary headband as I'm cycling through the two lamps. Still serving me OK but when off it shows itself to be substantially stretched out, distorted, twisted (counter).
- Batteries pretty certainly cutting out (quite abruptly) after much shorter use cycles. And when one does cut out with nothing around to affect the sensor it's dead. No need to wear out the switch making sure.
- To most quickly and efficiently determine which way is up when it's too dark for a visual feel for the port and starboard feet projecting from the bottom surface and/or the nearly featureless flat surface that needs to be up.
--
If we keep a couple rubber bands on a wrist whenever the Headlamp is in use we can partially stow the Headlamp with its business face well protected when- and where-ever we find ourselves when it's no longer needed.
--
Scenario... Have all the gear in operational mode but still need or want the Headlamp in motion sensor mode. It can be a major pain when every movement towards the back end of the Scope triggers it on. Solution... Aim it 90 degrees port or starboard and pan eyes towards the lit direction.
--
Also need an iPhone with Star Walk 2 (or comparable) installed on it.
--
2023/04/22 - I suspect my original, primary use headband became max bagged out a long time ago. Can't remember the last time I needed to make an adjustment. It measures a length of 803 millimeters - including end fittings. The headband off of my second one - which has seen very light use and is either in or very close to just-out-of-the-box shape - measures 638. So a stretch of at least 26 percent - and hopefully no more.
--
2023/04/23 - In not very demanding circumstances we can come down off the forehead and suspend the Headlamp in necklace mode.
--
2022/09/27
There's a little rubber flap intended to seal the port for the USB Charging Cable that tethers from its starboard end. I've always made an effort to get it properly secured whenever it's in need of it - which should be only after a recharging - but last evening while doing the historic Jupiter opposition max and after untold hundreds of such efforts I concluded that the design is such that there's no such thing as proper securing, had gotten real sick of seeing it constantly dangling into my field of vision, decommissioned it with substantial force but no damage to anything.
And hell... If it isn't staying secured after one secures it then it can't be doing much good with respect to its intended function - which I assume is to keep the lamp's interior waterproof.
I don't know for sure that the problem was confined to this particular headlamp but the first time I find the flap of another unit flapping in the field it's coming off as well - on the spot.
--
2022/09/29
The flap on the newer GFW3006 got decommissioned last night. The one on the (lightly used) Sx G03005 seems to be still doing its job.
--
2022/10/22
Minus the flap however... In low light one can spend a fair bit of time trying to insert the Micro-USB end of the Charging Cable into the latch rectangle at the top aft face instead of the Charging Port bottom fore. And even in good light a careful look is required to match the Cable and Port trapezoids to each other. The (wide) bases go fore.
--
2022/11/29 - Did some cleaning this afternoon - the primary strap which needed it and the secondary which didn't - plus both GFW3006 units which I sprayed down, brushed, rinsed. The newer one got a bit wet inside and turned itself on in blinding white mode and wouldn't turn off without being opened up and having its battery disconnected. Opened up both and left them for a while, closed, fell asleep, woke up to a red glow. I think I'm good now but I won't be pushing my luck in the rain after this.
--
Also noting...
These lamps are hinged at the bottom aft corners and designed - supposed anyway - to stay fixed at a user selected tilt angle from level to down about 45 degrees. The click stop function on this unit is degraded to the point that if one engages in much in the way of body and/or head movement the lamp abruptly rotates to full down. It's become pretty much unusable as a headlamp.
The click stopping "works" by means of port and starboard constructions in which little horizontally aligned knife edges projecting fore from the headband plate spring cutouts engage little horizontally aligned ridge/groove bumps projecting aft from the aft face of the lamp body - six ridges apiece. The more one employs tilt adjustments the more one smooths out the plastic constructions.
I'm Gooping the relevant surfaces of the headband plate and lamp body together as my best shot at a solution at present. Will do all three of my GOFORWILD units. Even though it’s only my first and most used GFW3006 that’s broke the others – given enough field action – will be and I’ll be in much better shape in the highly unlikely event of a Goop failure. (If they ain’t broke fix them before they are.)
(The Gooping only disables the tilt capability. The battery and guts of the unit are still as fully and easily accessible as they were before.)
--
2022/10/06
Have racked up a few hours with the Gooped first GFW3006 and am happy and doing fine with the mod. Also have recalled another issue I've had with the factory tilt configuration.
Scenario... Tilt status forgotten, unknown. Stressed and trying to effect a task quickly. Headlamp not responding to hand command. Multiple efforts, faster and closer, finally get too fast and close and smack the lamp hard hard and fairly painfully into forehead. And I think that's how I did some damage - fortunately inconsequential - to some GFW3006 1 plastic. So far in the mod field testing not a problem. I no longer have to remember, guess at, feel for tilt angle / position.
Another thought... If one desires more intense lighting on a low target it's not all that much of a problem to tilt one's head down a bit and roll one's eyes up a bit.
--
2024/03/28 - Yet another thought... As an alternative to Gooping just NEVER adjust the tilt down from full up after pulling the new unit out of the box.
--
Stowing
I wind the headband clockwise around the lamp, rubber band (large and heavy grocery store produce) around the equator, second rubber band doubled and centered perpendicularly.
As the rubber bands are pulled they join company with my wristwatch (left hand). A little excess diameter such that I often go several days without realizing that I'm carrying dupes/spares.
--
2023/03/15
The headband copy I use pretty much exclusively has probably been stretched out to the max for quite some time now. And I've always made a practice of keeping the Headlamp centered on the band with respect to the two plastic headband circumference adjustment enabling components. And that practice served to position them right over my ears.
Trapper hat cinched up snug and keeping me alive in the cold, strapped eyeglasses perpetually coming off and dangling for going onto the Scope and going back on for retargeting... Interference from the hard plastic with the Croakies strap had become a major crippling issue. Brain finally kicked in and I readjusted to position the connector over my left temple and the slider centered straight back at my six. Total end of problem.
--
2023/03/28 - Last night while getting ready to roll for an astro mission caught in the rearview a glimpse of my original GFW3006 in the "COB Red Light" mode I use almost exclusively. Noticed that on the starboard side only the two top edge spots were functioning. Not happy about that but I can operate on the remaining half dozen just fine and am guessing I'll be loading the battery 25 percent less.
--
2023/05/10
Thought/Hoped that the COB Red Light modes (on and strobe) problem might have been / was due to the nearly fried battery. Previous recharges had been getting me near zilch. These Headlamps take a "2 Pin JST-PH 2.0 millimeter plug". 2.0 millimeters looks like the measurement between the Headlamp's two connector pins. Had to go to China via eBay and wait a couple weeks for a couple replacements. zengtrader had a nice listing in which the connector flavors were well illustrated.
The battery is mounted - extremely (rather too) securely - on an adhesive foam pad. Need to get under a corner and apply a lift force like a starfish opening a clam. And also apply pressure with a sharp knife edge between the battery face and foam to eliminate or minimize the degree of foam tearing away and staying with the battery face. But at this point - according to the manufacturer - the headlamp and its band are supposed to become total garbage - along with shot battery - 'cause GOFORWILD won't allow us to even open the battery compartment and says nothing about sending it in to their local authorized dealer for servicing.
When reinstalling a battery bias to starboard to optimize access to the connector.
Didn't top off the new batteries before temporary connections for checks but the issue remained.
--
2023/09/19
Last night what I had left of GFW3006 One's Red capability sputtered for a while and croaked. Capabilities of the three White modes remain one hundred percent - but "Middle LED White Light on" is all I ever use for astro missions and extremely sparingly. So I'm now having to acquire a Three.
--
2023/09/20 - Three acquired.
Pulled and mothballed its pristine Headband. The bagged out One's will remain the primary and the mostly pristine Two's will remain the emergency option.
Pulled its battery and swapped with the One's. Now regret getting a couple spares on hand 'cause it seems the unit will cripple us long before its battery begins to.
Gooped it using the original tube. Liquid seemed a lot thicker that what I remember from early operations. Advise twisting the cap a half turn loose and back tight a few times within an hour or two of completion of the operation.
----------
Groups
Hopefully one will be sharing targets one has acquired with other individuals. And since it's a lot easier for tall folk to lean down than it is for short folk to hover, the Legs should be set such that, with the Center Column fully retracted and the Scope as low on the Head's Tilt Arm(s) as tilt considerations will allow, the shortest individual in the group can enjoy a comfortable view. (And, obviously, retract lower level / smallest diameter Extensions first. (And, in virtually all of my experience, partial retraction of Level 3 Extensions is all that's needed.))
First note that near home or at a sanctuary/refuge visitor center a bench or two-step step stool can greatly simplify and enhance the situation - 'specially for kids. At a Home Depot I test drove a little Gorilla Ladders GLS-2CS-2 2-Step Compact Steel Step Stool - $23.
http://live.staticflickr.com/65535/51052058977_b3199db12e_o.png
Well engineered, light, folds up nicely. 225 pound capacity.- anybody approaching that figure wouldn't be needing it to get up high enough to look through the Scope. (So do wish I could find - or even envision - a solution that would pack up nicely in my normal checked baggage allotment.)
We have 120 millimeters of PTH Lens Support range before starting to creep out of the Tilt Arm's tracks. Yeah, that's also introducing a parallax issue but at any range worth mentioning... And the issues of stability, balance, instability as you move from bottom to top up the Tilt Arm... Only concerns prior to locking on target.
And we tall folk never have too much trouble bending forward to look through the angled Ocular in standard roll. This is how ALL guided groups work - Lowest Common Denominator set, the tall guys just bend low.
2021/11/14
I've lately taken to setting up uncomfortably low - including in situations when there's zilch likelihood or possibility of sharing with an unknown. There may be a comfort advantage to standing a bit to the side of the back end and turning one's head sideways up while bending over.
Frequently get astronomical target guests who report getting nothing and will note that they're not getting their eye anywhere near centered on the back end glass. I tell them to forget about trying to see the target and work on getting their eye centered. Virtually always does the trick in short order.
2022/07/12
After having shortly after the above gone back to full up I'm again starting to experiment with low - Levels 1 and 2 fully extended, Level 3 left fully retracted. (And using the UA-180 Head.) Call the target North level to high, use 12 ATX roll. Standing WSW of the back end I face mostly East, bend at the waist to get my Scope eye - left - down to the back end, turn (pan) my head up (would be left if I were standing upright), acquire my target.
Not as comfortable as I'd be for a normal/standard set but not anywhere near a BFD. And now I can reasonably comfortably accommodate a wide range of heights with no further adjustments - with the possible exception of an ATX roll for a younger kid.
2022/11/30
I focus on an astronomical target - Jupiter let's say - for myself, put the guest on it, advise him/her to tweak the focus as necessary to achieve max sharpness. And what occasionally happens is that the guest goes nuts on the Focus Collar, turns the target into a big translucent white blob, thinks he/she is zooming in for a much better view. Always watch the movement on the Focus Collar. If it's excessive that's what's going on.
----------
Field Setup
---
Before getting started...
50807221333 - 50805022587
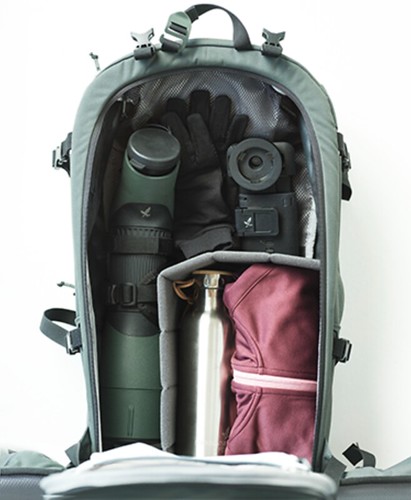
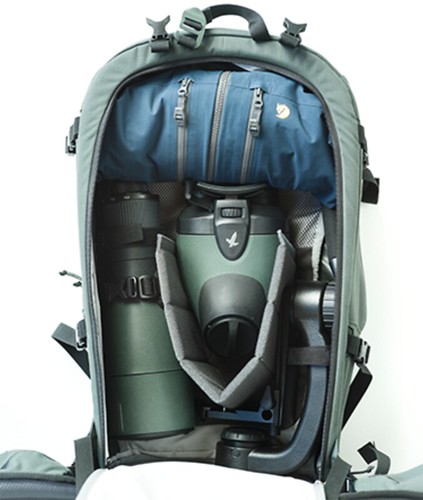
50805135552 - 50805024006
Let's designate those 1-2-3-4. Smoking gun series of photos. Those are all Swarovski factory shots. 1 is the only one that appears on the Swarovski site but all of them went out to and are being used by authorized dealers.
2-3-4 are all obviously illustrating hiking-for-birds configurations. And in 4 we see the killer space and weight PTH Professional Tripod Head stowed in the bag - rather than mounted on the PCT Professional Carbon Tripod as is the CTH Compact Tripod Head in 2. That's telling us that the:
- strategy that some actual humans employ for actual hike-in birding is to stow the PTH separately and spin it on to the set up Tripod without worrying about the stupid placebo set screw "for attaching tripod head"
- stupid placebo set screws don't actually do anything
Really pisses me off that I had to spend years figuring all this shit out on my own in isolation while not getting any real world procedures from the manufacturer. Reminds me a lot of the way the Wills Wing manuals tell us how to land their gliders while after countless decades their designer in an unguarded moment tells us that their gliders can't be safely landed the way they tell us to when real world conditions raise their ugly heads. Also the way u$hPa forces us to if we want to get rated to fly them the places we want to.
---
Prior to this point in the document we have setup procedures often described in really excruciating detail. Need a bare bones description of what needs to be done when we hit an observation point and need to get things done fast. We're assuming one observer or that everybody's 6'1". Using a PCT, PTH, ATX.
Set up Tripod.
Pan and lock Head towards target.
Install Scope / Plate / Lens Support assembly on Tilt Arm - at bottom unclamped.
Extend Sunshade and pull and stow Objective Cap.
Pull and stow Ocular Cap and extend Eyecup.
Back off resistance on Pan Clamping Lever and Tilt Dial.
Acquire target in Bore Sight.
Center target in Scope.
Lock Tilt and Pan.
Roll ATX to 10:30.
Raise Scope assembly on Tilt Arm to neutral point.
Breakdown...
Roll ATX back to 06:00.
Cap and Retract Sunshade and Eyecup.
Set and lock Tilt Arm to vertical.
Pan PTH to align controls face / starboard side with Leg 12NN and lock Pan Clamping Lever.
Pull and stow Scope assembly.
Collapse, lock, stow Tripod assembly.
Stow Tripod and Scope Assemblies in Manfrotto tripod bag.
----------
Weather
----
Rain
Yesterday, 2018/12/16, I did the Lower Kent County Christmas Bird Count on the Eastern Shore (about twenty miles NNW of Ridgely) in what may have been the most miserable weather I've ever encountered on a Count - and I've been doing them since I was a kid. Global warming has fucked up weather patterns everywhere on the planet and this past year and a third it's seemed like a rare day when it wasn't raining steadily with anything from moderately heavy to biblical. Yesterday everything was saturated everywhere and you could watch new rivers forming anywhere you went and it was coming down hard off and on throughout a real good chunk of the day. (And of course the weather here today would've been better than anything that could've been hoped for yesterday.)
The Canon glasses became little more than ballast a few seconds after getting out of the car the first time. I'd thought I'd thrown the lens hoods in the car but... But I doubt they would've made any noteworthy difference - it was the little end that was the real problem. And - as I've said - their rainguard is total crap included for show and the eye cups extended full aft weren't able to do much of anything either.
I put the Scope up in rain configuration - Sunshade, as always, and Eyecup fully extended; Scope rolled to 09 o'clock (angled ocular element horizontal). And everything got totally drowned anyway IMMEDIATELY. BUT... The Scope was still pleasantly surprisingly functional. I was able to ID floating waterfowl way the hell out in lotsa situations in which viewing from within the car wasn't any kind of option.
- Recommend not wiping the lenses dry under frequent use scenarios such as this one. That's a risk of doing something to the glass each iteration and the Scope's just going to get drowned again in the first seconds of the next stop anyway.
- Best to leave the Caps off between stops - otherwise the drops start turning to condensation and that WILL render you inoperative.
- The Sunshade traps a lot of water between it and the Scope body. That's not a problem in the field but you do want to drain it as best as possible after the outing and let it finish drying out before stowing and/or storing it.
---
2020/04/14
I had the clunky UV filters on the binocular at the time of the Count. They'd have allowed water in between them and the objectives and trapped it there so the binocular didn't have a snowball's chance in hell. Pretty sure those glasses would've otherwise functioned comparably to what the Scope did. Not eager to conduct another side-by-side under similar conditions but I did just drown them under the kitchen sink faucet and the view from the front steps was not conspicuously compromised.
----
Wind
On the late afternoon of 2020/01/10 on my second visit to Estero Llano Grande I gave the ATX 85 / PTH / PCT setup a real test flight on the levee at around 26°07'22.70" N 97°57'09.90" W. The wind was even more horrendous than it was on my first visit the day before. I was looking straight into the wind - SE, downhill, onto the water - and I'm pretty sure I was getting sustained fifty mile per hour.
There was enough weight in the Backpack for it to stay safely put on the ground and I got the Tripod and Scope cases safely secured in it. A hand was needed on the Tripod at all times to keep the assembly from blowing over. Llano Grande Lake was nicely loaded with Spoonbills, White Pelicans, Stilts, Avocets, herons, egrets, ducks but the Scope was majorly vibrating - and the situation didn't improve any when shooting crosswind. And my body was getting seriously swayed as well so ballasting would've had its limitations.
The Scope wasn't useless but I did way better with the 10x42 stabilized Canon binocular. It's stabilized and is reasonably well anchored on one's body. It would interesting to find the approximate point above which it's appropriate to leave the Scope in the bag.
2020/01/21 - On 2020/01/19 at the Osprey Overlook gazebo - 26°14'05.06" N 097°21'55.44" W - I found that a cold thirty rendered the unballasted assembly pretty useless for anything for which one would need a scope.
2020/09/11 - Chesapeake Bay Foundation - out to the end of the pier. Fair bit of wind from my left. Got something of a venturi effect between the ocular and my left/viewing eye. Latter was getting rapidly burned to uselessness by the wind and/or pollen. Got back in business by sealing off the flow with cupped left hand. Probably a good idea to assume this will happen and stop the problem before it starts.
----
Cold
If the Scope's been left locked up in the car trunk overnight we may have a condensation issue when first using it on a rapidly warming morning.
And for the human involved...
Heat gets sucked out of our body through our head fast and a jacket component hood is a problematic addressing of the issue.
Dorfman Pacific Hat Company Weathered Vegan Leather Trapper Hat. Scored a Large (22.75-23.25 centimeter circumference) one of those from REI 2022/10/17 and put it through a serious field trial the following evening and found that it really did the job.
Also does a fair job of muffling sound so...
---
2022/12/22 - Been living in the trapper hat near 24/7 since acquisition. Stands up to the cold really well yet doesn't roast me at room temperature. A baseball cap can go on underneath to keep the sun off the face or, for short excursions, rain off the glasses. But for astro missions it's problematic for high targets and tends to get tossed on the ground and forgotten. Best left in the car or Backpack.
---
2022/12/24 - Headed out at 2022/12/23 16:00 EST to the Makkah Center a few hours after the Bomb Cyclone kicked in locally in an effort to score the setting Sun and Mercury. Temperature was 18°F and wind was SW over 20. Gloves had to come off for short periods for a couple set-up operations. Scoring the Sun half killed me, sticking around in the car waiting for Mercury to become visible would've finished me off four times over.
---
2023/06/07 - Overnight temperatures staying high enough for the Trapper Hat to get a washing - soap and room temperature water. Drying may take forever.
---
2023/09/18 - Landed a spare, pulled the tags, sealed it in a 1.0 gallon ziplock, stowed it in the NFS-2 Compartment 1.
---
2023/10/10 - Temperature doesn't need to be very low for chilling one on an astro mission. Yesterday afternoon picked up from North Face a pair of insulated Men’s Lhotse Pants - Medium. Suited up with everything and hit the cattle farm for a test drive. Temperatures and wind weren't big issues but I could tell that this acquisition would've been a major plus if they had been. And they don't roast ya back home at normal winter room temperature settings. Pack easily enough in a 6x11 inch Equinox Bilby Nylon Stuff Bag.
---
2023/10/31 - Decades old North Face down jacket had been needing a first wash - in a front loader. Grangers Down Care Kit, followed the instructions for washing and drying, happy with the results. In the future the Buff Neckwear will be going on before the Jacket (and Trapper Hat) to protect the Jacket's collar from neck contact.
----
2023/11/29 - Last night was was brutal with respect to the cold department. Temperatures were well below thirty and the wind would cycle up enough to put the ATX 95 into vibration mode during a shortish cattle farm mission under a Moon a day beyond full. Was dressed to the max but the situation was not sustainable.
---
Sun
I'm pretty much always trying to minimize exposure of skin to direct sunlight. In the Pantanal I noticed both of our guides wearing light elastic fabric cylinders under and supplementing their baseball caps - stretched over top of head; down over back of head, ears, sides of face, neck, throat, lower face. I was sold.
Buff Merino Lightweight Multifunctional Neckwear
CoolNet UV Neckwear - Solid Forest
----------
LensCoat LensPouches
http://live.staticflickr.com/65535/51613470227_a90b7e8ea2_o.png


http://live.staticflickr.com/65535/47828015021_91d385f848_o.png
A little field guide to relevant sizes.
The Manufacturer number for our largest - 2XLarge, Black - is LCLP2XLBK.
- LCLP - They're all LensCoat LensPouches so we can lose that.
- BK - I'm just using Black, so likewise.
By dimensions in inches, width (diameter) prioritized, leading zeroes amended to tidy up the column a bit:
5.5x12.5 - 2XL -- PTH
5.0x11.0 - XLW - 115 front end
4.5x08.0 - 0LW - 95 front end in PTH mode - ATX/STX Ocular Modules (separated) - Canon 10x42 - Swarovski NL Pure 8x42
4.5x06.5 - MW -- 95 front end in UA-180 mode
4.0x12.0 - 0XL -- Apertura 50RAF-W Finder Scope - Barska Riflescope
4.0x05.0 - SMW - 85 front end - Seymour 425-475
3.6x09.0 - 00L
3.5x08.0 - 00M - UA-180 Posts, Lens Support Assembly - Swarovski EL 8x32 - Leitz 7x42
3.2x06.0 - 0SM - ATX/STX back end (mounted)
3.0x04.0 - 0XS -- PTH Lens Support - Seymour 300-325
---
Each has a "Front Element Protection Disc" installed in the bottom/front end (hard face out / foam face in). We wanna lose it for the:
- Swarovski NL Pure 8x42
- Feisol UA-180:
-- Posts
-- Lens Support Assembly
- PTH Lens Supports
- Solar Filters
---
The Pouches for the 95 and 85 front ends are great fits and with the Protection Disc installed there's a really good case to be made for losing the conventional Objective Covers. I'm doing so.
---
The OD of the 115 is highly likely 133 millimeters - a bit under five and a quarter inches - which would make the XLW a bit of a tight fit but I think we'd be OK. Otherwise the 2XL...
---
All these Pouches save for the 2XL and possibly the next size down also feature a plastic "Carabiner" (Snap Hook) as we can see in the illustration of the shorter job above. Save for the pair of Ms dedicated to the pair of UA-180 Posts I have way less than zero use for any of the Snap Hooks and have secured all that may be problematic outside of the problematic zone.
An appropriately colored Hair Band gets clipped into the Snap Hook and its other end gets fed through the webbing belt loop and clipped into the Snap Hook. End of worries about free swinging Snap Hooks getting jammed into Head hardware and flopping back onto optical glass surfaces. (For Solution Effort 1.0 I used rubber bands but they proved to be really adept at escaping Snap Hook engagement.)
Leitz 7x42 Rain Cover comes off and is stowed separately 'cause:
- I'm usually not birding and never doing astro when it's raining
- it makes stowing the glass in its LensPouch a royal pain
---
2022/09/06 had a major disaster with the new MW I'd owned a total of five days as I was attempting to secure it on the 95's front end. One of the Drawcord ends escaped from the little plastic Lock/Pull fitting that's supposed to secure them and disappeared into the hem of the Pouch. Killed a lot of time trying to work the end back to its exit point and routed back out into daylight but was getting nowhere and decided to completely extract the Cord. When I did it was another quarter second before I saw what the problem was and that the full extraction had been my only viable option.
The RIGHT way to treat a synthetic cord end for such an application... Cut the cord square with a cable cutter, fuse the end in a candle flame, mold the molten end to a point before it cools and hardens. What I found was a sloppy fuzzy shoddy mess and the smoking gun evidence of why that end had escaped from its Lock/Pull.
Fused it properly, worked it back into the fake leather reinforcement Tab opening, around through the hem, back out through the Tab opening. Also had to cut a lot of stitching securing the Tab in place and that was no easy task. (Major overkill on that aspect of construction.)
This was the second time I've experienced a version of this failure with these Pouches. But on the first I wasn't pulling as hard and the loose end came short of disappearing into the hem so got away with minor annoyance level.
Prioritizing the Pouches I'm using for the front and back ends of the Scopes I'm hand stitching an inch of the paired ends of the Drawcords together starting from where they become accessible as they exit the Lock/Pull. That makes a separation of the Lock/Pull highly unlikely and the accidental loss of a Drawcord end into a hem impossible.
These Pouches are otherwise nicely engineered and constructed. And they save the shoddiness for where it will normally be invisible and most destructive when a failure kicks in.
---
Prior to engaging the Objective ends LensPouches stretch out their mouths a bit. ('Specially the 85's SMW.) Two birds:
- the mouths will need to be stretched out a bit before they can make it over the front ends
- excess drawcord will be drawn into the hems such that their Cord Locked ends can't bang into any front end glass
Also a good idea to have the Scopes' Sunshades extended enough to ensure that the little that remains of the drawcords and their Cord Locks are taken totally out of the risk equation.
---
In my humble opinion these LensPouches are best stowed - in the Backpack's NFSC-2 (see North Face Surge discussion below) - à la Russian nesting dolls (matryoshki).
The pair for the UA-180 Posts is semipermanently connected by a Cable Tie and those Pouches are normally gonna be the first ones pulled after a hike-in. Stuff Starboard into Port. Then the Lens Support Assembly will be brought into play and its (identical) M can swallow the pair. Set complete, No Protection Discs in this batch.
Next the glass related stuff - ATX back and front ends - both with Protection Discs - and Solar Filter - without.
The Eyepiece Cover bungee Loop gets snapped into the SM's Snap Hook and the Cap itself goes into the Pouch. Then the wad of UA-180 Pouches can follow. (If the Eyepiece Cover isn't packed we can count on it picking up debris from the NFS's compartment.)
Front end Pouches can swallow anything but I usually just toss them in loose/separately. Mostly ditto for Filter Pouches.
---
2023/07/22 - The pair of Ms are pretty much totally useless on the UA-180 Posts. The corners of the Tilt Arm Lock Knobs are slightly acute but sharp points and the high ones (when we're locked in transport configuration) WILL punch clean through the neoprene whenever the Pouches start doing their jobs. Need to come up with a better idea - which may be or include filing down the offending points to roundish.
---
The interiors of the Solar Filter Pouches will come into contact with glass fore surfaces and likely do so with aft. I wash and avoid subsequently touching the Pouch interiors.
----------
Microfiber Pouches
I use Black Microfiber Sunglasses Pouches from pouchsupply for stowing, protecting, organizing small items. Originally these came with a single drawstring at the mouth which I'd amend with a Cord Lock to ensure the job was done right. And they're still (now 2023/03) illustrated that way in the eBay listing. But maybe about 2021 they got "improved" with double opposing drawstrings - which I hate. So now I Cord Lock one of the pair and lose the other.
LensCrafters does a Black Microfiber Bag which is better stitched together for half a dozen times the price at the outlet.
----------
Stowage
The PCT/PTH Tripod/Head combo... All three Legs fully collapsed and angled fully in to parallel, stood straight up vertical, the top of the Head's at an altitude of 825 millimeters. The max diagonal is 837 so any bag with an internal length capacity of 33 inches or better should do the trick. I'm stowing in a 34 inch Benbo Trekker...
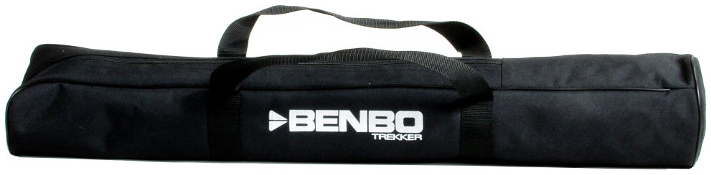
...Tripod Case. Goes in head first and will be parked with Legs 12 up, 04 and 08 down but for insertion rotate sideways or beyond to prevent the PTH's Pan Clamping Lever from snagging. Serendipitous perfect match for this combo - but discontinued. Vidpro TC35 Tripod Case is a good Plan B. (See Vidpro TC22 below - they use the same photo.) More length, width, volume, padding than we'd really like but...
The Scope / Plate / Lens Support assembly goes in a stuff bag (Equinox Bilby Nylon Ultralite - 18x8 inch). Both of those are then stowed in the big Manfrotto MBAG100PN (100 centimeter) bag.
http://c1.staticflickr.com/5/4581/26623027799_e85bc51fd3_o.png
We'll designate the left/wide/armored end bow and normal/handles/zipper side top.
The heavy/thick ends of the two assemblies go in aft - Tripod assembly full aft, Scope assembly full fore.
The bagged Scope / Plate / Lens Support assembly goes in port bow such that the Clamp Wheel of the Lens Support projects (harmlessly) upward and the ATX Ocular Module angles to fore starboard beyond the Tripod's bottom/Feet end. And note that the Clamp Wheel makes a good lifting handle for extracting the bagged Scope / Plate / Lens Support assembly from the MBAG100PN. That option ensures that the Focus Collar won't be interfered with.
The Scope assembly is a bit bulkier and lumpier than one would prefer but not a real problem.
Same deal with the ATX 95 and, for all intents and purposes - it DOESN'T fit in the 100. Needs a 120.
---
2020/03/28
The ATX 95 only needs a 120 if we're using it in conjunction with the Balance Rail - which we're not anymore.
---
For Scope assembly stowage with extra protection within the Manfrotto 100 or elsewhere this:
Vidpro TC22 Padded Tripod Case
http://live.staticflickr.com/65535/49710472217_e02f596686_o.png
works rather nicely. A few inches longer than it needs to be. But if you already have one...
---
The CT101/DH101 Tripod/Head combo folds up and stows in a Manfrotto MBAG70N (70 centimeter) bag - rather snugly but without any extra stress on the fabric and zipper. HOWEVER... Unzip two thirds of the length and one third of the cap disc. Install the Legs in the skinny end then pull the cap disc over the Head before zipping up the rest of that end. Don't stress/wear the zipper by using it to overcome tension.
And I left things substantially unzipped for the stop-and-go exercises - 'cause the equipment was quite adequately protected as things were and the less zipper use/wear the better.
2019/03/13 - Reconsideration. The Scope assembly is a bit bulkier and lumpier than one would prefer and that actually IS a real problem.
IF one leaves the Scope rolled to either 09:00 or 10:30 clamped onto the Balance Rail / Lens Support assembly one has on his hands a major volume sucking pig. Screw the Bore Sight tuning issue - it's not all that critical and not worth enough with this stowage issue properly taken into account.
New packing-for-next-observation-stop procedure...
Loosen:
- Balance Rail Aft Support
- Scope Tripod Ring Locking Screw
Roll Scope to 12:00.
Tighten:
- Scope Tripod Ring Locking Screw
- Balance Rail Aft Support
Stow.
My new stowage bag for the Scope / Balance Rail / Lens Support assembly:
North Face Youth Recon Squash Backpack - TNF Black / High Rise Grey. Pretty good fit for such an awkward shape, fair bit o' padding protection, handle, another secure zippered pocket for any small whatevers. Stow the assembly objective end in first, starboard side "down" (flush with the surface which would contact the wearer's back). And yes, does also accommodate the STX configuration. Also either along with the other Ocular Module.
For any set when time appears to be a significant issue leave the rotation at 12:00 and lock up your target. Worry about comfort, optimization if/as time permits.
Normally when rolling with no or little more than the Tripod/Head and ATX 85 assemblies being stowed in the Manfrotto 100 the Vidpro TC22 is a pretty good option. Lotsa length wasted on emptiness but so what.
Note: The Lens Support is a bit of a stowage bitch no matter what it's left installed on. The PTH needs to stay installed on its Tripod and that geometry's already a mess without the Slide projecting back out from it the other way perpendicularly. Still something of a headache when it comes off and stays with the Scope / Balance Rail assembly. For longer term stowage separating it from everything and stowing it in a protective pouch is about the best one can do.
http://live.staticflickr.com/65535/47828015021_91d385f848_o.png
LensCoat LensPouch (Small, Black) - SM
With that neoprene I feel OK dropping it in at the wide end of the MBAG100PN to keep company with the PCT Feet and little end of the ATX. To minimize profile and maximize safety margins for its self and neighbors:
- clamp firmly to minimum Channel
- rotate Clamping Lever counterclockwise to 07 o'clock
If/When the big Manfrotto MBAG120PN is stuffed for major relocation with enough Scope system gear and clothing to make zipping up hard on the person and zipper...
Two straps of one inch webbing and Fastex SR1 Double Adjust Buckles. Working from the little end forward cinch to compress, zip, leapfrog the straps until you're done.
Likewise under less demanding circumstances for any similar tripod bag...
- Set the bag on the ground/deck/floor (zipper up and) tail North.
- Straddle the bag halfway South facing North.
- Pinch the zipper halves together with one hand while zipping South with the other.
- Keep working South...
---
2020/02/01
Late last summer acquired a Manfrotto MBAG120PN Padded Tripod Bag - identical to the 100 'cept scaled up twenty percent. I'd been pushing my limits with the two One Hundreds and wasn't gonna be able to make it with the extra volume required for digiscoping configuration. It's made it through two airport check-ins minus any second glances due to oversize issues - and should have.
Pack dense heavy stuff in the One Hundred.
Center the CT101/DH101 assembly at the handle's lift point and distribute low density light stuff out at the fore/aft extremities. Otherwise the bag folds as you try to lift it and becomes a major pain to handle.
----------
North Face Surge Backpacks
I have two vintage North Face Surge Backpacks which get thrown in the car - along with the Scope/Tripod assembly, Kijaro folding chair, iPhone for astro missions. Designations:
- NFS-0 - Either one, doesn't matter.
- NFS-1 - Original acquisition. Routine stuff. Goes with me all the time, everywhere.
- NFS-2 - 2021/11/10 eBay acquisition. Glass dedicated.
Relevant item on the left has a top Handle Strap and Bottom Loop...

http://live.staticflickr.com/65535/50806225298_45d957508f_o.png
...as per their current Daypack on the right. (It's present on the Surge but tucked back underneath and pretty much invisible.)
---
A Swarovski BP 30 for comparison:
50805024006

(Note the width of the Lens Support on the PTH in the above photo.)
-----
Compartments
Four pretty much full height and width fully or mostly zippered compartments - which we'll designate NFS-0-1-2-3-4 from fore to aft (which is pretty much never the way we see it).
- NFS-0-1 - Incorporates a single zipper pull which is full closed at low port. All others use paired pulls. Compartment is a bit flat.
- NFS-0-2 - MAJOR VOLUME.
- NFS-0-3 - Flat again - but multiple flat pockets on its fore face and a zippered mesh pouch at the top of its aft.
- NFS-0-4 - Flat oddball with pouches and pockets on fore faces only. Aft face is a flap, separate bottom to top port and starboard zippers, a top flap buckles down to finish securing that space. At the top there's a substantial and easily accessible zippered pouch. A bit below are port and starboard zippered flat pockets.
- NFS-0-5 - Zippered pouch under the floor of the backpack opening aft.
- NFS-0-P - Water Bottle Pocket - Low Port
- NFS-0-S - Water Bottle Pocket - Low Starboard
Above the Water Bottle Pockets are adjustable straps to secure any seated long thinnish items.
-----
Zippers
----
The zippers are all YKK (Yoshida Kogyo Kabushikikaisha). They're rated by the width in millimeters of the coil they've just closed. The major volume compartment - NFSC-2 - is handled by a pair of 10s. All the others 07s. Knowing that helps moderate the octopus environment a bit.
Issue...
When we pull the NFS-0-2-3 compartments more open by grasping up top and pulling fore-aft the zipper pulls travel down below the fore-aft side straps (that we'd be using to secure a Walkstool in one of the two low side pockets) and it's a major bitch to extract them and figure out what the relevant compartments are. I've disabled - via stitching - the port and starboard lower runs of the relevant zippers to prevent them from burrowing out of sight and easy reach. The stops are higher aft / lower fore to optimally limit range, facilitate access, ease identification.
Similar issue and remedy with respect to the twin zippers which close the NSF-0-4 flap.
The openable runs in millimeters:
- 2 - 365
- 3 - 415
- 4 - 120 x 2
Very happy with the mods.
-----
Inventories
----
NFS-1
- NFS-1-1:
-- Hats:
--- Trapper - primary
--- Baseball - Pantanal
--- Sequel Desert
-- Ziplocks - bundled
- NFS-1-2:
-- Cotton Binocular Harness
-- LensPouch LW:
--- Swarovski 8x42
-- Sunglasses
- NFS-1-3:
-- MacBook Pro 13
-- NFS-1-3-1:
--- KN95 Mask
-- NFS-1-3-2:
--- Laser 1
--- Glass Cleaning Kit 1:
---- Dust Brush
---- Spray Bottle
---- Toothbrush Head
---- Lens Cloth
--- Dial Caliper
- NFS-1-4:
-- car key
-- NFS-1-4-1:
--- signal mirror
--- COVID vax card
--- cash
-- NFS-1-4-2 - Cards:
--- Driver's License
--- credit
-- NFS-1-4-3 - Cards:
--- debit
--- shopping
--- medical
----
- NFS-1-5:
-- gloves - leather
- NFS-2 Water Bottle Pockets:
-- Port:
--- empty
-- Starboard:
--- empty
----
NFS-2
- NFS-2-1:
-- Hats:
--- Trapper - backup
--- Baseball - Naturalist Journeys
- NFS-2-2:
-- 45066 Plate - 3/8-16
-- Headlamp - reserve
-- Solar Filter - 475
-- ATX 95 - LensPouched
-- Apertura Finder Scope
- NFS-2-3:
-- NFS-2-3-1:
--- KN95 Mask
-- NFS-2-3-2:
--- Laser 2
--- Microfiber Pouches:
---- Glass Cleaning Kit 2:
----- Dust Brush
----- Spray Bottle
----- Toothbrush Head
----- Lens Cloth
---- Tools Microfiber Pouches:
----- 1 - on a Cable Tie:
------ Headlamp Charging Cable
------ hair elastics
------ rubber bands
------ 3/8-16 nylon:
------- washers
------- nut:
-------- 3/8-16 / 1/4-20 Adapter
----- 2:
------ Gitzo Grease
------ Nickel
------ FRP Pouch:
------- Ziplock:
-------- Torx 06 Key
-------- Filler Screws - M03-0.50 x 2
------ Hex Bits:
------- Phillips 1
------- Inches - 5/32
------- Torx 25 x 2
------ Allen Keys bundle:
------- Millimeters - 1.5 - 2.0 - 2.5 - 3.0
------- Inches - 5/32
------- toothpick
------ Combination Wrench - 1/4 inch 12 Point
----- 3:
------ Hex Bits - Millimeters - 1.5 - 2.0 - 2.5
------ Combination Wrench - 1/4 inch 12 Point
- NFS-2-4:
-- NFS-2-4-1:
--- KN95 Mask:
---- needle:
----- point sheath - foam earplug
----- floss
----- Ziplock:
------ threader
- NFS-2-5:
-- Gloves - Firm Grip
- NFS-2 Water Bottle Pockets:
-- Port
--- Headlamp - Primary
--- Gloves - Ace
-- Starboard
--- Walkstool
-----
Walkstool
http://www.walkstool.com/sites/default/files/ws_comfort_45_screen.png

I use a Comfort 45 centimeter - which collapses to 35. Real nice for a hike-in long enough to require breaks and real useful as a table for the laptop for an astro set. And can be a real asset in airport situations.
Need to do a short freefall drill to park our butts on the short Walkstool. Have a hand grasping the North / 12 o'clock point of the seat triangle and avoid stepping on an 02 or 10 o'clock foot with a heel.
Needs to be stowed in a Water Bottle Pocket (Starboard is my choice) and upside down - as I eventually realized 2022/07/13. If we stow the it intuitively, easily, rightside up, as I'd always done prior to that point...
The telescoping legs only lock when fully extended. And with (or without) everything fully retracted legs sections - due to top end fittings and seating material - can't be folded in to parallel. Thus when the extensions are extended they're all radiating out from centerline. And what with the tight fit of the Water Bottle Pockets and elastic material their top edges the legs - minus intervention efforts - WILL extend and spread and make extraction impossible.
A heavy and/or doubled rubber band goes around the three legs extensions just "above" the feet to prevent undesired extension. Prior to desired extensions and use the rubber band is worked up and "stowed" over the buttons (which don't get depressed enough to matter if at all).
Middle area (about 80 millimeters above top edge of the Pocket) gets strapped in snug.
--
2022/09/08 - Noted that my Walkstool's rubber Feet had begun to be cut through, pulled things apart, was a bit ticked off to find that the bottom ends of the Leg extension tubing which had been left sharp as cut. Got out the files and dressed the profiles to smooth and rounded, ordered a new set for ten bucks total from Sweden, pulled them from the mailbox yesterday. Then it dawned on me that sharp bottom ends didn't really matter 'cause they seat on the flanges of plastic inserts (included with the purchased replacement Feet and that it's the low edges of those that are doing the damage. And we're only gonna be worried about marring something along the lines of an indoor wooden floor with a fully cut through Foot and virtually nothing in the field.
-----
Releasable Nylon Cable Ties
http://live.staticflickr.com/65535/51680100864_d86cb9d80d_o.png
Gardner Bender 47-108UVB 8-Inch. Rated for 50 pounds (so well capable of the entirety of our gear airborne with an extremely healthy safety margin; don't wear out; cost nothing; near zilch effort solution; modifications quickly, easily, totally reversible. Tie:
- 1 gets triple wound and cinched tight around the pinched center of the Strap to form and immobilize a tiny Top Loop - horizontal plane
- 2 was installed through the aforementioned Loop before we formed it - pointy end through aft to fore with locking end and locking ridges ending up starboard - horizontal plane
- 3 gets triple looped, lives on 4, connects between 2 and 4 - vertical plane
- 4 is semipermanently installed around the Center Column between the Tripod's Spider and Center Column Clamping Lever - horizontal plane
Tie 2 is the only one that gets opened and closed in the course of normal ops - two cycles per stop - to separate from and reconnect the Swarovski PCT Tripod assembly to the fully loaded Surge. Thumbnail on the release "button" as close as possible to parallel alignment with the Tie. (Perpendicular to whatever it is we're retaining.)
The 12 inch flavor of this product is of a different design and worth shit as far as safely securing anything goes.
---
For this:
GitzoSystematic-2
http://live.staticflickr.com/65535/52886913894_9b80140047_o.png
variation... We can run Cable Ties through the openings in the Spider frame on the South sides of the 04 and 08 Legs pivot points and connect those Tie loops to another going fore to the middle of NFS's Handle Strap.
-----
Elastics
A pack of:
goody.com

Goody Ouchless No Metal Gentle Elastics, Assorted Colors, 30 Ct
from the grocery store for under five bucks. Useful in the color coding department. Hold up for a while but they're sold as "No Metal" with nothing about what that translates to relative to the non no metal flavor - so I'll do it. They suck. And the sidewalks are literally littered with the evidence.
The allotment is as illustrated:
- 5 - Black, Red
- 4 - Orange, Violet, Green, Blue, Yellow
Also for color coding and regular elastic functions - a bag of rubber bands from Staples.
Beware of some flavor of grocery store rubber band - heavy and purple - which over time melts into a very problematic sticky goo in storage at room temperatures.
---
After years of heavy use of these NFS backpacks I still totally sucked at starting on a desired zipper pull for a relevant desired full depth compartment. New strategy for both utilizing colored rubber bands...
- NFS-0-1 only incorporates one pull which still closes at full port. Red.
- NFS-0-2 gets closed high starboard. Green for both pulls.
- NFS-0-3 gets closed high port. Blue for both pulls.
Still frequently effect false starts but this is working substantially better for me.
-----
Hike-In Mode
For an extensive hike-in we want to be configured along the lines of:

'specially with a UA-180 screwed onto the top end of the Tripod.
Tripod/Head assembly connection... With a little technique we can handle this issue fairly quickly. We're standing to the East and facing West.
- Fully loaded Surge lying flat on the ground/surface, aft face up, Handle end North / Bottom Loop end South. Our most problematic issue is the Bottom Loop connection. Its capacity happens to be about perfect for the mission but it's a bit of a trick to engage painlessly. With the Surge loaded and the Tripod raised to a shallow angle the Tripod behaves as a First Class Lever and its bottom (Feet) end rocks up as the heavy top (Head) end rocks down and things can get a little ugly. However...
- With Tripod Legs fully collapsed and angled full in and Feet a bit North of the Bottom Loop...
-- Back off Twist Lock 12-3, generously extend Extension 12-3 (Foot first) through the Bottom Loop, slide Tripod South to engage Bottom Loop over Twist Lock 12-2, allow Tripod to rest horizontally on Surge, fully retract Extension 12-3, hard clamp Twist Lock 12-3.
-- Retrieve Elastic from Cable Tie 2 and safety bottom ends of all three Legs together with Elastic on the bottom ends just above Feet level.
Now we can stand everything up to vertical and engage our Tripod's Cable Tie 3's triple loop with our Surge's Cable Tie 2 and lock to complete the operation.
Reverse sequence for a stop - 'cept we don't really need to jump through any hoops to disengage from the Bottom Loop. (Kinda like unthreading a needle.)
Good idea to start a lift grasping the Head. That action serves to verify that the Cable Tie 2 connection has been made and not unmade to facilitate any gear extraction and/or late stowage. The results of lifting by the Handle Strap minus the Cable Tie 2 connection are a bit ugly.
There's no problem lifting the whole assembly by the Tripod but we don't want things tilted up much above horizontal 'cause then we're starting to pull the Feet end up clear of the Bottom Loop.
Note that in order to release one of these Gardner Bender Releasable Cable Ties one needs to depress the release end of the little lock lever mechanism below the plane of the inside face of the Tie. Thus if we have one snugged up tight around a cylinder it'll be a royal pain in the ass to free it. Also best to free a Tie in one of our regular configurations Glove off. Much easier and with Glove on we're asking for a wear problem at the tip of our thumbnail.
-----
Rain
2023/04/07 midday I went to retrieve the two Surge Backpacks still in the car after the previous night's mission. 'Cept they weren't in the car 'cause I'd unloaded them stacked 2 on top of 1 on the driveway just behind the car, taken the Scope in with the intention of hauling them in together on the next trip. 'Cept there hadn't been a next trip 'cause I'd forgotten about them. And Murphy's Law had kicked in, it had rained hard, and both Backpacks and all their contents had been thoroughly soaked.
Massive job to pull and start drying all the contents and drying conditions in the house sucked a fair bit as I was between furnace and air conditioning seasons.
Suspended both Backpacks upside down with all compartments open but progress after getting down to damp was seeming eternal. Stuffed dry clothing in all compartments to force things as open as possible and greatly enhance circulation and that appeared to speed things up immeasurably.
That's one mistake I hadn't made before and will likely never make again. (Contents all came through no worse for the experience.)
----------
Tools
----
Dial Caliper, 6 inch - General Tools 142

Invaluable for working on modifications, checking settings.
----
A zillion years ago as part of a set I got a 1/4 inch drive 1/4 inch 6 point socket with a cool spring feature which would hold an installed bit in securely. Recently I tried in vain to find a source for one such. Couldn't even find evidence that one had ever existed. Figured the industry would much rather only sell us configurations with the business end welded in place.
But on 2023/03/15 I ordered from Wiha (Willi Hahn) Tools USA a "71301 - Hex Bit Socket 1/4" Drive 1.5mm" along with related toys. The bit was retained by a M04-0.70x03 set screw I had assumed until 2023/06/08 was welded in place. Application of a 2 millimeter Allen bit quickly blew that assumption apart. And the socket features an internal spring retainer clip at the top end so's minus the set screw things still stay together minus deliberate effort. Eureka.
Wish I'd read:
Looks kinda like:Wiha Hex bit sockets feature our standard insert bits in a square drive socket. Allowing you to use a square drive ratchet to get more torque and access areas that screwdrivers cannot.
The bit sockets make it easy to replace the bit with a hex set screw that holds the insert bit securely, in the event the bit needs to be replaced.
http://live.staticflickr.com/65535/52961266704_54f480f7cd_o.png
'cept that's a big clunky 3/8 drive flavor. And they can't be bothered to present us with a representative photo of anything in the quarter inch drive series...
http://live.staticflickr.com/65535/52980879296_2402e3e74d_o.png
One of the line in which the bit actually IS welded in place. Close enough. (Dickheads.)
If we wanna see what the actual item actually looks like we can only see it as part of a set - 71996.
http://live.staticflickr.com/65535/52961159566_6fddfaaced_o.png
The 2.5 millimeter flavor (71305) - which in the photo above best illustrates the actual product - is third from the right.
---
Earlier in this project I'd been assuming that one could pick up quarter inch drive hex bits - metric and/or SAE - in pairs off the hooks at any of the local hardware stores. One can't.
----
For installation, removal, tweaking the pivot resistance of our PTH Legs...
...we need two Torx 25 tools (simultaneously) and I don't find the pair of Allen key type Torx 25 tools (which came with Gitzo label flavor of the Tripod) very satisfactory for torqueing up to the extent needed. The handle legs are round, short, smooth and don't lend themselves well to firm, solid, comfortable, safe grips.
More serious tool configuration for example - pairs:
- Craftsman 1/4 inch 12 Point Combination Wrench, 9-44699
http://live.staticflickr.com/65535/52980808594_10b7edcec1_o.png

- Wiha 71302 - Hex Bit Socket 1/4" Drive 2.0mm (or any other bit size)
- Torx 25 Bit
Bit gets seated in the Socket, Wrench's box end goes over the Bit's hex length protruding from the Socket with the length of the open end angled away from target. Thumb pressing on the empty end of the Socket, fingers gripping the Wrench arm. Ditto for engaging the opposing screw head.
----
Scored the twin tubes of Gitzo Tripod Twist-Lock Grease from Japan for under sixteen bucks. Looks and feels suspiciously similar to Vaseline. What the hell, I applied it to all threaded contact areas of my single Gitzo and two Velbon Tripods.
---
2023/07/23 - Here's what it says on the tube:
The HEAD - not the TRIPOD.
And on one of the eBay listings:
Pantanal dry season dirt road recently... Visibility can go to near zero with a gust or passing vehicle picking up a cloud of very fine clay dust. And a couple of my adjustment mechanisms soon started feeling real gritty. And when I got into serious cleaning mode back home today I started questioning the wisdom of lubricating the any of the threading associated with the Tripod's nine Twist Locks. And my primary Tripod's Twist Lock assemblies got pretty thoroughly degreased earlier today. And if things don't appear to be broke on future missions they won't be getting fixed.Genuine Gitzo Tripod Twist-Lock Grease
Also degreased the four exposed clamping mechanisms on the UA-180.
Probably wouldn't be a bad idea to have a bottle of rinse water on hand in such conditions. Also to consider not pulling the Scope out of the vehicle minus a reasonably high value target in range.
----------
Glass
Objective and ocular glass is ALWAYS safer with Caps on. Kinda hard to see the birds though in those configurations.
When going live get the Scope assembly safely installed on the Tripod assembly. Extend the Sunshade and remove the Objective Cap - preferably in that order. In operational configuration there's no good reason NOT to have the Sunshade extended and it protects the glass almost as well as the Cap does. But do note that even with the Sunshade fully retracted:
the Objective lens is still pretty nicely recessed and protected anyway.
The Sunshade is installed rather snugly over the fore end of the Scope housing. At the back end of the range of housing covered by the retracted Sunshade there's a slight increase in the outside diameter of the housing which causes the retracted Sunshade to stick retracted. It's difficult to pull the Sunshade straight fore to extend it but with the slightest twist in either direction, clock or counter, while maintaining a pull and you're about 0.2 seconds or less from mission accomplished.
Similar arrangement all the way fore for maintaining the Sunshade in fully extended configuration. Twist if you like but a firm push straight back is all that's needed. Note that if the Sunshade is extended at all it's extended all the way. You needn't check to make sure it hasn't worked its way back.
On the little/back end you have an Eyepiece Cover with a bungee Tether from which it dangles when the Scope is functioning as a scope. Train yourself to rotate the Cover counterclockwise (unscrewing motion) when removing the Cover at the beginning of a bird stop. This also rotates and extends the Eyecup on which it's seated. And that puts the distance you want between your eye and associated lashes and the glass.
For some reason I have yet to identify I frequently feel an increase in resistance during the rotation - as if its bungee Tether were catching between surfaces and binding. I may never know what's causing this annoyance but the solution seems to be simply to increase grip pressure. Resistance immediately returns to normal.
---
2020/03/20 - More complex than I could've imagined. Today I felt the mystery resistance, checked to make sure that the Eyepiece Cover and its bungee Tether were textbook totally clear, confirmed that they were, watched the Eyecup slowly rotate clockwise and retract itself a bit. I think three efforts were required before I was able to get it to stay extended. No freakin' clue what's going on.
2021/08/31 - I still can't figure out how/why what's happening is happening but have figured out that it's an impediment to safe and efficient operation. Now I pop the Cap, extend the Eyecup, stow the Cover.
---
Normally I stow the Cap by Lark's Heading its Tether around the bottom of the top section of my fore port Leg. In higher winds we may want to stow it low to minimize any stability effect it may have as a result of bouncing off a Leg. (And it WILL have some and it WILL be noticeable.)
Keep your Ocular glass spotlessly clean at all times to minimize the temptation of some total moron to wipe the lens off with the waist area of his T-shirt or something he pulled out of his pocket. Ditto for the Objective but that end tends to stay really clean for long intervals anyway.
I carry a Vortex Lens Cleaning Pen 2:
http://live.staticflickr.com/65535/51741016345_c2fbd61ae3_o.png
with my gear. Retractable brush for particles and some graphite pad that's kept capped for spotty stuff. But I find that I virtually never actually use it. I tend to get very little in the way of particles, what I do isn't particularly problematic, when things do get a bit problematic I'd rather do a full proper (see below) treatment. But it costs virtually nothing to carry around and could be of some practical use some day. (The pad and brush tools separate from the main body.)
My nightly routine on trips is to unthread the Eyecup, rinse the ocular glass under the faucet, hit it with a dishwashing detergent solution from a 30 cc spray bottle, lightly drag a dedicated soft bristle toothbrush across the surface with the bristles at a low angle and pointing aft, rinse, hit it with a lens cleaning solution from another spray bottle, wipe it clean and dry with a micromesh lens cleaning cloth. Wash the micromesh periodically.
Binoculars and eyeglasses get the same treatment. Do it like an assembly line. Regular and sun eyeglasses, two binoculars, and the Scope. The Scope's objective lens is well protected and out of the way and rarely requires attention.
Swarovski's approach...
And five swipes of the brush across SWAROVSKI OPTIK Social Media Team's oil free palm. Harkens back to:http://www.youtube.com/watch?v=rPQ32r_eZG0
How to clean the lenses of your binoculars and spotting scopesSWAROVSKI OPTIK - 2015/07/23
When it comes to cleaning your optics, using the right cleaning products is as important as to apply the proper technique. The SWAROVSKI OPTIK CS cleaning set provides everything you need to clean your optics, this video shows you the right cleaning procedure in order to maintain the quality of your optics and extend its usable lifetime.
Best regards, the SWAROVSKI OPTIK Social Media Team
78-095505
http://live.staticflickr.com/65535/51407828617_64ab1f6374_o.png
Note that Dale holds his brush vertically upright while just wiping it under his oil free thumb to be sure it's free of particles. And then we're gonna use it to brush the particles off of our lens. Doesn't sound like the brush is brushing them off - sounds like it just absorbs them. So then is there really a point to this part of the exercise? And if we're really concerned about particle saturated brushes then why not use a comb or toothbrush bristles?Gene Brock
So you rub the brush in your palm before brushing the lens?SWAROVSKI OPTIK Nature
Before you clean the lenses with the brush you should make sure that the brush is clean of dust. You can rub it in your palm or blow it off.Rich
Yup, good to get some palm grease on your brush first to make sure your lenses need the cleaning they are about to get.octapusxft
What is the recommended way of washing this microfiber cloth after use?SWAROVSKI OPTIK Nature
You can wash it with clean water.octapusxft
So no detergents should be used for the oils that might originate from my hands?john1959ism
What type of microfiber cloth? What type of solution is used? Why rub the lens cleaning brush over your palm?SWAROVSKI OPTIK Nature
Dear John, thanks for your comment. You can treat your binos like eyeglasses. Use microfiber cloth as for glasses without metal parts. The solution is type of solvent based products (lens cleaner 614-832/1b). The brush is just wiped over your palm to be sure, the brush is free of particles.1guitarlover
I would never use the techniques used here. First, brushing the lens to remove solids, like sand or dust, could imply scratching the lens in the removal process. Sand and dust must be removed placing the lenses under a water stream. Then I use a mild soap solution for hand wash in order to remove any grease on the lens. The soap is rinsed again with clean water. Finally, the lens is dried with a proper microfiber clothing.
P.S. The problems with those liquids to clean lenses is that they may damage the composition of the protecting coat that covers the binocular. So my solution is simple: water and mild soap with a balanced pH. Cheers.SWAROVSKI OPTIK Hunting
Thanks a lot for your feedback and for your cleaning routine. The SWAROVSKI OPTIK lens cleaner liquid is made for our products, it won't damage the lens coatings. It's no problem using it for SWAROVSKI OPTIK products.shawn
Hmmm... Personally I would blow off any loose debris dust etc. first, blow the brush, then perhaps a light brush, then use the wet cloth.Loz
I was just thinking the same thing.Jim Schwartz
Golly gee willickers, these are poor instructions. First, you should use compressed air to blow off large dust particles... just use one of those cheap rubber bulb air dust blowers. Then, use a brush to wipe away finer particles, but don't stroke it against your hand first, as shown here in 0:24, otherwise you will pick up oils on your hand. Then use the cleaning liquid.Allan Gonzalez
The video shows the person stroking the brush on the palm of his hand, and contaminating the brush with his hand oils. After doing that several times, the accumulation of hand oils will act like a dust magnet, and the brush will contaminate your lenses with oils and dust. I learned this in a college photography class back in the days when we used film, and we brushed any dust particle off the film frames before enlarging them. The same rules applied to our expensive camera lenses. The microfiber cloth will eventually get contaminated and you will need to replace it.
Never once does SWAROVSKI OPTIK Hunting address the concerns of the nine respondents who feel that oiling the tips of the brush hairs prior to clearing particles may not be the best of ideas. And what are we more concerned about - particles or oil?
And the microfiber cloth only transfers fingerprint oil from your glass. It knows not to ever absorb it directly from your fingertips. And neither it nor your brush will ever benefit from a detergent solution cleaning.
The time and place to do this isn't on a picnic table out in the field. It's at the home kitchen or motel room sink before or after a session in the field.
All but - at most - ONE of the relevant respondents to this video and SWAROVSKI OPTIK Hunting's comments and/or replies.
---
2022/07/15
I always pack one of these brushes along with my gear but virtually never actually use any of them. I tend not to have significant issues with the back end while I'm operating and I'd much rather rinse with running or poured water, clean with a dishwashing detergent solution and a soft toothbrush, rinse, dry with the microfiber cloth.
----------
Glasses
You need glasses. If not prescription then at least sun. UV blocking, amber, polarized. And I'm not a fan of looking through glasses and scopes or binoculars at the same time. So you also need a retainer strap to keep them secure when you push them up on your forehead when doing the close view.
I recently discovered and am pretty happy with the Croakies (Micro) Suiters. Elastic tube which fits over the ends of the temples with a little slider/clamp which with which you can snug things up.
http://c2.staticflickr.com/2/1887/44212357622_f47e30cdec_o.png
----------
Binoculars
Referring to my Canon 10x42 stabilized glass as "binoculars" is a bit like referring to the vehicle on which one competes in the Tour de France as one's "bicycles". Two sets of glass / wheels but one device for each application. Convention has established the term on the wrong path but it's a binocular - even if I never manage to get my brain totally rewired for the logic.
Whenever we're packing scope we're probably also packing binocular. And if we're not we can pretty easily find ourselves wishing we had been. Scopes majorly suck for scanning featureless expanses of land, water, sky for worthwhile and valuable targets.
-----
My companion in this department is the Canon 10x42 L IS WP stabilized...
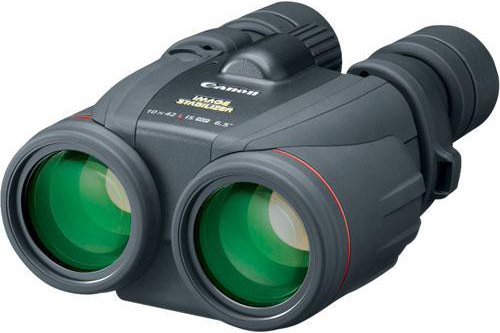

...harnessed. Up to 2020/01/21 I'd always had the front end protected by a pair of 52 millimeter UV filters. The glass didn't fit snugly in the rings, rattled, allowed and trapped moisture in, made cleaning a bitch, almost certainly were very effective in helping to render the binocular totally useless in heavy rain. I pulled them.
Forward of the filters I had a pair of channeled rings for mounting collapsible lens hoods. They (the rings) remain and themselves provide a bit of hood effect and help protect the objectives. And I recently saw a copy of these glasses which had been dropped - resulted in a rim being dented in such that that side could no longer accept an accessory. If that copy had been protected by these rings...
While the view is excellent the engineering of just about all the components involved in locking up the view is total crap. The Focusing Knob, Dioptric Correction Ring, Extendable Eyecups float all over the place all the time this glass is actually being used for its intended purpose. And the Rain Guard (Ocular Lens Caps) is TOTALLY useless.
The Focusing Knob - 20 Ridges on the rubber Grip - does 2.7 revolutions between max in and max out. A nice trick to deal with that component...
- Spin clock to max out.
- 11.5 Ridges counter gets me focused nicely at infinity.
- Crease under second knuckle of left index finger on Focusing Knob at 11 o'clock.
- Pull and spin the Knob counter to fingertip and I'm at or damn close to infinity and can work in if/as necessary.
Beats the hell outta hitting a blurry target and experimenting to determine spin direction and degree.
The Eyecup components - the little cylinders at the back end of each half which is twisted to adjust eye relief distance and protected by a rubber cap - is chintzy as hell. It floats if you breathe on it and I've had two of them crack. I stretched a double looped heavy rubber band on the cylinders fore of them to disable most of their retraction ranges and that's made life substantially more bearable.
The diagonal slot:
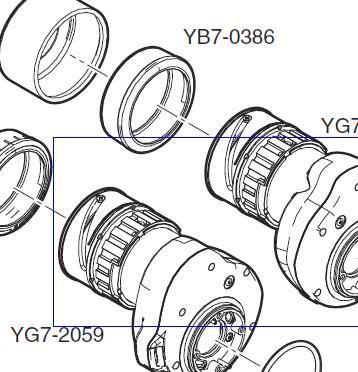
Advise having one or two of them in reserve. Parts Order Center knows it as: CY1-8033-010, formerly -000 - Sleeve, Cam, Eye Cup. Under ten bucks plus shipping.
- Note that there are fore and aft ends (look closely at the schematic) - although if one installs it backwards it doesn't seem to matter.
- It seems the original -000 is a sloppy fit compared to the -010.
There's a plastic amber Rx T-40 17B pill bottle the pharmacies use with a 47 millimeter ID which is a PERFECT fit for protective storage - if you have four spares anyway. (The length is a bit much.)
2022/03/30 called 800-652-2666. Pure hell getting past the robots to an actual human. When the bot bitch asks for the model name say "binoculars".
---
2023/08/01 - The Canon binocular has probably just made its last major expedition (Brazil - 2023/07/01-19). The stabilization is great but the unit weighs a ton and the stuff between the back end glass and user's eyes is chintzy total crap and I've grown real tired of dealing with it.
--
2023/10/04
I'd mothballed the Canon 10x42 and had been using the Swarovski 8x42 exclusively and heavily for star work. And I've been very happy with them in that application 'cept I've often longed for stabilization when lingering on a target area. So last night I dusted off the Canon and got it configured for the Cotton Harness using the Flat Camera Hub - seeing as how that glass is totally unsuited for rigging with the Everything Bracket.
The Hub needs to be biased max aft and that's still not enough to get aft of the Binocular's CG - it will want to tip front end glass up. We can keep it from getting much closer to that goal than a bit beyond horizontal (counter rotation) by minning out the Tether Adjustment but that's real problematic for targets more than two or three degrees above the horizon.
So I'd say for birding... Forget about it.
But for my usual astro mode... Once after a gear dump on site I'm parked in the folding chair and the Binocular's OK untethered for scanning and being parked in the Receptor Slot.
Probably a better plan though to have the 8x42 properly engaged with the Harness and the Canon loose and parked on a backpack between uses.
-----
For astro...
Leitz Trinovid 7x42 BA. Fraction of the weight, wider field of view, 6.0 (rather than 4.2) millimeter exit pupil. Way better for scanning.
But when I'm behind the Scope working on a high astronomical target (read low (and close to Tripod center) back end) the Harness doesn't keep them from banging into the Legs. Not hurting anything but a bit loud and annoying. Solution... Leave them harnessed but slip on the LensPouch M in which they get stowed.
Ditto for the Canon 10x42 and the LW.
Not a bad idea for other situations when one will be using the glasses but not anytime real soon. The LensPouch can be off and leave us ready for action in under ten seconds.
-----
2023/07/24
For binocular on the Brazil trip I was armed with my Leitz 7x42 and Canon 10x42. A bit in I started noticing that I couldn't focus worth shit on close targets with the former and 10x42 isn't what anyone wants for little stuff flitting around in the branches and vines. Just tested the Leitz glasses (back home) and found that I need to be out about 6.2 meters to enter the sharp zone. Can't believe that these glasses were always that bad. Mothballs.
A pair of Swarovski NL Pure 8x42 glasses (2 meter min focus) I scored used off of eBay - along with an FRP Forehead Rest - 2023/07/21 will be accompanying me on any future trips - thousands of miles and/or hundreds of yards.
http://live.staticflickr.com/65535/53082397734_97904306e3_o.png
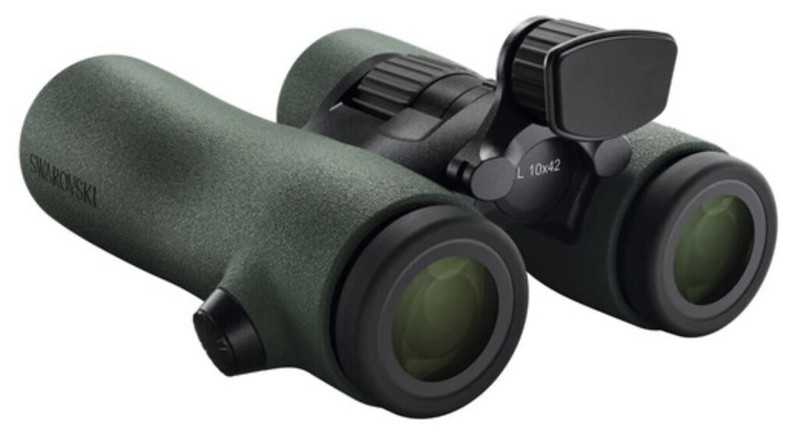
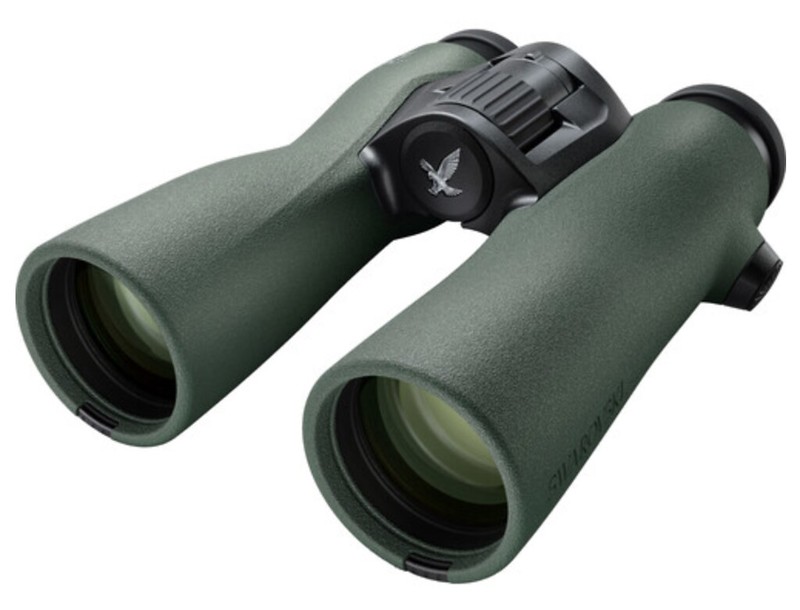
http://live.staticflickr.com/65535/53082606470_58b560b615_o.png
http://live.staticflickr.com/65535/53085473022_13bc509f6a_o.png
The Eyecups have a nice six step ladder feature. We want them adjusted out evenly to the point at which we're last seeing sharply defined circumference. Beyond that point we're losing field of view. I'm good at about four (out of six).
If the 8x42 is gonna be stowed in the Cotton Harnesss Recptor for an extended period on an outing it's not a bad idea to fully extend the Eyecups to better shield the back end glass.
Although the gap between the barrels spreads about 17.4 millimeters from max in to max apart the spacing between the two FRP receptor ports varies close to zilch and the Rest can be engaged or pulled with zilch consideration for the spread. All with which we need be concerned is keeping things square.
For focus to infinity... Counter all the way then back clock six ridges worth.
Good idea to pick the Glasses up off the table with middle finger and thumb fore and aft of the hinge. If we grip laterally/instinctively it's hard not to come up with the Barrels separation at min.
Binocular stows in a LensPouch LW (same as the Canon 10x42) - with a fair bit of room to spare.
-
Objective Lens Cover Filler Piece
https://live.staticflickr.com/65535/53186379949_4d67e29a07_o.png
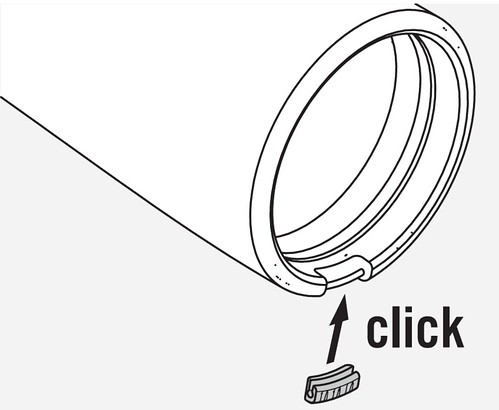
These are microscopic and a fair bit tricky. Inclination seems to be to try installing them from fore to aft. And if we haven't heard the distinct click then we're not fully and properly engaged.
--
http://www.bhphotovideo.com/c/product/1574324-REG/swarovski_36008_8x42_nl_pure_binoculars.html
Swarovski 8x42 NL Pure Binoculars 36008 B&H Photo Video
Yeah, I was having a lot of trouble going back and forth between the Strap Connector Cover and Strap Loop Connector while prepping the Glass for my sister.Tamima - 2021/08/04
Further, putting the strap on was a highly frustrating experience. It is a great concept, but one has to apply what feels like a ton of force to engage/disengage the little knobs that keep the strap secure. It took me nearly an hour to put the straps on.
NL Pure 8x42
Finally figured out how to do things fairly painlessly. And to give credit where it's due... Swarovski DOES illustrate the procedure in TFM.http://live.staticflickr.com/65535/53192233235_c4c23d9fc3_o.png
1 Carrying strap
2 Eyepiece cover
3 Twist-in eyecup
4 Focusing wheel
5 Diopter adjustment
6 Objective lens cover
7 Strap connector cover
8 Objective lens cover filler piece
9 Strap loop connector
Clear of the Binocular fully engage the Pin and Strap Connector Cover (7) or Strap Loop Connector (9). While carefully maintaining that seating insert the inboard end of the Pin into the receptacle and rotate clock to fully engage and lock. Without the prior seating count on a slight misalignment of the two components and that misalignment being a deal breaker issue all afternoon.
From TFM:
--ATTACHING THE STRAP
Press on the knob and rotate it counterclockwise (90°).
Pull the knob out.
Remove the pin from the ring.
Then press the pin into the strap until it clicks.
Insert the knob in the designated place on the binoculars.
Push the knob in firmly and rotate slightly clockwise.
Release the pressure from the pin and continue to turn it clockwise until it clicks.
Note: The pin is securely in place once you can no longer turn it without pressure.
2023/09/20
After about three days of test driving with the Forehead Rest I concluded that it was a bit problematic when using glasses and/or a headlamp and mothballed it. Yesterday I pulled it back out and started reconsidering things.
As far as I'm concerned eyeglasses should be up or down when using a binocular and/or spotting scope. If they're down they're way out of the picture and if they're going up there's zilch cost of going up a little higher. We can push them up few millimeters farther with the Forehead Rest as we're engaging if necessary.
We'll never or seldom gonna be wanting the headlamp on while while looking through glass and we'll be little compromised by having it strapped on a bit on the high side.
Did a lot of test driving in daylight and out on two extensive astro missions and it'll be staying engaged for the foreseeable future. It does seem to help a fair bit with stability and I'll take all I can get - shy of regularly dealing with the issues of the stabilized Canon glasses.
I engage it with my right index finger. Right hand thread sorta mechanism. Counter unscrews the contact, extends it aft. Clock retracts it. Recommend seating between targets, engaging when on one. And we can tweak the contact pressure with slight adjustment of the pitch angle relative to the "plane" of our face.
The Knob has 22 ridges around its circumference and we get 10 click stop settings from fully seated to fully extended over a range of 229 degrees.
The name leaves something to be desired. There's no resting going on with a binocular being used in any normal configuration. Put the scope on its tripod on a stationary target and we can walk away and come back next week and still be nicely centered. With the binocular we're constantly using muscle to stay on target. And the back end with the FRP properly engaged functions very much as a tripod.
Normally we're supporting the binocular with both hands and stabilizing it by pressing the rubber back ends of the eyecups back against our skull's eye sockets. With the FRP were adding the third leg and planting it in the middle of our skull's forehead area. And we wanna get the load distribution equalized as much as possible. And we can adjust the aft extensions of all three contacts to facilitate even loading.
--
Cleaning routine - after pretty much every outing...
- Front end glass rarely needs attention.
- With Eyecups fully extended rinse back ends.
- Fully retract Eyecups, spray with detergent solution, drag (soft) toothbrush bristles across glass, rinse, invert to dump water, dry with lens cloth, extend Eyecups back out three or more stops.
- Allow to dry before stowing or resume field activity.
It's difficult to impossible to adjust extensions of the Eyecups wet barehanded but a dry lens cloth will serve as a pretty good gripper pad.
--
1 - FSB-L Functional Side Bag - 739-969
1 - Carrying Strap - UCS Universal Comfort Strap - 739-0981
1 - Eyepiece Cover - 740-938A
1 - Lens-Cleaning Cloth
1 - Soap & Brush Kit - Soap & Brush Kit
2 - Cover Pin - 740-0260A
2 - Pin (Screws) - 678-981A
2 - Strap Connector Cover - 678-968A
2 - Objective Lens Cover - 740-936A
2 - Objective Lens Cover Filler Piece - 740-937A
2 - Strap Loop Connector - 678-976A
----
2023/07/25
On the Brazil trip I was doing a crap job of hitting targets in heavyish cover and canopies. I'd get them naked eye, pick a nearby branch or distinctive pattern, look down to get my hand on the harnessed glass, try to relocate my intended starting point, not get anywhere before the bird had gotten bored and relocated. At one point I heard one of our guides advising another one of our group to get a lock naked eye, stay on target while reaching for and bringing up the glass, tweaking the aim to get it on the target.
Yeah, I think I used to know that. And that got me thinking that...
ideally we'd wanna be using our scope on a tripod. But that's not gonna work worth shit in tons of situations with uncooperative close small targets - in which we want close focus, low mag, wide field of view, quick response capability. And in binocular mode our bodies are the tripod and head and we should be thinking of and treating and using them accordingly.
----
2024/03/28
Have had a major problem with the "Twist-In" performance of the Eyecups. The action gums up to the point that when very firmly torqued in to seat any efforts to extend result only in unseating/disengaging.
Remedial actions... Remove the pair and immerse in a cup of water just brought to a boil in the microwave, force extensions and retractions, repeat, lubricate with dishwashing detergent. Repeat if/when action again starts becoming sticky.
----
Harness
All of these - we'll call them - Hub configuration harnesses use an identical leather Hub. All save for Swarovski very likely use identical 1.0 x 0.0625 inch elastic strapping. That strapping starts stretching and warping with use that loads it (and us) up quite substantially.
In this configuration we want to minimize the play / maximize at-rest altitude of our glasses. If we go overboard with this strategy we start needing to stretch strapping when going into viewing mode, thus increasing the effective weight of our glasses. But going low results in a bit of a nightmare with respect to sitting-standing/standing-sitting transitions.
I strongly suspect that we're using elastic strapping 'cause that SEEMS logical and SELLS but would actually DO much better with nylon or dacron webbing.
The Swarovski label flavor of this harness...
http://live.staticflickr.com/65535/53081818017_b926f23cdf_o.png
...incorporates elastic strapping of the same cross-sectional dimensions but is of a different weave and has a different - stiffer maybe - feel and may hold up better.
---
2023/10/10 - From a pristine Swarovski label harness I measured the length of the elastic strap runs - as best as I could minus surgery - at 1350 millimeters. Removed the two straps from my seriously stretched and bagged out old Vortex label harness and put and stitched everything back together using nylon webbing. No extended test driving but already I'm much happier with the zilch stretch option.
---
2023/10/20
Did the surgery. 1350 millimeters. Not bad. Got ten feet of one inch polyester for a pair of five foot / 1524 millimeter replacement Straps. Too long. Stitched three inch S-folds at both of the Low Sliders' anchors to reduce lengths six inches apiece. Test drove. Pleased with the results.
If one ever needed/wanted more Straps lengths... Stitching is such that the two pairs of runs could be easily pulled out in the field.
---
Stowing... The way it comes outta the box.
Stand behind an individual harnessed up but minus binocular.
Grasp the Hub's starboard edge with tips of thumb and a couple fingers.
Vaporize the individual.
Fold the port side upper and lower (doubled) runs of strapping straight up against the aft face of the Hub.
Fold down the fore face.
Continue to completion.
Ditto for starboard.
A rubber band or two to keep the bundle tidy.
Stow in a Microfiber Pouch.
Harnessing...
- Clip the port hook into the port ring.
- Trap the glasses against your body.
- Clip the starboard hook into the starboard ring.
This way we're never relying on a single connection to keep disaster safely at bay.
-----
With a 44066 Plate screwed into the underside of our Canon 10x42 we can:
- snap it into the DH101 Head
- set it down on a tabletop and have it stay level
http://live.staticflickr.com/65535/32674727837_22469e8520_o.png

24-023212
http://live.staticflickr.com/65535/51410518816_5ed7cfbb81_o.png
Strategy for mounting on the PTH...
The glasses are too wide to mount on the PTH when connected directly via a 45066 Plate - but...
http://live.staticflickr.com/65535/50980244232_07ca0834e3_o.png
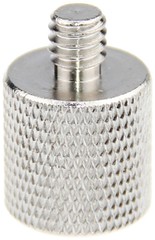
A 45066 Plate, a pair of those 3/8-16 female to 1/4-20 male adapters, a 1/4-20 female to 3/8-16 male adapter sleeve between them, all the way up the Tilt Arm with the Lens Support and we're almost doable. Add nylon washers:
- 3/8 above the Plate
- 1/4 above both of the Adapters
Now you've built yourself a little pillar to get things up, sufficiently clear, still fully engaged and clampable on the Arm. (I've used a pair of the Triad-Orbit 3814ADA Adapters which take me up 16 millimeters apiece.) But you have to play around to get things straight ahead and tight, panning the glasses left against too high a resistance setting starts disassembling things.
- For panning hands on the Head only.
- Here you could use the PTH's Handle since you don't need its receptacle cylinder as a Bore Sight. (Ditto for the DH101.)
- Consider swapping out the PTH for a DH101 Head for the exercise. Probably the best option if available.
Don't be too aggressive torqueing your assembly together and getting things properly aligned. It isn't that difficult to shear off the 1/4-20 projection of an Adapter into what it's engaging above it - hopefully not the binocular. (Learned that one the lesser hard way - prior to amending the washers - at the expense of two Adapters and a Sleeve.)
The PTH configuration is doable - for someone who knows what he's doing. But probably not a good idea for an unattended casual. For those folk you really need a configuration in which the binocular is directly and firmly mounted on a proper plate.
---
2021/10/22
The Feisol UA-180 is an excellent platform for the Canon 10x42 glasses. (Need a Swarovski 45066 Plate to get operational.)
---
The Canon 10x42 is HEAVY and rather bulky. If we're ONLY using our binocular to scan for scope targets - rather than for locking up close, fast moving, feathered stuff in the branches - we might wanna consider something considerably smaller and lighter. I've acquired a LensPouch M to accommodate my Leitz 7x42 binocular and it now lives in my gear bag ready to go for occasions when I'm not gonna be using a binocular for final product work.
---
2023/02/01
Up to now I've been stowing the Canon 10x42 glasses in a Swarovski Field Bag Pro - Large (for EL 42, EL 50, EL Range Binoculars) - discontinued.
Very nice fit in which the Vortex Harness can be nicely accommodated but the LensPouch LW is also a very nice fit for the glasses, Swarovski 45066 Plate, Harness is a fraction of the price the Swarovski FBP was, isn't discontinued, stows better, may be a bit easier to deal with. I'll be test driving it for a while.
---
2023/04/17 - I've test driven it for a while. Much happier with the LensPouch solution. And the Canon 10x42 does great in an LW. They fit like gloves and stow much better and it's a lot easier to work drawcords than zippers. There's a strong analogy here with the Swarovski Stay-On Cases versus LensPouches for the Scopes glass.
-----
Swarovski EL 8x32 SwaroVision
http://live.staticflickr.com/65535/53129853168_e882a9a4c1_o.png

----------
Cotton Carrying System
Cotton Carrier - Camera Harnesses/Camera Holsters/Camera Carry Systems – Cotton - Camera Carrying System
http://www.cottoncarrier.com/pages/binocular-harness-1

Cotton Carrier G3 Binocular Harness
CCS G3 Grey Harness For 2 Cameras – Cotton - Camera Carrying System
Design: North Vancouver, BC
Manufactured: Vietnam
On 2023/07/08 our Naturalist Journeys Pantanal group converged at CGR Campo Grande with one of our guides - Benedito Freitas. He was loaded for bear (or Jaguar) with a glass harness the likes of which I'd never seen before. In the course of that phase of the tour I got an intro and test drive and landed one back home 2023/07/27 for the binocular only mission. So let's take a look.
---
2023/09/16 - I've been test driving, using, modifying my copy intensively for over seven weeks to date and will likely stay with it for the rest of my life but it has a serious vulnerability - of which Cotton is bloody well aware and going to great (but way insufficient) lengths to conceal - which can very easily free our glass for an unrestrained plummet from waist height to the surface. Only yesterday - after documenting a dozen at least somewhat misdirected strategies to deal with the issue - did the lightbulb finally really come on. So don't get within five hundred yards of one of these things before reading below about and understanding the relevant configuration and adjustment issues.
-----
TFM
http://cdn.shopify.com/s/files/1/1183/7406/files/cotton-carrier-g3-harness-instructions-eng.pdf
All 1 - 2 Camera & Binocular Harness Instructions
Shouldn't we have adjusted the Shoulder Straps first? Getting them at an optimal extension and evenly matched is no quick and easy task. And this way we have to take the Harness back off to start doing this task right.1. Fit the Camera Harness by pulling the Speed Straps EVENLY, ensuring the unit is tightened snugly on your body. Harness rests mid torso as shown.
Mid torso? Can you define the range? Any issues related to tweaking high or low?
"Tightened snugly" or "resting"? Pick one.
Sorry. I'm totally unable to use my Shoulder Tightening Straps to ensure the Harness is snug and comfortable. All they allow us to do - in conjunction with the Shoulder Straps - is adjust the height at which our payload is suspended. I'm adjusted for max possible and the Harness is no more or less snug and comfortable than it is max down.2. Use the Shoulder Tightening Straps to ensure the Harness is snug and comfortable. Balance with waist to ensure the weight of your camera is distributed evenly.
Snug AND comfortable? Pick one. If the Harness is snug we can't breathe and if it isn't comfortable we won't be using it.
Balance with waist? So we're splitting loading fifty-fifty? I'm not sure how I would go about doing that. The way I'm doing it and getting along great is hundred-zero.
Waist? How did we get down to waist? I thought we were supposed to be up at mid torso.
We're not tightening or loosening anything with adjustments of Shoulder Tightening and/or Shoulder Straps. We're adjusting the level at which our Breastplate - with its glass payload - is suspended (and fully supported).
The Shoulders or the Shoulder Straps? I'm hoping the latter 'cause I'm not able to do much in the way of adjustment of the former.3. The Shoulders are adjustable from the inside. Larger or shorter individuals can take off the Harness and re-adjust the velcro straps to whats comfortable.
And this is Issue 3?
Any adjustment is gonna be comfortable with the Belt slack and no glass engaged in the Receptor.
So these Harnesses are being shared and swapped around amongst different individuals?
Yeah, we have to take it off. Couldn't we have made a pretty good stab at the issue before putting it on?
They come out of the box engaged with the velcro at equal extensions. What is it and why was that figure selected?
And how many years have you had this up without ever bothering to see if "whats" had been properly spelled?
Otherwise there's no risk whatsoever of our camera falling out of the Harness. Can't imagine what use we'd ever have for a Safety Tether.4. Ensure you align the arrow of the Camera Hub in direction of the lens.
CAREFUL: putting the arrows the wrong way will put your camera at risk of falling out of the Harness.
And if we put the arrows the right way there's no way in hell for them to rotate to a wrong way.
Very comforting to know. Guess we don't really need to bother with any Safety Tethers.5. Insert the Camera with the Camera Hub at 90 Degrees into the Harness Receiver. Resting with the lens down the camera will lock in with our PatentedTwist& Lock System.
Are there any real world scenarios in which the Camera WON'T be resting with the lens down and thus not locked in with our PatentedTwist& Lock System?
I myself tend not to be resting when I'm in the field working my glass. Might that not be a relevant issue?
Really great that your PatentedTwist& Lock System is patented. Is it CERTIFIED by any entity - including you guys - to any actual standards?
I don't think we're really gonna need to worry about having HIGH IMPACT Split Rings on our cameras with the lengths of the Safety Tethers set that stupidly long. 'Cause in real world scenarios the HIGH IMPACTs will occur long before the Safety Tethers will have chances to start tensioning up.6. Attach the Side Holster to the Camera Harness using the Velcro Wraps. Alternatively, you can attach the Side Holster to your belt or the waist strap of your backpack.
7. Attach the Camera Tethers from the Camera Harness D-Rings to the HIGH IMPACT Split Rings on your camera. (splitring included with the Camera Hub)
Walking, birding, astro don't count as active? What relevant issues with respect to your list are nonexistent with respect to mine?Features:
Lens Stabilization Strap: A strap that holds the lens snug against the body while active. (eg. biking, skiing, climbing, running.)
Your Lens Stabilization Strap is gonna keep our glass engaged in your Patented Twist & Lock System a helluva lot better than your Patented Twist & Lock System is. Relying only on your Patented Twist & Lock System we can bend at the waist to retrieve the LensPouch and immediately find our glass a lot more airborne than would be likely in damn near all biking, skiing, climbing, running acivities.
Pity your Lens Stabilization Strap is only good for stabilizing long camera lenses / of zero use with respect to engaging short binocular lenses. Real good thing that we're able to adjust our Tether lengths to minimize the likelihoods of our lenses becoming lethally destabilized.
Guess it would've been too much trouble to provide us with the link - here or anywhere else on your site.Visit our YouTube page for video instructions
http://www.youtube.com/@CottonCarrierCameraSystems
Not much in the way of instructions - but we can see how Cotton is fitting and using this gear.
Also very useful in seeing what we're not seeing. And I'd be very interested in seeing an enactment of a scenario in which a Safety Tether comes into play. As far as I can tell from all the materials you've made available there are no sets of circumstances in which one can be of any use. Reminds me a lot of the hang gliding industry/culture back-up loop. Think I'll decommission mine and toss it back in the box - same way I did for my glider's back-up loop.
Note that all adjustable webbing ends are folded over and stitched such that there's no component of the harness itself which can be fully disengaged and separated.
-----
Package Options
For Binocular-only we need a CCS G3 Harness and - for a non 1/4-20 adapted binocular (pretty much all of them) - an Everything Bracket. Going beyond those basics gets confusing.
-----
Options Comparisons
----
Our binocular's gonna ship with a strap - which weighs and costs zilch. If it's around our neck our access to our glass is excellent and risk of dropping it is zero. But it does nothing to stop it from swinging fore and precious little to stop it from swinging laterally. And it's our worst option for maximizing loading on our shoulders and minimizing it on our neck.
----
A conventional harness is our best option with respect to the neck issue. Big improvement in the swinging department but far from a cure. Binocular has to rest fully below sternum in order to have enough strap to get in viewing position without resistance. Scope - high target and front end, low back end. Straddling the tripod leg to the left of the scope's back end and twisting waist and neck left/up to get my left eye in position behind the back end... The binocular WILL BE banging into the straddled Leg.
And the elastic strapping permanently elongates, bags out, distorts over time. And elasticity is the last quality we want in equipment involved in this mission in any case. I replaced the majorly trashed strapping from my primary use harness - which saw the vast majority of its use with the Canon 10x42 - and replaced it with one inch nylon about 2023/10/15. Port and Starboards were 1350 millimeters each - about what I could measure from a pristine Swarovski. Short test drive - no perceptible downsides.
Planning on redoing a pristine way overpriced Swarovski with dacron in the near future. May go up to 1500.
----
The Cotton Harness...
The Binocular stows high on our chest - bottom end of the Receptor Slot up at sternum level. Relative to the conventional harness that translates to a vector which reduces downward loading on our shoulders and increases forward loading just below the base of our neck.
And we have to stow the Binocular. We can't just stop holding it up in our hands. And the idea that it's safely and securely stowed in Cotton's Patented Twist & Lock System is ludicrous and dangerous. Bend over to pick a LensPouch up off the asphalt and count on your glass going airborne. And pray that you have your "Safety Tether" engaged and adjusted short enough to bring it to an abrupt stop before the road surface does the job. With full out adjustment my 8x42 will have hit the deck 260 millimeters before I've made contact with the cap. And I’m a bit over six feet tall. So let's go for min here.
Asterisk... We actually don't have to stow it - if we're stationary and OK with it dangling at the end of the minned out Tether at pelvis level from one of its Harness Posts. But the operational costs of doing that are way higher than the sane option.
---
The Harness incorporates three flavors of Side Release Buckle - all of which engage flat or with a half twist (to upside down) - which we'll identify by relevant strap width (inches):
- 1.500 - Belt
- 1.000 - Port Shoulder - Lens Stabilization Strap
- 0.625 - Tether
The Swarovski Harness incorporates 0.625 (5/8 inch) which is incompatible with the Cotton's and won't do a twist.
---
The (Port) Shoulder Strap Buckle is male element down and the (Port) Chest Strap Buckle is male element fore. And the Shoulder webbing is 1.0 while the Chest is 1.5. So we won't get very far screwing things up in relevant procedures. And the width issue can be a substantial aid in determining whether or not we have our hand in the right place.
---
There's a Rain Cover in the package (illustrated clipped in and suspended from the Belt in the above photo) but most binoculars are supposed to be good for a few meters underwater and if we're out in the rain with this gear we probably wanna still be using our glass and needing it to be up and on target immediately.
-----
Optimal Adjustments
We'll refer to:
- the elements of the Harness which support the Binocular's weight as the Collar - Shoulder Straps and top areas of the Breastplate and Back Panel. Pretty much the same as we have with a T-shirt. And all of the top and aft Collar area is under and distributing loading.
- what constitutes the bottom perimeter of the Harness - the bottom edges of the Breastplate and Back Panel and the Chest Straps - as the Belt. Note that It does NOTHING in the way of load support. And the more we believe what's being claimed in TFM about it being of value for support and load distribution the more trouble we're gonna have in the inhalation department.
I've done a lot of test driving with the Belt adjustments from snug to generously expanded and found zilch downsides related to the latter end. So let's set such that we'll be comfortable with layering for the coldest temperatures we're likely to encounter - at least for the next month or two.
The minimum Belt/circumference length we we can achieve before/without going asymmetrical is 780 millimeters. Min lopsided is 748. Cotton specifies:
Funny. The Belt is supposed to be up at mid torso (see above.) What does the waist have to do with anything?One Size FitsAll: design going from 26" to 57" inch waist
Which is a min of 660 millimeters - 120 millimeters of excess. Lopsided still 88.
- So much for getting the Belt adjustment snug.
- I'm chest 980 millimeters and finding 1125 (145 excess) just fine.
With that adjustment I'm good for triple digit temperature dress down to weather requiring undershirt, long-sleeved cotton, two polypro jackets, windbreaker. If the cold insists on more layering than that I'll probably just suffer with the Swarovski label (BSP Bino Suspender Pro) elastic harness...
http://live.staticflickr.com/65535/53081818017_b926f23cdf_o.png
...modified 2023/10/20 to no longer be elastic - for the short time I'll need / be able to be out in such conditions.
--
2023/10/09 - Nah. Yesterday I restitched the Belt configuration out to 1190 millimeters. Replaced the windbreaker with a serious down jacket and got through a substantial astro test drive with zero issues.
-
2023/11/06 - The Cotton Harness - as I have its Belt semipermanently adjusted - does compress the down under all of its areas a bit. But none of them are problematic with respect to heat loss and to date I haven't noticed the slightest problem. And I've had zero inclination to revert to the conventional harness.
--
It's absolutely critical for us to minimize Tether length / maximize safety margin. First step in that department is to get the Breastplate up to max possible.
Total rubbish.2. Use the Shoulder Tightening Straps to ensure the Harness is snug and comfortable.
I have the Shoulder Straps (about 440 millimeter total length) adjusted such that the leading edges of the loop element velcro runs on their undersides are matched with the leading edges of the hook element patches in the port and starboard Shoulder Strap pockets at the upper corners of the Back Panel - minimum possible fore/down extension with velcro contacts fully engaged - 120 millimeters of Shoulder Strap projecting out beyond the upper port and starboard corners of the Back Panel.
Effecting this adjustment requires a bit of effort but we only need to do it once and it's one-size-is-optimal-for-all - the taller the better. Insert a credit card between the velcro surfaces to prevent engagement while adjustments are being effected.
Are people actually swapping these Harnesses between themselves and other individuals and readjusting? And if they are we're not gonna be making any adjustments to the Shoulder Straps and/or the Shoulder Tightening Straps. They're minned out and staying that way.The Shoulders are adjustable from the inside. Larger or shorter individuals can take off the Harness and re-adjust the velcro straps to whats comfortable.
---
2023/10/10
I should be so fortunate. Last night I'd seriously layered up for astro and attempted to harness up. The Starboard Shoulder Strap disengaged from its pocket's hook component velcro and pulled out completely or damn near. Granted, this isn't a safety issue - it would be impossible to lose glass this way. But it cost me time and effort and it's bullshit we shouldn't have to tolerate.
When we're configured properly about a third of the length of a Shoulder Strap extends fore into daylight and down to and down towards a Breastplate corner. And about two thirds stay retracted and out of sight in the interior of the Back Panel. The undersurface of this range of the Strap is pile component velcro. The adjustment is "locked" by a transverse patch of upward facing 1.5 inch "width" hook component velco - 'cept when we're struggling to harness up while seriously layered up.
So the primary project of today was to make the adjustments of both Straps precisely, evenly, semipermanent with use of needle and dental floss.
And it'll be nice to have heard the last of crackling velcro during donning and stripping whenever things are briefly crooked and tight.
---
Shoulder Tightening Straps... Take them out of the equation as much as possible.
- Adjust them down to about min and to leave a couple millimeters clearance between the bottom extremities of the Shoulder Straps and the top port and starboard corners of the Breastplate.
- Stitch just below their Port and Starboard Sliders to fix the adjustment.
- Coil the excess adjustment webbing, stitch to fix the coils, stow the coils in the port and starboard webbing loops provided for the purpose.
-----
Belt Adjustment
Loosen up the Harness's Belt adjustment generously, take the Harness off like a T-shirt, pitch it forward 180 to upside down, look at the Breastplate's Belt. Its center isn't very close to the Breastplate's center. Breastplate center to Belt end:
- 222 millimeters - starboard
- 254 millimeters - port
The extra length - 32 millimeters - provides us with a clean surface for engaging the (Port) Side Release Belt Buckle - and complicates things a fair bit when were adjusting and shooting for bilateral symmetry. So let's sew a line of dental floss stitching 32 millimeters out starboard/clock from the Breastplate Belt area's starboard end and treat that mark as the starboard end of the Breastplate run of the Belt. And from now on when we refer to the Starboard end of the Breastplate Belt it's that mark and our Breastplate Belt width / run of circumference is 508 millimeters.
And to get into complexity much further let's take a look at the port and starboard webbing elements of the Belt.
All ends are stitched such than nothing can be disengaged from anything (as mentioned above).
The Starboard Belt Webbing emerges from the starboard bottom corner of the Breastplate, runs clock and aft to a Slider stitched to the starboard bottom corner of the Back Panel, comes back fore.
We'll describe the Port Belt Webbing starting from fore port outboard. Runs fore to the Slider of the male element of the Side Release Buckle whose female component is stitched to the Breastplate's (extended) port belt area about 80 millimeters in from its end, routes to inboard through the Slider and aft towards the Slider stitched to the port bottom corner of the Back Panel.
Just before we get there at about 300 millimeters we encounter a stitched S-fold in the webbing which prevents us from cinching up to the point of overlapping the Breastplate and Back Panel Belt projections. (Which was a pretty nice idiot proofing touch.)
After rounding the Slider we have tons of extra webbing to adjust out to the ridiculous range, use for pulling to reduce Belt girth, fold forward and stitch flat against the working run of the Belt webbing - like I've done.
To start getting things adjusted and symmetrical it really helps enormously to have a 2 inch Binder Clip available.
Harness goes flat on the table, Back Panel down, Breastplate up, Belt / bottom edges toward us and even with each other. It's very easy to get the Back Panel and Breastplate longitudinally perfectly centered with each other 'cause the Back Panel is a bit wider than the Breastplate and we can compare and match the visible edges widths. That done clamp the center bottom Belt edges together with our Binder Clip bottom center.
Scenario 1... We want a circumference of 1016 millimeters or over.
If it's 1016 we adjust the Port and Starboard Belt Webbing to get an aft run (Port and Starboard Webbing runs plus Back Panel) of 508 and we're done.
If we adjust out 10 millimeters port and starboard we get a 1056 circumference - 'cause we're increasing the fore run 20 and the aft the same. So small equal/symmetrical tweaks out on the sides translate to substantial loosenings of the Belt.
Scenario 2... Tightening up to below 1016.
It's best to fold the Back Panel longitudinally in half to find center, clamp it, reduce as evenly as possible at the Sliders, eyeball for symmetry, try on for desired fit.
--
2023/10/09 - Rather than determining and measuring from the Breastplate's center point...
Measure from the port and starboard edges of the Stash Pocket at the bottom edge of the Breastplate (fore run of the Belt).Stash Pocket: Simple pocket on the front of the Harness for storage of small items.
---
I'm putting together a Binocular-only assembly for my sister who lives a couple thousand miles to the west and is at the exact bottom of the specified chest circumference range - 660 millimeters. That means the port Belt run is minimized to close to zero and the starboard Belt run is the port Belt run plus 32 millimeters. That leaves me with a lot of excess Belt webbing to deal with - two runs port and one starboard - and zilch available functioning Belt webbing on which to stitch coils of excess.
Solution...
Coil the one element of excess starboard webbing and coil the two elements of excess port webbing together and Cable Tie them to what's available in the areas. For starboard we have a free 32 millimeter plus a bit run of engaged Belt webbing. For Port we can go a little aft to the base of the webbing loop securing the Slider (anchored at the bottom port corner of the Back Panel).
The Cable Ties are routed insertion ends up inside, over to outside, back down to lock ends, engaged, trimmed. As I happened to manage the coiled webbing both port and starboard trimmed Ties happened to end up at 110 millimeters.
-----
Donning
Let's start thinking of the Harness as heavy sleeveless shirt that bottoms out a lot higher than what we're used to - 'cause that's essentially what it is. Kinda stiff but we CAN put it on with all the Straps fully connected and adjusted to combat lengths quickly and easily enough. But for max speed, ease, efficiency - as far as I can tell so far...
We're referring to:
- what constitutes the bottom perimeter of the Harness as the Belt - which disengages on the left side of our chest
- the generous openings through which our arms protrude as the Sleeves
- clock and counter as from an aft perspective
Two pairs of Straps - Port and Starboard Shoulder and Chest (Belt). All are adjustable, Port only disconnectable.
Starting configuration:
- both Buckles engaged
- right hand suspending Harness:
-- from top of Port Shoulder Strap
-- low in front
Raise Harness.
With:
- left hand:
-- disengage (Port) Belt Buckle
-- grasp top port corner of Breastplate
- right hand disengage (Port) Shoulder Adjusting Strap Buckle.
- left hand remaining at top port corner of Breastplate:
-- lift Harness to enable/facilitate full insertion of right arm through Starboard Sleeve
-- position Breastplate for final orientation
- right hand grasp bottom edge of Breastplate and immobilize
- left hand:
-- reach aft to engage port bottom corner of Back Panel
-- engage fixed end of Port Belt Strap
-- slip out along length of Port Belt to check for / eliminate any twisting
-- engage base of male element of (Port) Belt Side Release Buckle
-- and right hand effect connection
-- retrieve Port Shoulder Strap (which will pretty much certainly have tucked between back and Back Panel)
-- and right hand effect connection
- both hands grasp bottom edge of Breastplate and tweak for final positioning
Fifteen seconds.
-----
Disengaging
Right hand:
- Blow (Port) Belt Buckle.
- Grasp base of male/bottom element of (Port) Shoulder Strap Buckle.
Left hand:
- Blow (Port) Shoulder Strap Buckle.
Maintain grasps on both Shoulder Strap Buckle elements.
Reroute Port Shoulder Strap to starboard of neck.
Reconnect Shoulder Strap and Chest Buckle elements.
-----
Binocular Adapter
For getting a binocular Harnessable... Two options...
---
My Canon 10x42 L IS WP comes tripod ready with a 1/4-20 Socket and Cotton furnishes us with a with a Hub for the task. Good thing 'cause no way in hell this glass can be adapted for Cotton's conventional binocular incorporation.
The Hub Assembly includes the Hub element, a rubber washer, and a 1/4-20x0.5 Stainless Button Head Socket Cap Screw and a 5/32 Allen Key for torqueing it on. The Hub needs to be biased max aft but that's still not enough to get aft of the Binocular's CG. We'd need to go back about another 18 millimeters just to make it to neutral. So if we're on the trail bird ready this binocular is gonna have a very strong tendency to stabilize objective end straight up - 180 degrees from the orientation we'd have with a strap or conventional harness and 90 counter from what we'd get with a conventional binocular in the Cotton illustrated configuration.
Balances on a tabletop as nicely - if not as stably - as when fitted with a 45066 Arca-Swiss Adapter Plate. Still... If we do a little extra hoop jumping we can get this Harness/Glass combo safely and reasonably nicely operational.
Starting with the configuration we were using with the conventional harness... Lose the harness but keep the pair of tabs engaged at the Binocular's Port and Starboard Strap Mounts and the little Split Rings which keep them engaged.
Onto the Harness's Port D-Ring install a duplicate of the Tether configuration we have installed at the Starboard to connect to any other binocular.
Adjust the lengths of both Tether's down to about 140 millimeters...
- stops the Binocular f'rom panning all but a couple degrees up from horizontal (port or starboard)
- allows:
-- only a negligible plummet
-- us to get on a painfully high target
---
For glasses minus a 1/4-20 Socket (just about all of them - including my Leitz and both of my Swarovskis) the Everything Bracket which velcros onto a barrel also provides a Hub.
For the purpose of orientation for this discussion we're going with the NL Pure 8x42 and are behind the glasses looking out level. We'll do millimeters - unless specified otherwise - and wrap clock. I have the Everything Bracket velcroed onto the starboard barrel - which leaves the glasses aimed level out to starboard when engaged and at rest (as in the above illustration).
The Main (molded plastic) Element of the Bracket has the 1.25 inch diameter Hub which is oriented aft at 06 o'clock (aligned with the (Starboard) Objective Lens Cover Filler Piece) and has a pair of slots fore to engage the Velcro Strap. The slots are 1.375 inch (fore/aft) - for some odd reason - but we'll only be using the fore 1.0 inch extent 'cause that's the width of our Velcro.
For installation...
The Velcro has its anchor end stitched onto a plastic "Loop" (rectangular frame) - Starboard side as we're wrapping things. The Loop measures 35.0x23.5 outside and 26.0x13.0 in. Finished length (Loop included) is 335.
We want the Loop oriented at 12:30 and with the Strap biased fore we can get the aft 7 millimeters of the Slider's aft port edge engaging 7 millimeters of the Binocular's Hinge fore starboard edge.
So we're wrapping the Velcro from its anchor end clock around the Barrel, up through the Loop, tensioning back, locking onto the available pile side surface.
It's a bit of a drill to get everything optimally aligned and brutally tensioned so we should consider this installation moderately permanent.
And since it's moderately (probably more) permanent I've trimmed off 15 millimeters of unengaged Strap end which was doing nothing more than flapping in the breeze.
-----
CCS Patented Twist & Lock System
The CCS Patented Twist & Lock System is a near total scam. The Hub we have configured with whatever glass we're using can only engage - or disenge - the Receptor with one of two pairs of alignments. Assuming we're standing or sitting reasonably normally - torso reasonably vertical - for:
- camera - telephoto - vertical aimed down or up
- binocular - horizontal aimed starboard or port
When fully engaged / bottomed out the glass will pivot 90 degrees such that its CG is reasonably close to straight below the Receptor.
While the camera will end up in normal strapped orientation the binocular ends up sideways.
But in Cotton World all torsos are eternally upright - at or near vertical. Nobody ever bends at the waist to:
- pick up a LensPouch or solar filter
- tie a shoe
- catch a snake
And WHEN something like that happens - which it very frequently does out here in Real World - we can and need to count on our glass reacting to the new up direction, rotating ninety one way or the other, re-engaging and exiting the Receptor Slot, accelerating down towards the surface at 32 ft/s2. And we sure better have the fuckin' Tether:
- engaged
- adjusted short enough to neutralize the shortcomings the CCS Patented Twist & Lock System
A real good argument can be made for eliminating the CCS Patented Fake Twist & Lock capability and just extending the Slot uniformly full down. Then we wouldn't be as easily lulled into false senses of security by the glass not adequately aligning half the time when we go for the LensPouch.
So why opt for a CCS G3 Binocular Harness? 'Cause:
- the access, stowing, support, comfort issues blow the alternatives clear outta the water - despite not being Patented
- and we can manage the major downside issue
-----
Lens Stabilization Strap
The Lens Stabilization Strap - wich will never be used to Stabilize a Lens out here in Binocular World - works really nicely as a belt on which to secure our iPhone 13 in its ykooe Cell Phone Holster. For bulletproof protection the iPhone goes in upside down, screen aft, aft of the Lens Stabilization Strap.
-----
Tether
http://cdn.shopify.com/s/files/1/1183/7406/files/cotton-carrier-g3-harness-instructions-eng.pdf
All 1 - 2 Camera & Binocular Harness Instructions
Accidental drops outta what? Our hands?Patented Twist & Lock System
Comes with a safety tether to prevent any accidental drops.
I've used binoculars for over half a century and have never accidentally dropped one out of a hand. Yeah, we're virtually always gonna use them in conjunction with a neck strap or harness so if we did have one escaping from our grip no harm would result. But I've still never even heard of of a binocular being accidentally dropped out of anyone's hand or hands. So how 'bout you guys?
So it's pretty fuckin' obvious that:
- your Patented Twist & Lock System doesn't actually lock a binocular
- you guys know that:
-- but don't want us guys doing too much thinking about this issue prior to purchase
-- and are reasonably content letting us guys discover the issue in scary and expensive ways
And the Tether does absolutely NOTHING to PREVENT a drop. All it can do is ARREST one. And it can only do that if it's been adjusted to a short enough length to kick in prior to impact. So can we get some guidance on how to go about effecting that adjustment?
http://www.youtube.com/watch?v=oBs-xrHRTiE
2016/09/16 - CCS Binocular Bracket instuctions
http://live.staticflickr.com/65535/53191262419_482a2c3f76_o.png
0:04 - CCS Binocular Harness
http://live.staticflickr.com/65535/53191464216_aa5c9bf610_o.png
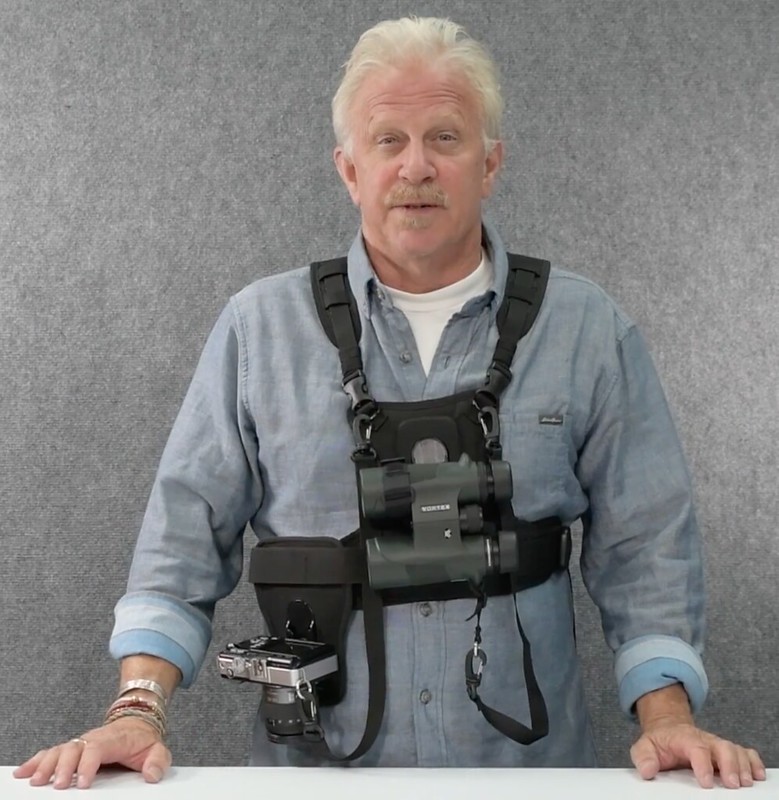
1:28 - Andy Cotton Chamberlayne
Just kidding.
On your website you have two photos of your Binocular Harness in binocular mode - really just one photo illustrating grey and camo flavors.
The Tether length isn't horrible. And I believe this is the only example of a non insanely stupid setting we can see anywhere in any Cotton material. (Looks like it's disengaged but if we go to their site and go full rez...)
For anchoring of the Tether we're provided a choice of two 1.0 inch D-Rings - Port and Starboard anchored at the top port and starboard corners of the Breastplate. Their orientations are 07:30-01:30 and 10:30-04:30 respectively. And we're gonna go with starboard (as illustrated).
As opposed to subtracted redundancy.Safety Tether
Backup high impact rated Safety Tether. Provides an extra level of security when using the harness. Added redundancy allowing you to be certain your camera is always safe.
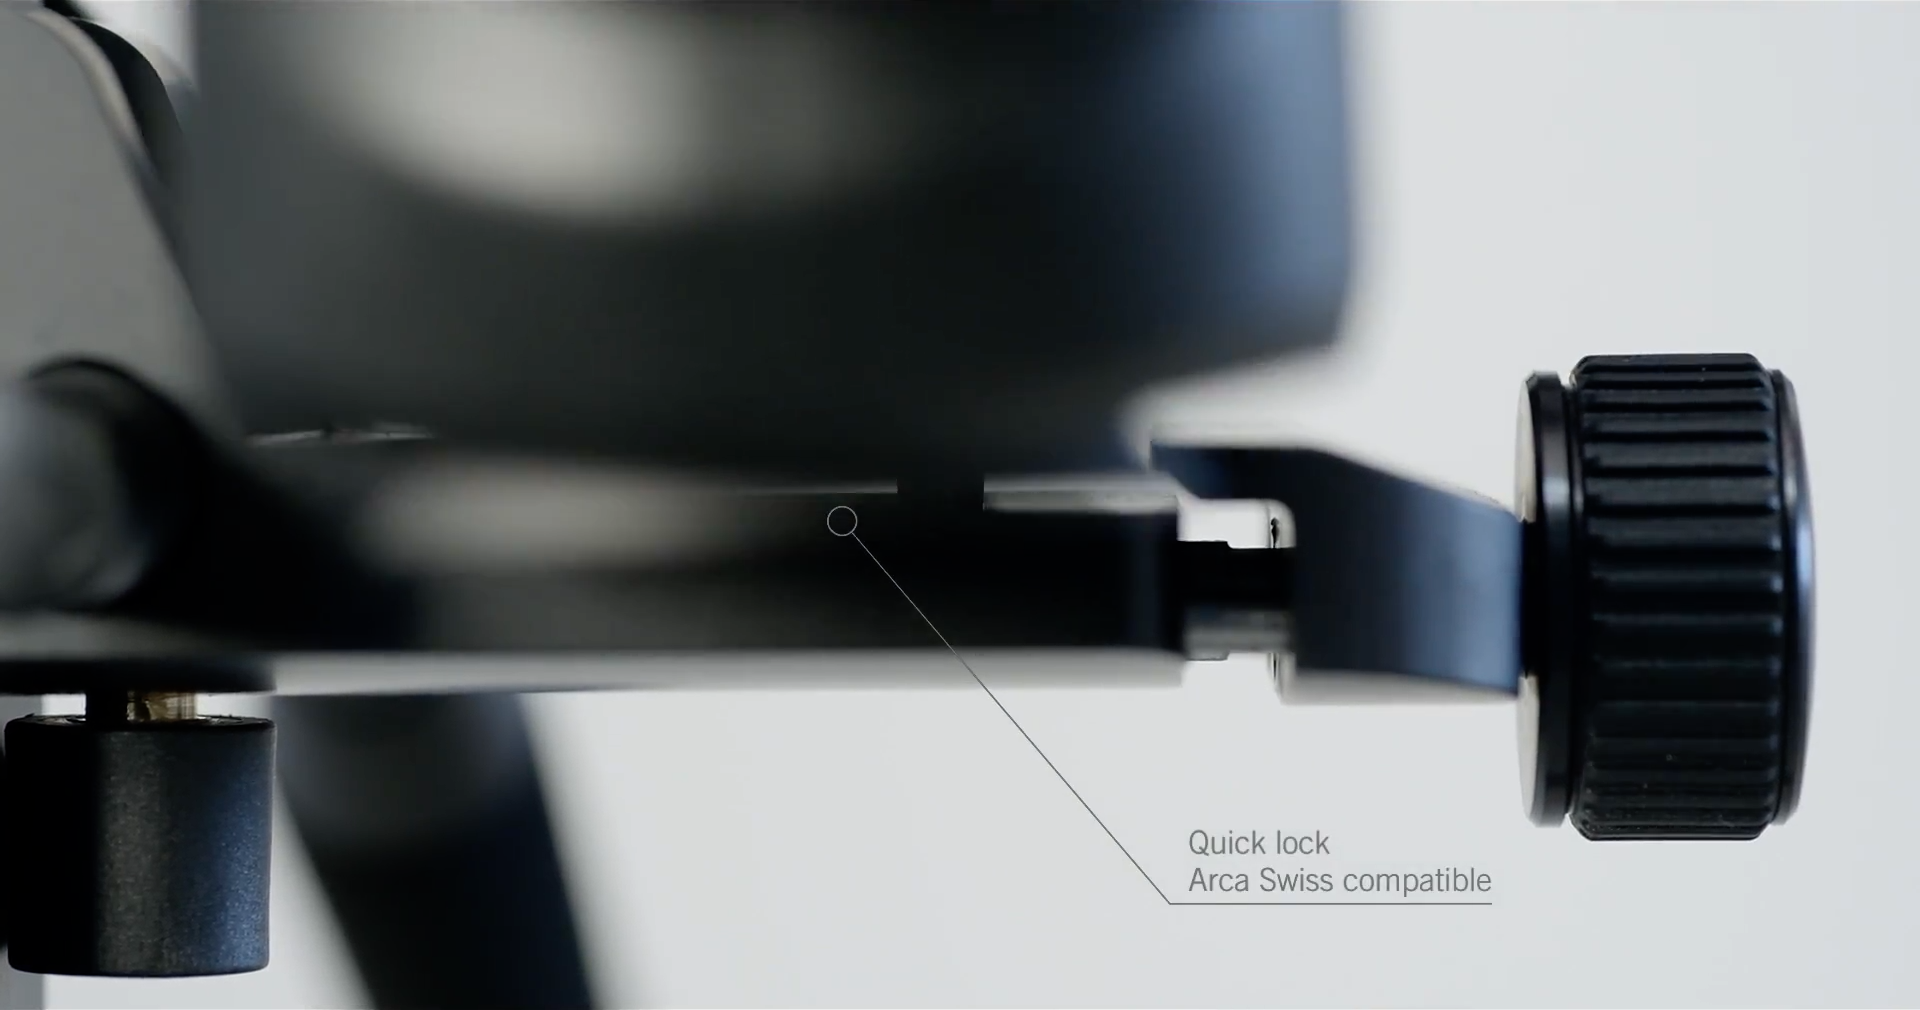
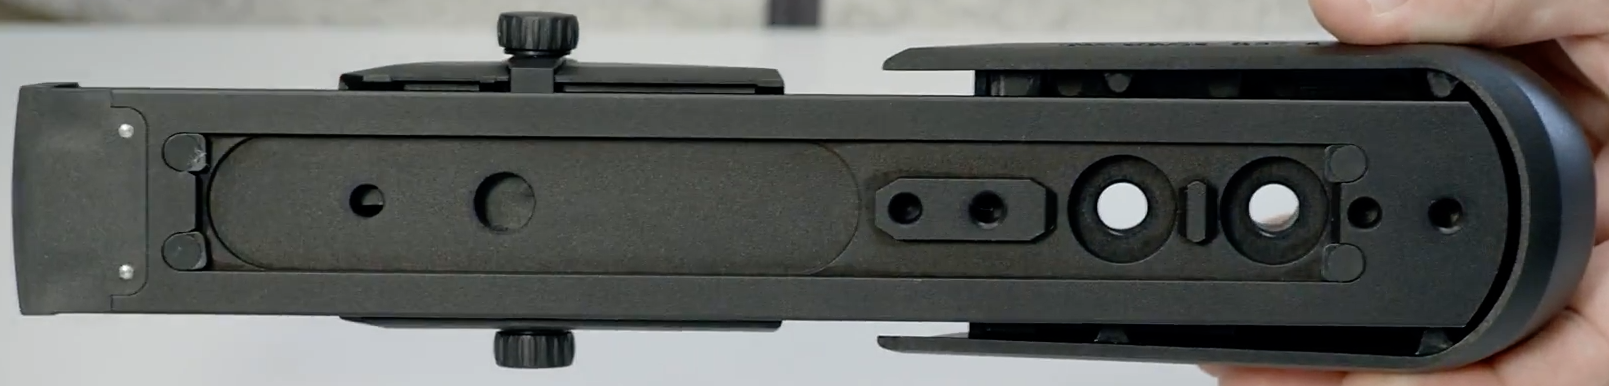
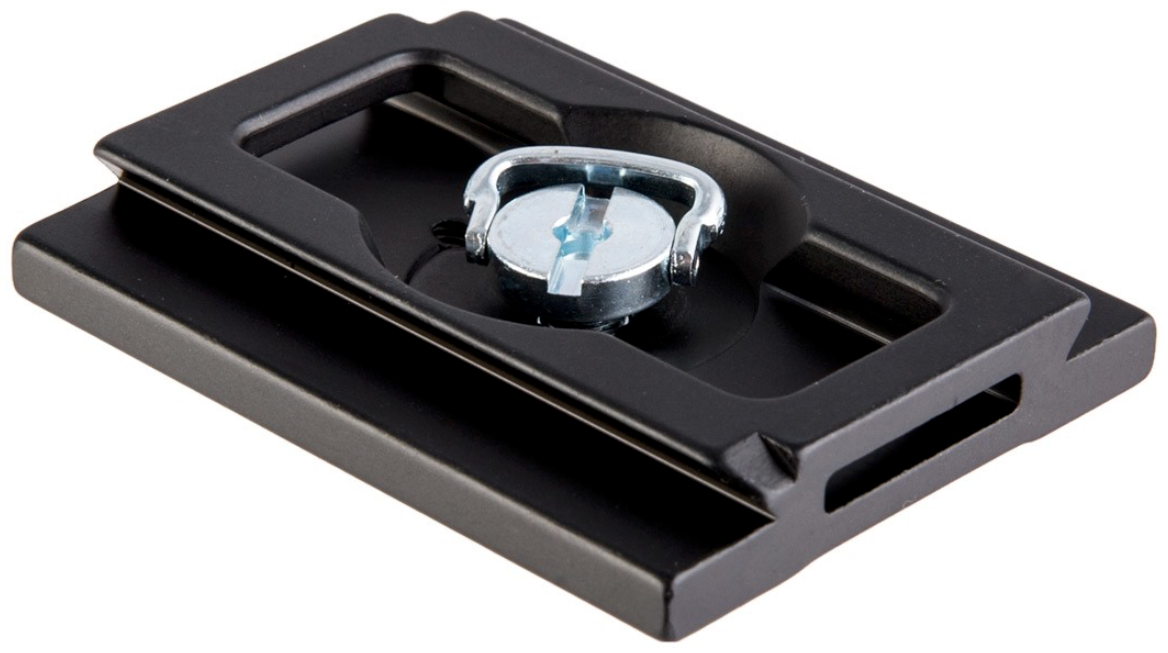
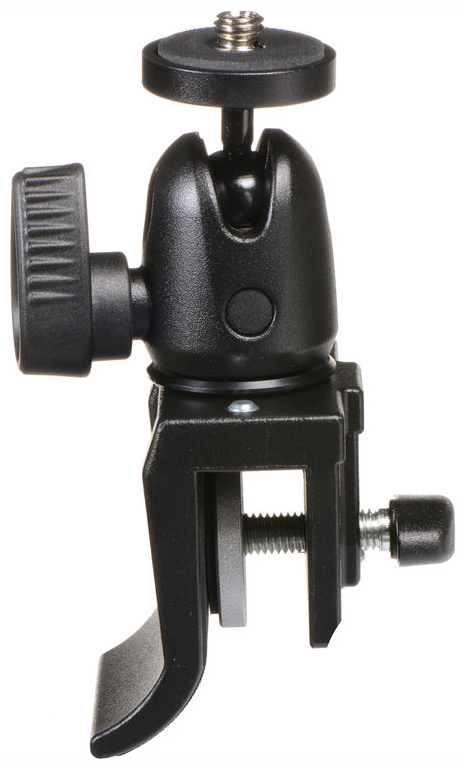
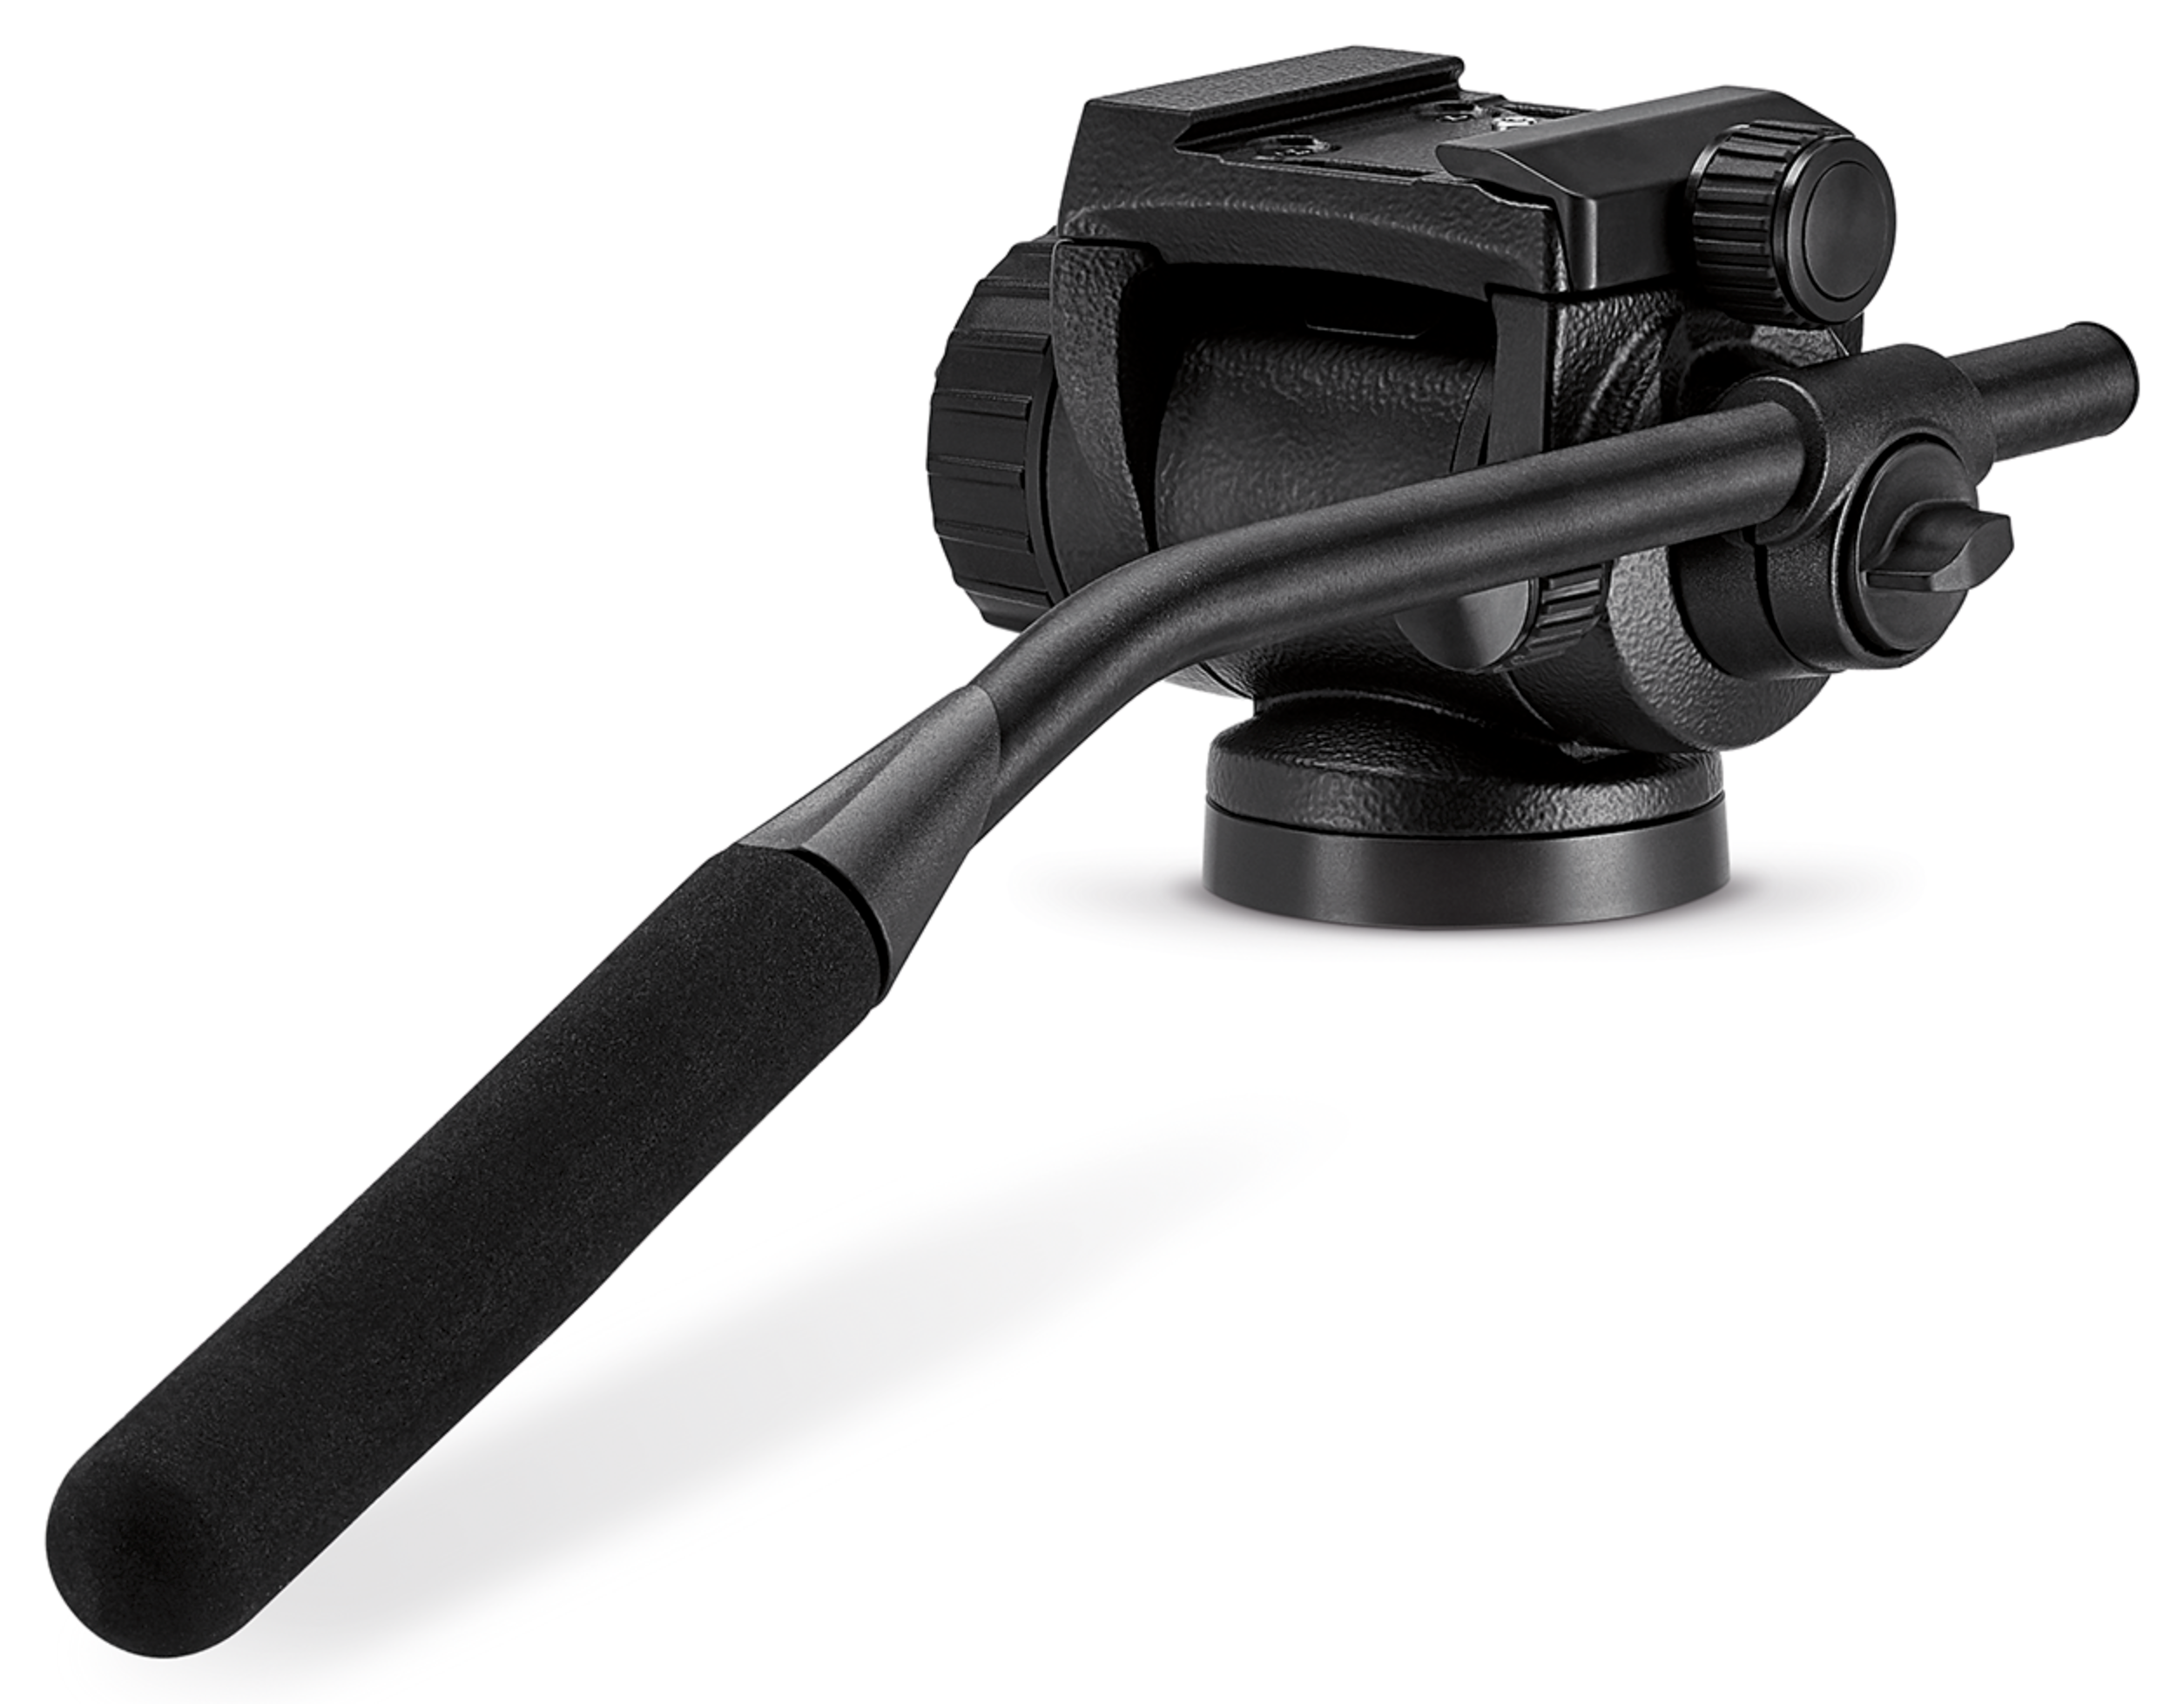
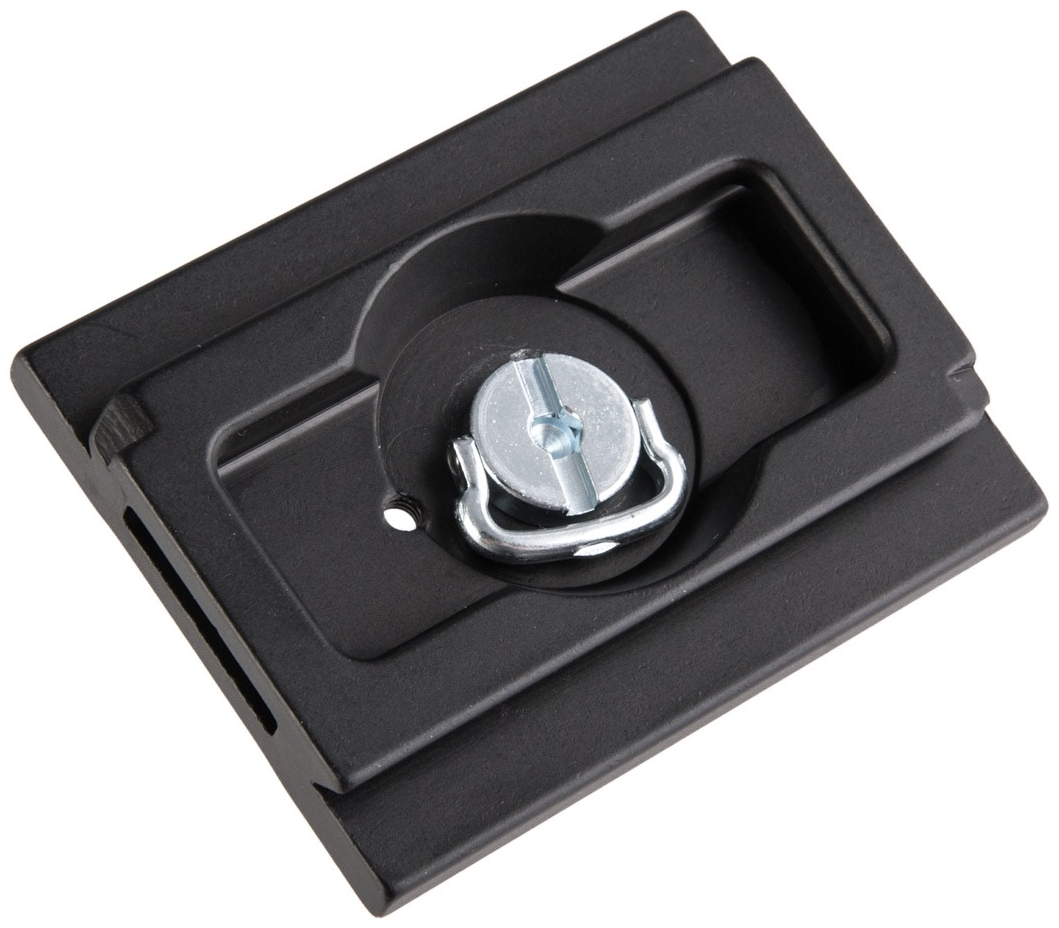
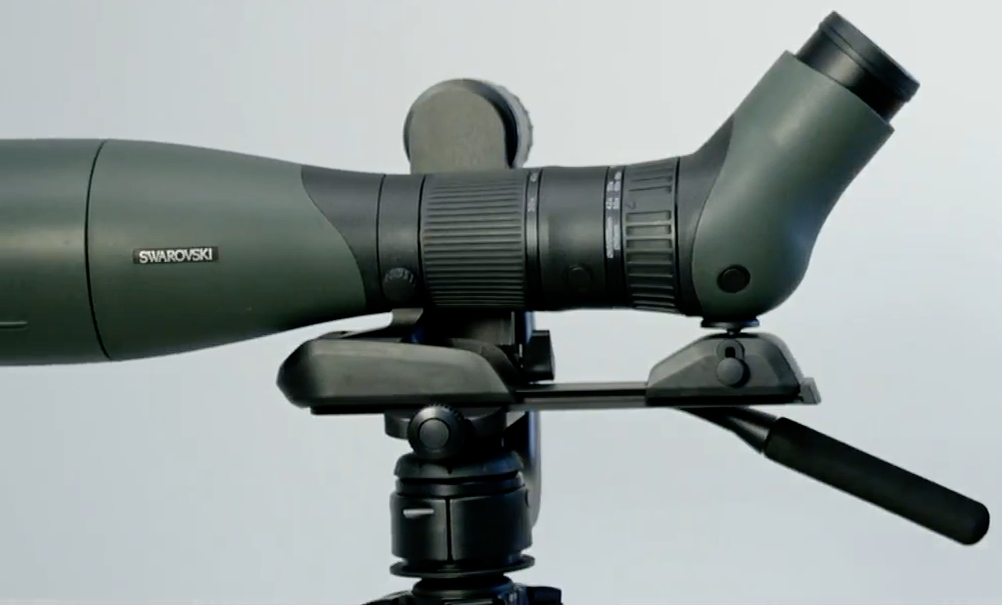
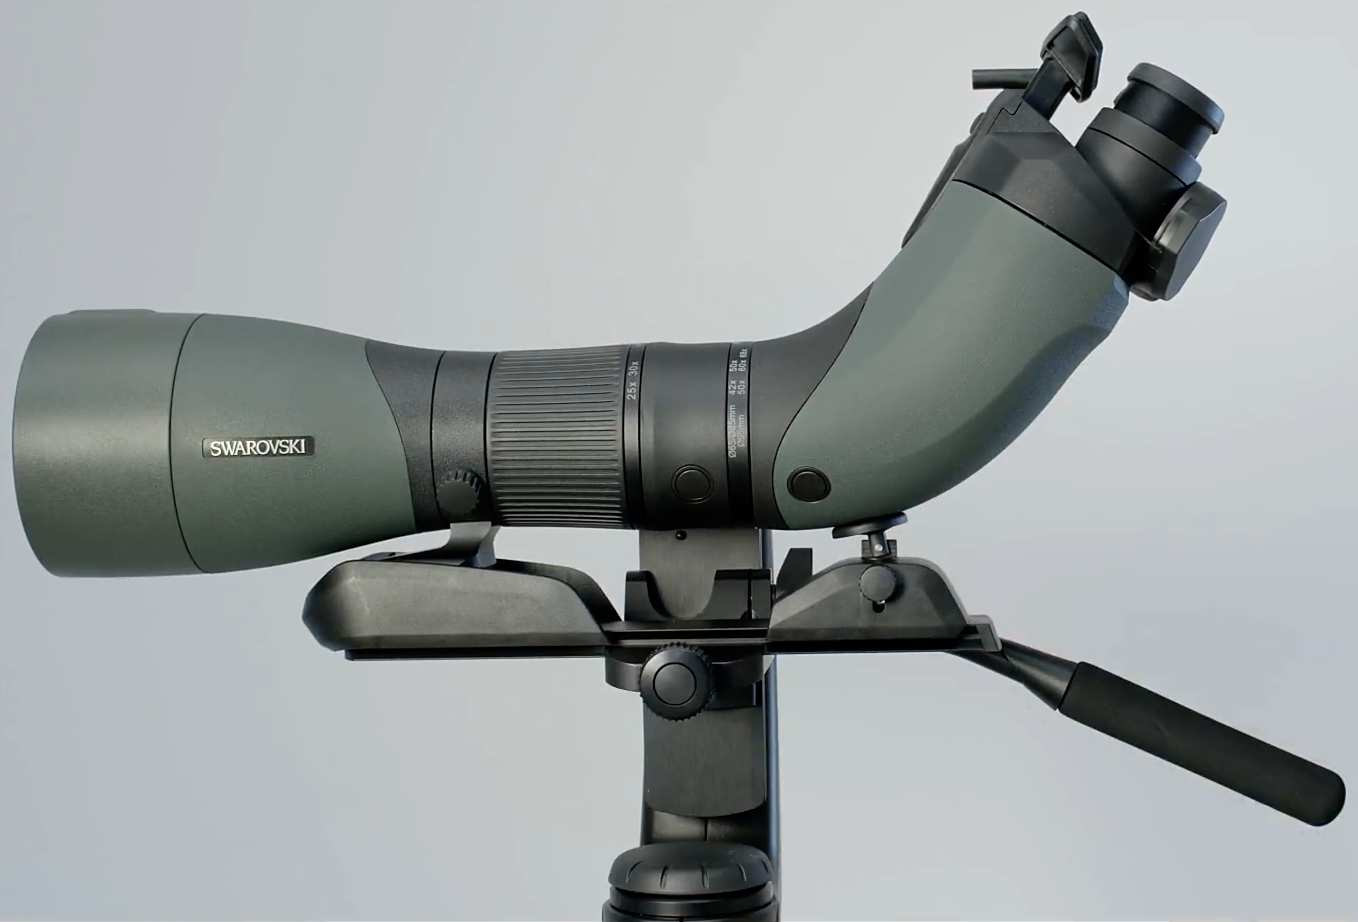
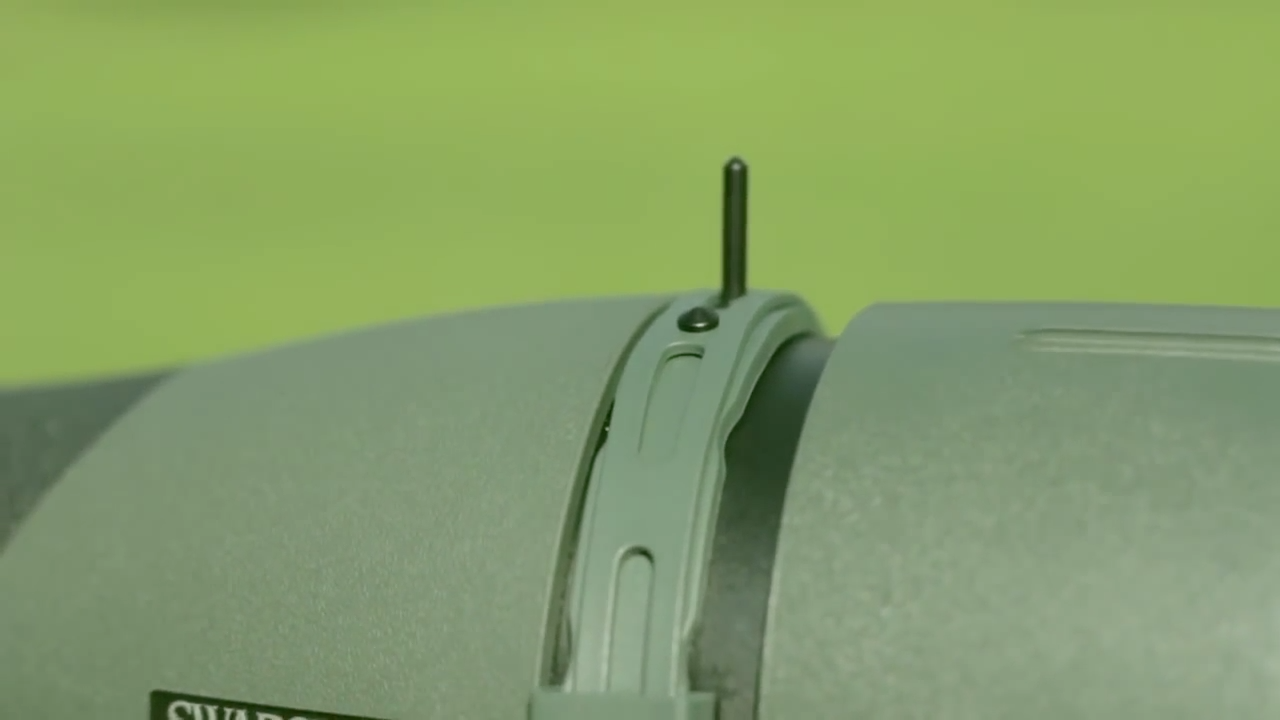
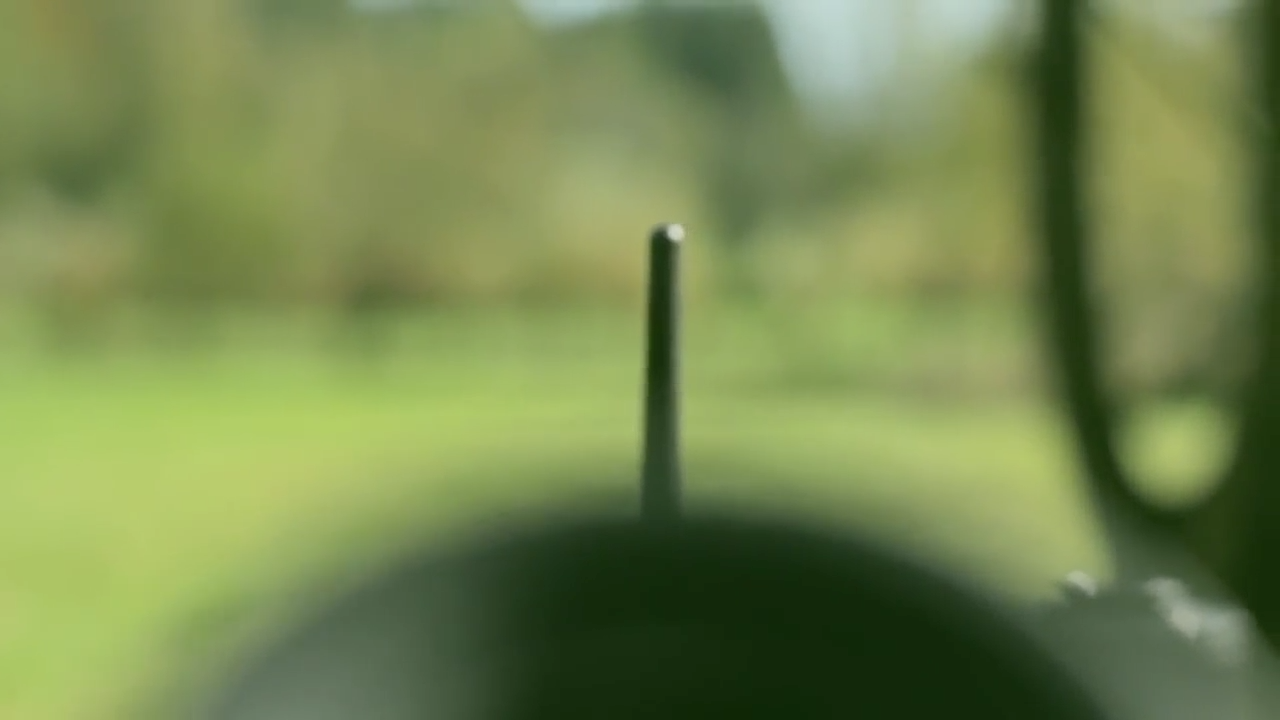
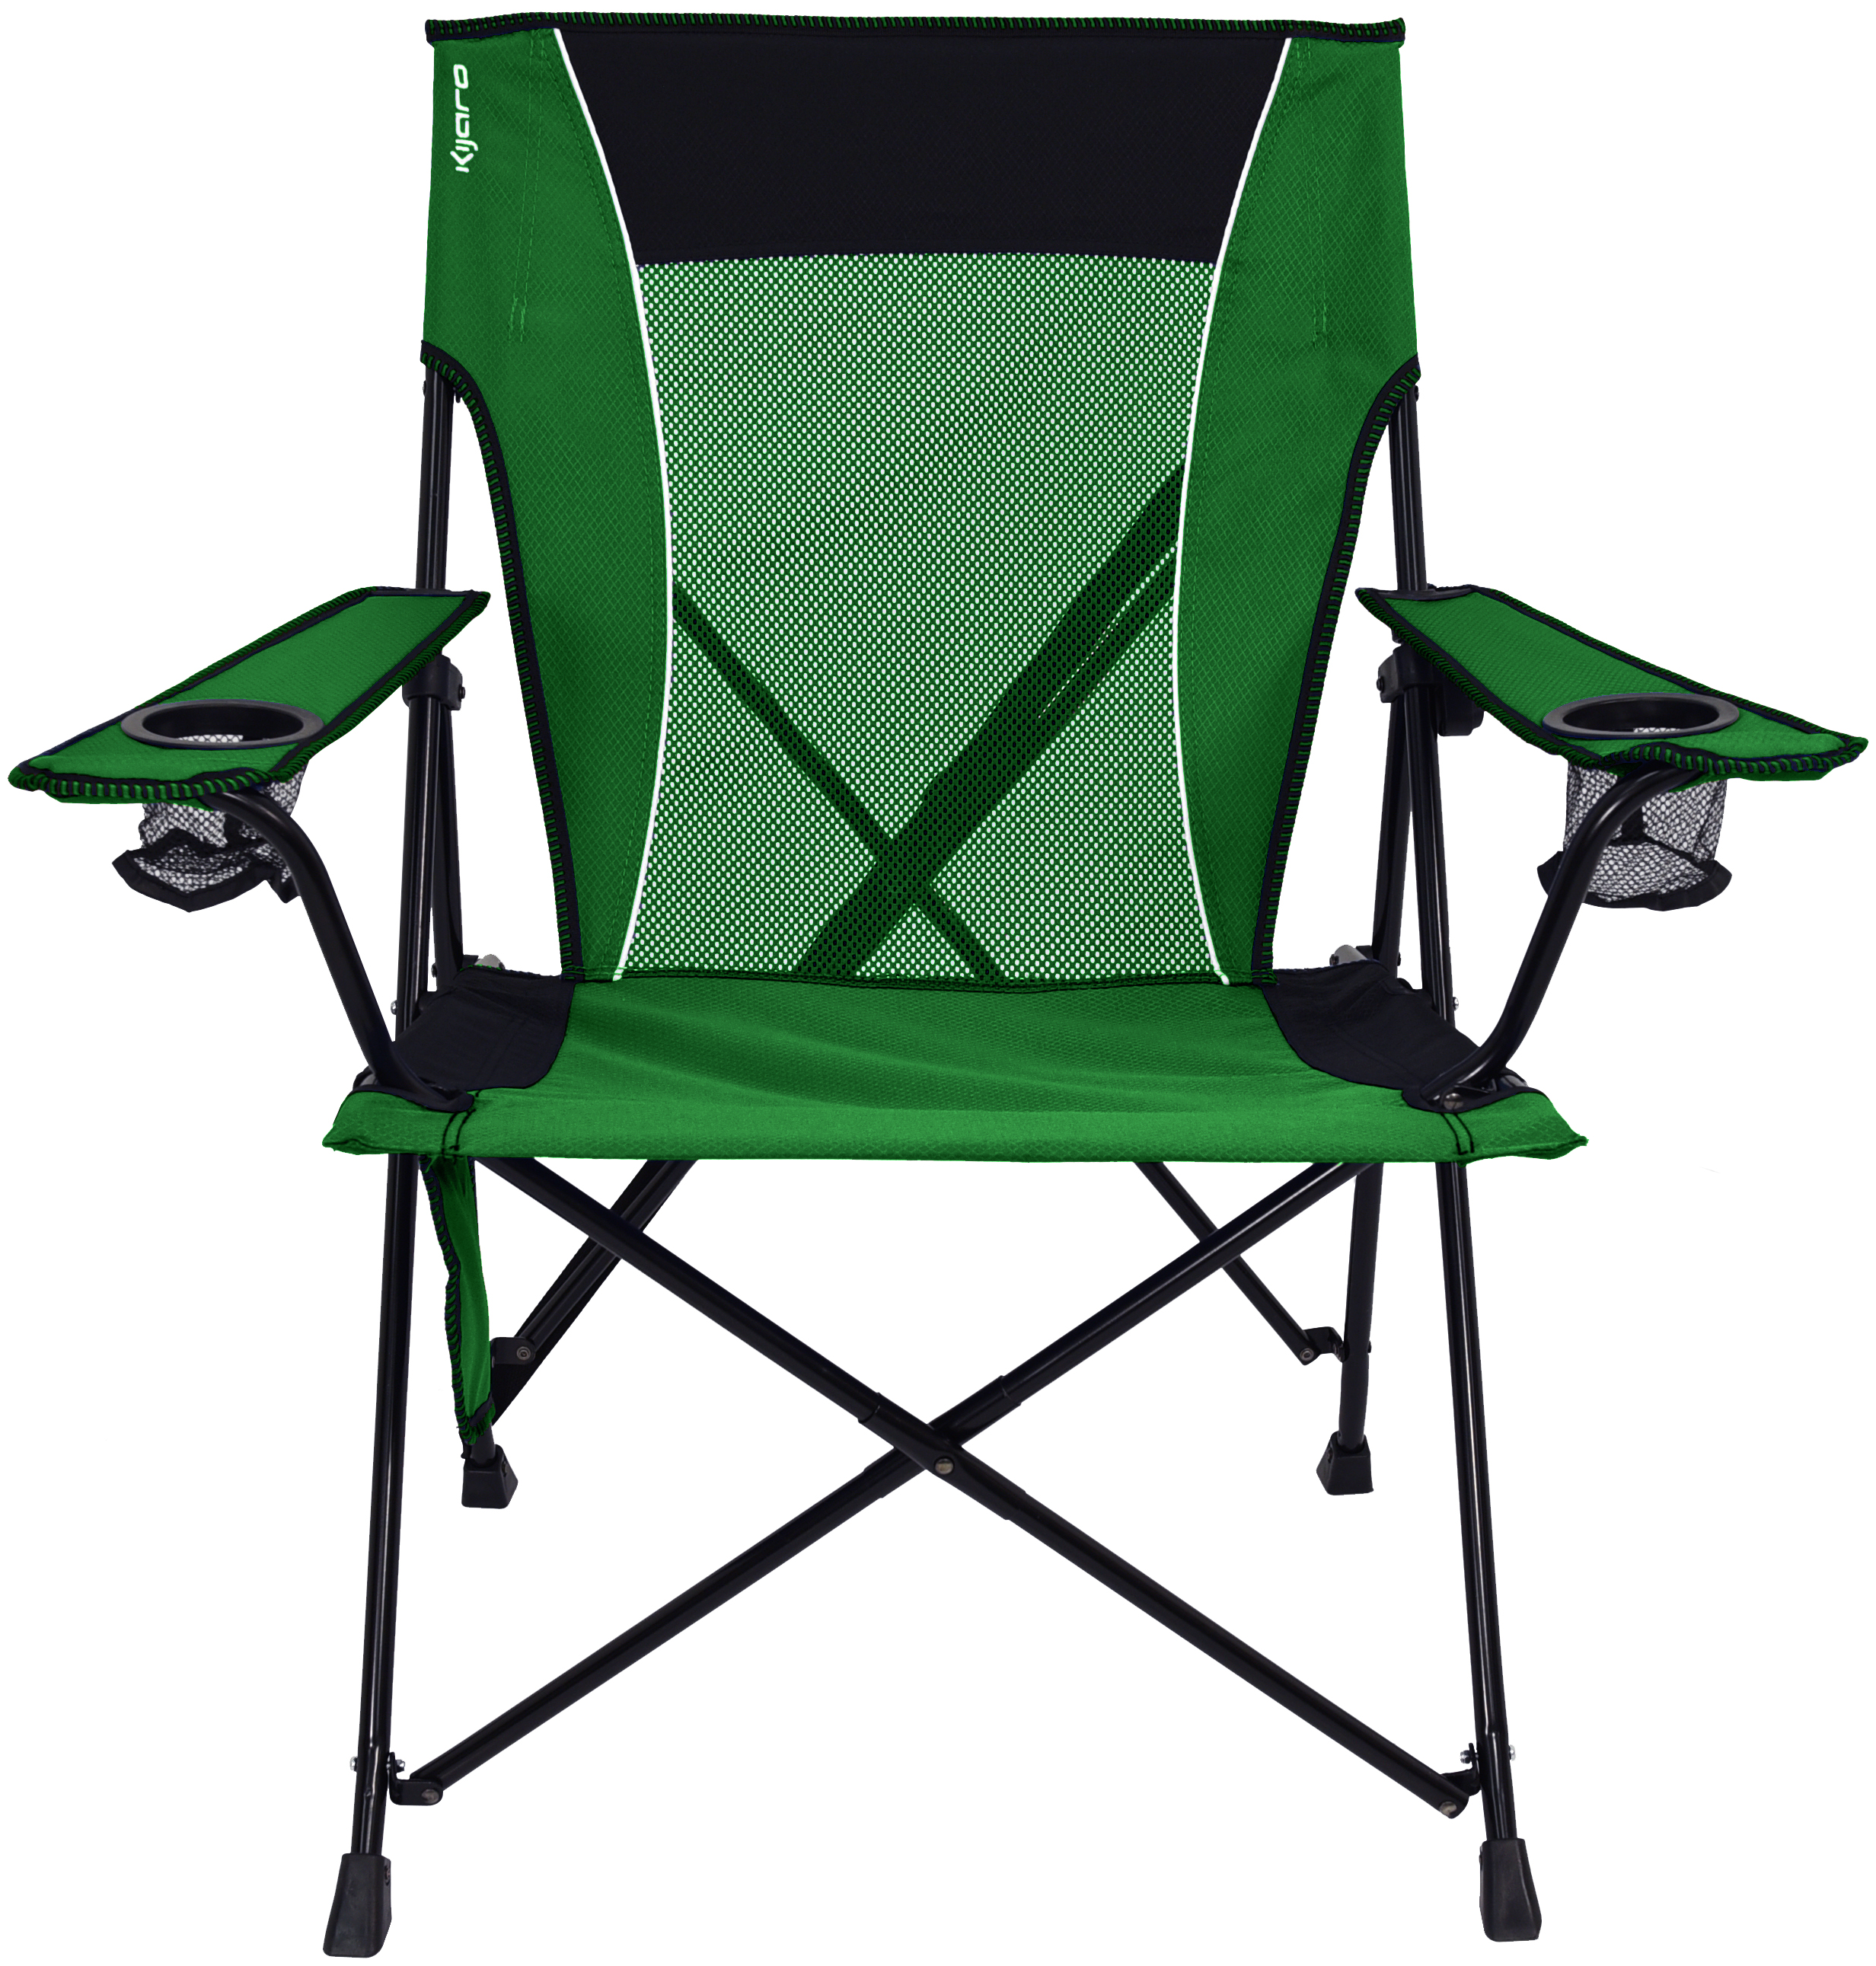
So we're not allowed to be certain our camera is always safe without the backup high impact rated Safety Tether?
Show us a similar photo with the driver bending down to retrieve a LensPouch off the asphalt using the hand he's currently using to suspend the camera out and up. Also note the conspicuous absence of a single Cotton photo illustrating glass dangling from the Safety Tether engaged solely by and directly from a D-Ring.
Is the skull tattoo on your forearm intended as a warning regarding this configuration? The way it's used on an iodine bottle?
Tell us why the Safety Tether needs to be that fucking long - and can't be adjusted down to a halfway sane length the way the flavor you're currently shipping (some of the time) can.
The Tether is the massively critical element of this system 'cause the only thing keeping our binocular engaged in the Receptor Slot from going airborne is gravity. And gravity is only working FOR us when we're standing or walking reasonably upright. And WHEN things go south we better hope that the Tether is:
- engaged
- adjusted short enough to tension up prior to impact
--
Somewhat expensive problem with respect to Swarovski Glasses...
It helps a lot to own a Swarovski BSP Harness to have the aforementioned Strap engaged on the Starboard Post. And we can leave the Port Strap engaged on the BSP, stow the mostly complete Harness in a Microfiber Pouch, throw that in the North Face Surge's NFSC-2 compartment, be in good shape if we need to switch modes for some reason.
But short of that... Swarovski glasses ship with a pair of "Strap Loop Connectors" (9) in the box which can replace the "Strap Connector Covers" (7) which come installed.
http://live.staticflickr.com/65535/53192233235_c4c23d9fc3_o.png
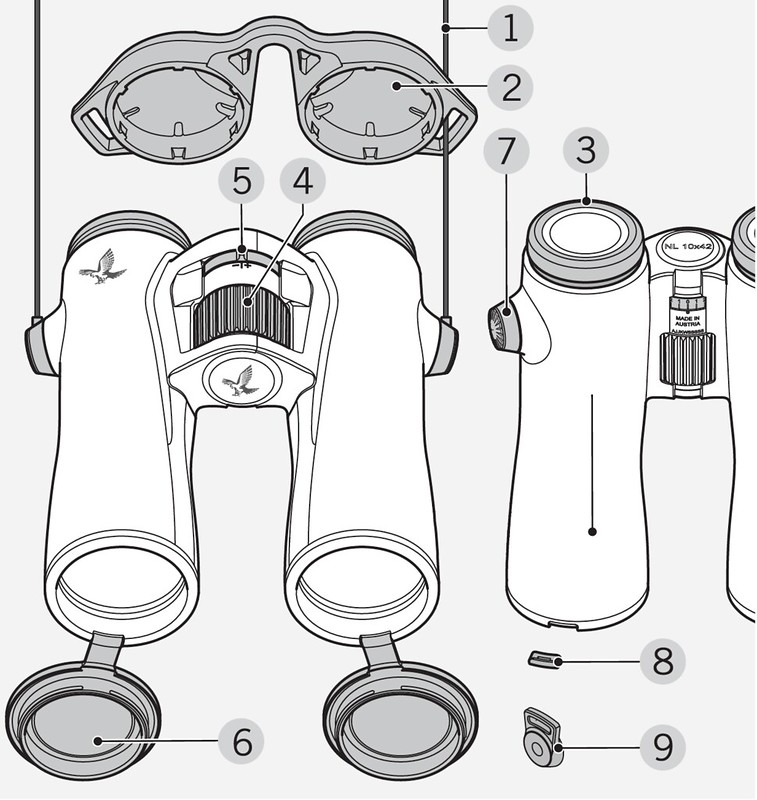
So that option can make things a lot less expensive.
--
Connecting and disconnect the Tether to and from the Binocular with the latter engaged in the Slot. Much easier, negligible safety considerations.
--
2023/09/12 - The almost current flavor:
http://live.staticflickr.com/65535/53183248965_c43445633b_o.png
Smoking gun shot. I landed my first copy 2023/07/27 and the second I'm prepping for my sister 2023/08/29. If we look real closely at the male/downhill element of the Side Release Buckle we can see that it features a Slider (for webbing length adjustment) at its downhill end. But the downhill end of the Slider has been treated as a Loop and the webbing has been stitched accordingly - so the overall extension length of that component is fixed at about 315 millimeters. Didn't catch that until now.
Quality control issue? Then how come they're using that photo as an illustration of their current state of the art? And is there anything on their website in the way of an apology and an offer to remedy free of charge?
If I hadn't caught that detail I'd have been kicking myself for having been stupid enough to chop up the component to modify it to get into my green range.
Un fucking believable. I'd mothballed the top component and done surgery on the bottom to be able to get myself an optimal overall length - which at that point seemed to be 208 millimeters. With the illustrated configuration modified to incorporate the Slider as a Slider we can do about 210-520 - close enough at min but I'd just as soon not have those miles of useless loose ends flopping around in the breeze.
My sister's copy was configured properly - such that the Slider element of its Side Release Buckle could be utilized as a Slider. And the webbing material is of a finer weave and softer and more flexible - and would be my choice.
So why the hell are we supposed to need that Side Release Buckle disconnect capability in the middle of the Tether? Somebody find me something in TFM, on their website, in one of their videos or present a scenario so obvious that they never dreamt it wouldn't be blindingly so to the dimmest of their owners.
We have a hard time noticing in the photo but the upper component webbing width is stepped down - from 5/8 to 7/16 inch - on its way to the top.
Note that the Slider at the top end of the top component is nothing like the one in the one currently shipping. The current one is small and rather elegant with small and larger ends. Small end should be top but they don't necessarily ship that way.
--
Two-part webbing Tether which connects our Binocular to our D-Ring - measurements in millimeters...
- top component:
-- secured to the D-Ring via a Sliplock Tri-Glide Plastic Slider - little end up (like it comes outta the box if we're lucky)
-- bottom end features the female element of a Side Release Buckle
-- length:
--- 280 - measured with the Slider separated
--- 230 - measured with the Slider engaged and adjusted for max
- bottom component:
-- features:
--- male element of the Side Release Buckle at its top end
--- Snap Hook - with a very substantial spring loaded gate - at its bottom
-- 370 - separated with end folding eliminated
-- 315 - engaged max adjusted overall length from bottom edge of female element of Side Release Buckle with end folding intact
- 500 - max adjusted overall length of both components assembled
- 205 - min adjusted overall length of both components assembled
---
But in order to do things RIGHT...
Top component of the Tether disengaged and back in the box.
Remove the stitching which prevents the male element of the Side Release Buckle from being separated from the bottom component.
Separate the male element of the Side Release Buckle and snap it back into the female element of the Tether in the box.
The bottom component of the Tether is now the Tether. (Overall length - 370.)
We'll designate the face of the Tether with the little folded over and stitched end at the Snap Hook as aft.
Secure the Tether to the Harness's starboard D-Ring utilizing the 5270 5/8" Wide Mouth Sliplock Tri-Glide Slider we just got from Buckleguy.
Adjust for optimal length. Webbing routing is:
- fore up from the Snap Hook, through the Slider, to and through the D-Ring
- aft down from the D-Ring and through the Slider
With the Breastplate adjusted for max up - as described above - we're in good shape to adjust the effective Tether Length (D-Ring engagement to Binocular engagement point) out for straight up targeting without having to worry a lot about clearance when bending over to retrieve the LensPouch off the asphalt. But we should always worry about it anyway and safety the engagement with the free hand.
With my Tether adjusted for tension free straight up it's 210 millimeters from D-Ring engagement to Snap Hook end. And then there's another 155 courtesy the Swarovski Harness component. Bend at the waist to put middle finger first knuckle on the floor and there's 120 millimeters of air between the 8x42 and impact.
And in this configuration the effective Tether length is very easily adjusted by means of the 5270 Slider - 'specially when we have the Webbing and Slider in a U profile.. So we can very easily dial way down - and still little cramp our style for straight up. Min possible adjustment is 105 millimeters.
And for the record... When we're considering EFFECTIVE Tether length we should understand that we need to account for the entire chain between the our chest at relevant D-Ring position and the 8x42' Starboard Strap Connection Post. And that includes the issue of the Breastplate sagging when being pulled straight down away from our chest when we're bent over at ninety. For Yours Truly that's about 80 millimeters. The Breastplate thickness and D-Ring contribute about 37 millimeters and the Binocular's Side Release Buckle Extension (semipermanent attachment element of the Swarovski BSP Harness) adds another 115. And the Binocular itself is cocked down to eat up 180 millimeters worth of its safety margin. 622 millimeters between the relevant point on our body and the asphalt.
I won't ever need or want much more than 210 so I've triple overlapped and stitched 90 millimeters of the free end to bring the overall length down to 310 millimeters and the single thickness stretch (available for Slider adjustment) down to 280.
And as it's really easy to adjust Tether length with this configuration... After an astro mission is wound up it's a good idea to dial down substantially. And the worst that that could cost us would be some rather mild resistance when going up for a high angle perched or soaring bird.
---
The Snap Hook can't engage the Swarovski Binocular's Side Release Buckle female element. Cheap and reasonably elegant solution to that issue - a Releasable Cable Tie cut down to 79 millimeters engaged over the aforementioned female element. The cut end is inserted from in- to outboard through the slot between plastic and webbing and the lock mechanism end is routed up inboard, out over the top, and back down to the cut end and engaged two or three clicks worth.
To engage the Snap Hook... With:
- left hand give the lower region of the Cable Tie loop a squeeze between left hand thumb and index to project more target up top
- right hand thumb and index and middle fingers engaging the Snap Hook's spine:
-- press the gate down onto the projecting area of the loop to retract the gate
-- rotate counter to fully engage and allow the gate to snap back closed
To disengage... Index fingertip on Hook's spine, thumb and middle finger tips retracting spring.
And to engage with a Swarovski Harness we can just shove the top of the Cable Tie loop fore or aft clear of the (female) Side Release Buckle element's opening.
---
When we won't be needing the Binocular for immediate use we can take the Tether length / drop issue totally out of the equations by engaging the D-Ring with the Snap Hook end of the Tether. And that doesn't even cramp our style much if a worthwhile target suddenly appears at a near straight up angle. We still have about 170 millimeters of effective tether length between the Harness's D-Ring connection point and the Binocular's Strap Connection Post. (115 millimeter Swarovski Binocular Strap (component of the Swarovski BSP Bino Suspender Pro harness.)) And after eating all that up the front of the Harness fairly easily lifts as much as we'll need it to. And we can shift it up with our left hand and zilch effort while on target with right.
---
Note that in the manufacturer's photo...
...there are Snap Hooks at BOTH ends of the Tether. That can't happen with the Tether components currently being shipped.
-----
Receptor

---
Engaging
Engaging the Binocular in the Receptor Slot tends to be a total no-brainer:
- IF we have lighting adequate for being able to see what we're doing
- AND we can afford to take our eyes off our target for several seconds
My Binocular sees most of its non practice use in inadequate lighting and I like to practice for worst case scenarios. So let's just assume and discuss flying blind scenarios and procedures.
We're gonna be using the NL Pure 8x42 and needing a standard right hand grip to use for engaging and viewing.
Right Hand:
- Binocular aimed down
- Fingers 4-5:
-- curled over top of starboard barrel and under / fore of Bridge
-- supporting virtually all of Binocular's weight
- Middle Finger on top of Focusing Wheel
- Index Finger on top of aft end of Hinge
- Thumb:
-- routed fore of / below Tether (Tether preferably routed over webbing (skin) between thumb and index finger)
-- below and clamping - distal bottom edge in contact with top (near) edge of Hub mount
We need to get the Hub FULLY engaged in the Slot. But it's not very difficult to catch with the port edge and miss with the starboard. And that engagement works surprisingly well. The Binocular will go full down and can be rotated to 04:30 (versus 03 o'clock) - but will be cocked aft about twenty degrees. And we can stay pretty nicely engaged - until we bend forward at the waist about twenty degrees to get on the back end of the Scope for a high target. (Ask me how I know about this one.)
--
2023/08/27 - Over the course of the month since acquisition I developed and documented scores of bulletproof techniques for quickly and safely getting the Binocular fully engaged in the Receptor Slot in worst case scenarios (cold and dark - insulated gloves preferably on) - most of which pretty much sucked. But finally...
Binocular engaged in right hand using described standard grip
Breastplate target area - just above Receptor Slot mouth
Left hand:
- thumb:
-- aft of Breastplate target area
-- pressing fore to pitch Breastplate out fore
- fingers:
-- fore of the Breastplate:
--- index high
--- middle and ring over target area
-- little - fore of the Breastplate low port and out of the way
Plant Hub on middle and ring finger area over target area.
Pitch Binocular fore ten degrees.
Withdraw left hand.
Engage fore (bottom) edge of Hub.
Pull down and a bit fore and bottom out in Slot.
Rotate Binocular 90 counter / to 03 o'clock.
From Glass up on target (both hands) to completion - three seconds or under. And we can keep eyes on target continuously.
Discussion...
We ultimately want the Hub flat against the Breastplate face inside the Slot but it's a bit difficult to initiate a flat contact blind. With the Binocular (and Hub) pitched fore a bit we don't need:
- the precision required for flattening the Hub on the Breastplate surface
- as much precision for entering the mouth of the Slot
And when we're engaged in the Slot the Hub WILL BE flattened.
Pulling fore while bottoming out verifies the check integrity of connection.
The forced counter rotation "locks" the Binocular into the bottom of the Slot such that we don't need to worry about any hang-up issues.
For disengaging... Standard grip, rotate (pan) clock to vertical, torque/pitch/tilt ocular (top) end away/fore, lift clear of Receptor Slot. (Tilting ocular end aft does a pretty good job of locking the Glasses in the Receptor Slot.)
-----
Back End Glass Protection
After using the NL Pure 8x42 in conjunction with the Cotton Harness for many moons with the Eyepieces Cover mothballed it eventually dawned on me that:
- these glasses were trimming a bit nose down
- the back end glass was getting crudded up unnecessarily by debris originating mostly from my face
- it was stupid to leave the back end glass exposed during long periods during which the glasses would not come into play
So now there's a short cord Tether securing the Binocular's Eyepiece Cover - via its Starboard Eyelet - to the Harness's Port D-Ring. Cover stays on the back end of the Glasses 95 percent of the time, gets pulled and stowed behind the port side of the Breastplate - fore face fore - when closer looks at birds or stars are needed.
Harness gets stowed with the Cover still tethered and Snap Hook (Starboard) engaging the Port Eyelet. (Cover is suspended with its fore/inside face fore.
-----
Driving
When driving with the Harness on, Binocular engaged, seatbelt off it feels a lot like driving with the seatbelt on. Good news... The seatbelt can be engaged just fine with no issues presented by the Binocular.
-----
Stowage
Stuffs very nicely in a Granite Gear 12 Liter Toughsack - 7.5 x 16.5 inch. Then that can go very neatly in a North Face Surge's NFSC-2 compartment.
And for air travel I see no problem whatsoever with wearing the Harness - along with a binocular - onto the plane. I've never had the slightest problem boarding with the glass - always before the (bulky and heavy) Canon 10x42 - and a conventional elastic harness.
-----
I wonder just how many individuals are gearing up with this Harness for binocular-only. I suspect not many 'cause it probably seems like overkill. Not in the least - in my humble opinion. This Harness has its issues but they can all be dealt with and I feel zero enthusiasm for resuming operation with a conventional harness.
And if we ever start questioning the value of this harness relative to the conventional - even with the safety issues inherent in the former... Stow the Cotton and regear with the conventional - even modified with the polyester straps - for a few hours around the house and forays into the yard for field testing and practice.
At this point - 2023/10/21 - I've been living in the Cotton Harness not far south of 24/7. That's mostly with the 8x42 stowed elsewhere but still scores of hours with them engaged. Occasionally I'll need to slap a hand on my chest to determine my current status. With the conventional harness that's never an issue and there's never a point at which we won't feel better having it stowed back in the Pouch and Backpack.
----------
UTAs Universal Tripod Adapter
Swarovski has a UTAs Universal Tripod Adapter (49185)...
...which enables one to get the probably most / possibly all Swarovski glasses - including my 8x42 - properly clamped into SOME Arca-Swiss tripod heads.
http://www.youtube.com/watch?v=0xOjx3LpuhU
Landed one 2023/08/17. Clamps Arca-Swiss but is tapped for 3/8-16 and, of course, with the Adapter we can do 1/4-20.SWAROVSKI OPTIK Hunting - 2015/03/06
Lightweight and flexible
The UTA universal tripod adapter can be easily attached to tripods for comfortable and steady viewing. Thanks to the flexible concept of the UTA universal tripod adapter it fits for the EL Range, EL family and SLC 42 binoculars.
Universal? Yeah, right. No way in hell can it be used on the older Swarovski label Gitzo Gimbal Fluid Head (PTH) with its 68 millimeter width Vertical Slide. With the wider original Gitzo label flavor to which Swarovski eventually bailed... Not bloody likely. Notice the PTH makes an appearance neither in TFM nor the video. We see the Tripod Adapter ONLY on "their" Compact Tripod Head (Gitzo 2 Way Fluid Head) - which is widely reviewed as junk. Also flies on their long extinct DH101 - which was nothing to write home about either. And neither of these platforms allows us to adjust altitude.
Enter the Feisol UA-180.
Problem. The relevant width - between the Lens Support Adjustment Clamps - is 138 millimeters. The Adapter's relevant width (totally independent of whatever glasses we're mounting) - outside face of Strap Starboard to outside face of Strap Port) is a bit over 141. And if the Post had been just a wee bit higher...
Relevant glasses I have on hand for test flying:
- Swarovski:
-- NL Pure 8x42
-- EL 8x32
- Leitz Trinovid 7x42 BA
All of them CAN be clamped in sans Plate but none of them really SHOULD be - 'cause we'll need to be clamped with the Strap fully fore of fore faces of the Port and Starboard Lens Support Clamps and will be left substantially fore heavy. (Yeah, wouldn't kill us, but I don't like operating that way.)
So let's make a 45066 Plate a semipermanent component of our configuration to get everything problematic up - 12 millimeters and well clear of the Lens Support Clamps with plenty of air to spare. (Works out best to crank up the 3/8-16 with the Plate pushed aft.)
Strapping...
- Both Swarovskis need to be strapped with the front ends of their Barrels even - or near - with the front edge of the Adapter platform. We need to strap across their Barrels with the aft edge of the Strap flush with the fore edge of the Binocular Hinge. But the 8x32 is a bit problematic 'cause the Harness Posts can catch on the aft edge of the Adapter Frame. Lift them over and slide the Binocular fore for a flush adjustment. If the Strap is distorted several millimeters fore the world won't end.
- The Leitz needs to be strapped over its Hinge - between the Offset and Focus Dials.
This puts the:
- 8x42 - way tail heavy
- 8x32 - a bit tail heavy
- 7x42 - a good bit nose heavy
Balancing. 45066 Plate. Millimeters projecting fore (+) or receding (-) aft of fore edge of UA-180 Clamping Channel...
- 8x42 - +10
- 8x32 - +08
- 7x42 - -25
If we suddenly need to go into hand-held mode... I'm probably not ever gonna be using this setup for sharing. And if I'm using it for myself only I'm probably gonna be high on the Tilt Arms with the tilt moderately clamped and shooting out horizontally or at a modest elevation.
Something airborne and interesting suddenly appears... Loosen the Lens Support Knobs, pull the whole assembly, get on target. That can be done in under five seconds.
----------
Lasers
Any time you're birding or doing astro in a group of more than one there should be at least one laser pointer on hand. And it doesn't hurt to have a few loaners on hand.
The typical eBay job is 5 milliwatts, runs off of a pair of AAAs, weighs and costs zilch, may not have much in the way of life expectancy. But I've found a more powerful green 532 nm laser with which I'm so far pretty happy.
http://www.bestlaserpointers.com/200mw-532nm-green-laser-pointer-zoomable-focus-interchangeable-lens-grid-black-shell.html
200mW 532nm Green Laser Pointer Zoomable-Focus Interchangeable-Lens Grid-Black-Shell - Best Laser Pointers
http://live.staticflickr.com/65535/49165828461_303d2d1174_o.png
Eighteen bucks with shipping, middleman in New York, ships from Shenzhen just North of Hong Kong in about a week. Heavy, distinctly more powerful beam, push-button switch on the back end, waterproof, runs on an 18650 battery.
Rechargeable lithium-ion, on one charge lasts FOREVER. Ran one from about half past 2019/12 through early 2020/07. Long Texas bird trip, tons of playing around, accidentally left on in pocket for gawd knows how long. Final action on first charge - after fair stretch of non use laser came on dim and quickly and abruptly died.
I've heard a criticism of laser use by a competent, ethical guide in Costa Rica. But the impact I've observed in group birding and experimentation has been zilch up to very minimal. And it's real easy to divert or kill a beam should a negative response be noted.
Note:
A lot of these higher power lasers use a hold-on/release-off button like all the five milliwatt cheapos have and are armed and safetied by using a tiny door-lock type key to turn a switch in the back end. I initially was a bit cool on this design because keys can be lost and I didn't like the idea of having one of these jobs being turned into a permanent paperweight as a consequence.
However... Three of these lasers of two different flavors from two different sources use identical/interchangeable keys. I'm guessing they're all identical and they give you two of them with each unit. And it's a lot faster and easier to go on/off with this design. So you have that advantage with the downside that you have to actively disable it before stowing it in a pocket or pouch in which the button might be pressed and held down.
P.S. The guys at Stevens Battery Warehouse in Annapolis told me you can install these cylindrical gadget batteries in backwards and hit the on switch without harm (after one of them inadvertently did). Something one might consider to safety things for air travel.
---
2022/12/13 - A couple of incidents recently of pulling 200 milliWatt lasers out of stowage for use and finding them already blasting green. From now on when they get stowed at the end of a mission they'll be getting stowed with the battery reversed.
---
2022/12/20
I have some Chinese HZM888MA chargers which take a single relevant battery seem not to work now. Everything I put in results in a flashing red status light. Also have an UltraFire WF-139 Rapid Charger which probably does work but one needs two dead batteries to get things in gear.
----------
Air Travel
On a 2023/07/01-19 trip down to Brazil (very recent at the time of this amendment) for a couple Naturalist Journeys tours - Parque Nacional de Itatiaia and the Pantanal - BWI to São Paulo for Step one, I had a scary twenty minutes or so trying to claim the Glass-dedicated North Face Surge. I'd had a similar stressful experience several years prior with gear in the big conventional Manfrotto MBAG100PN Tripod Bag which doesn't work well on many conveyor systems and will often end up at Oversized / Special Handling. But this one was just pretty heavy for its very modest size.
A uniform came to my aid, took me thirty yards over to the relevant area, alleviated my suffering. I was still confused for a few moments more. Then... OH! They x-rayed it, saw that it was very expensive, looked out for my best interests. I'd had it packed and padded extremely bulletproof but thanks for the extra care - as stressful as it was for a bit. Next time Special Handling will be my Plan A.
Flights were on two Brazilian airlines - Copa and Azul. First got us in and out of country by way of Panama City, second got us around inside. They're a lot stingier on their luggage allowances than what I've gotten used to on all other relevant occasions (one versus two checked plus similar carry-on) but I was able to pull it off fairly easily with tons of allowance to spare.
- North Face Surges:
-- Checked dedicated to heavier glass - ATX 95 and Canon 10x42
-- Carry-on dedicated to GT3543LS Tripod, UA-180 Head
- Laptop case with MacBook Pro, iPhone, Garmin, chargers, adapters, cables, passport, cards...
Major Scope stuff goes first into the NFS-2 and clothing, smallish whatevers get crammed in strategically to serve as padding.
In surface configuration the duffle bag goes from padding back into duffle bag mode and things get a lot less crowded in the Backpacks.
BWI-PTY-GRU-CGR-BSB-CGB-GRU-PTY-BWI
Baltimore - Panama City - São Paulo - Campo Grande - Brasilia - Cuiabá - São Paulo - Panama City - Baltimore
Needed to get into flight configuration for:
- BWI-PTY-GRU
- GRU-CGR
- CGR-BSB-CGB
- CGB-GRU-PTY-BWI
GT3543LS Tripod breakdown is the major bitch. And to get started... Installed at the tops of the three Legs Extensions there are diameter relevant components Gitzo insanely identifies as "Hose Clamps" - D104223 - D104222 - D104286. We're gonna call them Alignment Shims. And we'll start with Leg 12 and use it as the model for 08 and 04.
I happen to wear Wigwam At Work Crew Socks - Large. A pair is damn near custom built as a protective case for the Legs Extensions bundle.
- Separate UA-180.
- Cap Mounting Stud with 3/8-16 Nylon Nut.
- Pull Color Coding Elastic (Yellow) off of end of GSF30S Foot.
- Fully disengage Twist Lock 12-1.
- Disengage Extensions 1-2-3 set (collapsed).
- Pull (off of top end of Extension 1):
-- Alignment Shim D104223
-- Twist Lock 12-1
- Reinstall:
-- Twist Lock 12-1 (onto bottom end of Level 0)
-- Alignment Shim D104223 (onto top end of Extension 1)
- Secure Alignment Shim D104223 installation with doubled Color Coding Elastic.
- Install a mission dedicated Color Coding Elastic doubled and low on Twist Lock 12-2.
- Ditto for 08 and 04.
- We're staggering the three pairs of Color Coding Elastics 12 high, 08 mid, 04 low to prevent overlap, jamming things out of parallel.
- Rubber band the bundle together to keep things compact, even, parallel, beautiful - high on the carbon, low on the 2 level Twist Locks.
- Feed Bundle into Sock 1 in normal and matching rightside up orientations.
- Fold over the couple of inches of excess sock remaining at the top.
- Work upside down Sock 2 down over the above and rubber band the remaining flop.
Bundle - rightside up - gets Releasable Cable Tied at the Tripod's 10 o'clock:
- top under the Spider and to the Fake Center Column (or, in its absence, Ballast Hook)
- bottom with the bottom ends of the Tripod's three angled in Legs
Two and just over two Cable Ties required.
This product now goes into the otherwise empty Land's End cotton duffle bag. That package gets flipped to Spider down / Feet up and stowed in the Carry-On North Face Surge's NFSC-2 compartment. We're approaching the length/height of what the compartment can handle but not pushing the envelope in the least. The zipper can be closed minus any stress.
The UA-180 gets stowed - also upside down - fore of the Tripod in the same compartment.
Clothing then gets strategically crammed in to make things highly catastrophe resistant.
When switching from Plane to Operational mode the duffle bag becomes available for use as a duffle bag.
This job can be done more elegantly with the factory Grips installed on the Twist Locks but they tend to disintegrate rather easily and we don't have any potentially expensive issues threatening in this plan.
The Socks, Elastics, Rubber Bands, Cable Ties necessary to get us airworthy can live as a small kit in a gear bag.
----------
Swarovski Digiscoping
----
So the ATX/STX system was launched in 2012 and the "aiming aid" / finder tube was eliminated from the back ends of their Ocular modules to accommodate the TLS-APO scope-to-camera adapter. All the rage. You go to Swarovski's website today - a decade later - and they never heard of it before. Click around long enough and you can still find the components available in Spotting Scope Accessories but if you don't already know what you're looking at/for...Swarovski Optik - 2022/07/21
INGENIOUS SYSTEM
Since its launch in 2012, the ATX/STX spotting scope system has been impressing hunters all over the world with its modular design. Different objective and eyepiece modules can be flexibly combined with a unique degree of precision. For detailed nature watching, four lens sizes are available: 65 mm, 85 mm, 95 mm and 115 mm.
I think it's pretty evident at this point that this technology was a fizzle fad. So while this section is on how to do it don't do it under any circumstances.
---
2022/08/22
On 2022/08/14 I was at the nearest Ace Hardware in the nuts and bolts aisle getting the fasteners I'd need to get my new Apertura Finder Scope mountable for Arca-Swiss. Caught the eye of another shopper and a conversation about wildlife oriented trips to Alaska (where I'd been with my gear once and where she goes every year) resulted. She asked me if I knew about the Mississippi Kite at a pond NE of BWI that had been attracting attention recently. I didn't but got on eBird back home and found the (artificial) pond - 39°11'50.35" N 076°35'40.44" W - blazing in red flags with the most recent reports about five minutes ago - not "A" Kite but mom, dad, and a kid.
Got my ass up there 2022/08/16 11:00 EDT and found the birds and several of my ol' birder buddies before getting the car parked. Hal and Lyn were accompanied by a Stay-On Cased ATX 65, DH101 Head, CT101 Tripod. And the show was spectacular. And the ratio of conventional birders to high tech wildlife photographer geeks with serious tripods and humongous lenses was decidedly low. Strong Chinese presence.
Made it back the next day at 09:00. More so on the demographics.
2022/08/20 08:00
Very strong Chinese. Speaking Mandarin probably to each other and mostly accented but very competent English with the several me types. Didn't seem to be typical birders but had their shit together on wildlife. And I was stunned by the serious photography technology they were packing and blazing away and getting results with. And it started dawning on me that nobody else present had set up with a spotting scope or was even packing a binocular.
They showed me results on their displays. Didn't see anything that would've looked out of place on a National Geographic cover. Any wonder why we're now hearing zilch about digiscoping equipment?
So let's just use the SPOTTING scope equipment for its intended purposes - real time scanning, targeting, viewing, sharing.
---
Mounting a camera on the back end of a Scope. For the purposes of this discussion I'm mostly narrowing things down to the equipment I've selected - Swarovski ATX/STX 25-60x85 Scope system and Canon EOS 6D(WG) DSLR.
http://www.swarovskioptik.com/digiscoping/10007.466129
System Overview
http://live.staticflickr.com/65535/50726899226_df28119ae0_o.png
http://www.swarovskioptik.com/binary/10008.614112
While one definitely wants the ATX (angled) configuration for looking at the birds one definitely DOESN'T for photographing them.
In the photos above you see the ATX at "normal" 12 o'clock configuration with a 25-60x65 on the front end and an iPhone on the back - viewing screen facing majorly skyward. Put a reasonably serious camera on the back and that puts you far above your Objective barrel and substantially lower Bore Sight.
Your LCD monitor is also left facing majorly skyward. And if you happen to be using a DSLR and not blocking the viewfinder with your head or a cover you can get sunlight beamed through your partial mirror into where you really don't want it as your picture's being taken.
List of relevant features on the top surfaces of the camera left facing up and away from you:
- Mode Dial and its Lock Release Button
- LCD Panel
- Buttons:
-- Drive Mode Selection
-- ISO Speed Setting
-- Metering Mode Selection
-- LCD Panel Illumination
- Main Dial
Being tall and having the Scope barrel up at or near eye level is usually gonna give one a viewing advantage. With this assembly in 12 o'clock configuration you're often gonna be able to see a lot of interesting stuff your Scope and camera won't. Roll to 09 o'clock and everyone's back on the same page. However...
- It's a bit of a trip back to the right to get lined up behind our Gunsight.
- Our camera's horizontal set is only good at the particular tilt attitude for which we're aimed. Tilt down and the camera goes starboard side high, tilt up and the camera goes starboard side low. With every significant change in tilt the TLS-APO's set screw needs to be loosened for the correction to be made and reclamped for the shot - assuming it hasn't yet flown away (which it probably has).
Bottom line on this... We're gonna need to use 12 configuration for a dynamic situation but good freakin' luck on target acquisition in a dynamic situation. And we're gonna prefer 09 o'clock when time isn't a big issue. And we're gonna be wishing we had an STX Eyepiece Module (49902) just about all the time. I eventually decided to stop wishing and get one.
http://www.photoinfos.com/Spektiv/Swarovski-ATX-STX-spotting-scope.htm
Swarovski ATX / STX Spektiv - Spotting Scope. Test Review
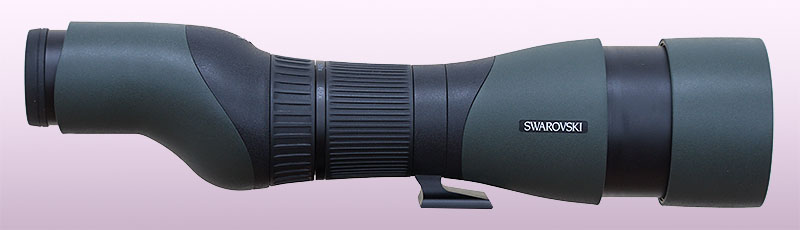
(May also try to get an inexpensive used 65mm Objective Module in order to be able to have two operational Scope systems at any given time.)
Note that the while the STX Eyepiece Module is offset from the Objective Module it's also parallel to (rather than angled away from) it. So we can roll it to 09 or 06 o'clock for small advantages in raising the Objective Module (Scope) up to our comfortable viewing and/or max advantageous shooting level and lowering the CG a wee bit.
We need a Balance Rail and really want an Arca-Swiss compatible - PTH or CTH - head. That's a lot of weight we're adding to the back end and we need to have the assembly precisely balanced for efficient acquisition. And no way in hell I'd wanna sacrifice the pendulum stability of the PTH.
TLS-APO - Apochromat Telephoto Lens System...
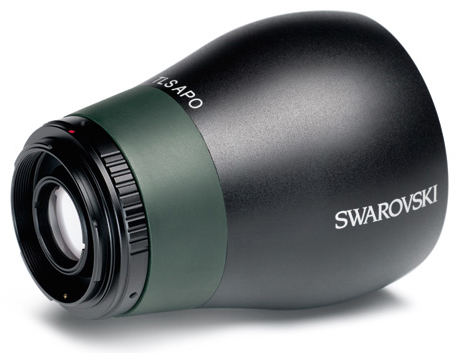
...is the interface between your camera and Scope.
http://www.photoinfos.com/Spektiv/Swarovski-ATX-STX-spotting-scope.htm
There's a lens inside the housing which is aimed at your Scope's exit pupil when it's installed. And when it isn't it makes for a reasonably good wide angle lens with tons of depth of field.
The APO requires and comes with a DRX Adapter Sleeve kit which consists of the Sleeve and a modified Eyecup which traps and locks the Sleeve into position.
DRX Adapter Sleeve (ATX/STX to TLS APO/DCB II)
If you have both the ATX and STX Ocular Modules (like I do) and want them both digiscoping ready (like I do) you can pick up an extra kit for seventy bucks at:
http://www.optics4birding.com/swarovski-drx-adapter-sleeve-atxstx-to-tls-apodcb-ii.html
Swarovski DRX Adapter Sleeve (ATX/STX to TLS APO) Optics4Birding
Weights in grams:
045.0 - Adapter Sleeve
063.5 - Eyecup - Kit
108.5 - Total
041.8 - Eyecup - Standard
066.7 - Extra grams you have to carry around.
133.4 - Extra grams you have to pack.
Leave the Scope's Eyecup fully extended. It doesn't/won't interfere with anything and helps keep your safety margins on the wide side.
Swarovski zoom, focal length, aperture, exit pupil ranges for the STX/ATX digiscoping configurations:
-- 65mm - 25x-60x - 750-1800 - 11.5-27.7 - 2.600-1.083
-- 85mm - 25x-60x - 750-1800 - 08.8-21.2 - 3.400-1.417
-- 95mm - 30x-70x - 900-2100 - 09.5-22.1 - 3.167-1.357
(I'm 85mm Objective lens diameter, zoom from 25 to 60 power, have focal lengths from 750 to 1800 millimeters, apertures from f/8.8 down to f/21.2, exit pupils from 3.400 to 1.417 millimeters.)
Mount the camera configuration on the back end of the Scope gently, wiggling if necessary. Ensure that the DRX Adapter Sleeve's lip is cleanly contacted before clamping - otherwise you're gonna find yourself trying to look through a blurry, dimly lit tunnel.
Ensure the PTH's Tilt Dial is locked hard before installing and removing the camera.
Canon EOS 6D(WG) DSLR camera...

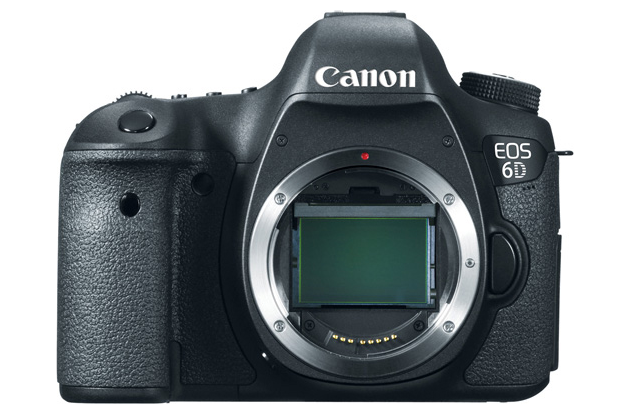

I'll be assuming the reader has one or has something else with similar features.
Lose the strap, stows with the TLS-APO (43 millimeter) mounted, back end of the camera down, peripherals (remote, batteries, charger, cord) pouched to the sides of the TLS-APO in a Swarovski Field Bag Pro X-Large (60519 for XL(SLC56) glasses) binocular case.
(It makes it into a Large (60518 for L(EL 42/50) aimed down but very snugly and at the expense of too much time and effort for short cycle stuff. If we use it the camera's best extracted by squeezing the case at the objective end of the TLS-APO.)
LensCoat Pouch:
http://live.staticflickr.com/65535/47828015021_91d385f848_o.png
LensCoat LensPouch (Large Wide, Black) - LW
Pretty good option for an ATX/STX Ocular Module. Eight inch length/height, four and a half diameter. There's a compartment inside at the bottom in which a (four and a half inch diameter) stiffened foam disc insert is secured. You'll want to remove it at least for occasions when you're cramming your extra Ocular Module into your baggage. It'll stow nicely and be better protected in the external pocket of any one of the Swarovski Field Bag Pro cases but it's probably best to just leave it at home.
Targeting...
Targeting's a significant bitch without the camera. With it your field of view is a 3:2 aspect ratio rectangle cut out of the normal full viewing circle. And from the specs:
http://www.usa.canon.com/internet/portal/us/home/products/details/cameras/eos-dslr-and-mirrorless-cameras/dslr/eos-6d
DSLR | EOS 6D | Canon USA
which I think means only forty percent of the light is going up to the viewfinder while the rest is going to the sensor plane so's the camera can autofocus an autofocus lens prior to the picture being taken (totally useless for a digiscoping application). So if you really want to appreciate your Scope as a scope leave the camera on the back end for lotsa practice time then pull it and take a look.Viewfinder
Quick-return half mirror (Transmission: reflection ratio of 40:60...
Leveling...
If the Tripod's set up vertically, and it should be, and if the Legs are all fully extended and the surface is flat and level it will be, then the port face of the Tilt Arm...
http://c1.staticflickr.com/1/859/43616064242_2d9f9715b2_o.png
...will also be. (The starboard face, due to the taper issue, won't be.)
With the camera in normal horizontal orientation, sight beyond its bottom edge to the Rail, adjust for perpendicular, and you have a good shot at coming out perfectly horizontal. For vertical, if you roll counterclockwise, adjusting for parallel is a total no-brainer.
Then... Three really cool Electronic Level displays:
- LCD:
-- Monitor (back)
-- Panel (top)
- Viewfinder (through)
In the viewfinder works for horizontal format only. Indicator pulses from the center to the high side.
Stability...
I've read that shock from mirror action tends not to be an actual detectable issue but you can lock it up - after selecting the option - by depressing the shutter button halfway down a second or two before going all the way. But I haven't the slightest doubt that touching the camera enough to depress the shutter button in the first place is going to totally dwarf any issues the mirror action might cause. So if you try this trick use a remote (Remote Switch RS-80N3). Also use a remote if you don't try this trick.
Also don't use this trick if there's any likelihood of your target moving cause you're introducing a delay and blacking out your target during the delay. Much better option... Live View shooting.
The mirror locks up and becomes a total nonissue, you're viewing your target on the LCD monitor and getting a real good idea of what your product will look like, and you're using the remote.
Note that - along with aperture control and autofocus - you don't get image stabilization with a digiscoping setup. For IS in the non digiscoping universe you chose between a stabilizing lens and stabilizing body. (You don't to both simultaneously 'cause they tend to cancel each other out.) And body stabilization is pretty much useless when using long focal length lenses so...
Remote Switch RS-80N3...
http://www.swarovskioptik.com/binary/10008.562721
http://live.staticflickr.com/65535/50757047607_7ff02ac637_o.jpg
Shutter button and shutter release lock. Used ones cost zilch on eBay. Use it for everything. Plugs into your N3 socket, has an 80 centimeter cord. Wrap three and a half counterclockwise coils around the aft end of your TLS-APO to:
- relieve the bending flex and strain on the cable at the connection point
- minimize the remote's freedom to travel in the wind
- put the shutter button conveniently close to your right hand
When wrapping put a mild twist in the cable as/if necessary to get the button side of the remote facing reasonably aft. And always lift the remote at least a half inch or so before you take your shot to slacken the cable and stop keying the camera into your presence. (You go counter to prevent the cable from hanging down in front of your Bore Sight.)
The rubber cover for the N3 and external microphone terminals on the lower port side of the camera is peeled off from its bottom edge and is pivoted clockwise around its attachment point at its top fore corner.
http://www.hoodmanusa.com/Hoodman-Live-View-Kit-for-all-DSLR-Cameras-HLVKI-p/hlvkit.htm
Hoodman Live View Kit for all DSLR Cameras - HLVKIT
http://live.staticflickr.com/65535/48089426913_005a6540e7_o.png
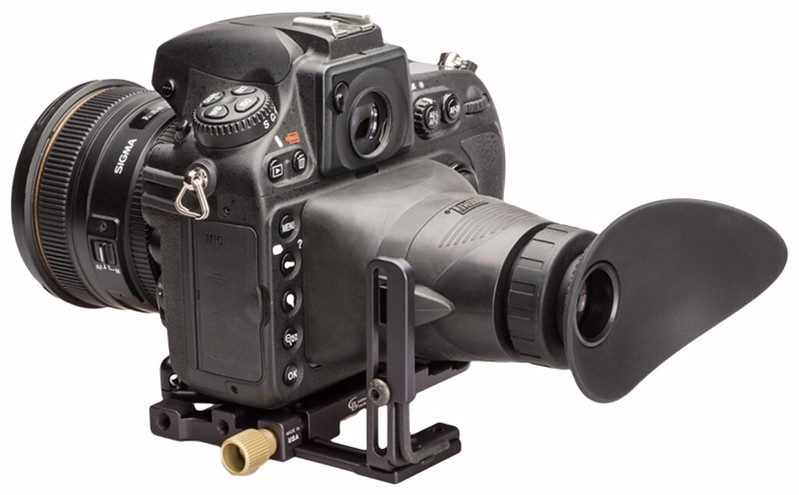
If you wanna be able to see your LCD monitor when there's sunlight around...
The concept is solid but the execution majorly sucks. Good news - you can jump through a few hoops and make it work.
The camera illustrated above is a Canon EOS 5D and the relevant geometry is identical to my 6D or close enough.
The heads of the socket head screws which lock the anti-twist bars project below the plane of the upper surface of the head of the D-ring 1/4-20 screw which secures the base plate to the base of the camera via the latter's tripod socket. Translation - You can't adjust, set, lock the starboard anti-twist bar as is illustrated, or at least very strongly implied, in the video. You have to loosen the D-ring screw. Set and lock the anti-twist bar, then lock the D-ring screw.
And the latter doesn't seat on the washer / base plate. Its starboard edge seats on the port side of the head of the starboard socket screw. Workaround - Fashion a couple cereal box cardboard washers to effect the requisite clearance after you've failed to find anything with a small enough OD at the hardware store. (And recognize that after the fix the lower surface of the D-ring screw will project beyond the base plate.)
The eyecup is loose as hell and rotates a bit freely around its mount. A thin rubber band double looped over the mount to occupy the slop range makes that situation bearable. Maybe there's a rubber O-ring which will do the job better.
And the kit doesn't come anywhere close to fitting in the provided stuff bag. (Gotta admire the consistency.)
This thing needs to be broken down for air travel - although the base plate assembly can and does live and travel bolted onto the camera body just fine. Have the above photo available when you need to reassemble everything.
Pull the TLS-APO but leave the base plate assembly and the little 60513 Swarovski Field Bag fits over it like a glove. (Pity it's been discontinued.)
Note that your viewfinder becomes unavailable with the hood mounted but that assembly pops off and on quickly and easily.
---
2019/06/12 17:12:58 UTC
http://live.staticflickr.com/65535/48090818018_fd1c398640_o.png
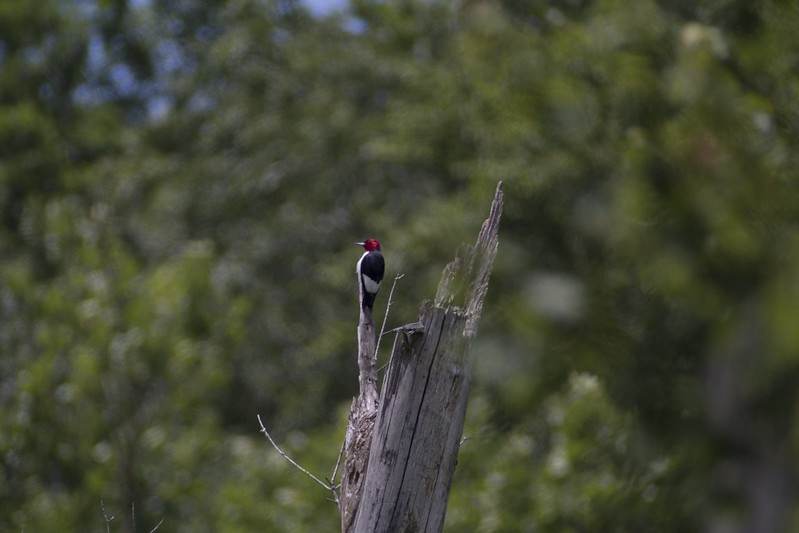
----
- Sharing and Multitasking
I'm a bit shy of 6'1". The PCT Tripod with Legs fully extended, Center Column fully retracted, PTH Head with its Lens Support bottomed out, Balance Rail puts the center of the Objective element at about 1.685 meters when you're shooting level. That's a pretty comfortable digiscoping height for Yours Truly and the Scope's high and stable. Partially retract the Legs and compensate with the Center Column so you can quickly drop down for the shorter crowd and your stability goes to hell.
In other words... If I'm shooting I won't/can't be sharing. And with the camera mounted and the assembly balanced for digiscoping those brilliant, wide field, million dollar views you get using the Scope as a scope are down the toilet to no small extent.
(Note: If I go up the PTH's Tilt Arm to the 58.5 millimeter mark for neutral stability I use 300 (versus full 376.5) millimeters for the PCT's Level 3 Extensions.)
Hadn't really thought through these issues before and they now seem conspicuously absent from promotions and discussions of digiscoping and digiscoping equipment.
----
- Reconfiguration Sequences
The procedures for changing back and forth between optimal Viewing/Sharing and Digiscoping modes - optimized for speed, efficiency, ease, safety. Note that:
- Yours Truly is tall - YMMV
- we're assuming:
-- a flat level surface
-- an Ocular Module mounted on a Balance Rail
---
http://live.staticflickr.com/65535/47691657471_7d2da506b0_o.png

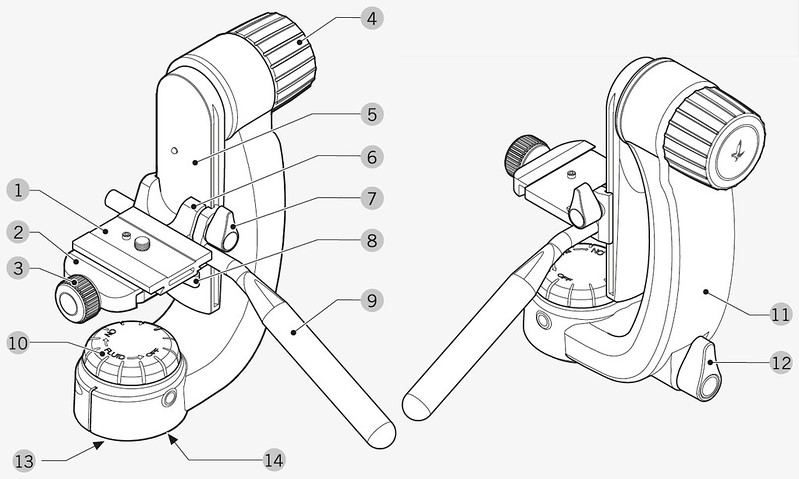
http://live.staticflickr.com/65535/32815757747_e03fc5465a_o.png
----
- Strategy
http://www.photoinfos.com/Spektiv/Swarovski-ATX-STX-spotting-scope.htm


Minimize the threats to the Scope itself - the Objective and ATX/STX Modules.
- The most critical point in both of these operations is the installation of the Ocular Module. The procedure is described above. Carefully align, slowly engage, flatten the contact surfaces against each other before rolling to lock.
- Minimize the disassembled time. After one Ocular Module is disconnected from the Objective Module it's capped and stowed and immediately and carefully replaced by the other.
- When capping the fore end of an Ocular Module:
-- don't look for the alignment dot. Look for the middle Torx head screw just in front of "SWAROVSKI" and just under the alignment dot.
-- start with the Cap slightly "below" the target circle, align the Cap's arrow with the alignment dot, slide in, seat, bayonet.
- LensPouch works well for the loose Ocular Module for swapping procedures and transport.
- We're flipping the entire Scope/Head/Tripod assembly upside down and resting the (former) top of the PTH Tripod Head on the top of our left foot. We want this done with the balanced STX assembly 'cause it has nothing projecting towards the ground in upside-down mode.
- When flipping the assembly... Stand to the port facing starboard, squeeze the Legs in to parallel, rotate the assembly 180 degrees clockwise on your left/target side. Reverse for going back upside up. This keeps you properly oriented and saves time and effort. Also when flipping back up it's not a bad idea to bend over and grab the PTH Base midsection (between the Pan Clamping Lever and Tilt Dial) with your right hand and (former) upper area of the Tripod Legs with your left.
Resetting the Legs Extensions is the most time and energy expensive phase of the reconfiguration. And partial retraction for ATX is a good bit more of a pain than full extension for STX. For the former extend and clamp the Legs as described above for regular setup.
We need to get the Balance Rail Aft Support shifted all the way aft to keep it out of the way when we're swapping Ocular Modules.
- There's about one free Clamping Wheels revolution between the last vestige of resistance and off-to-the-stops. Make sure you're generously within that range.
- When:
-- shifting the Aft Support fore/aft do it with hands on both of its Clamping Wheels and maintain light downward pressure to keep the Pad fully depressed and clear.
-- we're in:
--- Viewing/ATX Mode we're balanced with the Rail set far aft and both of the Aft Support Clamping Wheels in clear air so we can deal with that task immediately.
--- Digiscoping/STX Mode (with the camera on the back end) we're way tail-heavy and thus balanced with the Rail set way the hell fore. And the starboard Aft Support Clamping Wheel winds up being blocked by the Tilt Arm. So we need to slide the Balance Rail way (back) fore to ATX mode prematurely - right after we've pulled the camera.
We need to have the ATX configuration rolled up from 10:30 to 12:00 before effecting the ATX-STX swap to facilitate the tasks and minimize confusion, delay, damage potential.
Learn your balance and neutrality points. Save yourself time and effort in the field. Determine by going to minimum resistance on the Tilt Dial, tilting high up and down, watching where the Lens Support platform stops in relation to the Panning Resistance Dial. (It will never center - you're going for mirrored offsets.)
My configurations - all with 85mm Objective Module, Sunshade extended; both Oculars with Eyecups extended; STX fitted with DRX Adapter Sleeve:
- ATX Ocular - aft extremes of (fore) Balance Rail Fairing even with aft face of Lens Support platform.
- STX Ocular - aft extremes of (fore) Balance Rail Fairing 7 mm fore of aft face of Lens Support platform.
- STX Ocular Digiscoping Assembly - fore extreme of Balance Rail Aft Support even with aft face of Lens Support platform.
Asterisk for that last one... My particular setup with a heavy DSLR on the back end. My spot of preference for the aft edge of the Balance Rail Aft Support is a bit shy of halfway between Swarovski Graduations 4 and 5. And I can fine tune that position such that when the fore edge of the Aft Support is even with the aft face of the Lens Support platform I'm perfectly balanced for digiscoping. Lock it down, trace the Aft Support's fore and aft faces onto the Rail's upper surface...
----
- Starting Configuration
Scope assembly bottomed out and locked on Tilt Arm.
Tilt Arm tilt adjusted to vertical.
Tilt Dial and Pan Clamping Lever locked.
We're assuming that the Scope/Head assembly will be up at a comfortable working level for the necessary procedures. If it's not then adjust the Center Column extension and procedures as necessary.
----
- Viewing to Digiscoping
Install Eyepiece Cover.
Unclamp Balance Rail Aft Support, slide full aft, lightly reclamp (Pad down).
Roll Scope to 12:00 and lock.
Disengage, cap, stow ATX Module.
Install STX Module.
Set and clamp Balance Rail Aft Support.
Lift Tripod/Scope assembly, squeeze Legs in to parallel, invert, place (former) top of Tripod Head on top of left foot.
Fully extend and lock lower Tripod Legs sections.
Flip and plant Tripod/Scope assembly.
Unlock Lens Support Clamp Wheel, slide Balance Rail (Scope assembly) fore to balance point for digiscoping configuration, reclamp.
Pull and stow Eyepiece Cover.
Install and level camera.
Relock Lens Support Clamp Wheel.
----
- Digiscoping to Viewing
Pull and stow camera.
Install Eyepiece Cover.
Unlock Lens Support Clamp Wheel, slide Balance Rail (Scope assembly) aft to balance point for ATX configuration, reclamp.
Lift Tripod/Scope assembly, squeeze Legs in to parallel, invert, place (former) top of Tripod Head on top of left foot.
Set and clamp Level 3 Extensions to pencil mark.
Flip and plant Tripod/Scope assembly.
Unclamp Balance Rail Aft Support, slide full aft, lightly reclamp.
Disengage, cap, stow STX Module.
Install ATX Module.
Roll Scope to 10:30 and lock.
Set and clamp Balance Rail Aft Support.
Pull and stow Eyepiece Cover.
----
- Digiscoping System Components Storage
Vidpro TC27 Padded Tripod Case
http://live.staticflickr.com/65535/49710472217_e02f596686_o.png
Very nice fit.
STX Module
Bayonet Lens Covers
- Aft - 49250
- Fore 702-941A
LensPouch LW
TLS-APO-43
T2 Adapter for Canon EF Mount
Canon EOS 6D(WG) DSLR
60513 Swarovski Field Bag
Battery:
- Packs - LP-E6
- Charger - LC-E6E
Hoodman Live View Kit for all DSLR Cameras - HLVKIT
Remote Switch RS-80N3
It is nice having things longitudinal and zippered so you can stow, organize, access, inventory easily, quickly, efficiently.
----------
Safety

---
Whenever I'm handling glass I'm constantly wired for threat assessment - thinking about the worst that could happen at any given moment in the present circumstances and trying to maximize safety margins.
On the early afternoon of 2022/05/20 I had the 95 ATX / UA-180 set up for solar near the top of the driveway and discovered a shadow pattern near the back end that made center punching the Sun a quick no-brainer. Wanted to see how the new trick would work on the 85 which was bagged - and had been for gawd knows how many months - with a PTH. The Scope's Foot was engaged by the Head's Lens Support - separate from the Tilt Arm / rest of the Head/Tripod assembly.
Started putting things together inside, hard clamped the Scope / Lens Support assembly to the Tilt Arm, headed out to some space adjacent to the 95 setup. Arrived at the station, rotated the Scope /Head/Tripod assembly a bit top-end-low to facilitate Tripod Legs extensions, Scope went airborne and crashed on the asphalt.
I had ASSUMED that the Lens Support - with the nylon Hex Nuts replacing the stock Knob - had been stowed hard clamped to the Foot. And how I could've been stupid enough to stow that gear with the clamping totally backed off...
"Good" news... The 425 Filter was totally destroyed - but the Scope was totally unscathed.
NEVER leave or stow gear loosely assembled and ALWAYS assume it is and verify the connection before moving anything. Verify again before starting to go any degree of upside down. (The gun is always loaded.)
..
2022/10/08
I've not done well clamping glass that's on the rail(s) way or fully down. I HAVE done well of being scared shitless that I'm loose whenever I'm about to go into a mode in which there's a possibility of gravity seriously and successfully working against me. I can now trust myself to never trust myself with regard to this issue.
--
2023/05/14
Just figured out what had undoubtedly happened to precipitate that incident. I'd have quickly slipped the 85's Foot full into the Clamping Channel with the intent of checking and clamping for balance shortly thereafter. When that Glass is balanced the Foot protrudes 19 millimeters out from the fore edge of the 60 millimeter Channel. The Safety Stud installs at the fore/aft center of the Channel. And there's 36 millimeters of empty Channel aft of the Foot's aft edge. At balance an installed Safety Stud would only be able to arrest the 85 if it were nose up and starting to slip out aft.
I somehow got distracted, failed to balance and clamp. The Foot was fully engaged in the Channel and totally not clamped. Looked fine. Neatly mothballed everything in the Manfrotto MBAG100PN. Disaster patiently waiting months for the next light of day.
Stayed fine - to all appearances - while I assembled the gear and carried out to the setup point.
Fuck the Safety Stud. Never install a Foot in a Clamping Channel - just for a moment or two - without applying just a modest degree of clamping torque. And take five or ten seconds to verify security before going into a situation in which security could really matter.
---
Whenever screwing anything into anything give alignment your best shot and then turn counterclockwise until you feel the click identifying the starting point for engagement rotation.
Ensure Tripod Legs are securely locked in the desired extension length(s) and adequately spread before mounting Scope. Never hurts at any time to twist check individual Twist Locks.
Use one hand to loosen a Center Column Lock Lever and have the other in position to take the full weight of whatever's currently installed above the Connection Plate. (I almost got my right hand chopped off on this one using both hands to loosen the PCT's firmly clamped Lock Lever. (But glad I was able to cushion the impact for PTH / STX 85 assembly up top - Center Column fully extended.) Interesting that Swarovski warns of this guillotine issue in the CT101 manual and that it ceases to be a hazard when the PCT manual is published.)
Keep the Tripod's Center Column firmly clamped at all times between height sets or adjustments. Eliminates a lot of annoyances and surprises.
It doesn't hurt and costs little in time and effort to check clamping mechanisms for security.
Assume the Scope assembly is dangerously unbalanced and grip accordingly before actuating a quick release lever on a Tripod Head.
With respect to the PTH... Install and uninstall the Scope as an item of the Scope / Plate / Lens Support assembly. Avoid separating the Scope / Plate assembly from the Lens Support with the Lens Support mounted on the Tilt Arm.
When carrying the Scope/Tripod assembly on one's shoulder (with Tripod Legs extended) it's best to have the glass on both ends capped and the Sunshade retracted. (Think wet low overhanging branches.) Minus the Objective Cap leave the Sunshade extended.
Use and leave the Scope with Sunshade and Eyecup fully extended.
Not a bad idea to rotate the ATX to 06 o'clock when it will be out of use for a significant period.
Crack the windows a bit before locking the car and walking away on a hot sunny day - but take the iPhone with you.
Keep glass spotlessly clean at all times to minimize the likelihood of someone else helping with the issue.
If you're aiming at the Sun using a solar filter aim somewhere else BEFORE removing the filter. (Yeah, BTDT too.)
Especially don't aim the unfiltered Scope at the Sun when you have a camera on the back end.
Don't leave the Scope uncapped and unattended aimed towards the path the Sun will be taking.
Stow smaller protective bags and cases in the big full assembly bag as they come off - 'specially when it's windy and/or when you're around water. (Had to use the Tripod as a giant tweezers set to retrieve the Scope assembly bag from the mudflats area on the periphery of Westchester Lagoon after a particularly nasty gust from the wrong direction.)
Piers are dangerous - times ten in a substantial wind. Extra care assembling, removing, stowing components and peripheral items.
Keep gear clear or in front of your set when the Scope's being used.
Don't use the zipper pull to pull sides together. Use the free hand to bring the sides in to parallel before bringing the pull up into the region.
ID tags on all the equipment bags.
Find out where "oversize" (overlength) baggage will be routed before you start staking out your flight's the designated carousel. (If the conveyance system involves a sharp descent the tripod bags will probably get routed elsewhere.) Have both options covered if relevant and you're not flying solo.
Do not be the least bit polite in positioning yourself for baggage retrieval unless you're carrying the Scope itself in your backpack.
Doesn't hurt to stow components with exposed 1/14-20 and 3/8-16 threads - headless tripods, hookless center column endcaps, Balance Rail, adapter plates - with nylon hex nuts screwed on hand-tight.
Stay organized - or make your best effort when things inevitably become impossible.
Turn the Lens Support's Clamping Lever only with contact and pressure exerted with the tips of your thumb and index and middle fingers. It's more instinctive to use your thumb and the upper surface area of the distal joint of your forefinger but you're dealing with a lot of torque/resistance and after lotsa practice and field use repetitions these past five months this action suddenly started triggering a flash of major searing pain radiating from the relevant joint. I'm probably/hopefully slowly recovering from the Repetitive Strain Injury but as I write - 2018/09/26 - I'm dealing with a mild but constant feeling of pain and numbness and I have to be careful lifting a coffee mug. 2018/11/15 update - I fully recovered maybe a month ago but that's not a problem I ever wanna invite into my life again.
Never lift or support a non vertical Tripod/Head assembly with one hand unless it's at the balance point.
Note that if you knew your Scope or Scope assembly was gonna be dropped from a working range height you'd want your Sunshade and Eyecup fully retracted and at least the latter capped.
The Sun tends to be really great for taking pictures and really bad for exposed skin.
The more you sweat in practice at home the less you'll bleed birding at the wildlife refuge.
----------
References
---
http://www.swarovskioptik.com/us/en
Swarovski Optik North America
800-426-3089
info-us@swarovskioptik.com
Don't hold your breath waiting for a response to a carefully written request or inquiry sent to the above email address.
--
http://myservice.swarovskioptik.com/s/article/Spare-parts-catalogue-Binoculars-Telescopes-2022?language=en_US
SPARE PARTS CATALOGUE - BINOCULARS, SPOTTING SCOPES AND OPTOELECTRONIC INSTRUMENTS
This can be saved as a PDF. And as such we get abilities to search and harvest text.
--
Swarovski has seen fit to pull all their Glass PDF Owner Manuals off line and send us back to the paper era. But...
- I've archived everything relevant on the hard drive.
- There's zilch in them that couldn't be figured out inside of thirty seconds by anyone with half a brain or better.
- The catalogue above is better.
- http://www.manualslib.com/brand/swarovski-optik/ - Swarovski Optik User Manuals Download
--
Spare parts catalogue - Binoculars & Telescopes 2022
- 088 - EL 8x32
- 110 - Universal Adapter
- 116 - NL Pure 8x42
- 144 - ATX Ocular
- 148 - STX Ocular
- 154 - ATX Objective
- 164 - TLS APO
- 166 - Digiscoping Interface
- 172 - Balance Rail
- 178 - Stay-On Case - ATX
- 180 - Stay-On Case - STX
- 196 - DH 101
- 198 - PTH
- 204 - PCT
- 206 - CT 101
- 218 - Binocular Accessories - Tripod Adapter - Forehead Rest
- 220 - Bino Suspender Pro - Strap Loop Connector
- 224 - Telescope Accessories
This can be saved as a PDF. And as such we get abilities to search and harvest text.
---
http://www.youtube.com/watch?v=eL4eOVsvO4g
Nice presentation on the issues, engineering, mechanics, physics, trade-offs of various flavors of tripod heads.
---
http://www.the-digital-picture.com/Reviews/Gitzo-GT3543LS-Systematic-Carbon-Fiber-Tripod.aspx
Gitzo GT3543LS Systematic Carbon Fiber Tripod Review - Bryan Carnathan
---
http://www.uccomponents.com/a-few-common-screw-head-types-and-what-they-are-used-for/
UC Components, Inc. Morgan Hill CA
---
http://greenbankobservatory.org/
Green Bank Observatory
----------
Support Items
Lutz Tool Company 15-in-One Driver - 6327942
CT101
- Torx 25 bit, 1 inch - 1 - Ace Hardware - legs pivot resistance
- Allen key, 3 millimeter, with flathead screwdriver tip - included - leg section clamping resistance
- Jar Lid Gripper Pad - Center Column Limit Stop wrench
- Kaiser Circular Bubble Level
- DH101 Head
- Manfrotto MBAG70N
PCT
- Benbo Trekker Tripod Case - 34 inch
- Vidpro TC35 Tripod Case
- Torx 25 bit, 1 inch - 2 - Ace Hardware - legs pivot resistance
- Allen, 3 millimeter - Connection Plate Locking Screws (removal only)
-- Head protector
-- Center Column:
--- Limit Stop
--- Assembly Disc
- Gitzo Tripod Twist-Lock Grease
- Alliance Brites Pic Pac Rubber Bands Assorted Sizes/Colors - 1.5 Ounce
Car Window Mount
- 1/4-20 - 3/8-16 Adapter
- Nut, Nylon - 3/8-16 - protector
- STX Ocular Module
DH101
- Penny - Pan Resistance Locking Screw
- Nickel - Handle Clamping Screw
- 44066 Adapter Plate
- 1/4-20 - 3/8-16 Adapter
- Nut, Nylon - 3/8-16 - protector
PTH
- LensPouch 2XL
- Dial Caliper, 6 inch - General Tools 142
- Mechanical Pencil, 0.5 millimeters - Pentel
- Gitzo Tripod Twist-Lock Grease
- Lens Support Clamping Lever - spare - Gitzo D1108138 Scroll Lock Knob
-- Spares:
--- Spacer, Plastic
--- Washer, Steel
- Lens Support
-- LensPouch SM
-- Clamping Lever - Plan B
--- Plain Steel Metric Socket Cap Screw - M05-0.8x20 - Everbilt - Home Depot
--- Allen Bit, 4 millimeter, 3/8 inch drive - Husky - Home Depot
--- Allen Key, 4 millimeter - Ace Hardware
--- Retainer for Washers and Spacers
--- Nut, M05-0.8 - 2
-- Safety Stud
--- Allen Bit, 2.5 millimeter
-- Mounting Stud
--- 7 millimeter standard combination wrench
--- Nut, Nylon - 1/4-20
---- 85 - 2
---- 95 - 1
----- Socket - 7/16
-- Flat Head Screw
--- Allen, 2.5 millimeter
---- Key
---- Capri Tools Hex Bit Socket
-- Endcap - Socket Hex Drive Set Screw
--- Allen Bit, 2 millimeter
45066 Quick Release Plate for PTH:
- Allen:
-- 4.0 millimeter
-- 2.5 millimeter
- twist tie
Gitzo GS5370LDR Long Quick Release D Profile Plate
- Allen - 4.0 millimeter
Balance Rail
- Nickel - screwdriver
- Allen - 4.0 millimeter
- Nut, Nylon - 3/8-16:
-- Screw retainer
-- Protector
Jobu Design Arca-Swiss Adapter
- Allen - 4.0 millimeter
ATX/STX
- Vidpro TC22
- North Face Youth Recon Squash Backpack
- Equinox Bilby Nylon Ultralite - 18x8 inch
- Lens Cleaning Kit
- Stay-On Cases - air travel
- 1/4-20 - 3/8-16 Adapter
- Capri Tools Torx 08 Bit Socket
- 85
-- Gitzo GS5370LDR Long Quick Release D Profile Plate
- 95
-- 45066 Quick Release Plate for PTH
NL Pure 8x42
- Torx 06
-- PB Swiss Tools - T6 S/N 305349 PB 41.6
-- Wiha - 75706 - System 4 Torx MicroBits T6 x 28mm - 76106
Canon 10x42
- Phillips 0
Leitz 7x42
- Slotted 2.5
1/4-20 - 3/8-16 Adapter - Application:
- Male (Objective Module Foot) - Nickel
- Female (Car Window Mount Stud) - CT101 Allen key, 3 millimeter, with flathead screwdriver tip
Feisol UA-180
- Everbilt Nylon Washer - 3/8
- North Face Youth Recon Squash Backpack
- LensPouch M x 2
- Allen - millimeter:
-- 1.5 - Bushing
-- 2.0 - Mounting Base Plate to Pan Housing Cylinder
-- 2.5 - Tilt Arms Axles
-- 4.0 - Base Plate to Lens Clamp
Barska 1-4x28 Riflescope
- Allen:
-- 03 millimeter
- Socket:
- 12 millimeter
Cotton Harness System
- Allen - TUZ 5/32 CR-V
Stuff Bags/Pouches
- Equinox - www.equinoxltd.com
- North Face - www.thenorthface.com
- Black Microfiber Sunglasses Pouch - pouchsupply
- Duraflex 6523 Pop Lock, Plastic Cord Lock - Buckleguy
----------
Component Weights (Grams)
1449.2 - CT101 - minus Ballast Hook
0033.5 - CT101 Ballast Hook
1896.4 - PCT
0005.6 - Gitzo Center Column Bubble Level
0438.8 - DH101 - minus Handle
0072.3 - DH101 Handle
0046.4 - 44066 Adapter Plate
0067.6 - 45066 Quick Release Plate for PTH
0103.8 - GS5370LDR
1127.1 - PTH - minus Lens Support, Handle, Handle Clamping Lever, Detent Button Assembly
0048.4 - PTH Handle
0009.3 - PTH Handle Clamping Lever
0002.0 - PTH Detent Button Assembly
0181.7 - Lens Support
UA-180
Frame
1225.1 - Frame
Tilt
0100.2 - Arm
0001.1 - Flat Head Screw (2)
0000.9 - Pan Head Stop Screw (2)
0055.5 - Axle
Bearings
0012.3 - Cup - Inboard
0011.3 - Race
0011.3 - Cup - Outboard
Support
0499.0 - Lens Support
Flat Head Screws - M06-1.00x20 - Lens Clamp to Lens Support Base Plate
0004.4 - Stainless
0004.2 - 12.9 Steel
Lens Clamp Studs - millimeters
0007.2 - 43.5
0006.0 - 36.5
0005.5 - 30.0
0137.0 - QP-200 (minus Mounting Screws)
1723.5 - UA-180 total - configured for Swarovski Standard Tripod Ring (Foot) minus Spacer Nuts
0176.6 - Manfrotto 243 Car Window Pod (Clamp)
0140.8 - Car Window Mount Head
0349.8 - Balance Rail
0818.6 - ATX Ocular
0862.8 - STX Ocular
0041.6 - Eyecup
0063.5 - Eyecup - DRX
0009.5 - Eyepiece Cover
0045.0 - Adapter Sleeve - DRX
1116.1 - 85 Objective
1369.3 - 95 Objective
0027.4 - 85 Objective Lens Cap
0032.5 - 95 Objective Lens Cap
0085.6 - SOC-ATX
0086.2 - SOC-STX
0088.5 - SOC-85
0101.6 - SOC-95
0199.0 - TLS-AP0-30
0203.0 - TLS-AP0-43
0050.0 - T2 Adapter - Canon EF
0607.7 - Barska 1-4x28 Riflescope
0028.4 - Barska Endcaps
0245.6 - Riflescope Rail/Plate Assembly
0860.0 - NL Pure 8x42
0020.3 - FRP Forehead Rest
0606.5 - EL 8X32
1196.9 - Canon 10x42 L IS WP - tripod ready
0673.1 - Leitz Trinovid 7x42 BA
0027.2 - CCS Everything Bracket
-----
Carrying weight of 2023 primary scope configuration:
2195.2 - ATX 95 Swarovski Standard
1725.3 - Feisol UA-180
2080.9 - Customized Gitzo/Swarovski Tripod
6001.4 - Total (13.23 pounds)
----------
Measurements (Millimeters)
PCT
- Center Column - 28 x:
-- 305 - carbon
-- 308 - overall
- Legs Extensions - 0 - 1 - 2 - 3
-- diameter
--- 33 - 29 - 25 - 22 -- difference: 4 - 4 - 3
-- length
--- 401 - 390 - 420 - 427
- Twist Locks - 1 - 2 - 3
-- diameter
--- 39 - 35 - 31
-- length
--- 38 - 37 - 36
-- Grip length
---32.5 - 31.5 - 30.5
- Legs Stops Angles
-- 24-52-85
Foot
45x43 - Standard
38x43 - Arca-Swiss
Clamping Channel Lengths
- 060 - Swarovski PTH
- 120 - Feisol UA-180
Adapter Plate
45x043x14 - 44066
55x070x12 - 45066
55x140x12 - GS5370LDR
Objective
231x105 - 85
286x115 - 95
010 - ATX/STX Objective Module Bayonet Projection (aft - beyond the above)
----------
Threading
From:
http://www.boltdepot.com
Bolt Depot
US Machine Screw Diameters - Inches
Size - Nominal Thread Diameter - Nearest Fractional
00 - 0.060 - 1/16
01 - 0.073 - 5/64
02 - 0.086 - 3/32
03 - 0.099 - 7/64
04 - 0.112 - 7/64
05 - 0.125 - 1/8
06 - 0.138 - 9/64
08 - 0.164 - 5/32
10 - 0.190 - 3/16
12 - 0.216 - 7/32
SAE:
- 3/8-16:
-- ATX/STX Objective Foot
-- Ballast Hook - D4040.77 - GT3543LS (Systematic)
-- PCT:
--- Mounting Stud
--- Foot
-- Quick Release Plate 45066
- 1/4-20:
-- PTH Lens Support Mounting Stud
-- CT101 Tripod Ballast Hook
-- DH101 Head:
--- Adapter Plate 44066
-- Car Window Mount Stud
--William Optics M-PRC110RD
Metric:
- M26-1.00:
-- CT101 Center Column (Connection Plate and Limit Stop)
- M20-1.00:
-- UA-180 Tilt Axles
- M12-1.00:
-- Ballast Hook - D104214 - GT3542L (PCT)
- M08-1.25:
-- CT101 Center Column Clamping Lever
-- Car Window Mount Window Clamp
- M08-1.00:
-- Car Window Mount Head Clamp
-- PTH Detent Button Housing
- M08-0.75
-- Apertura 10x50 Finder Scope
- M06-1.00:
-- PCT Legs Pivot (Torx 25)
-- Tripod / 44066 Plate Set Screws
-- UA-180:
--- Lens Support Assembly:
---- Base Plate Clamps Studs
---- Base Plate to:
----- Base Plate Clamps
----- Lens Clamp
---- Plate Clamping Studs
-- PTH Lens Support Mounting Stud
-- Car Window Mount Set Screws
- M05-0.80:
-- CT101 Connection Plate Set Screws
-- PTH Lens Support Clamping Lever
-- Seymour Solar Thumbscrews
-- Barska 1-4x28 Riflescope Rail and Plate Mounting
- M04-0.70:
-- UA-180:
--- Tilt Axle to Tilt Arms
--- Tilt Arm Stops
-- ATX/STX Tripod Ring Click Stop Pin
-- PTH:
--- Lens Support:
---- Clamping Lever
---- Mounting Stud
---- Clamp Wheel Dust Cap Retainer
---- Safety Stud
--- Handle Clamping Lever
--- Quick Release Plate 45066 Centering Stud
-- Car Window Mount Head Clamping Lever
-- CT101 Extension Clamps
-- Barska 1-4x28 Riflescope Ring Mount Clamps
- M03-0.50
-- UA-180 Mounting Base Plate
- M02-0.40
-- UA-180 Bushing
----------
Model Numbers
Tripod
49070 - CT101 - Carbon Fiber Tripod
49278 - CCT - Compact Carbon Tripod
49277 - PCT - Professional Carbon Tripod
GT3542L - Gitzo Mountaineer Tripod
GT3543LS - Systematic Carbon Fiber Tripod (Long)
Head
49076 - DH101 - DH 101 Head
44066 - Tripod Plate for DH101
49078 - CTH - Compact Tripod Head
49077 - PTH - Professional Tripod Head
45066 - Quick Release Plate for PTH
49089 - Balance Rail
49043 - Car Window Mount
ATS/STS
- Ocular
49430 - 20-60
49440 - 25-50
- Objective
-- ATS Arca-Swiss
49315 - 65
49615 - 80
-- STS Standard
49319 - 65
49619 - 80
ATX/STX
- Ocular
49901 - ATX
49902 - STX
00000 - Bayonet Lens Cover - Fore (702-941A)
49137 - Eyepiece / Eye Cup
- Contact - 702-9404
44127 - Eyepiece Cover - Aft
- Objective
-- Standard
49965 - 65
49985 - 85
49995 - 95
-- Arca-Swiss
48865 - 065
48885 - 085
48895 - 095
48815 - 115
Objective Cover
49251 - 65
49252 - 85 (702-0268)
49253 - 95 (702-0269)
49250 - Bayonet Lens Cover (702-975A)
49230 - ME - 1.7x Magnification Extender
SOC - Stay-On-Case
49953 - ATX
49954 - STX
49950 - 065
49951 - 085
49952 - 095
49956 - 115
Swarovski Field Bag
60519 - X-Large Pro - 56mm SLC
60518 - Large Pro - EL Range Rangefinder
60517 - Medium Pro - 32-42 EL/SLC
60513 - CL Companion
Digiscoping
49136 - DRX Adapter Sleeve
- TLS APO
49332 - 23
49312 - 30
49342 - 43
49130 - T2 Adapter for Canon EF Mount
Binocular
32208 - Swarovski EL Swarovision FieldPro 8x32
36008 - Swarovski NL Pure 8x42
49161 - FRP Forehead Rest
44143 - BSP Bino Suspender Pro
----------
Serial Numbers
GC641118 - PCT
G0686840 - Gitzo GT3542L
A8644 - DH101 - 1
A8812 - DH101 - 2
GZ361445 - PTH - 1
GZ391704 - PTH - 2
SN/U50160140 - Feisol U-Mount UA-180
H874127378 - ATX - 1
H834427962 - ATX - 2
H824325090 - STX
H873826466 - 85
H835129769 - 95
AD1116096A - NL Pure 8x42
AD1344306A - NL Pure 8x42
F853746263 - EL 8x32
G860427794 - TLS-APO-30
G874223794 - TLS-APO-43
112027001037 - Canon EOS 6D
----------
Acquisition Dates
H874127378 - 2018/03/08 - new
H834427962 - 2021/03/18 - used
H824325090 - 2019/04/29 - used
H873826466 - 2018/03/08 - new
H835129769 - 2020/03/02 - used
AD1116096A - 2023/07/26 - used
AD1344306A - 2023/09/12 - new
----------
Index
Elements - Order of Discussion
The Mission
Backup Loops
- Tripod Connection Plate Set Screws
- Detent Button
- Safety Stud
- Stay-On Cases
- Tripod Center Columns
- Gitzo D0806.05 Assembly Button
Control Axes Terms Conventions
Tripod Orientation
Tripod Legs Extensions
MidHead Screws
Tripod Stability
Swarovski Label Tripods
Velbon CT101
Gitzo PCT - Professional Carbon Tripod
Center Column Lock Lever - Locking/Unlocking
PCT-CCT Identification
PCT Twist Locks
GT3543LS Systematic Carbon Fiber Tripod
Head Installation
Clamping Levers
Flat Head Screws
Car Window Mount
Tripod Heads
DH101 Tripod Head
Arca-Swiss Quick Release System
Gitzo 2 Way Fluid Head / Swarovski Compact Tripod Head
PTH - Professional Tripod Head
PTH Controls
Lens Support Clamping Lever
Lens Support Clamp Wheel
Tilt Arm / Lens Support
PTH Handle
PTH Scope Mounting
Lens Support / Plate/Scope Assembly Connection
Tilt Arm / Lens Support Connection
Plates - Arca-Swiss
- Conventional
- BR - Balance Rail
Swarovski Standard to Arca-Swiss sans Plate
Balancing
Pendular Balance - Really Done Right
Balance and Neutrality Points
Assemblies Definitions: Tripod versus Scope
PTH / Balance Rail / ATX Scope Tilt Extremes
Feisol UA-180 Carbon Gimbal
Uprighteousness
Tripod Feet
ATX/STX Overview
Zoom and Focus
Objective Modules Field Guide
Power and Cost
Fields of View
Moving Targets
ATX/STX Field Packing
Video tutorial: SWAROVSKI OPTIK ATX/STX spotting scopes
Finder Scopes
- ATX/STX Stock
- Scope and Mounting Features
- Barska 1-4x28 Riflescope
- Apertura 10 x 50 Right Angle Finder Scope
- Canon 10x42 L IS WP
Solar Filters
Astronomy
Headlamps
Groups
Field Setup
Weather
LensCoat LensPouches
Microfiber Pouches
Stowage
North Face Surge Backpacks
- Compartments
- Zippers
- Inventories
- Walkstool
- Releasable Nylon Cable Ties
- Elastics
- Hike-In Mode
- Rain
Tools
Glass
Glasses
Binoculars
Cotton Carrying System
- TFM
- Package Options
- Options Comparisons
- Optimal Adjustments
- Belt Adjustment
- Donning
- Disengaging
- Binocular Adapter
- CCS Patented Twist & Lock System
- Lens Stabilization Strap
- Tether
- Receptor
- Back End Glass Protection
- Driving
- Stowage
UTAs Universal Tripod Adapter
Lasers
Air Travel
Swarovski Digiscoping
- Sharing and Multitasking
- Reconfiguration Sequences
- Strategy
- Starting Configuration
- Viewing to Digiscoping
- Digiscoping to Viewing
- Digiscoping System Components Storage
Safety
References
Support Items
Component Weights (Grams)
Measurements (Millimeters)
Threading
Model Numbers
Serial Numbers
Acquisition Dates
Index
----------
2024/03/28
----------
----------